diy craft: how to sew a buttonhole
the present i got in my junior high gift exchange was a big bummer: a fluffy white teddy bear with his chubby arms wrapped around a plush heart. i shoved the teddy bear in my backpack and and got on the school bus home wishing i’d ended up with something better. lucky for me the girl sitting next to me on the bus had as much disdain for her gift as i had for mine and we happily traded. i got home and tacked my new gift, a huge poster of guns ‘n’ roses to my bedroom wall. i was going through a serious pure rock phase fueled by g ‘n’ r’s album: appetite for destruction. i relished in the hard heavy rock as i stared at axl, slash and the rest of the bad ass band. i loved every song on that album, especially ‘it’s so easy’. decades late, i have no idea what happened to that poster or my guns ‘n’ roses cassette tapes but i still carry my pure rock roots with my in my crafty ventures. ‘it’s so easy’ always runs through my head on repeat when i sew a buttonhole. i’d been sewing for many years before i attempted sewing a buttonhole, thinking it would be really difficult. then one day, i tried it…. cue my buttonhole sewing anthem… ‘it’s so easy’. if you didn’t go through a pure rock phase, don’t worry-you can pick your own buttonhole anthem, like linda ronstadt’s ‘it’s so easy’ or the commodores ‘easy’. just start humming and follow the simple instructions below and soon you’ll be a buttonhole master.
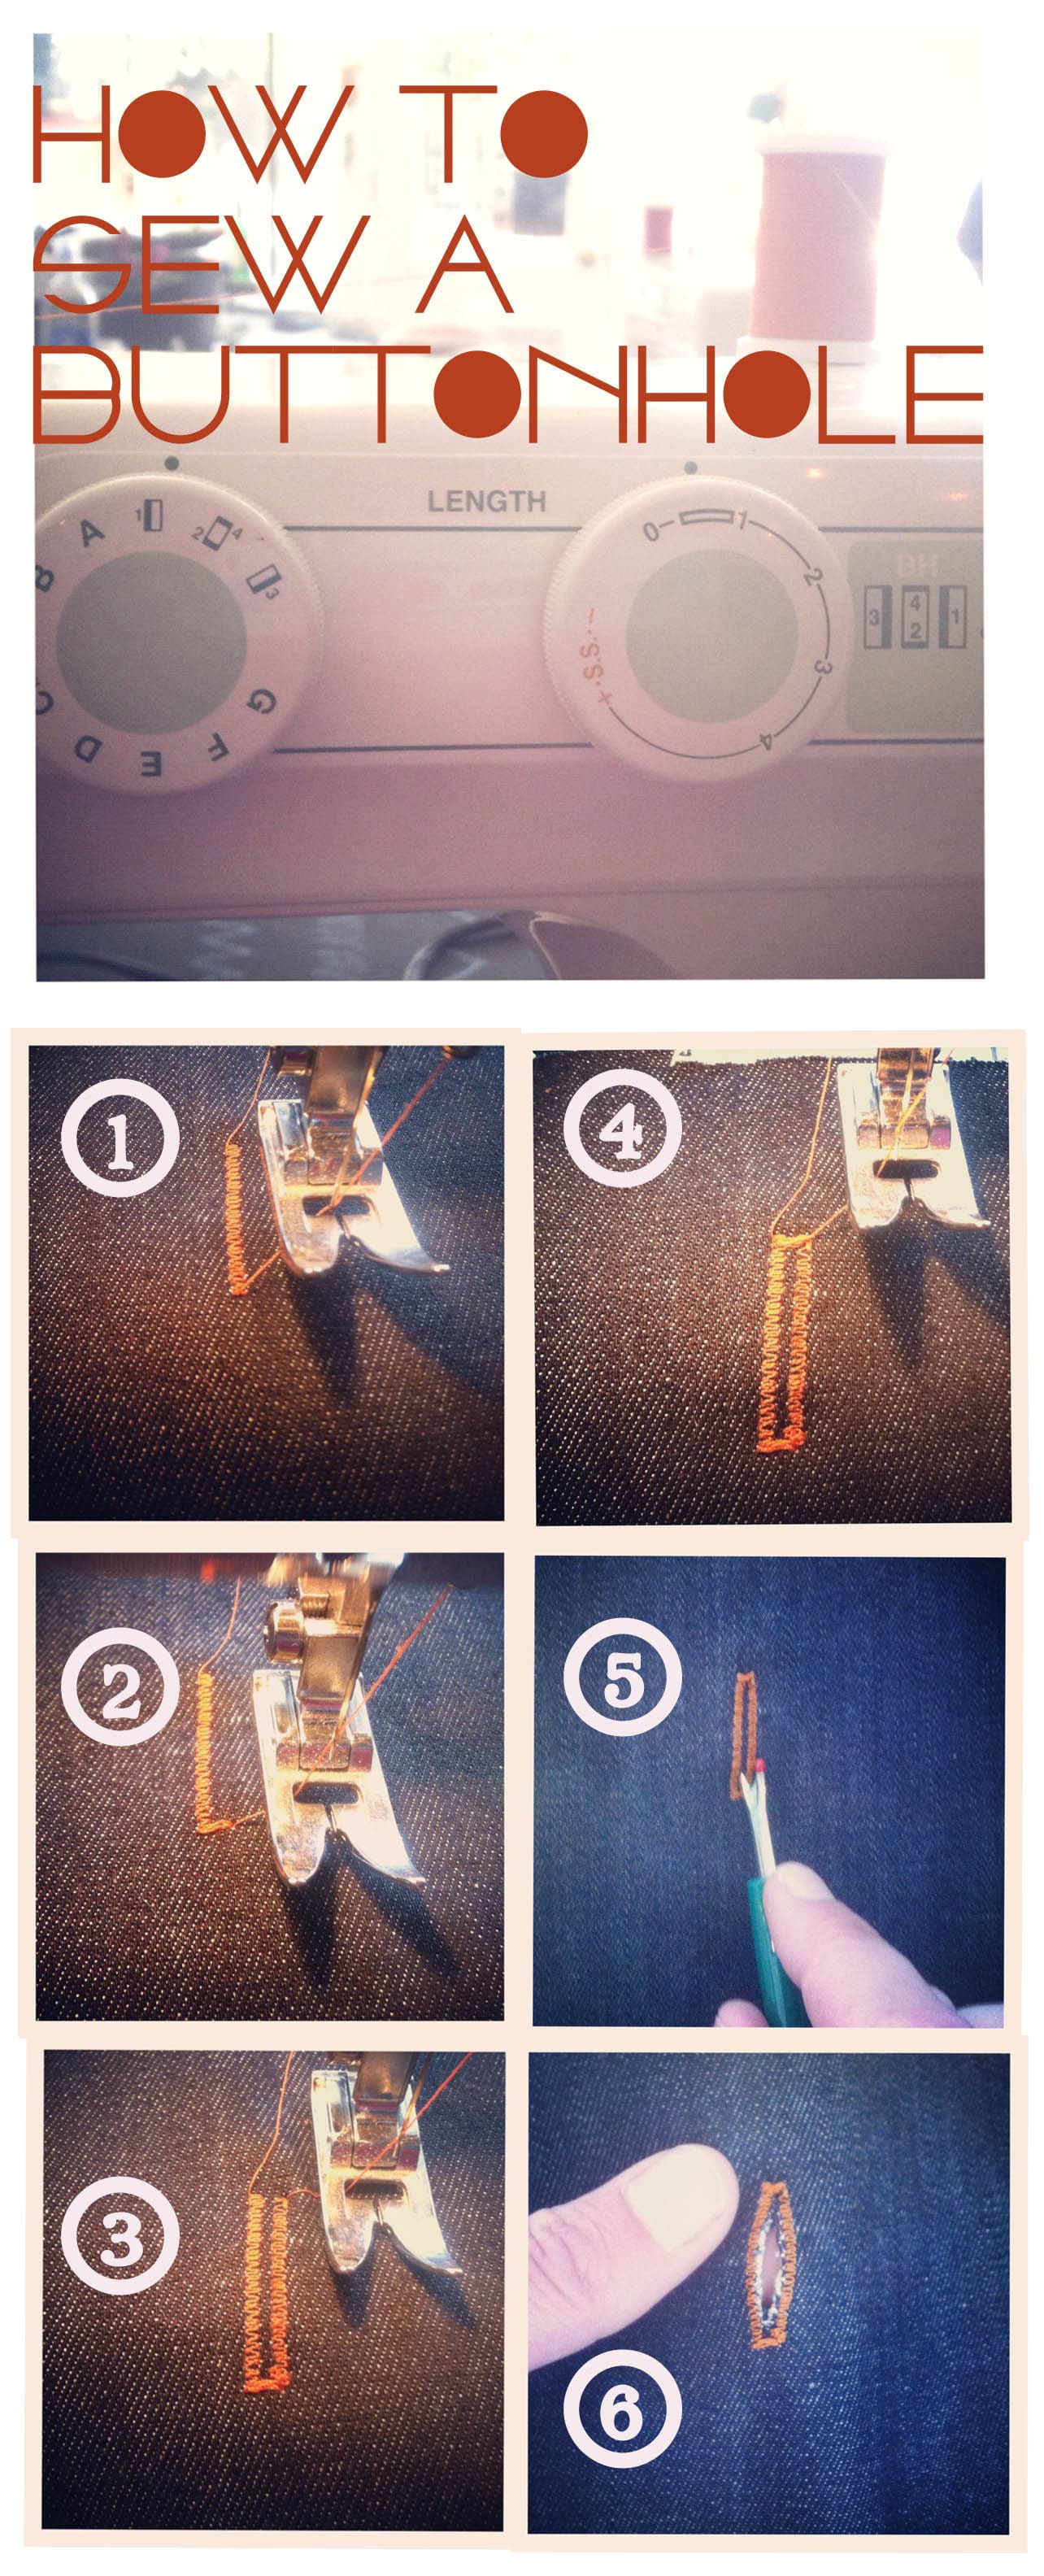
how to sew a buttonhole:
1. set your machine the buttonhole setting. usually it’s signified by a BH and then 1,2,3 and 4. the numbers are for each of the four steps of the buttonhole process.
2. make sure your stitch length is between 0 and 1 (in other words very short).
3. set your button on your fabric and measure how long your buttonhole needs to be so you can be sure your button will fit through it. use chalk or a pencil to draw a ling the length you want your buttonhole to be.
4. position your fabric with your marking so that you’re starting in the upper left hand corner of the line you made. set your machine to BH1 (or whatever setting it is called on your machine). step on the pedal and stop when you get to the bottom of your line.
5. switch the machine to BH2 and sew across the bottom of the buttonhole.
6. switch the machine to BH3 and sew a reverse stitch then stop when you get to the top of the 1st line you sewed (so that the lines on each side are the same length).
7. switch the machine to BH4 and sew across the top of the buttonhole.
8. now use a seam ripper or an exacto knife to cut out the middle. that’s it!
*the more you practice the straighter your lines will be and the easier it will be to have them be the same length.

Hi Nicole,
I love your cute story! I’m going to start humming one of those songs next time I’m making a button hole! I’m linking up to this post to share directions for making a button hole in my post on our DIY duvet cover. I had some challanges with my machine, borrowed a friend’s and had success but I don’t want to make my own tutorial for button holes since you have already provided a great one! Check out my blog, its all about fun connections with kids. In this case it was my college freshman and how we were DIYing most of her dorm room.
hi caroline!
thanks so much 🙂 i just checked out your blog–it’s really cute and well done. i love your title photo too of the bike! thanks for linking our button hole post.
-nicole