diy craft: how to screenprint with stencils
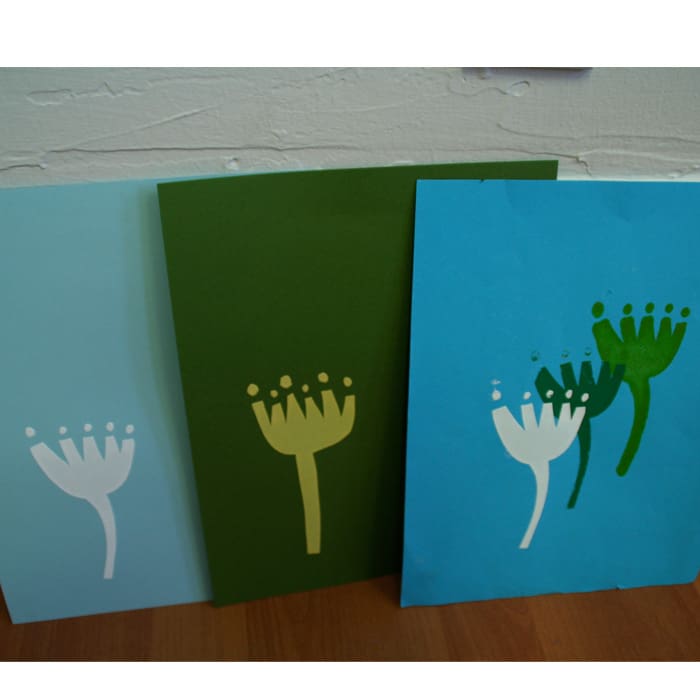
when i started random nicole there were no “indie craft fairs”. i used to sell my creations at fashion sample sales, churches, school bazaars and holiday shows hosted at fancy la houses. i was making handbags and had just started to design tees. i didn’t know to screenprint and the the internet was not the vast plethora of DIY knowledge like it is now. i didn’t know you could “burn” a screen (burning a screen is the process of making a transparency of your image and using it to permanently burn your image on a screen by placing it on a blank screen coated in light sensitive emulsion and then exposing it to light). so instead, i bought a blank screen, drew an image on card stock, cut it out with an x-acto knife, taped it to my screen and pushed ink through the screen with my squeegee. at one of those house sales, i had my handmade tees on display– and this punk rock guy (in plaid pants peppered with safety pins and band patches) was checking out my tees and asked me how i printed them. i told him about my crude technique and he said, “whoa…that’s pretty punk rock.” that punk guy was todd who became one of my screenprinting “teachers”. lessons consisted of me helping him prints tees though the fog of cigarette smoke and punk music blasting from his stereo. todd taught me tons about inks, drying, placement, design and all things printing. now i have a big set-up with a four color press and flash dryer, but sometimes i get back to my roots and print things with hand-carved stencils. when i teach screenprinting classes, i always include this in my lesson because it’s a simple and inexpensive method of printing.
what you need:
screenprinting squeegee (available at art supply store or order online at anthem or mclogans)
water based printing ink (available at art supply store or order online at anthem or mclogans)
blank screen (available at art supply store or order online at anthem or mclogans)
stuff to print on (old tees, new tees, blank stationary etc)
card stock
x-acto knife
clear packing tape
what to do:
-draw an image on your card stock, make sure you cut the card stock down so that it will fit on your screen before you draw. keep it simple as you will have to cut it using an x-acto knife. you can also use pre-made stencils. if you’re not the best at free hand drawing, you can trace an image onto your card stock using carbon paper.

-use an x-acto knife to cut your image out

-tape your image to the flat side of the screen. make sure all the areas of the screen that aren’t covered by paper are taped over so that ink doesn’t seep through any spots except for the open area of your stencil

-flip your screen over
-set what you are going to print on (paper, tee or textile) down on a flat surface. place your screen on top with the flat side down. position it so that your image is where you want it to be on whatever you’re printing on
-place a few spoonfuls of ink in a line above your image on the screen

-take your squeegee and using a bit of pressure drag it down your screen, back up again. you can do this more times if you feel enough ink hasn’t passed through your image on the screen to what you’re printing on. be sure not to move the screen or what you’re printing on or your image will get blurred or smudged.
-carefully pull up the screen

-remove your stencil from your screen and let the ink dry, you can reuse it later.

-wash your screen right away as water based ink dries pretty fast
-marvel at your craftiness. if you printed on paper, set it somewhere for the ink to dry. if you printed on a textile, let the ink air dry and then iron it on both sides for about 3 minutes. you can also toss it in your clothes dryer on high for 60 minutes to make sure the ink is dry.
