
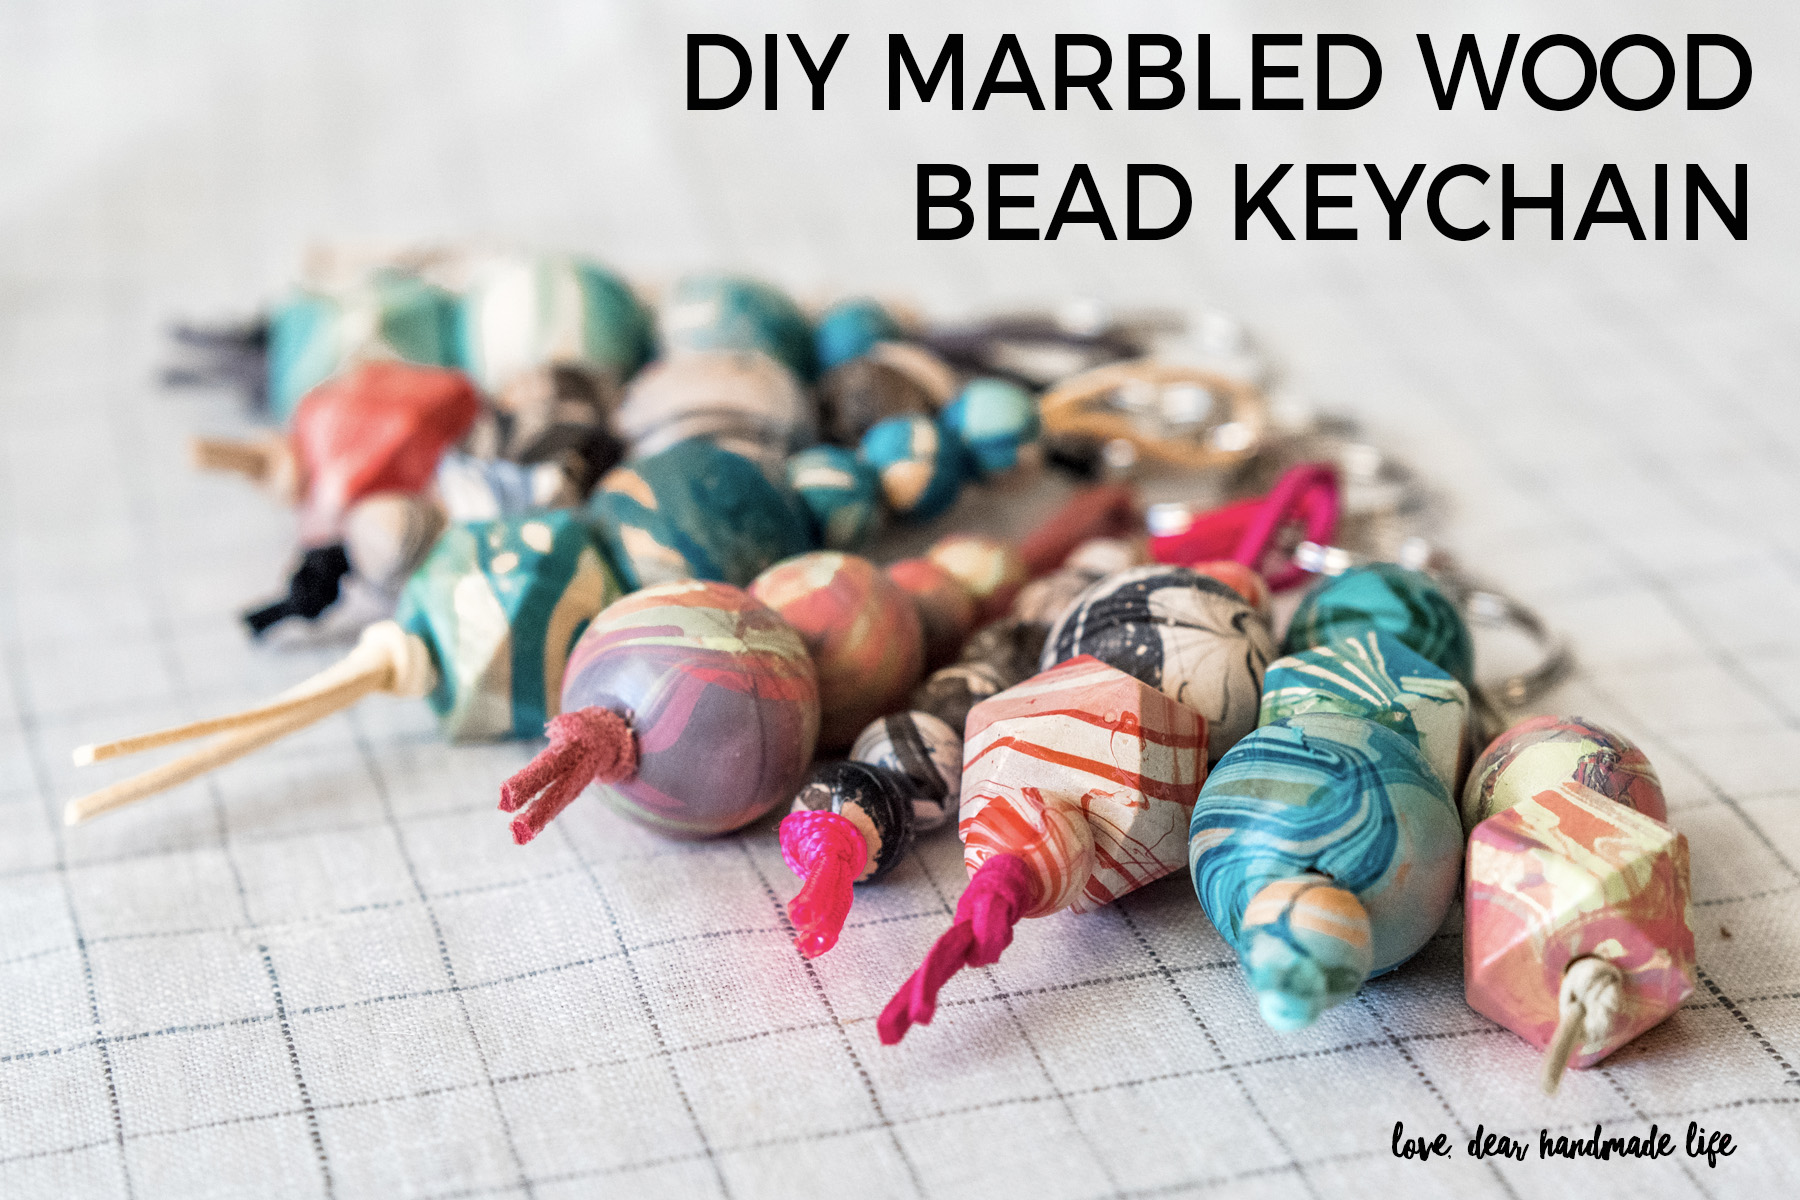
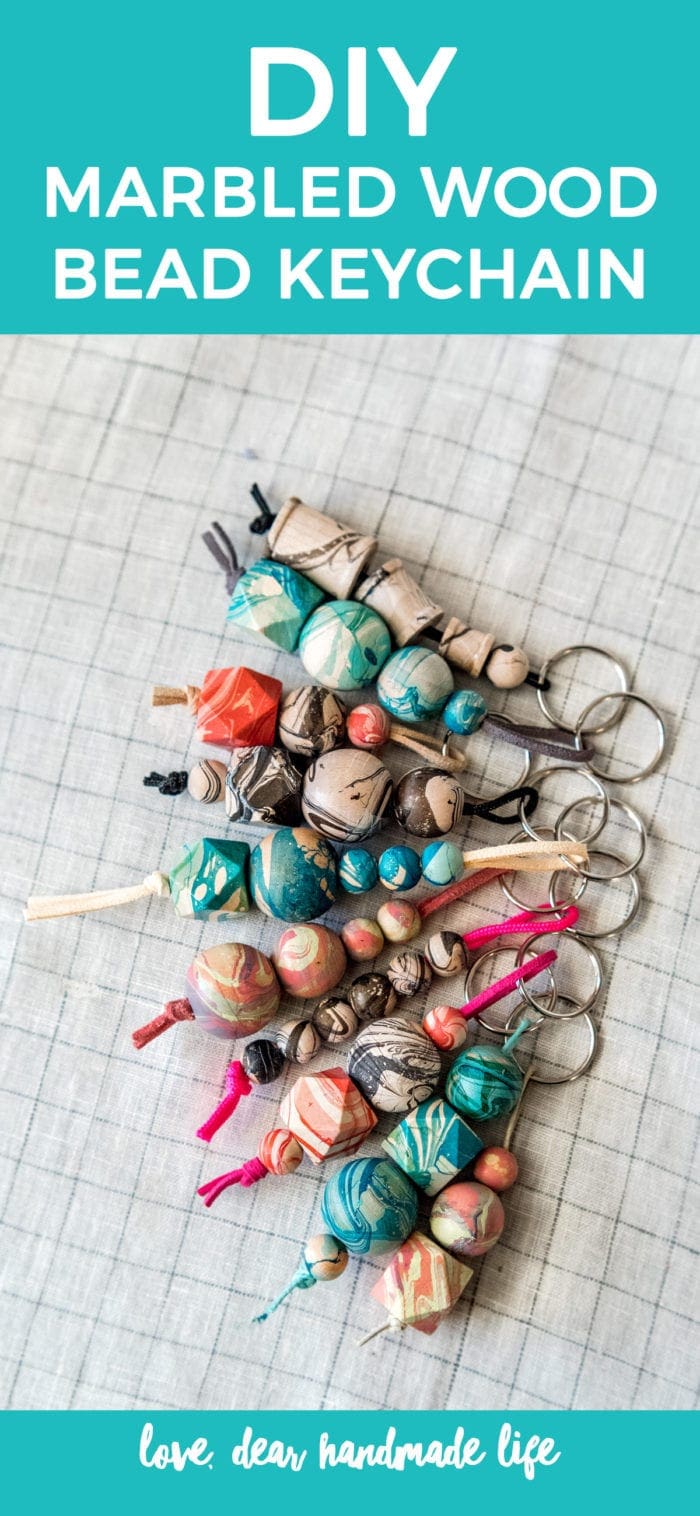
DIY Marbled Wood Bead Keychain
Editor’s note: If you’ve been to our Craftcation: Business & Makers Conference, then you probably already know (and love) our friends at Darice who have been our official craft supply sponsor for the conference for the past five years! This DIY project features items we shopped for on Darice.com. With over 45,000 wholesale craft supplies, the possibilities are endless!
Darice caters to small business owners and makers with low minimums and a freight-included program. If you’re not ready to start buying wholesale, at least make sure you’re getting the best retail price possible from Darice’s sister business Consumer Crafts.
-Nicole S.
I feel like marbling has had it’s fads over the years and still comes and goes but I’ve always loved the way it looks. I tried the nail polish method a few years ago but could never get the results I wanted. When I found out that Darice was hosting a class at Craftcation using these Easy Marble paints I knew I had to try it out for myself! I’m a craft manager and usually don’t get to participate in any of the fun crafts while at Craftcation, so I got to do that here 🙂 Let me show you how I did it.
WHAT TO GET:
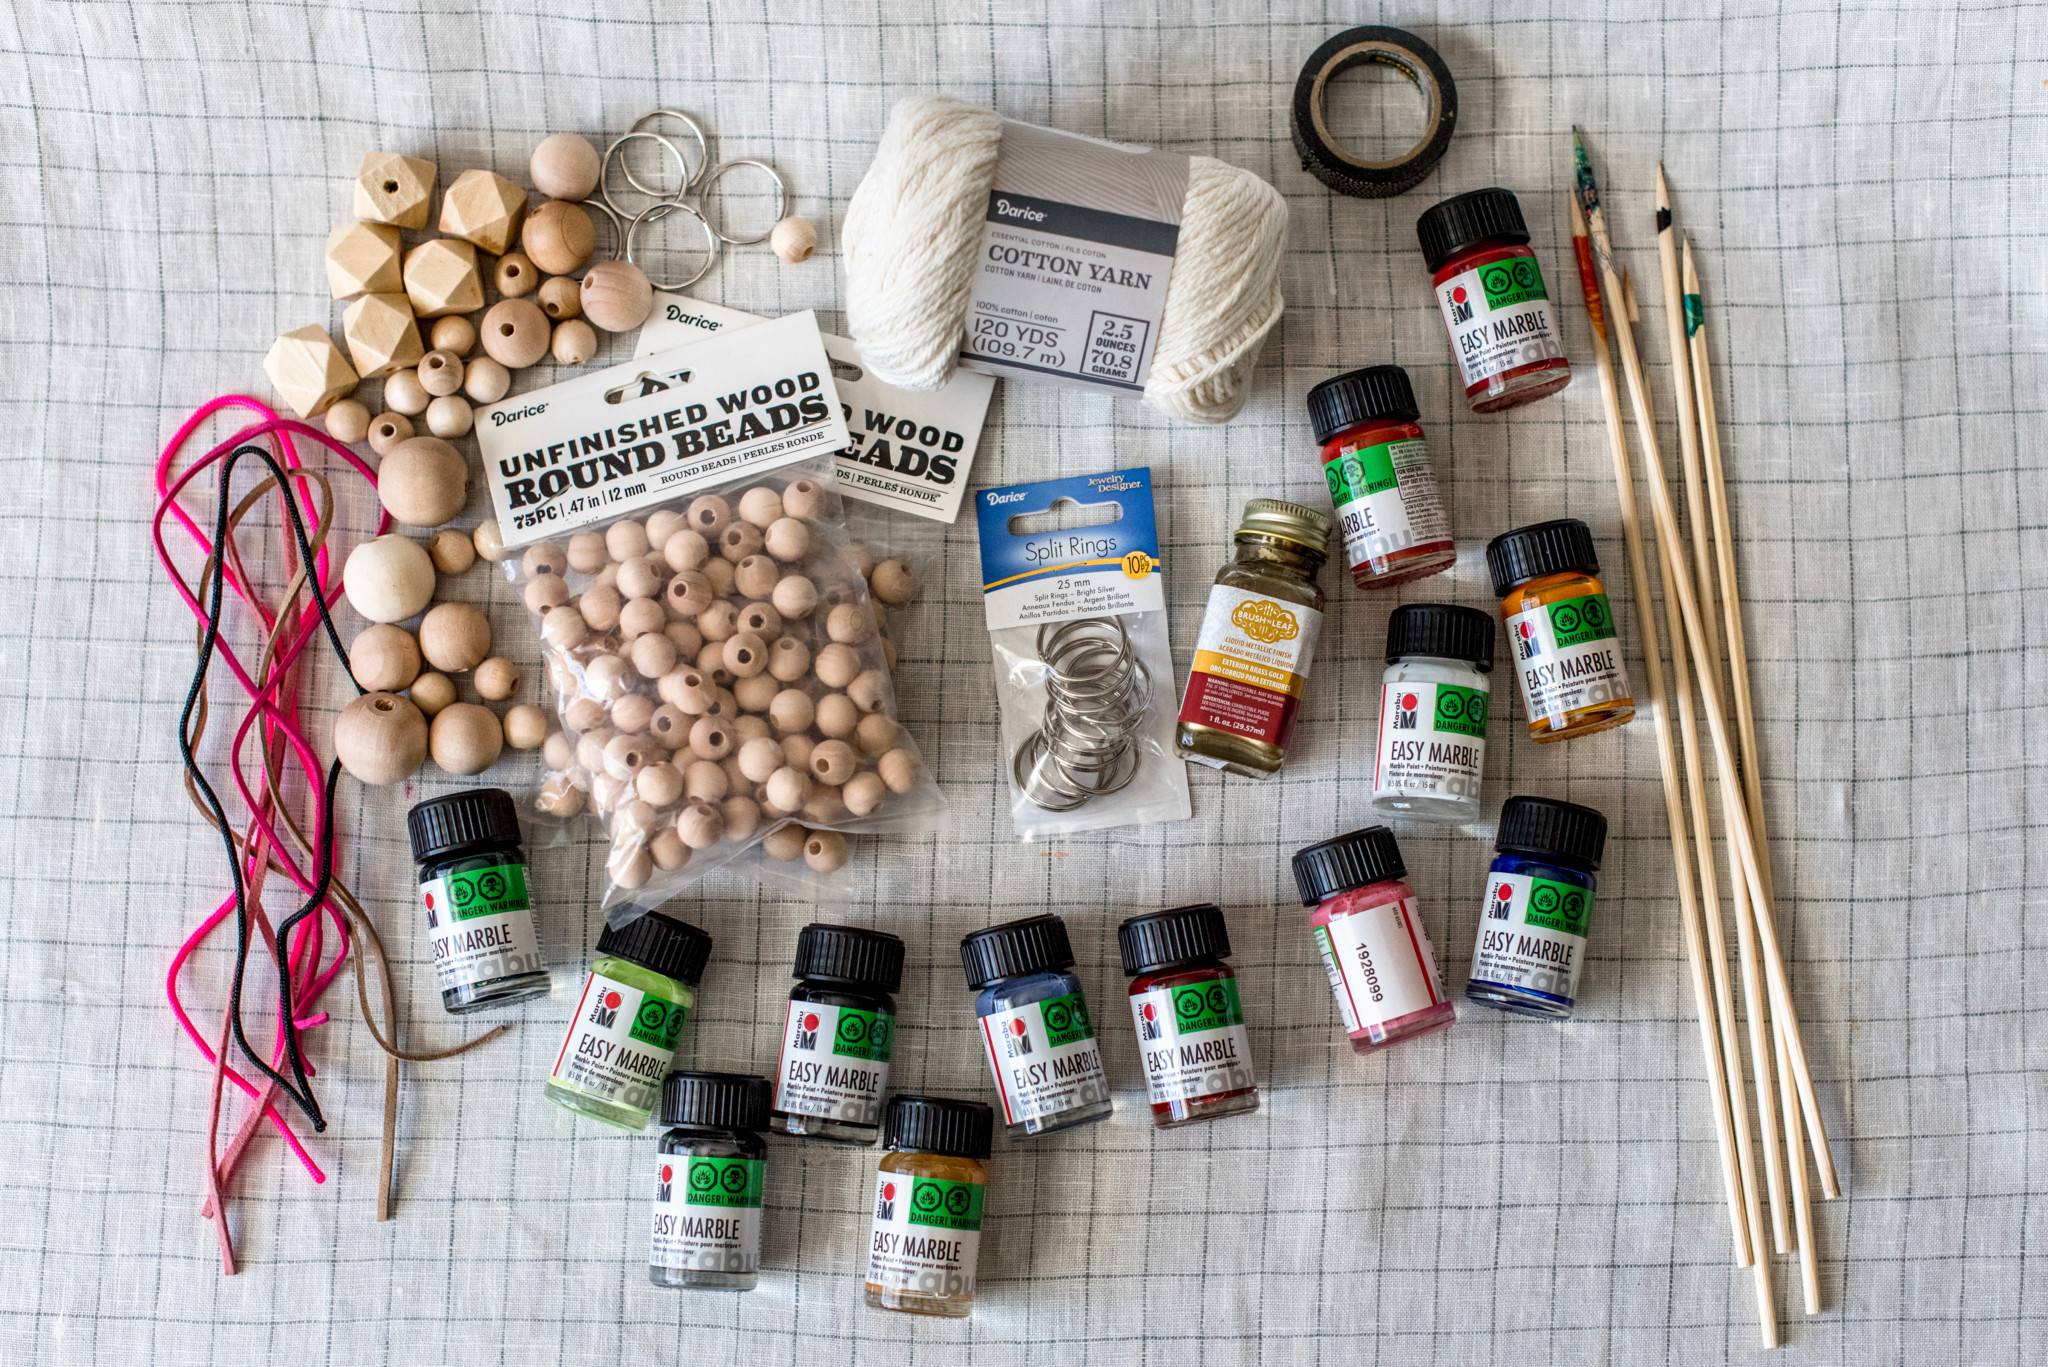
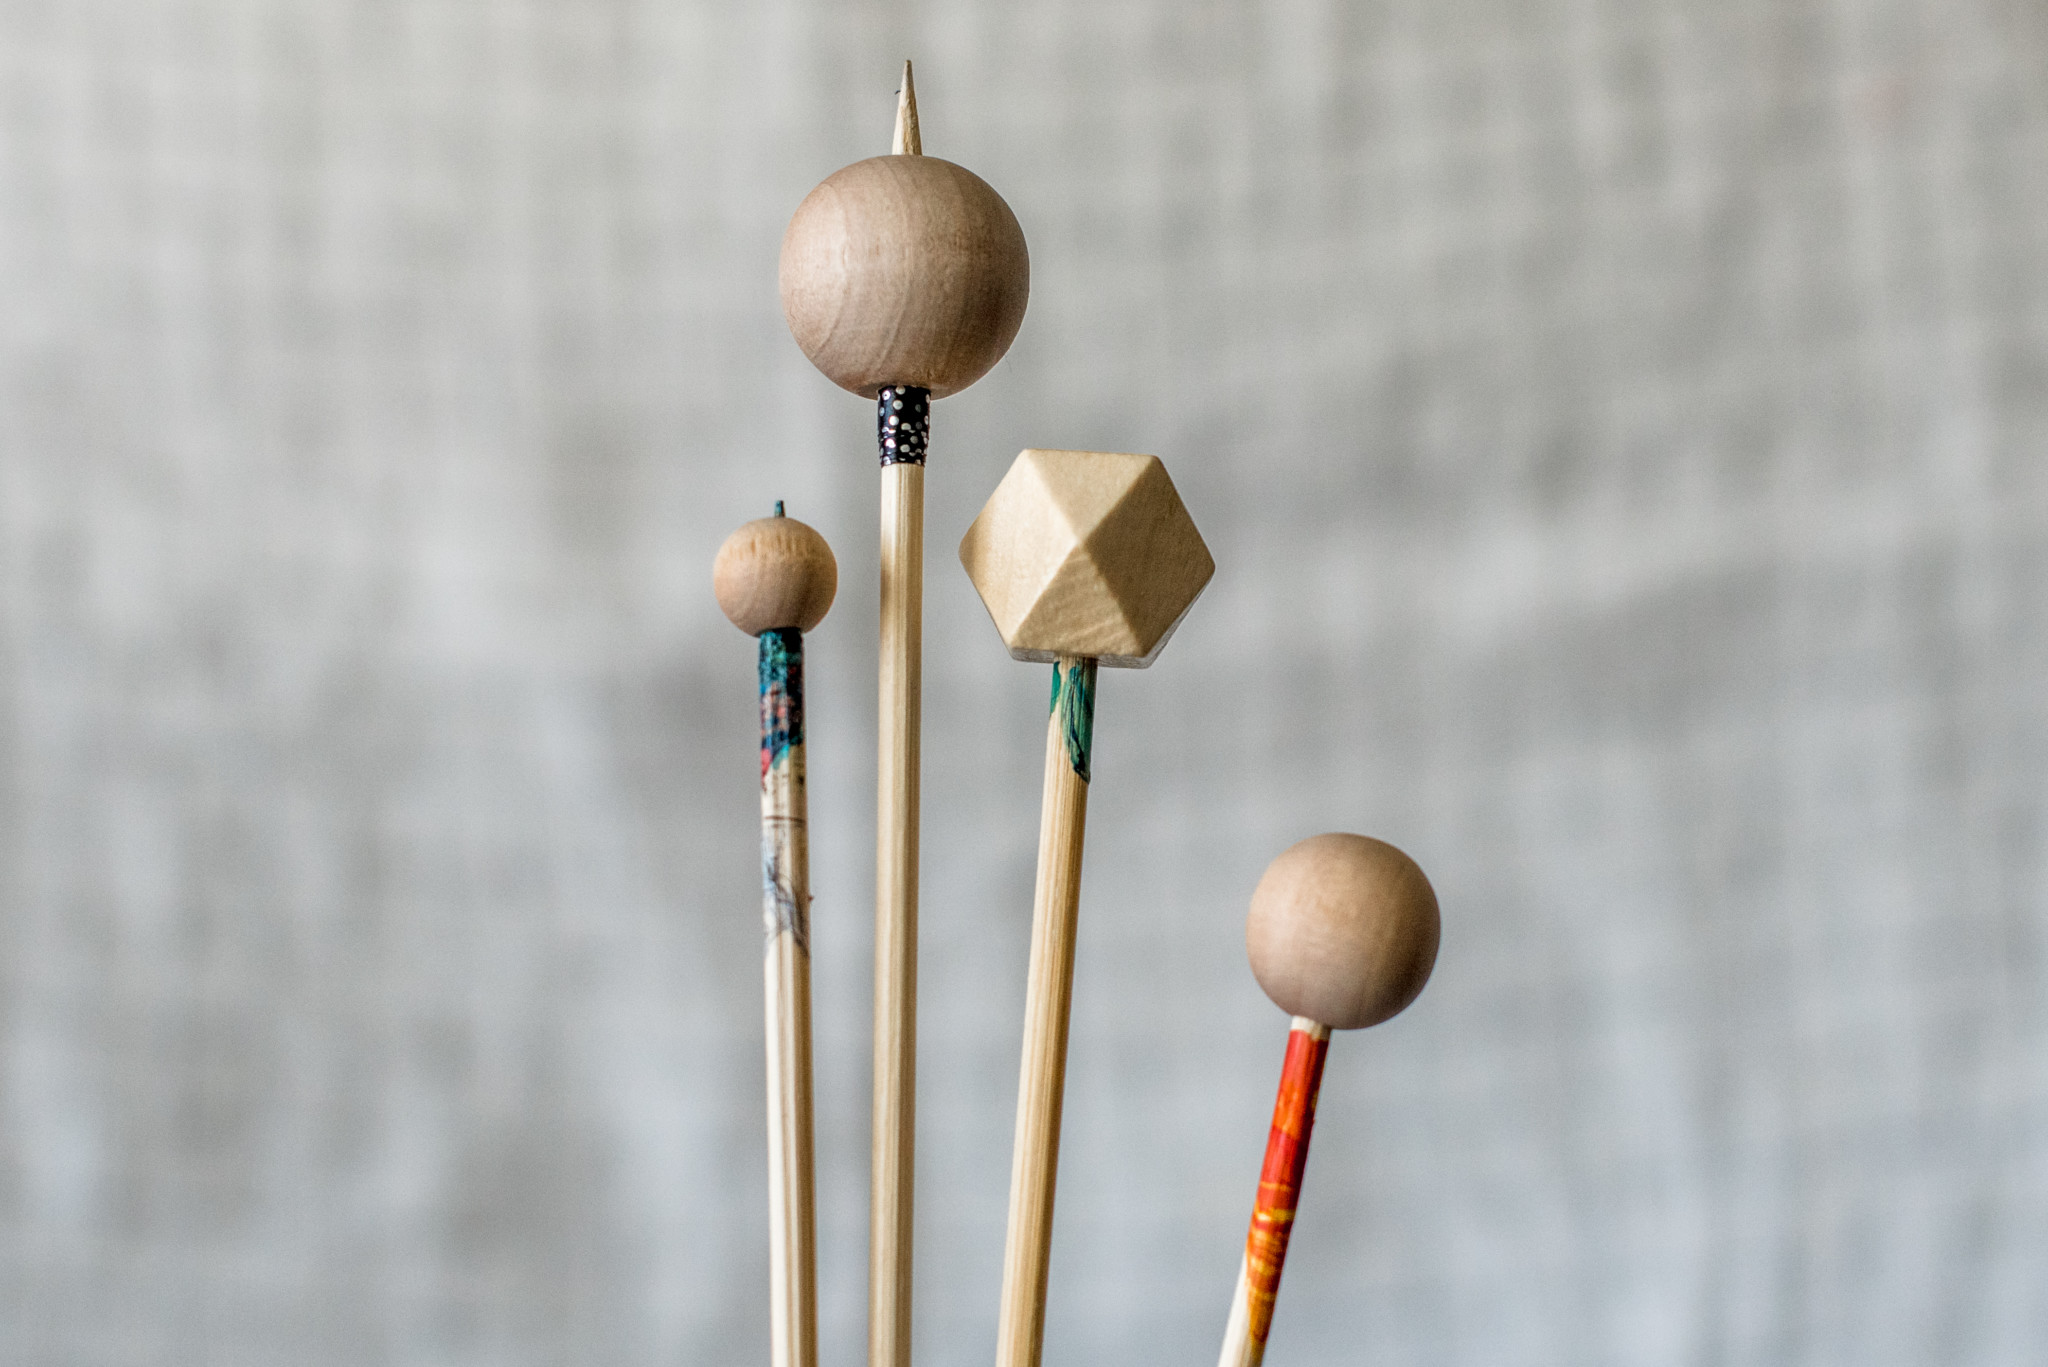
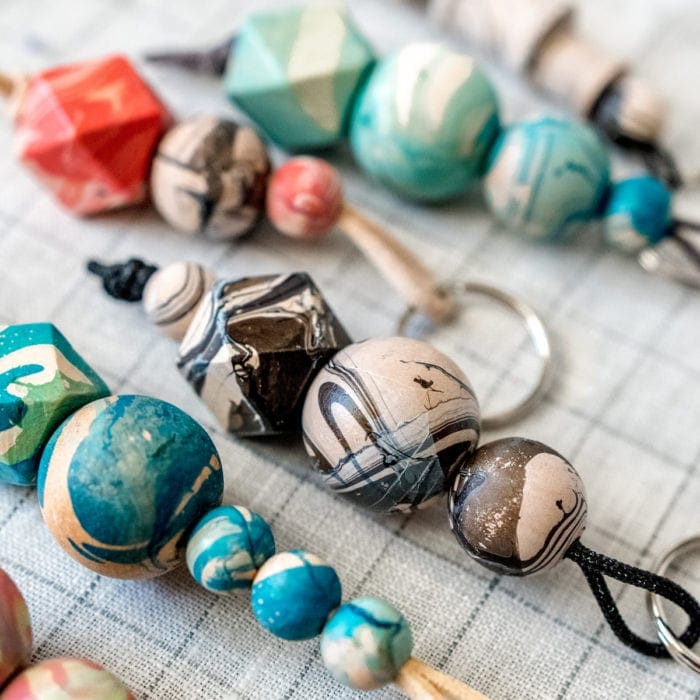
-Wooden Beads in various shapes and sizes like these
-Various cording of your preference -Nylon, Leather, vegan suede, or even cotton yarn like this
-Split Ring Key Chain Rings: These work great.
Wooden Skewer sticks
Washi Tape
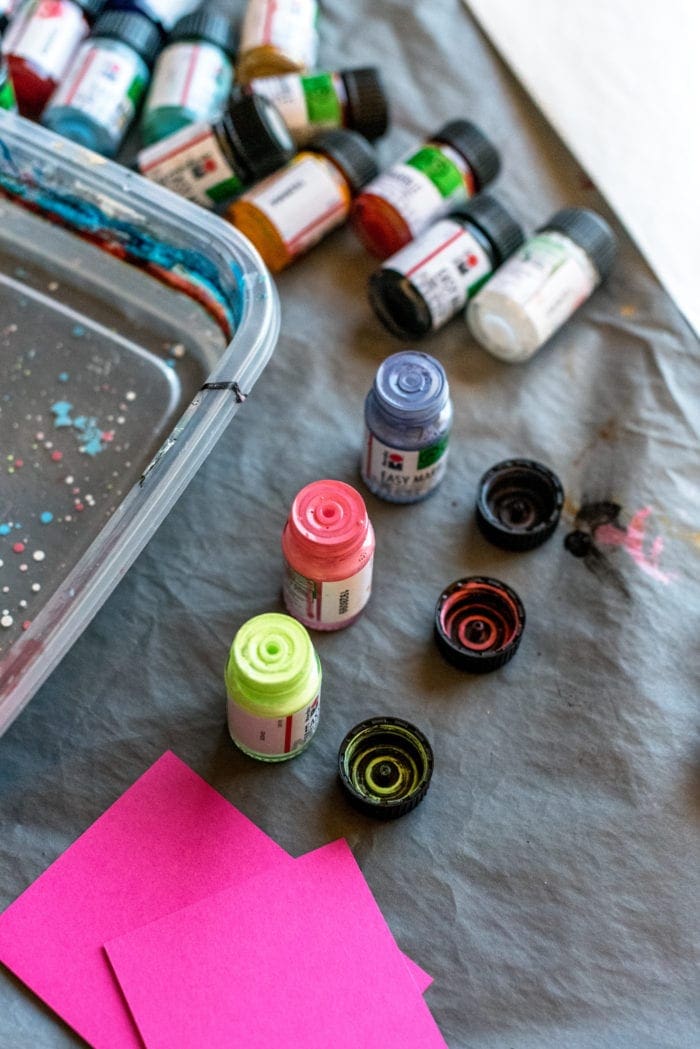
For the Marbling:
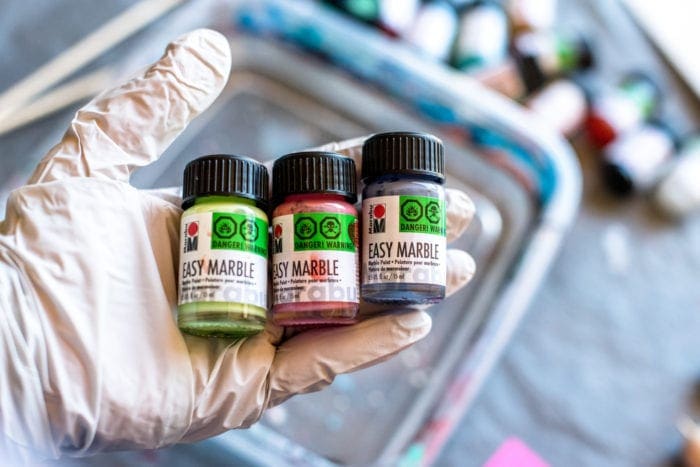
Easy Marble by Marabu in various colors. These are what I used: This basic set, the sunset set, these spring colors and these metallics
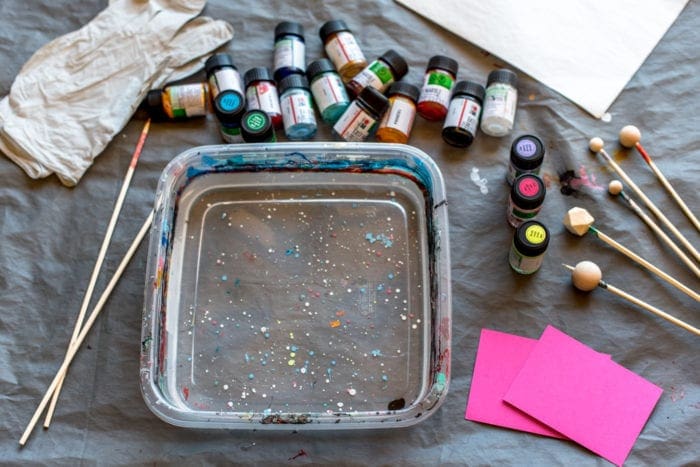
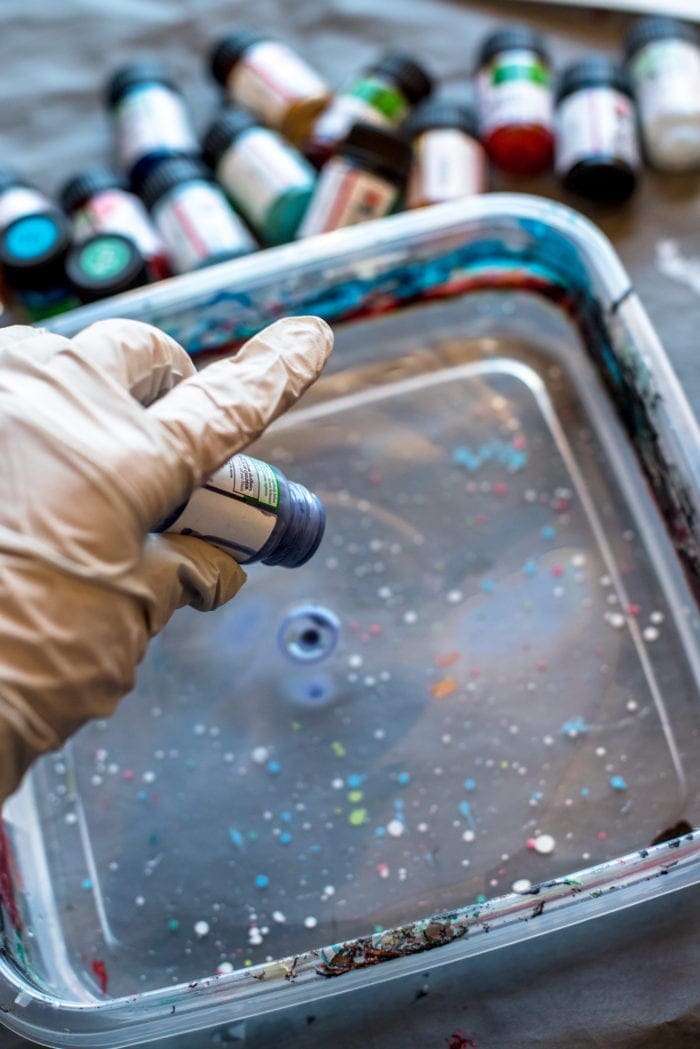
A Shallow plastic container (mine came from the dollar store) filled at least half way with room temperature water
Gloves
Scrap piece of card stock to pick up left over paint
Optional- Deli Sheets or Parchment paper to pick up left over paint
WHAT TO DO:
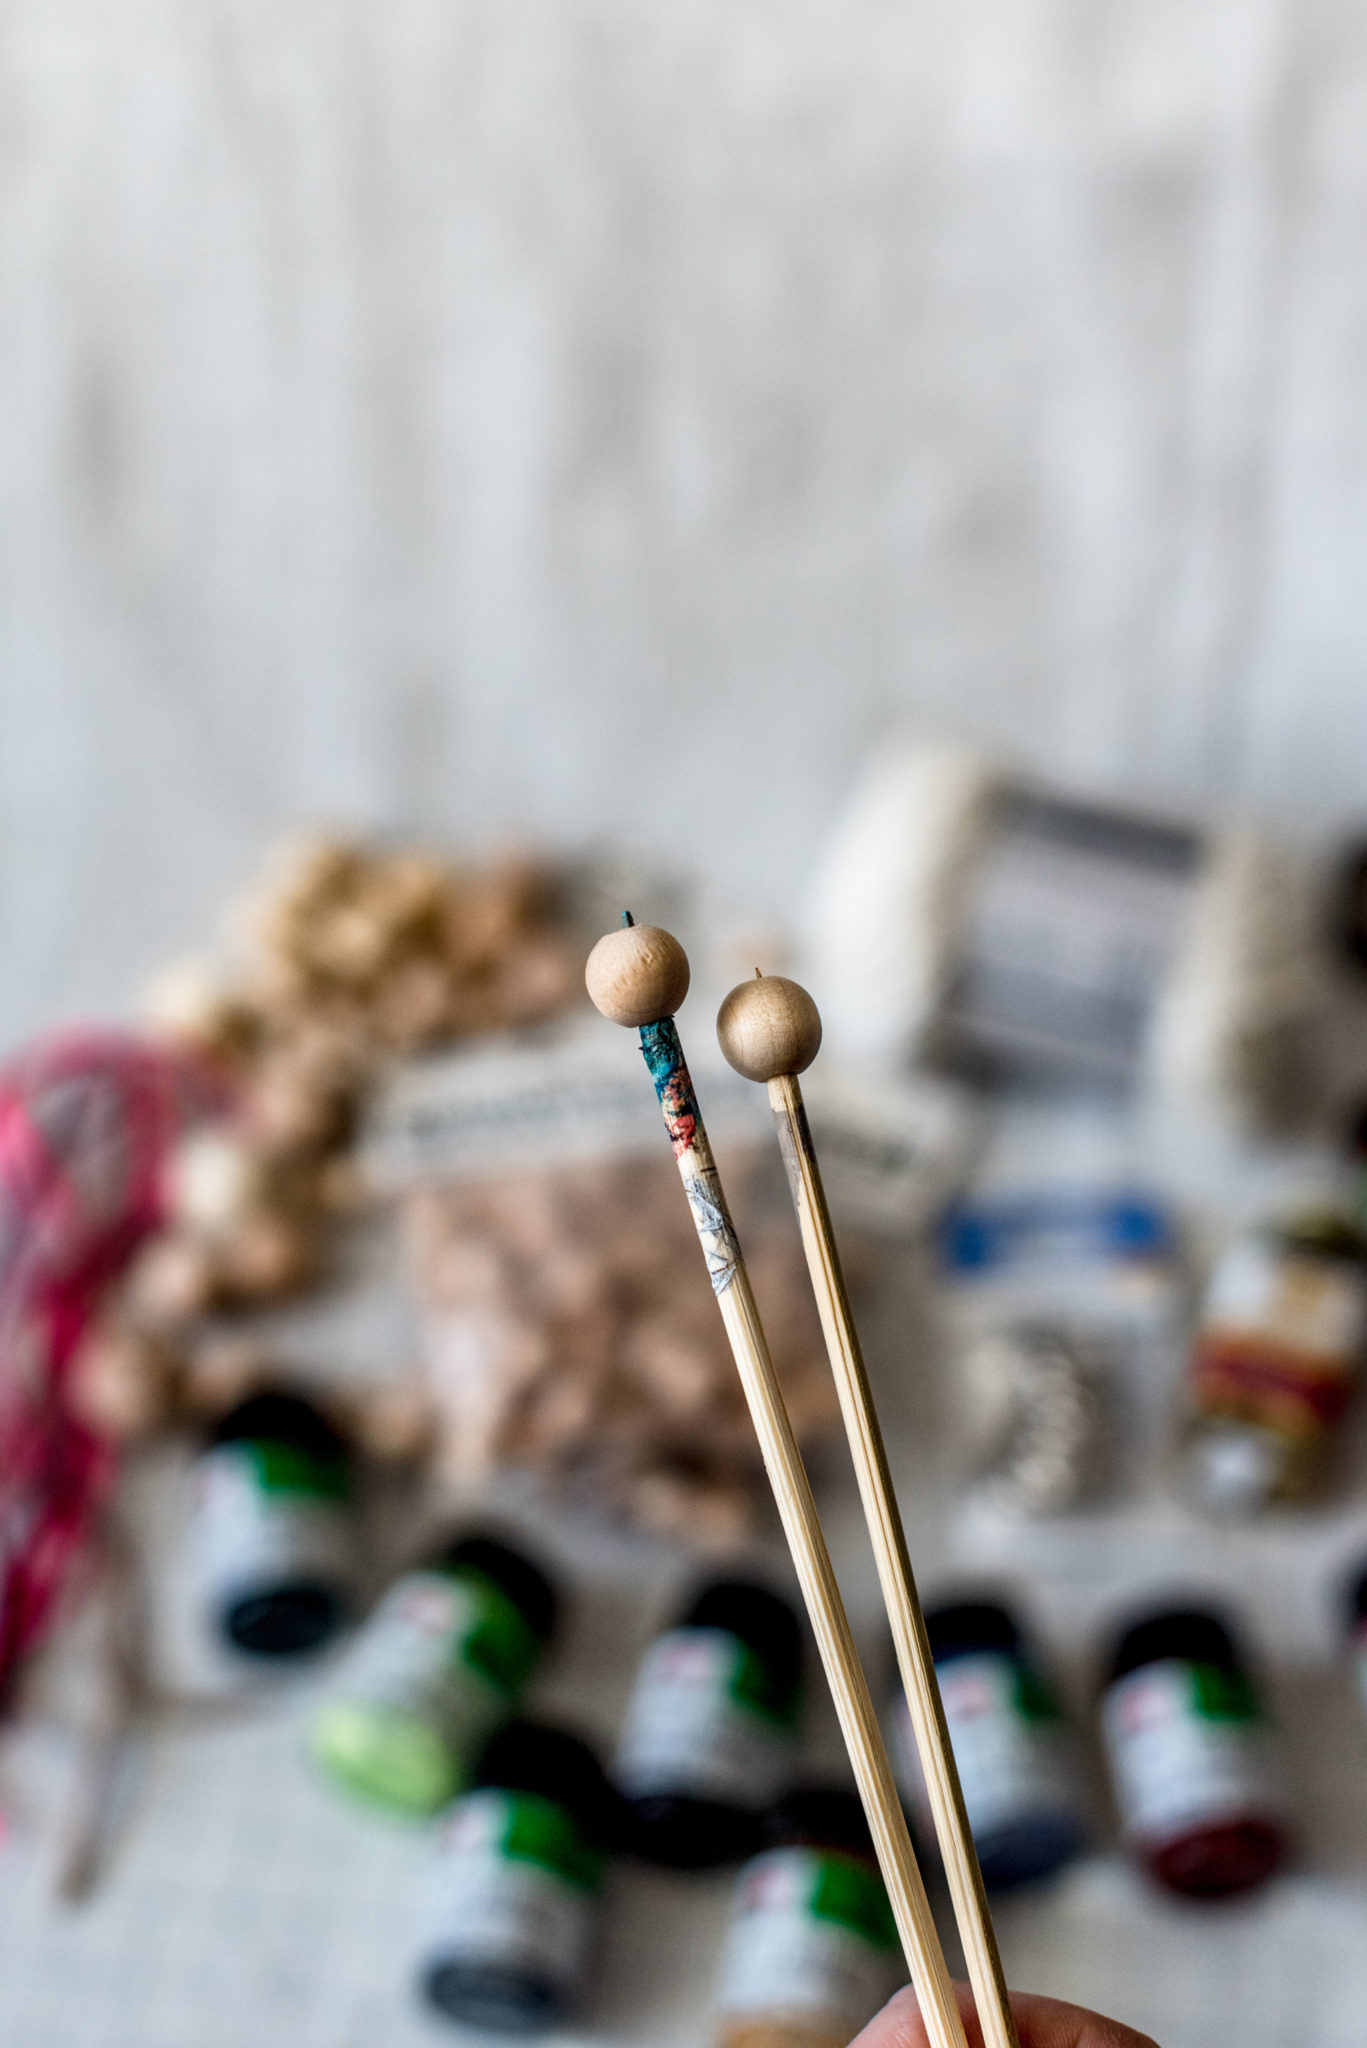
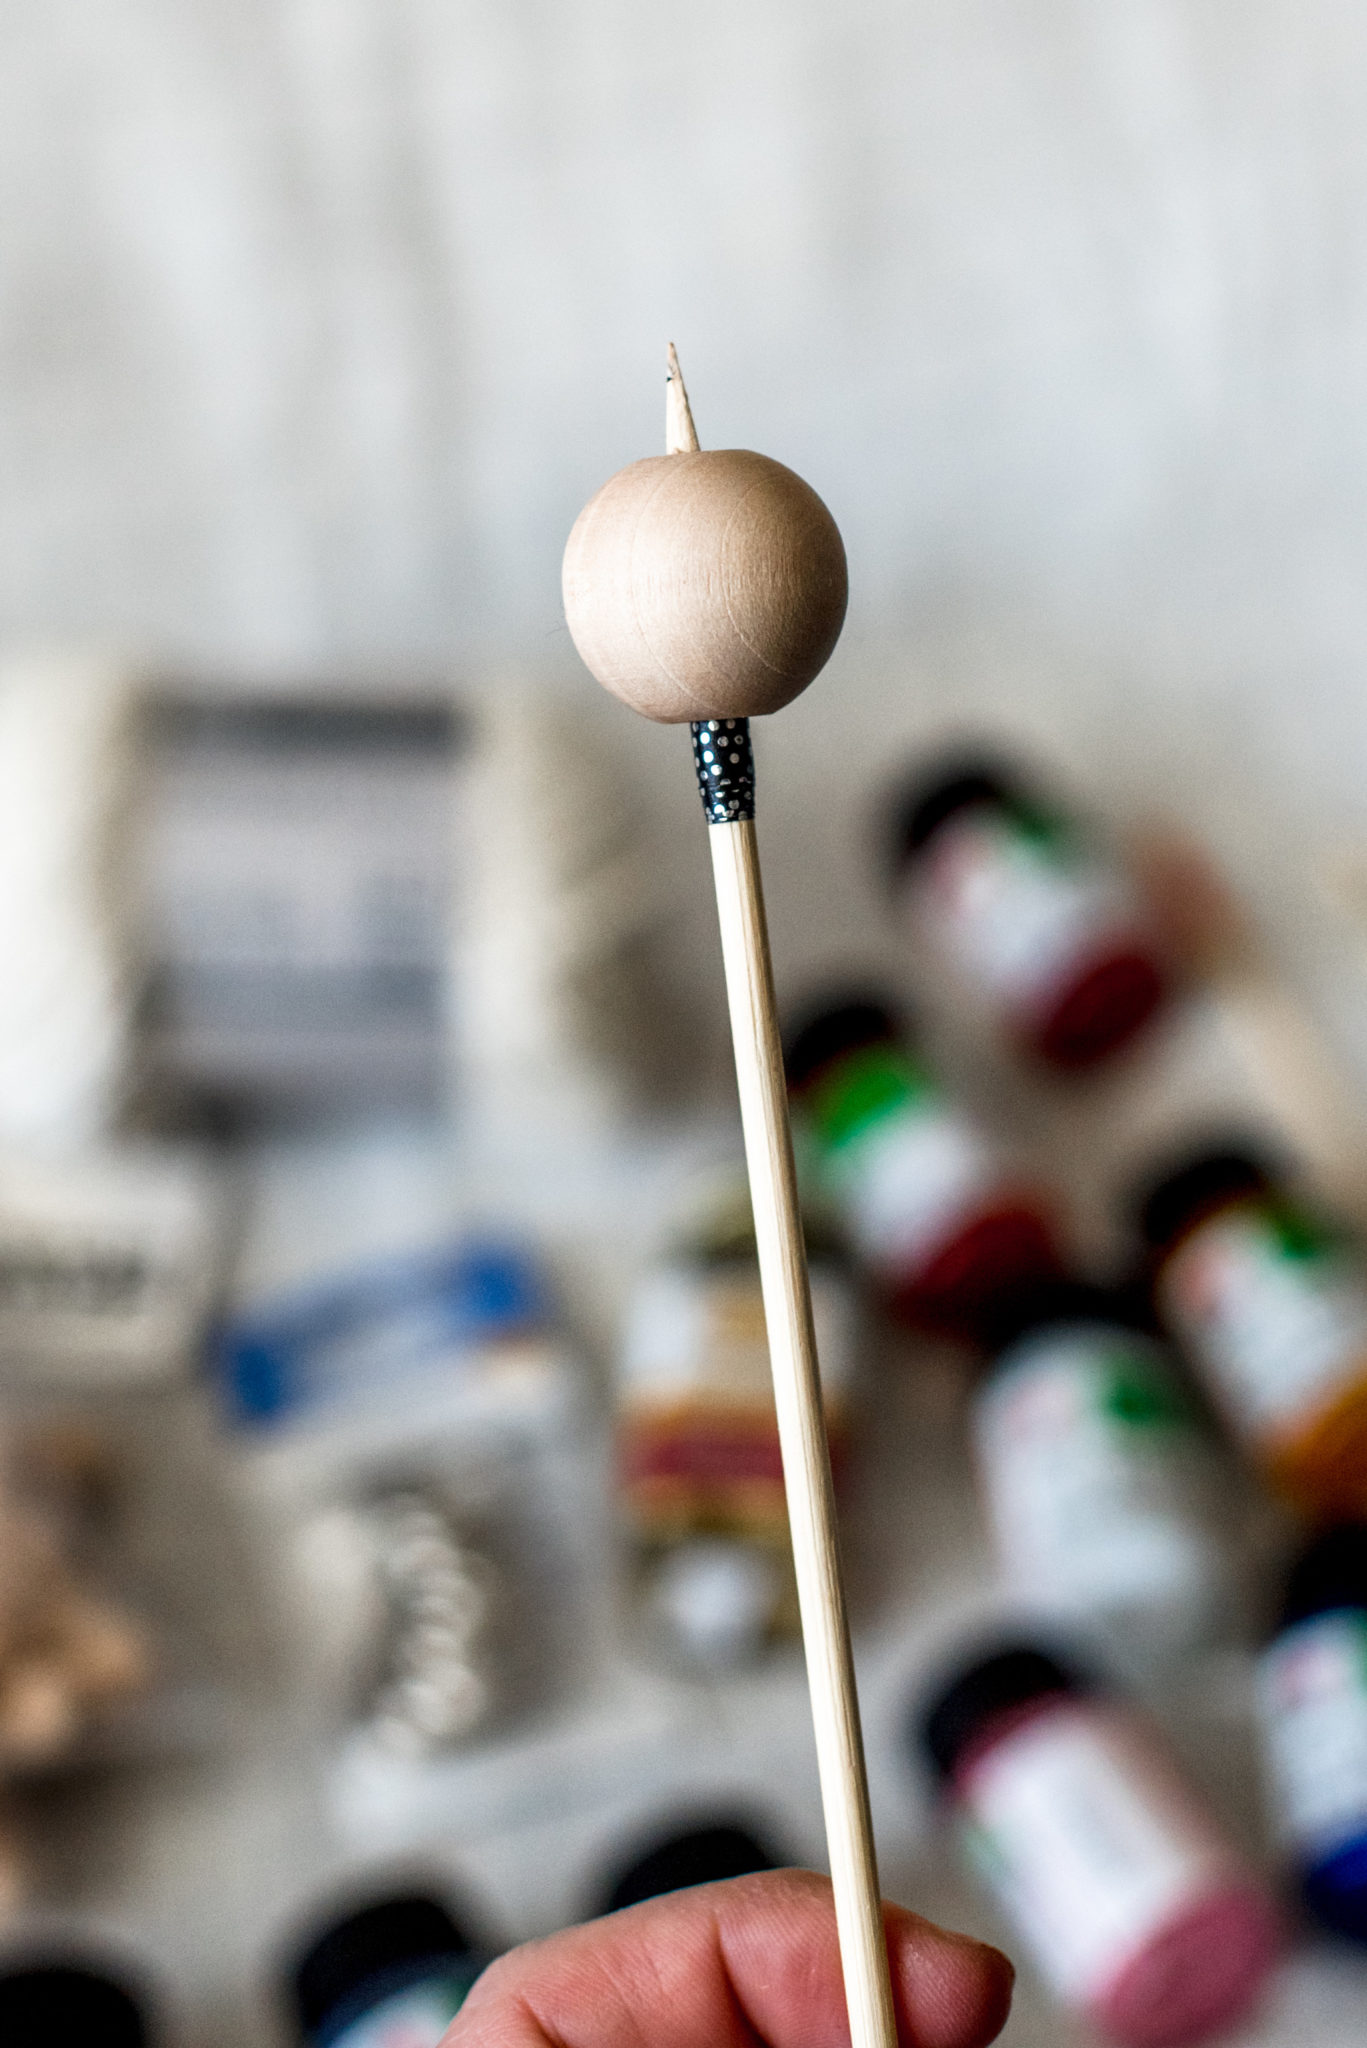
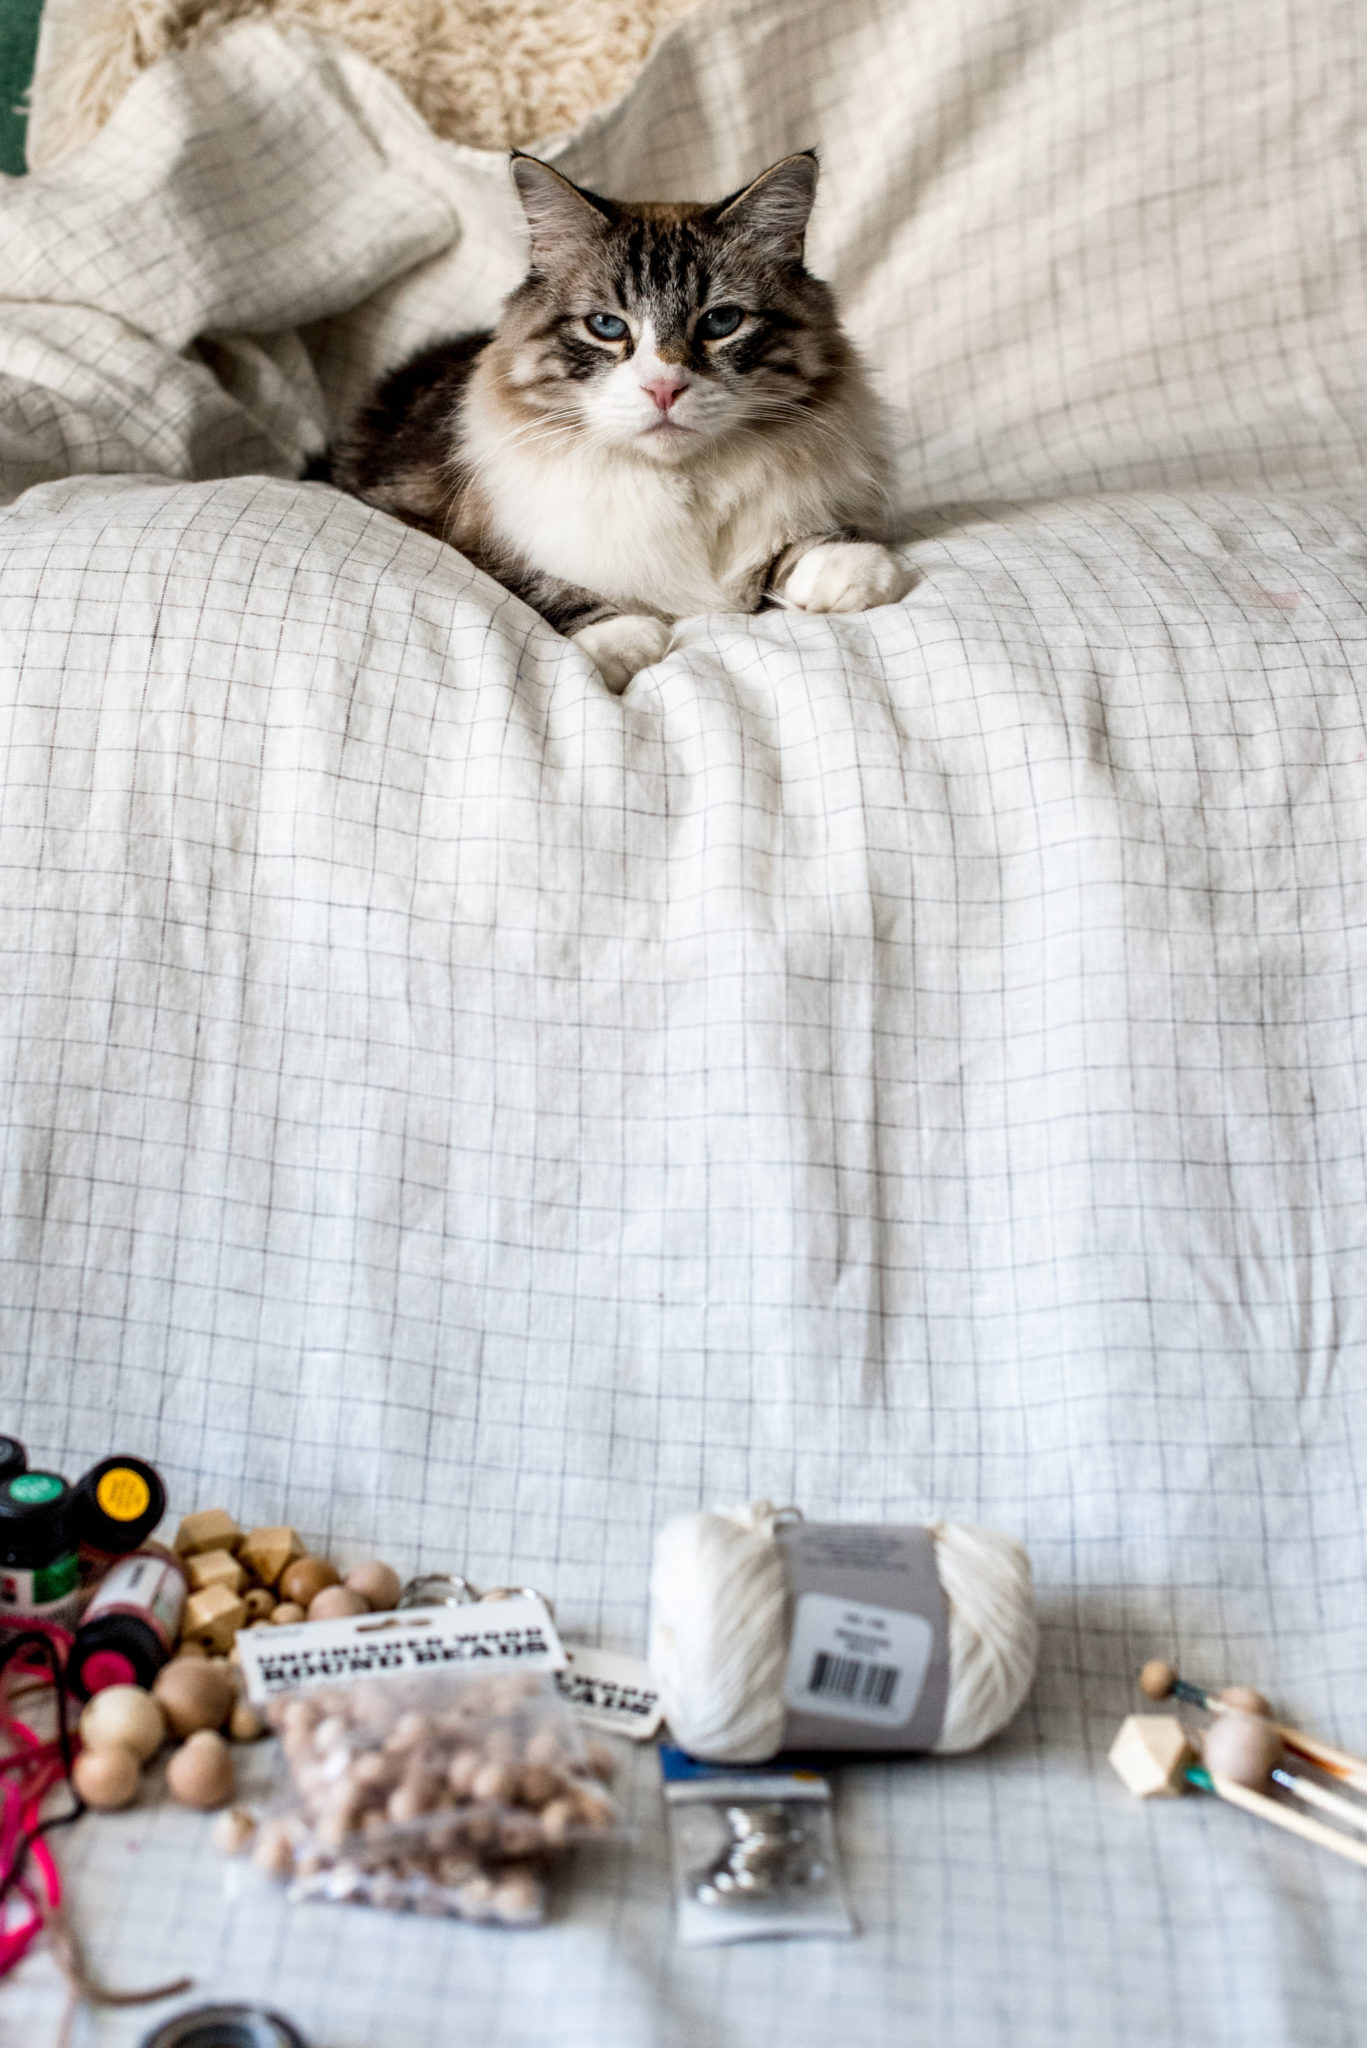
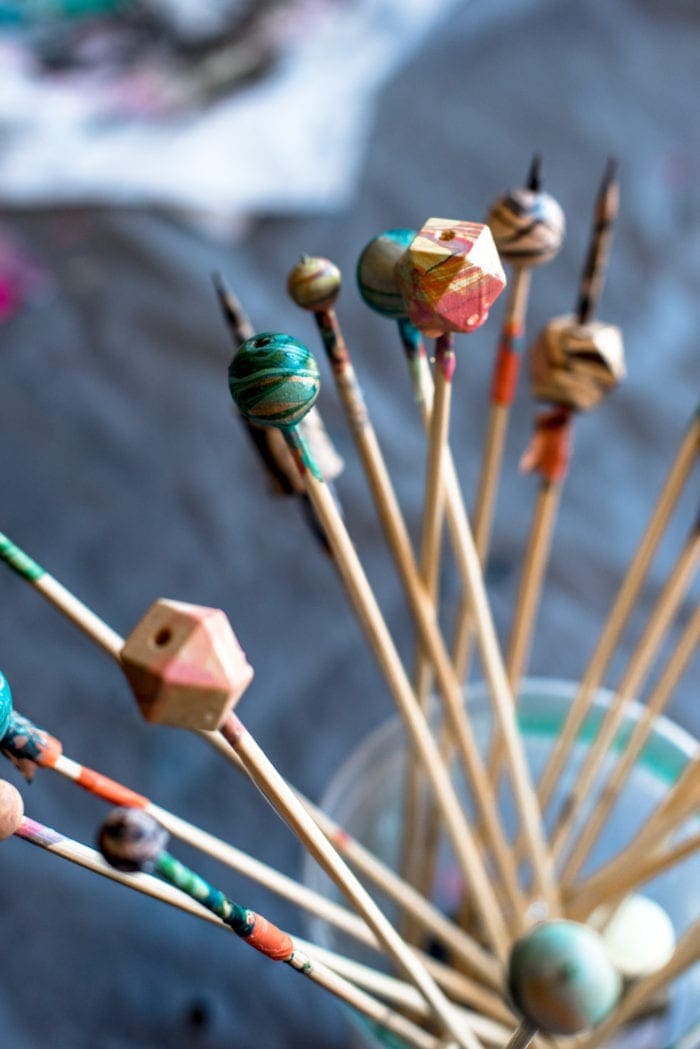
1. Prep your skewers with the beads. If your beads have a larger hole you can wrap some of the washi tape around the top of the skewer to make it bigger and so the bead will fit more securely. Also make sure your kitty is supurrvising (ha ha) you.

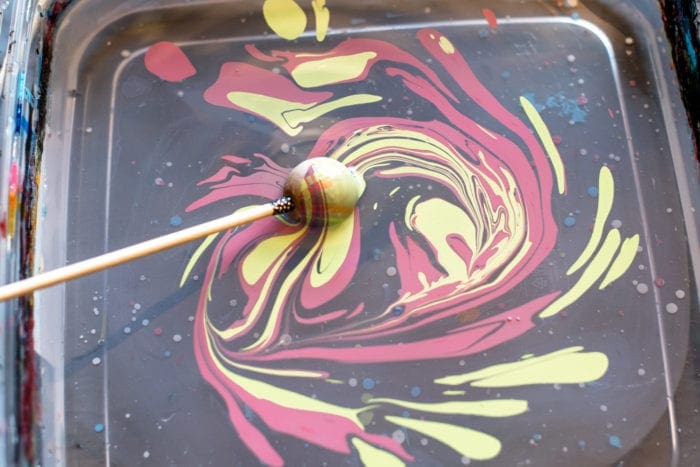
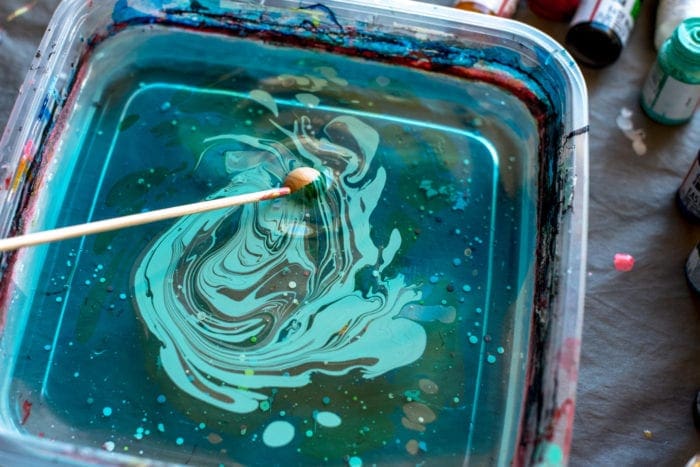
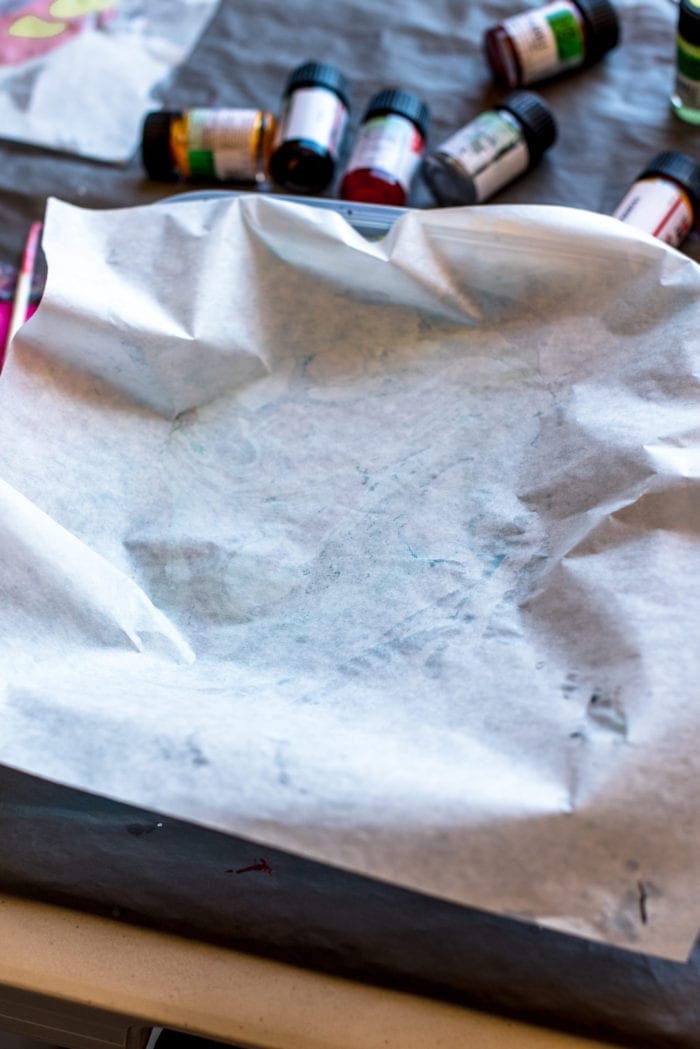
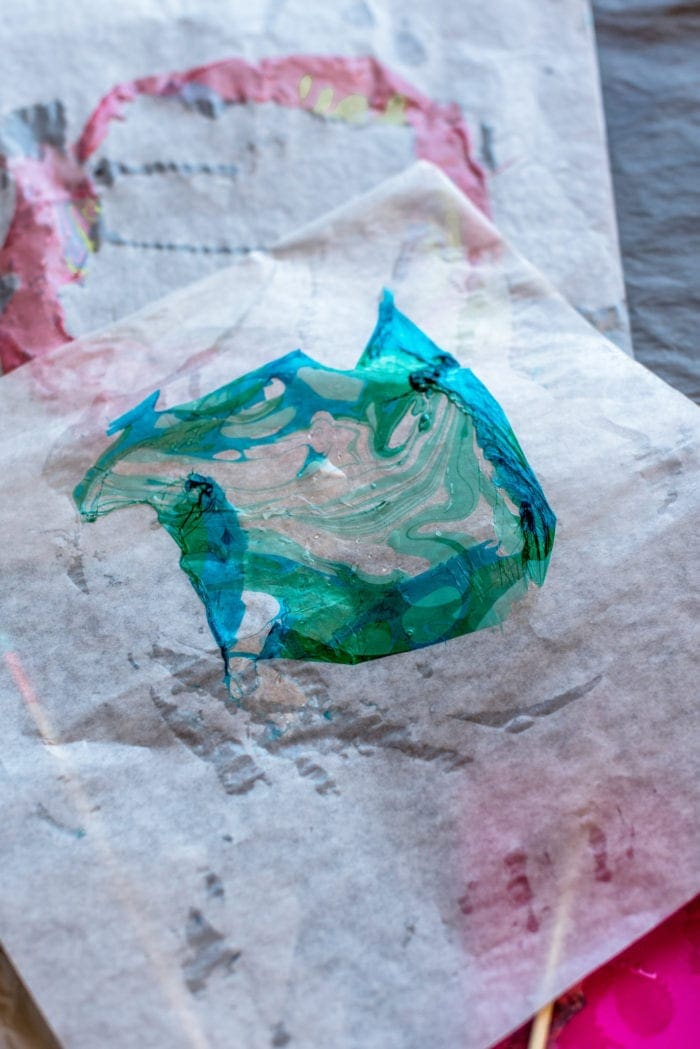
2. Prep your marbling station, it’s best to do this outside on a surface you don’t mind getting dirty and with enough fresh air because the marble paint has very strong fumes. Here you will need your plastic container, more skewers for mixing the paint in the water, rubber gloves and scratch paper or deli sheets to pick up excess paint. Fill the plastic container you are using with room temperature water. Next choose the color palette you want to use. I like the combo of only using 3-4 colors but the possibilities are really endless on color combos. Shake your paint well and open all the lids at once, this will make for easier access once you start since you’ll want to move quickly. Shake as much paint into the water as you’d like for each color, use a clean skewer to swirl the paint in a way you prefer. Then take your wooden bead on the skewer and dip it into the pain, I tried to do this in a side sweeping motion, rolling the bead on the paint as I went to cover the entire surface. Depending on the size of container you are using, you should be able to get a few beads done with the same paint if you move quick enough.
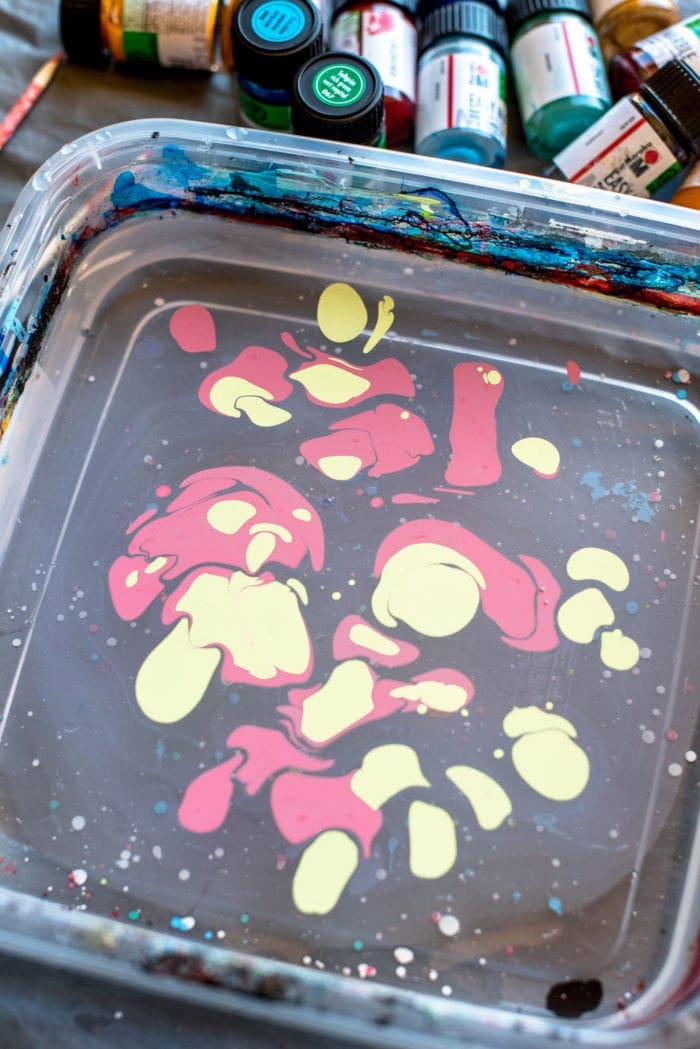
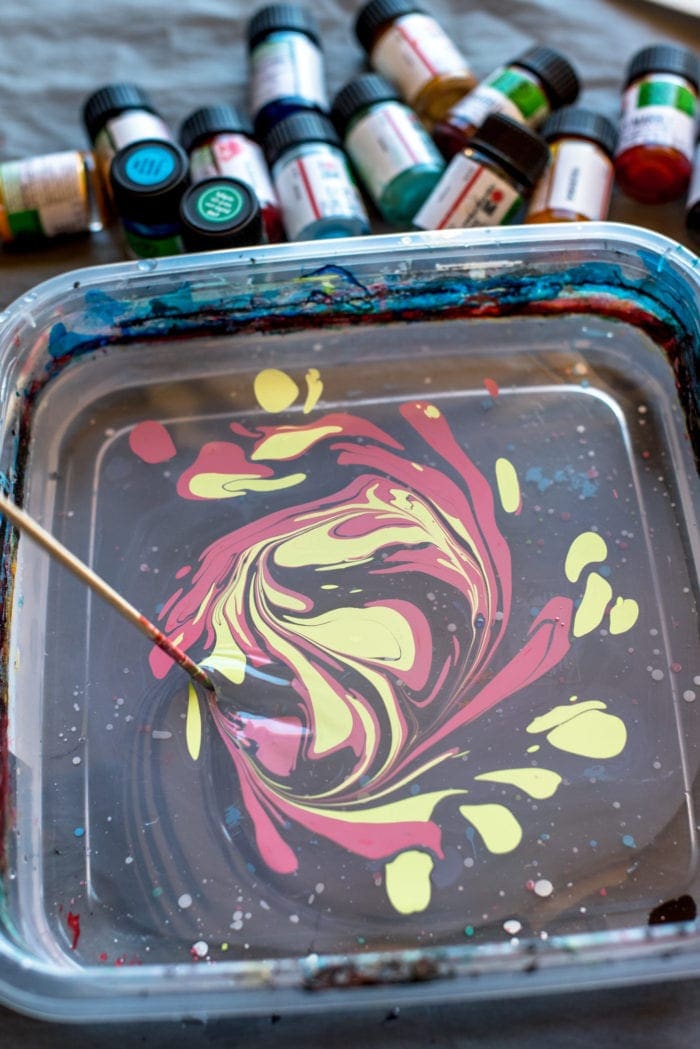
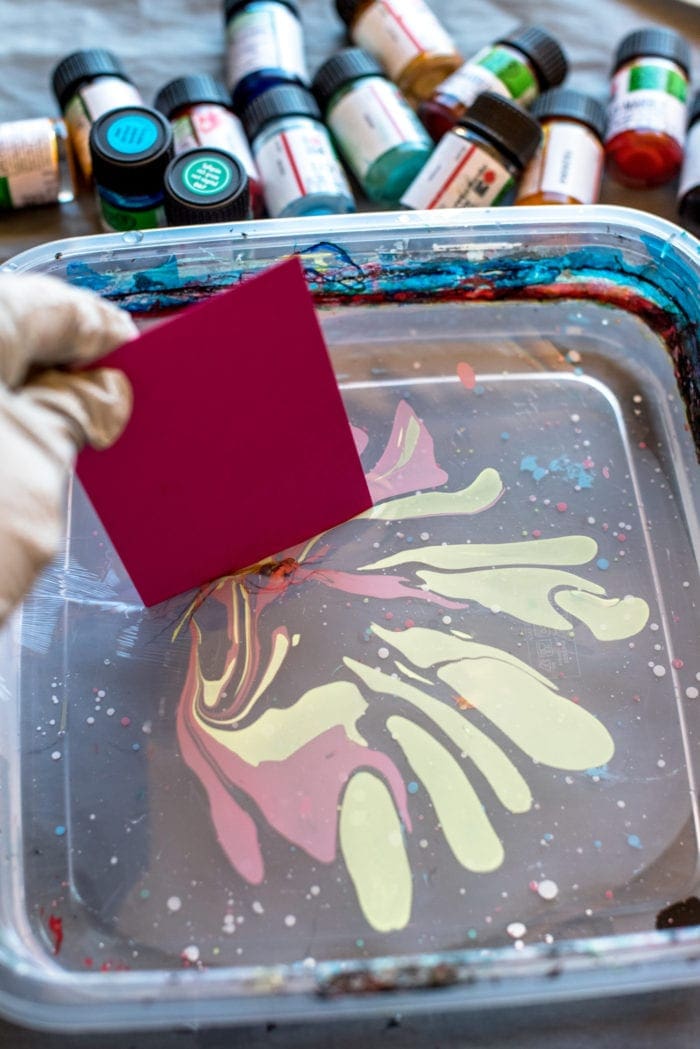
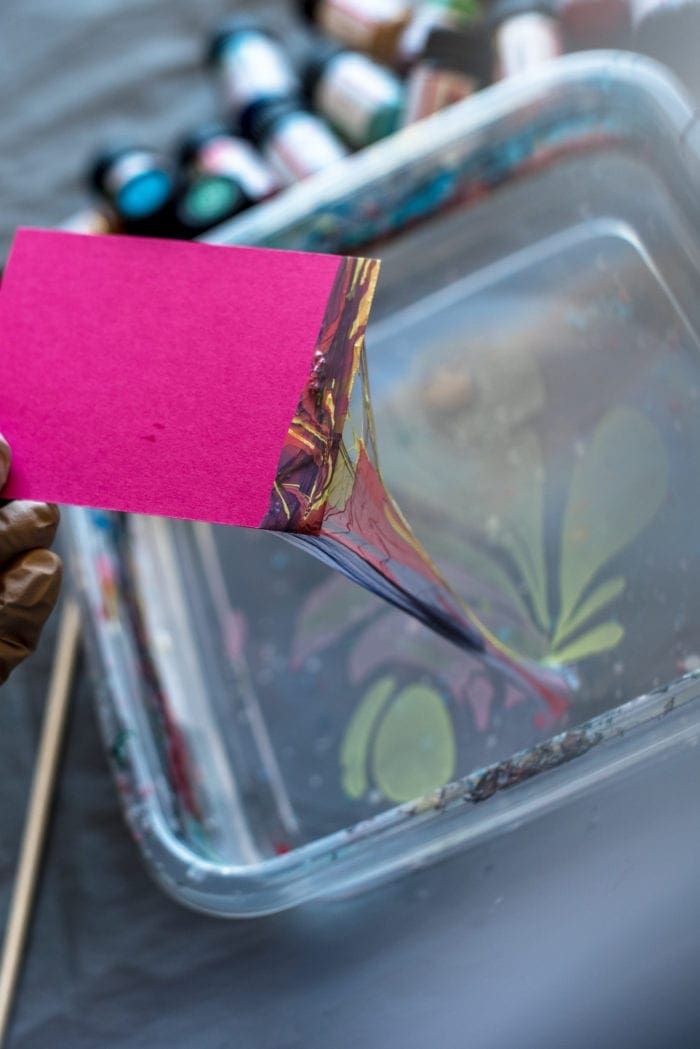
3. Use your scrap piece of paper or deli sheet to pick up any of the excess paint & repeat. I like using the deli sheets to pick up larger amounts of paint, you can then use those to display as art, in art journaling, mixed media crafting etc. As I dipped the beads I sat the skewers upright in a tall container to let them dry, this is a better idea then laying them flat so that any wet paint doesn’t transfer onto anything else.
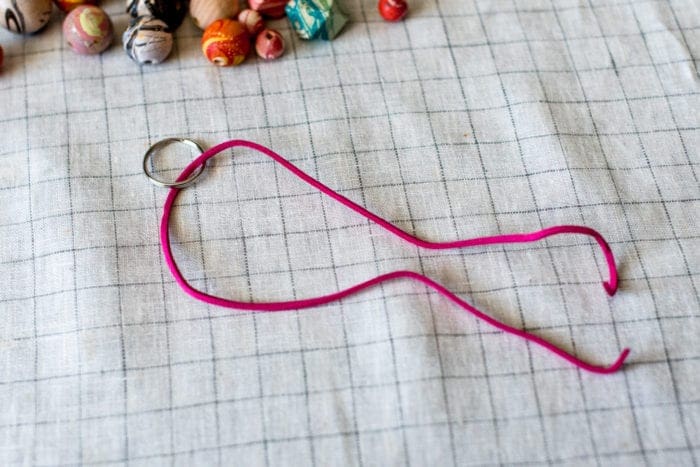
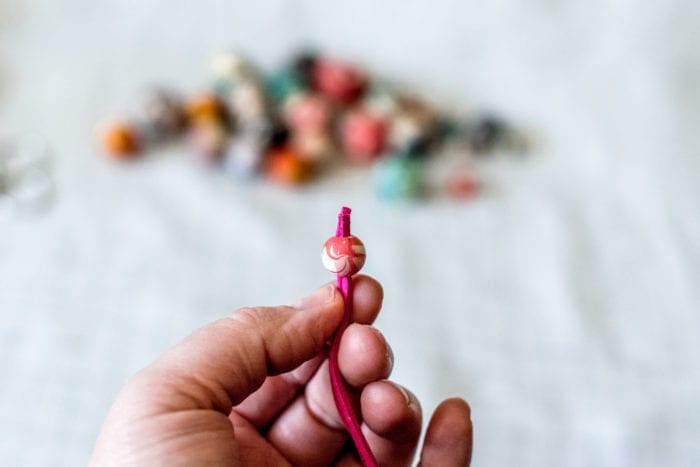
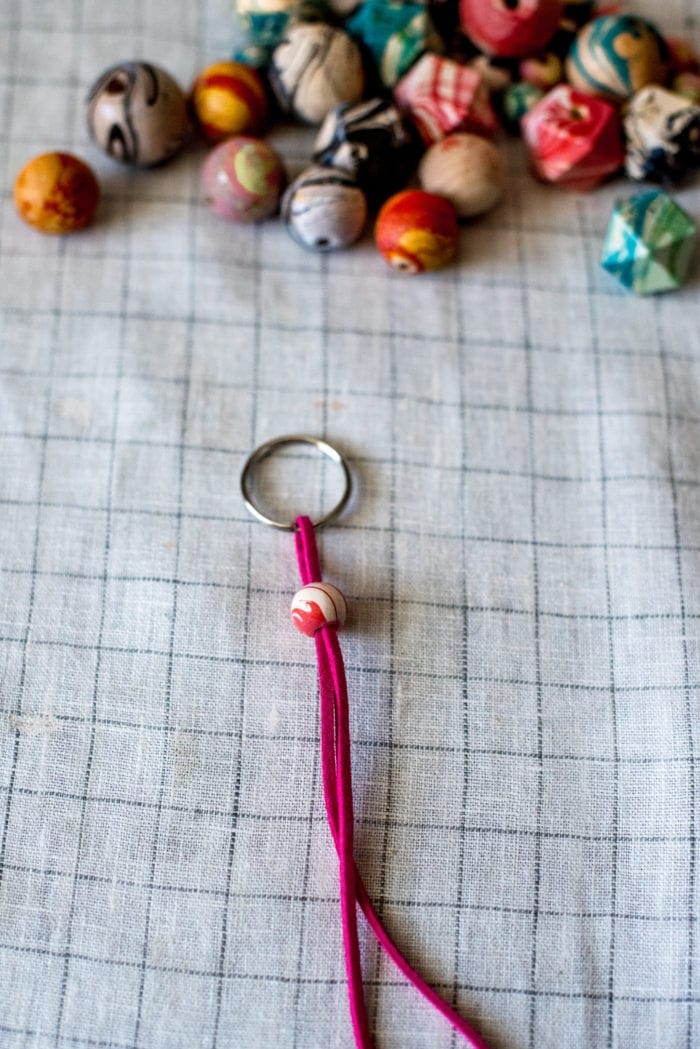
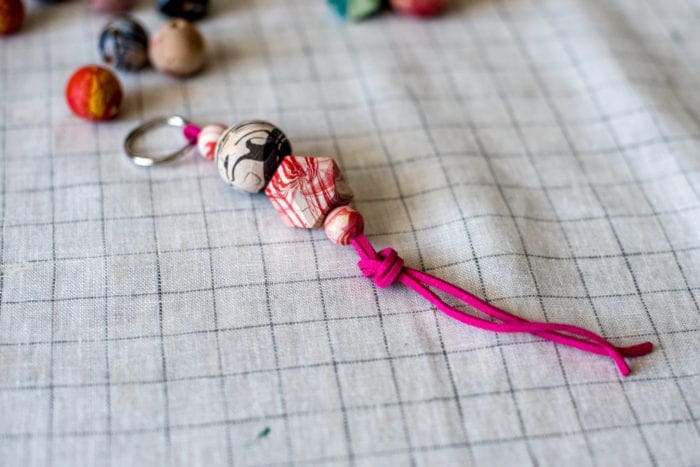
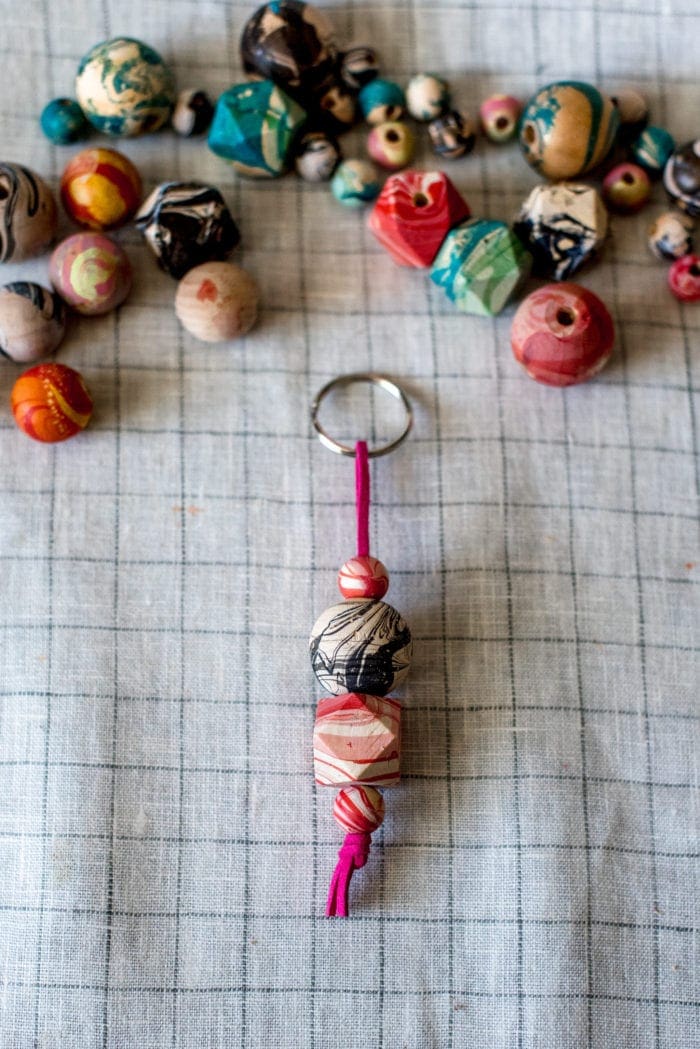
4.Once your beads are completely dry you can create your keychain. Take a split keychain ring and put the string/cording that you are using though it, I didn’t really measure here since once your beads are strung you can cut it to the length of your choosing. Pinch the ends of your cording together at the bottom and start stringing your beads in an order you like. If you’re having trouble getting the cording though the hole of the bead you can wrap some Washi tape tightly around the ends to make in smaller or more pointy to make it through the hole easier. Once I had the beads on the cord the way I wanted them I tied the ends of the cord into a simple knot and cut off the excess cording, and you’re done! These are so fun & easy to make, the options are really endless and they would make great little last minute gifts too.
ABOUT NIK:
Nik is a maker, day dreamer & potty mouth who loves cats, coffee and craft beer. She is a self taught hand embroiderer and will DIY pretty much anything she can get her hands on. You can see her work on Instagram @wastingthyme & @nikvphotography. She lives in Long Beach with her husband and her three awesome cats (that she can’t shut up about).

