
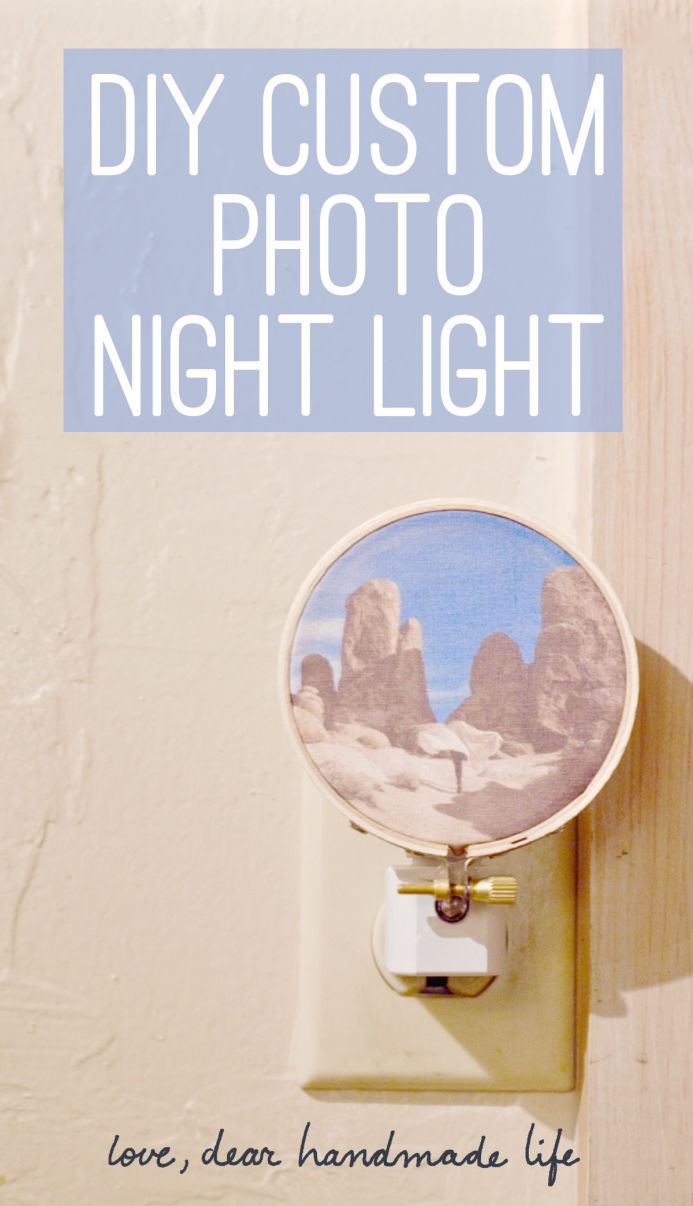
DIY Custom Photo Night Light
Editor’s Note: We’re beyond excited to welcome Dear Handmade Life staff member LP Hastings to the blog. You may know LP as our photographer, event assistant and videographer (check out the video she made at Craftcation Conference 2015 to see just how awesome she is)! This post is the second post in her new series on our blog: “First-time Crafts”. Although LP is a creative powerhouse she loves trying out new crafts and isn’t shy about embracing the awkwardness and learning curve that goes along with being a beginner. We’re so excited to introduce LP! -Nicole S.
Let me be honest, I love crafts, but sometimes I’m really bad at them. Many times they don’t come out looking Pinterest perfect and instead of being happy that I created something, I feel like it wasn’t good enough! This column is about embracing such crafts for the first time and will include the honest tips that you might not find elsewhere. Let my mistakes not be yours – now go forth, and craft!
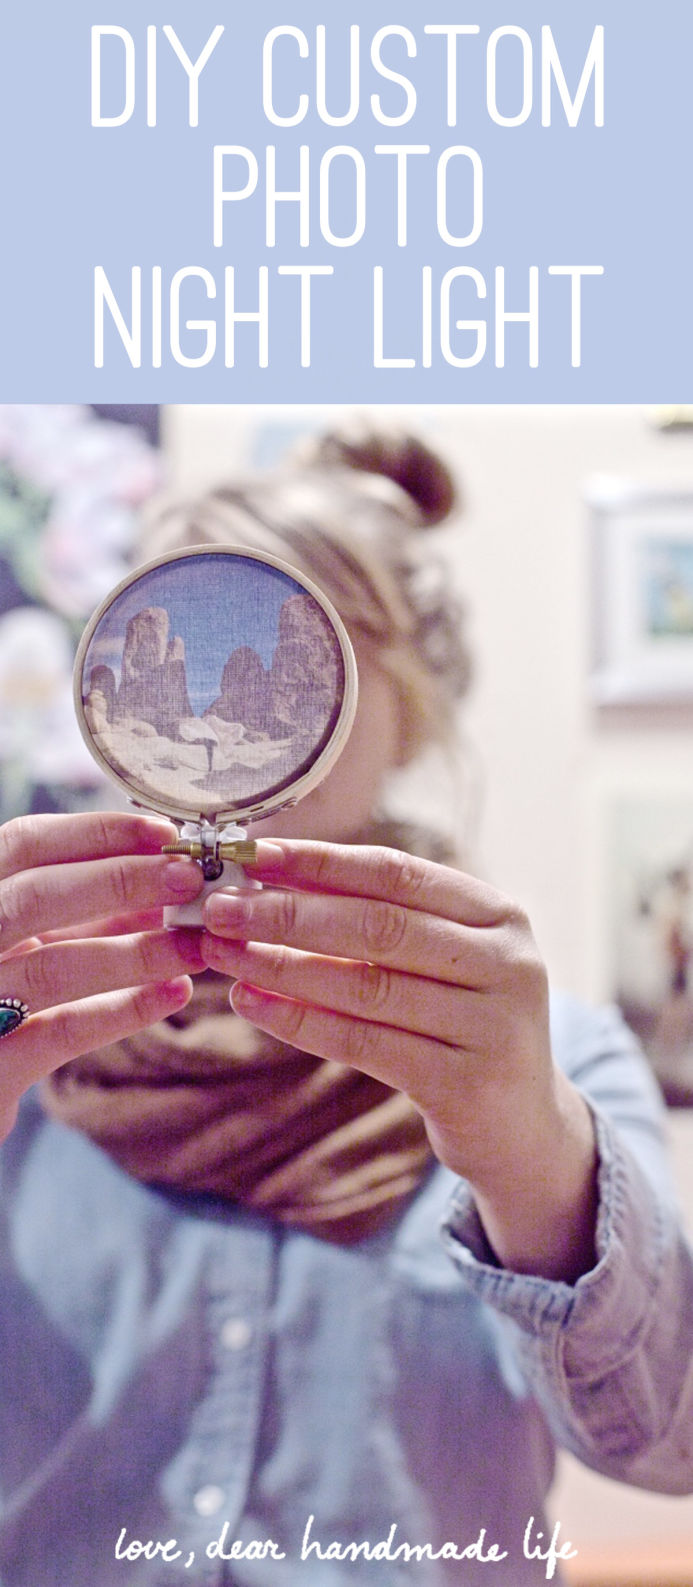
Foolproof crafts are the best and this one is particularly satisfying for it’s ease and cheap supplies. From start to finish, making your own custom photo night light will take about an hour. I think it’s a fun way to display your favorite photos and even if your printer isn’t that great, the muslin texture makes up for it. They also make good custom gifts – pretty sure your Grandma would love a night light with your big ol’ face on it. Let’s get started.
WHAT TO GET:
-Muslin Fabric
-Freezer Paper
*Reynolds Wrap seems to be the only brand that sells in stores. My local Safeway didn’t have it, but Target did.
-Computer with photo editing software
-Inkjet Printer
-Iron
-Scissors
-Embroidery Hoop
*3 inch or 4 inch hoop will work. I wouldn’t go much bigger unless you have a lot of room around the outlet.
-Night Light
*Home Depot has many to choose from, however, I’m on the fence about if LED or Tungsten lights are a better choice. A night light with a Tungsten bulb has a warmer color and allows you to switch out the bulb when it goes out, but an LED uses less electricity and won’t get too hot. Yet the biggest factor with an LED is that once it burns out, you’ll have to pull off the photo and glue it to a new light. Choose whichever seems more practical to you.
-Hot Glue
-Paint + Brushes
*If a different color hoop will accent your photo nicely, you may want to paint and dry it before securing the photo.
WHAT TO DO:
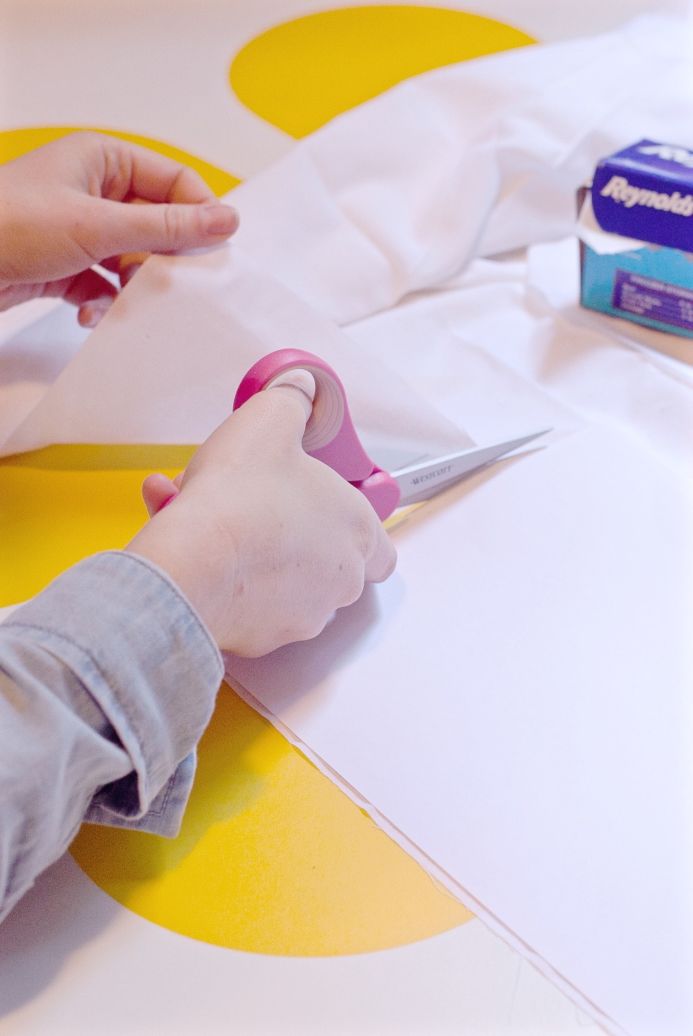
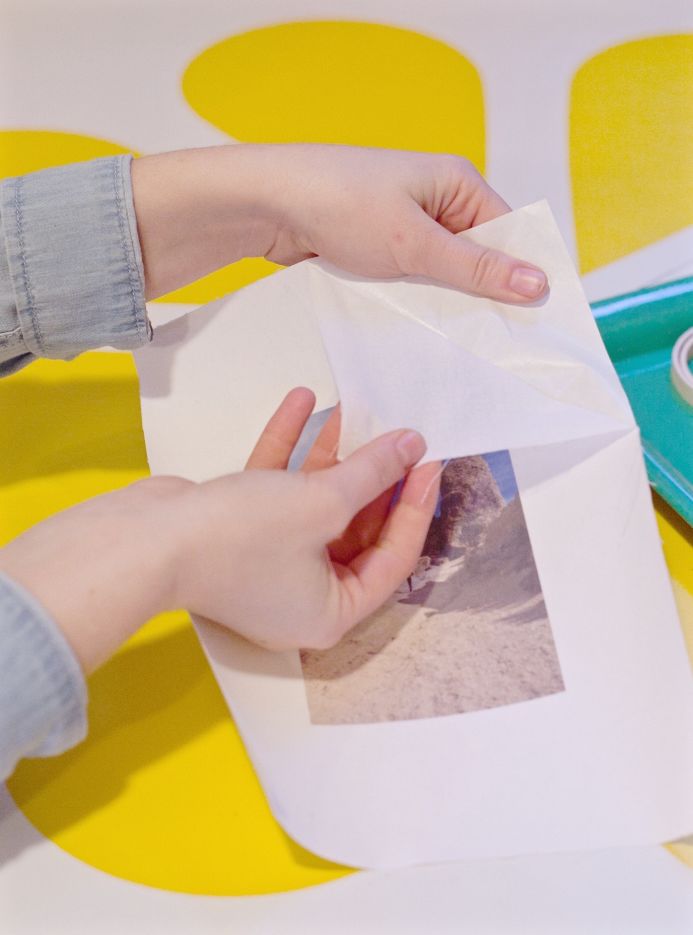
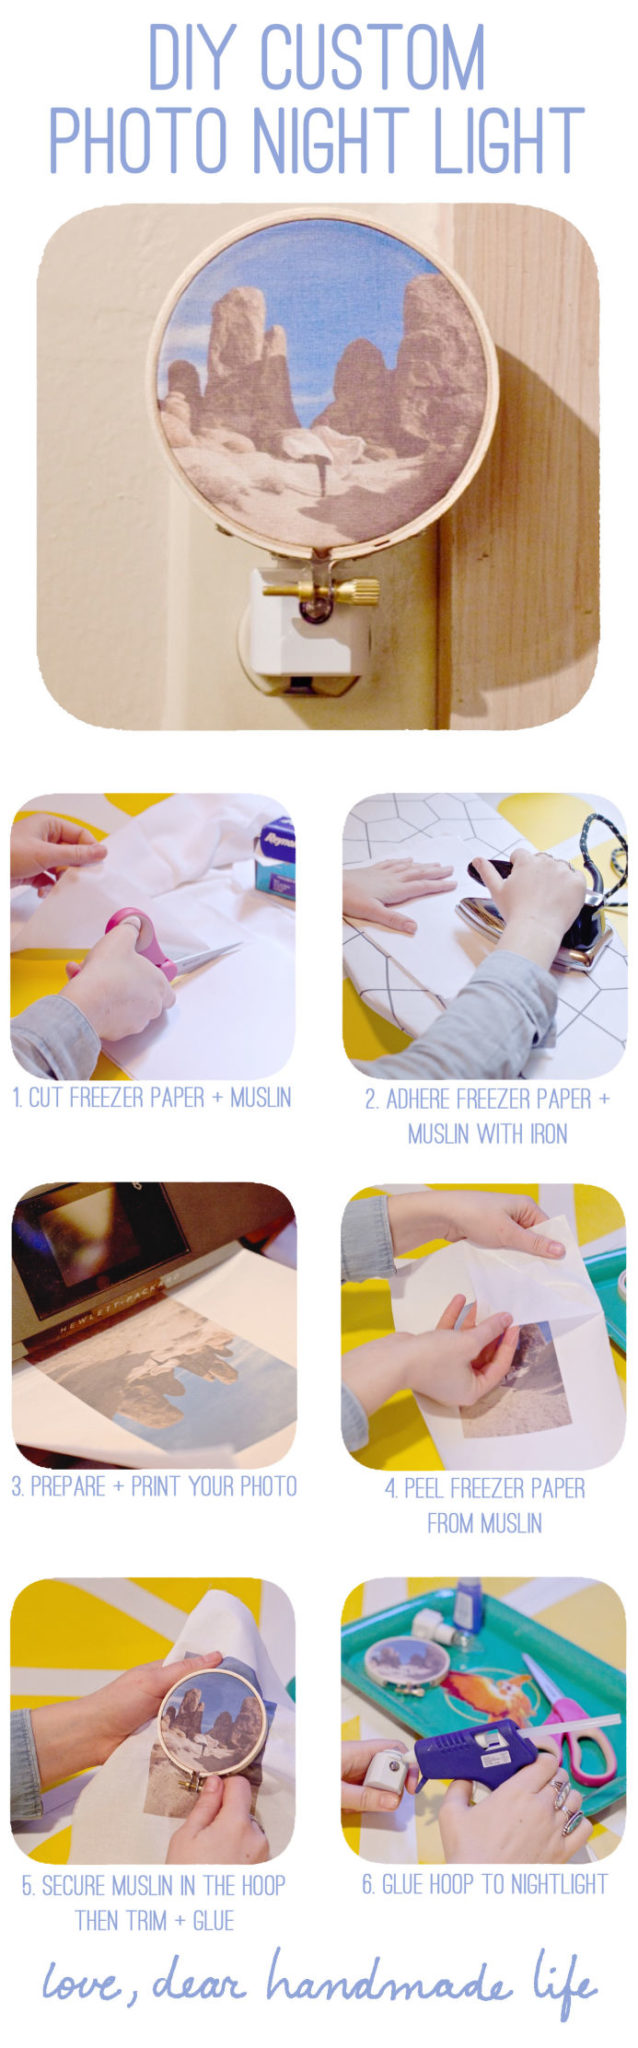
- Cut a piece of freezer paper and a piece of muslin to 8.5 inches by 11 inches. I think it’s easiest to use a piece of regular printer paper as a template. You don’t need to make the angles super straight as long as it will fit into your paper tray, but you don’t want any fringe coming off.

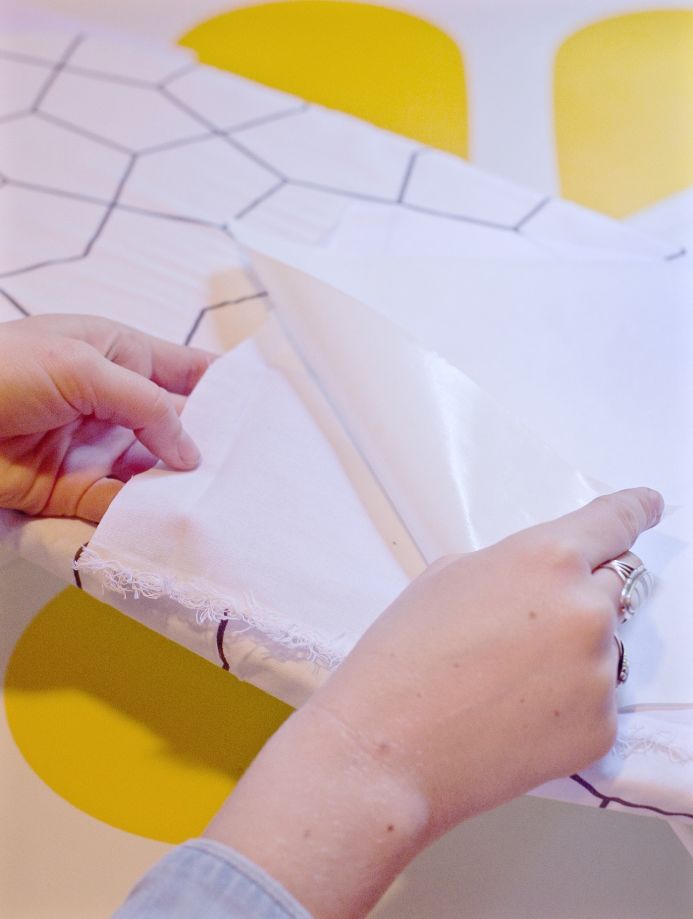
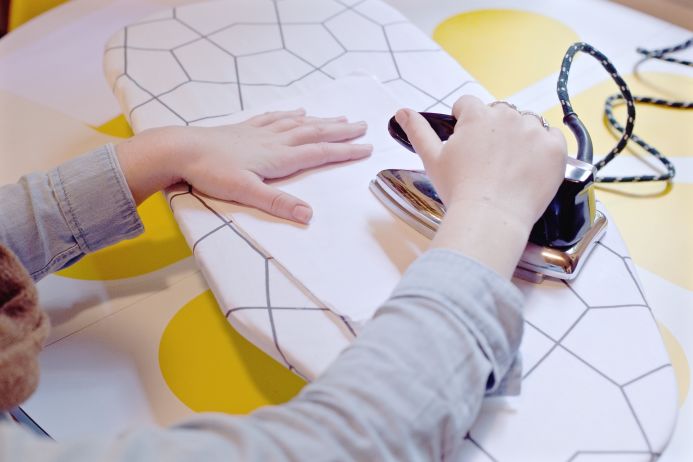
- Place the muslin against the sheer, waxy side of the freezer paper. The sheer side is the one that adheres to things. With your iron on a high setting, slowly run it over the muslin fabric. Start from a corner and push out while you iron or else air bubbles will be caught between the muslin and freezer paper. Don’t worry if you do get air bubbles, however, it doesn’t matter too much.
- Take out any paper from your printer paper tray and place the muslin/freezer paper piece in. Take account of how your printer accesses it’s paper – many will flip it over and print on the backside, so you may want to place the paper with the muslin side down. Then you’ll want to change the paper type in your printer settings – Photo Matte worked well for me.
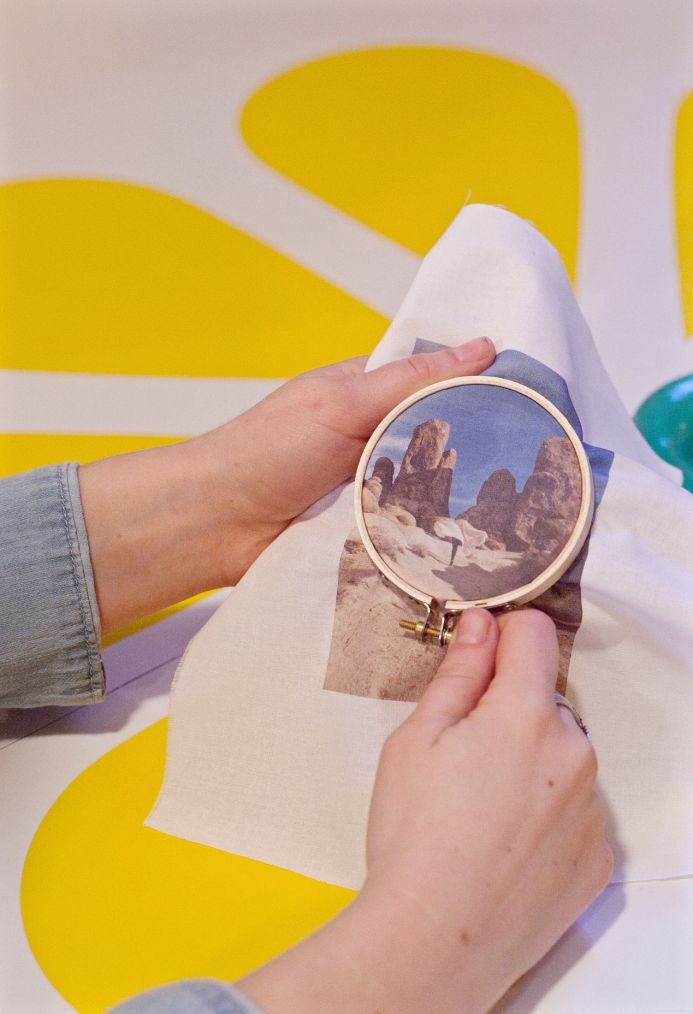
- Choose the photo you’ll use. Choose something that will compose well in a circle and doesn’t have too many little details. Those details will get lost once the image is shrunk down. In hindsight, I should’ve chosen a photo that did not have details in the white range, as they get washed out once the light is on. Remember that your dark shapes will show up best.
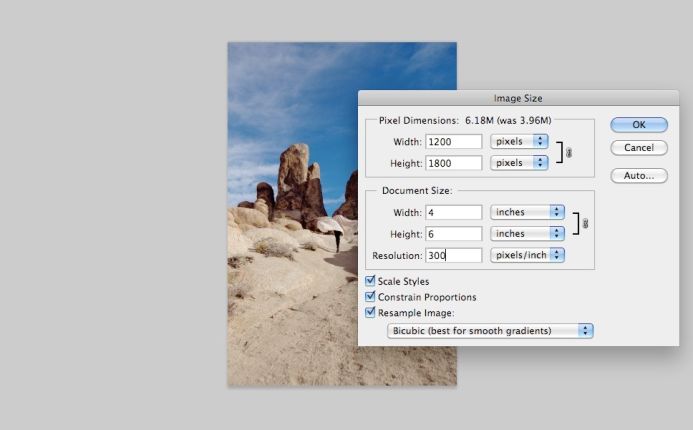
- Resize the photo and make sure the DPI is 300. If you’re using a 3in hoop, resize the photo so that the shortest side (length or width) is 4in long. If you’re using a 4in hoop, resize so that the shortest side is 5in long. You just want to make sure there’s extra room around the photo once it’s in the hoop.
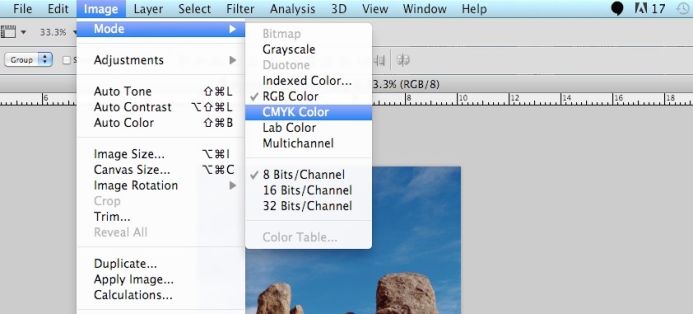
- Prepare the photo to print. Your photo should be set to CMYK colors.
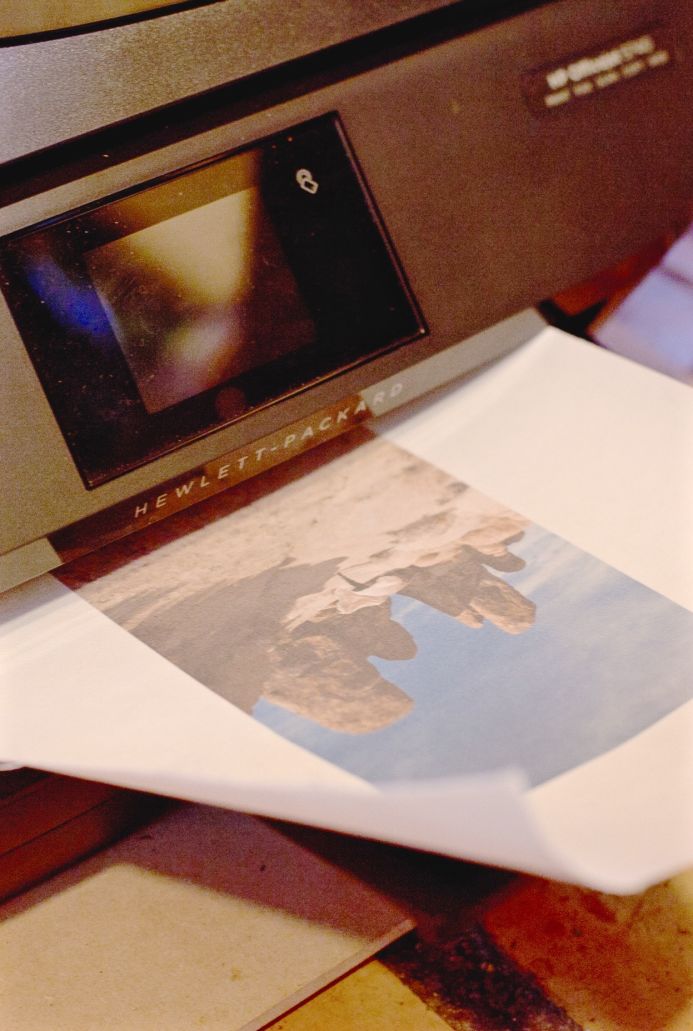
- Print! You’ll probably want to roll the paper in the opposite direction it’s curling so that it lays flat in the tray.
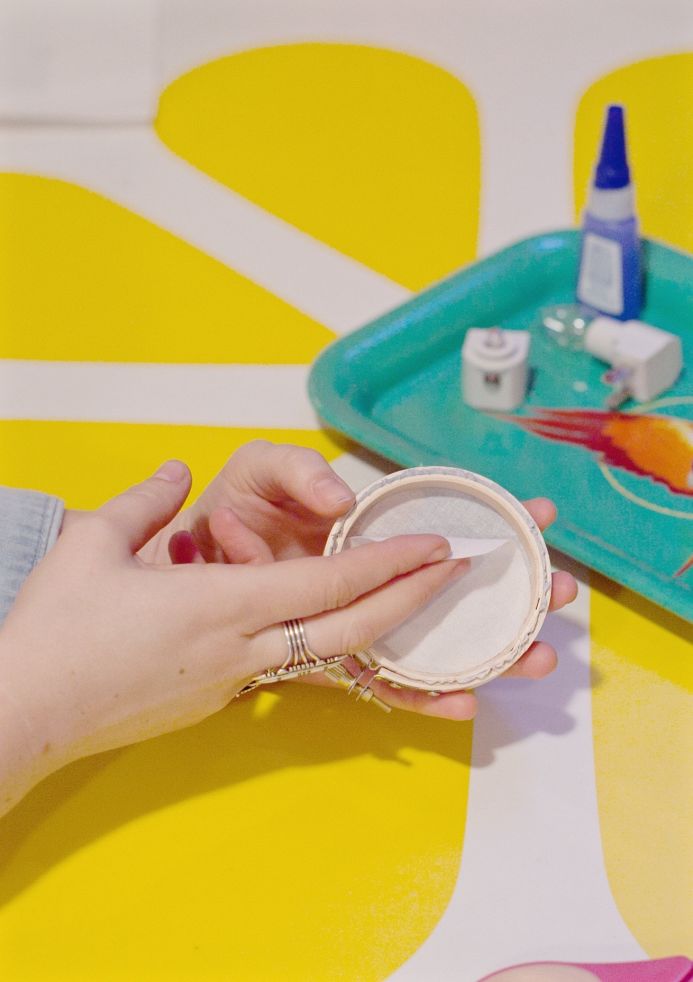
- After your print has dried, peel the freezer paper off of the muslin. Secure the muslin inside your hoop, and make sure the screw fixture is on the bottom of the hoop. Pull it tight so that the print is taut. If you decided to paint your hoop make sure it’s very dry before putting the photo in.
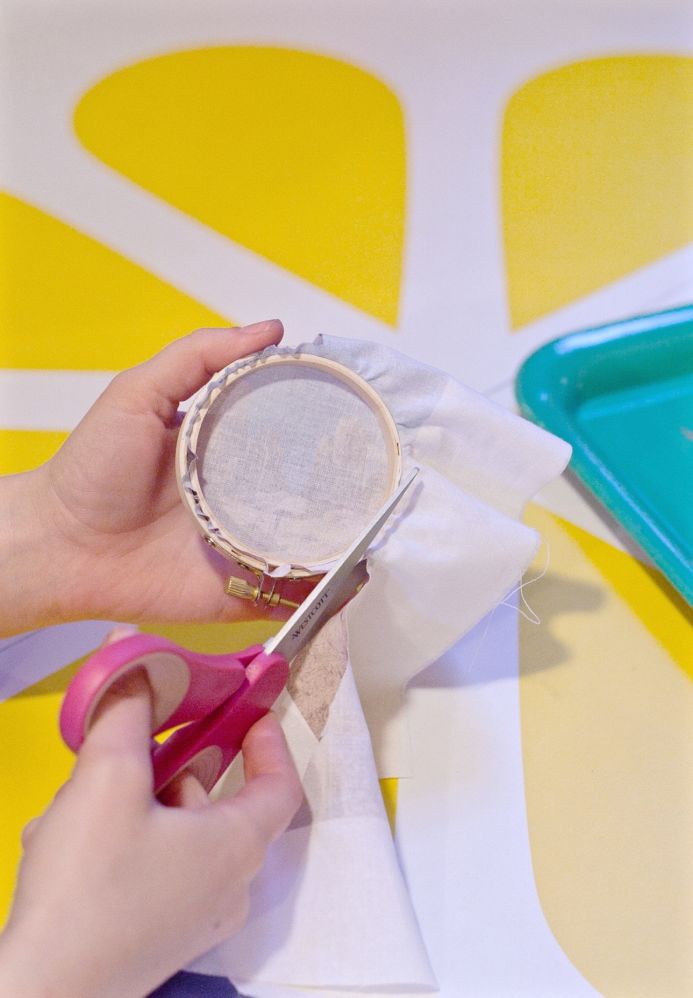
- Cut off the excess fabric, leaving a few centimeters around the edge so you can still tighten it if needed.
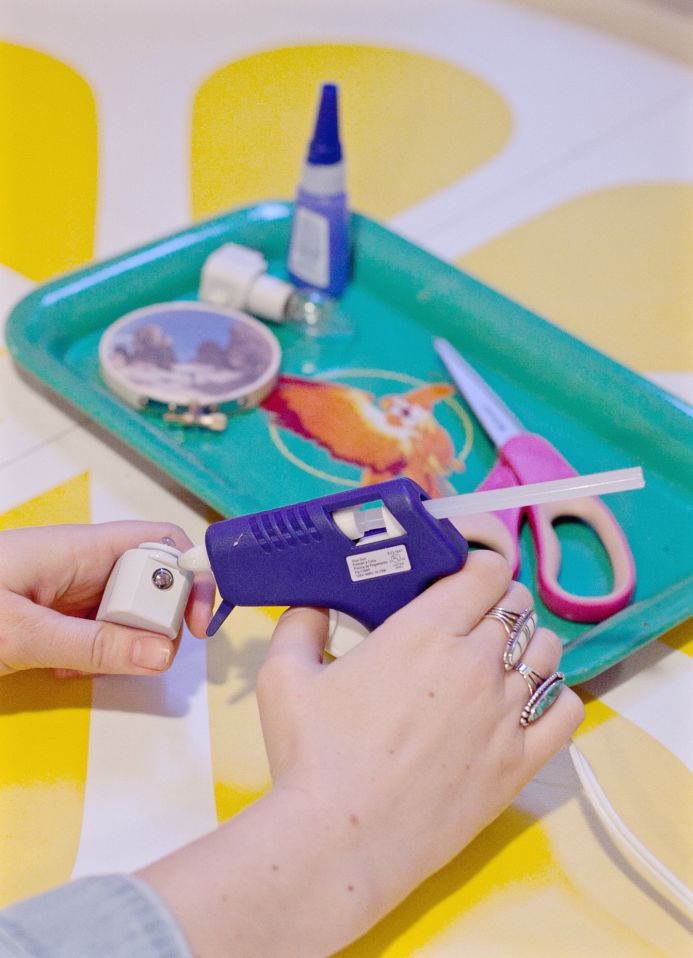
- Place a thin line of hot glue on the inside of the hoop and then press a small, round muslin fabric against the backside. This will help the light come in much smoother.
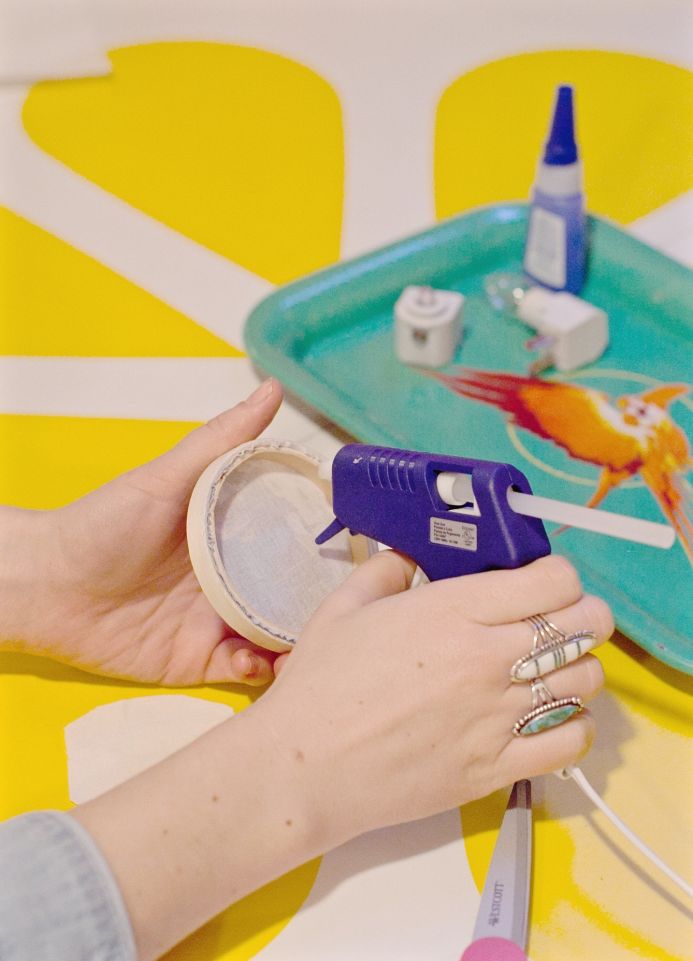
- Remove the cover of the night light and place a glob of hot glue on the front. Make sure that your hoop is not blocking the daylight sensor (if there is one) and that it’s not too close to the light if you’re using Tungsten. Press the bottom of the hoop (where the screw fixture is) to the glue and hold for a minute.
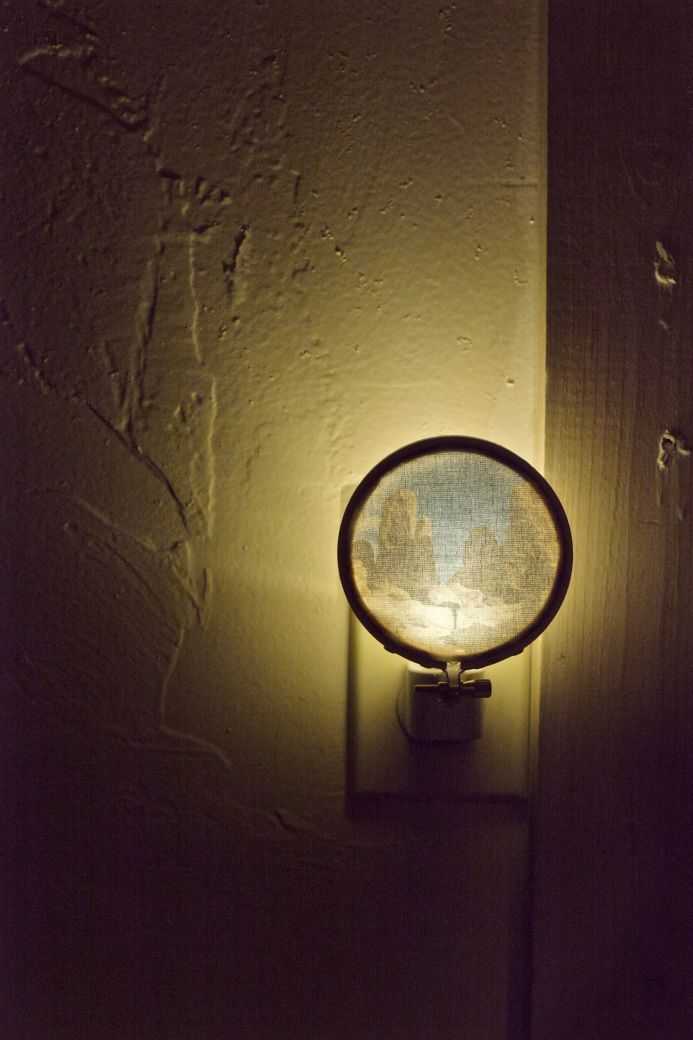
- Enjoy!
-LP Hastings
LP is a writer, photographer, and videographer living in a tiny cabin in the Santa Cruz Mountains. She’s a regular on the Dear Handmade Life team and loves working with her hands. When she’s not shooting, she’s crafting jewelry for her line The Pod Shop or traveling with her art community at the Magoski Arts Colony in Fullerton. Follow her on Instagram @lphastings or @thepodshop


5 Comments
Comments are closed.