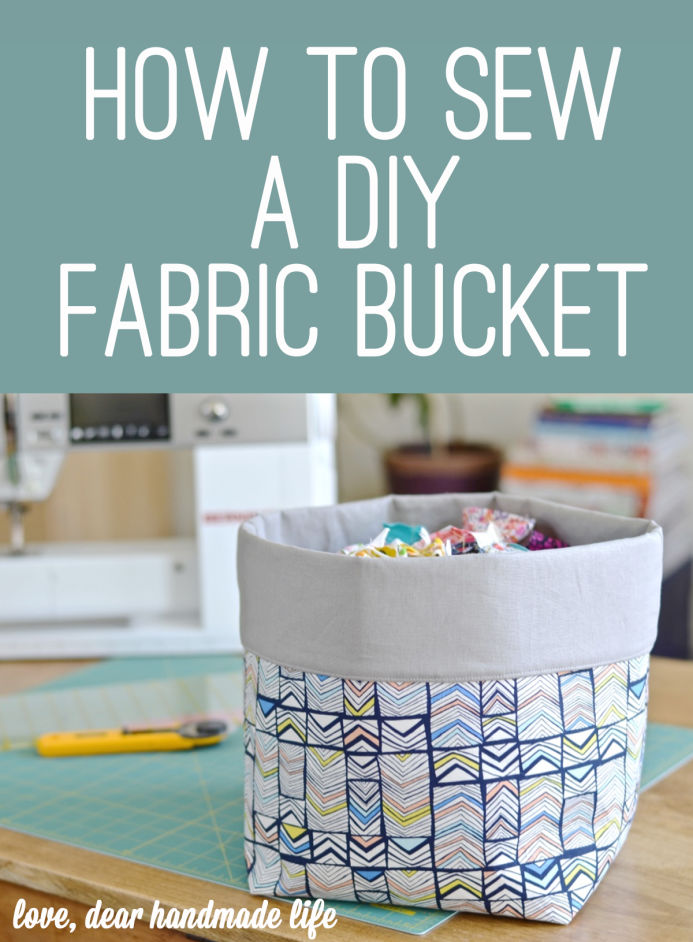
DIY Fabric Bucket
6,045 pounds.
If you took all of the scraps of fabric that I’ve accumulated over the years and weighed them, that’s the number you’d get.
Okay, so I totally made that up. But it sounds pretty compelling.
I recently cleared out a bunch of outworn and unnecessary things from my apartment, and well, my life. It has taken me a long time to realize that if something isn’t working for me, that I need to actively do something about it. Take for example, my closet. It really wasn’t working for me. It was packed to to the gills, full of unused crap, stinky and worn out shoes, and clothes that I hadn’t worn since moving back to the US almost seven years ago. But I had a nice, almost comforting habit of walking in– bumping into at least seven things– looking around, and coming to the conclusion that to actually do something about this catastrophe was far too daunting and overwhelming. So I would shut the door and walk away, knowing in the back of my mind that the problem was still there.
Then, for reasons unknown to me– perhaps the Ides of March? The universe? Boredom?– I had an epiphany. Why do we keep ourselves small? Why do we ignore those nagging feelings that tell us something is wrong? We know, deep down, what greatness looks like for us. For me, my closet was a big old fat metaphor for my stifled greatness. And it was time to stop ignoring it.
One day, instead of tackling my to-do list, I did it. I took EVERY LAST ITEM out of that damn closet. By noon, I had already taken five giant bags of clothes and crap to Goodwill, and had filled up another five bags for recycling or trash. And that was just from my closet.
You should see it now! I actually want to spend time in my closet. Who am I? But I’m not sorry, because it is so beautifully sparse, whittled down to only the items that make me happy.
Because of this, it was no surprise that within a week of the “Great Clearing,” all other parts of my house– and life– received the same cutthroat, yet thoughtful, attention. There was carnage everywhere, but dammit, that’s the price of greatness.
And then I got to my sewing space.
Fellow crafters will agree that the fabric stash is a bit of a non-starter. We all inadvertently sign a contract upon purchasing fabric that states, “I will not, ever, throw this fabric away. Ever. In the event that I am cleaning out my house in some sort of kamikaze fit of clarity, I will keep every scrap of this fabric, no matter what. Period.”
So what did I do? I kept it all. And those thousands of pounds of scraps? Those too. Those stayed. I simply made my fabricaholism a part of the decor by implementing these two magic words: Fabric buckets.
My advice to you all? Clear out all unnecessary things in your life, except your fabric. For that, make fabric buckets.
Here’s how.
Love, Ashley
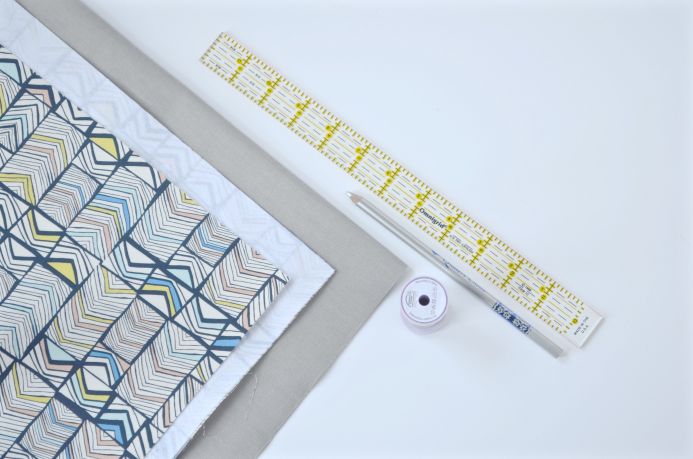
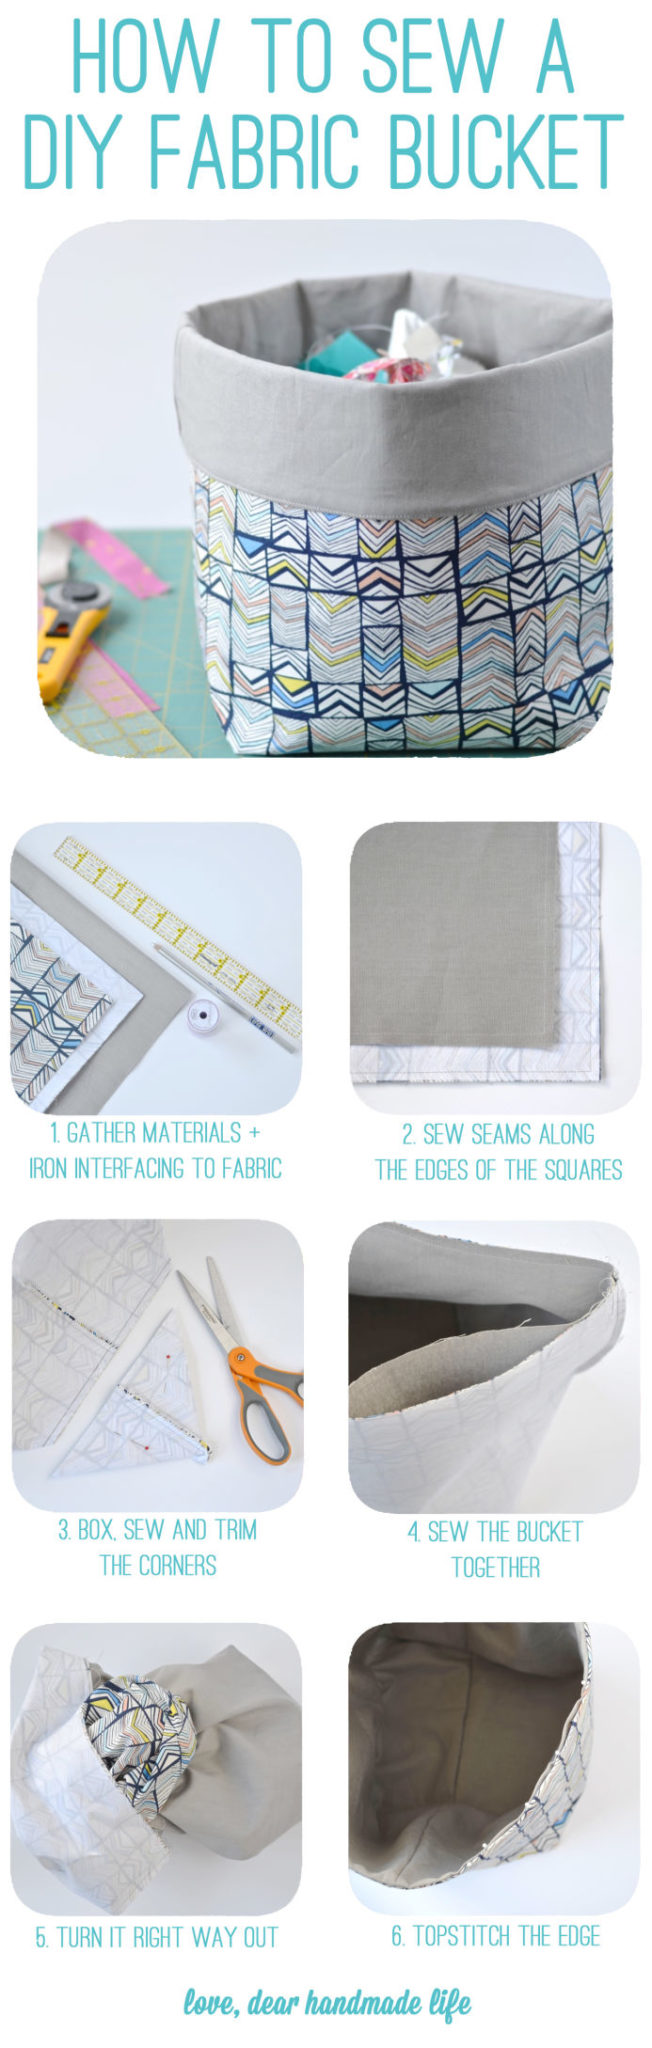
What to get:
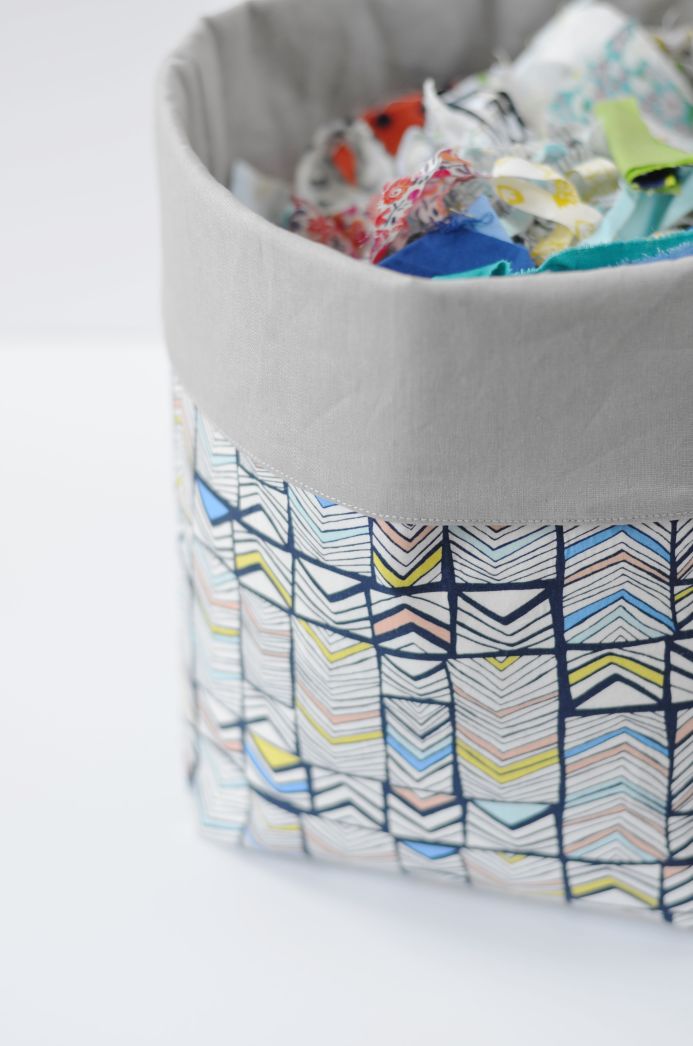
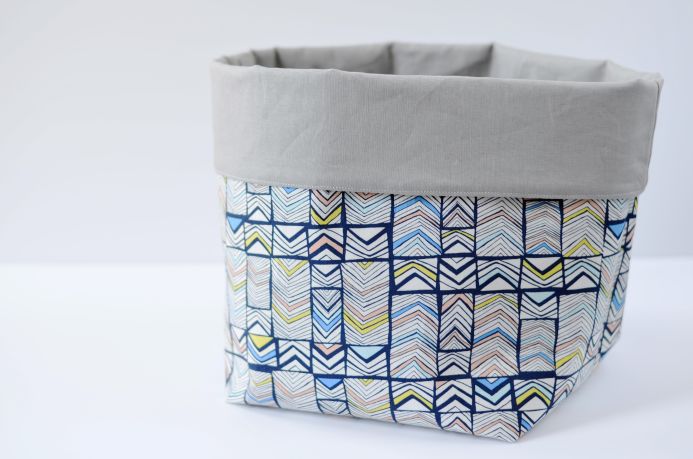
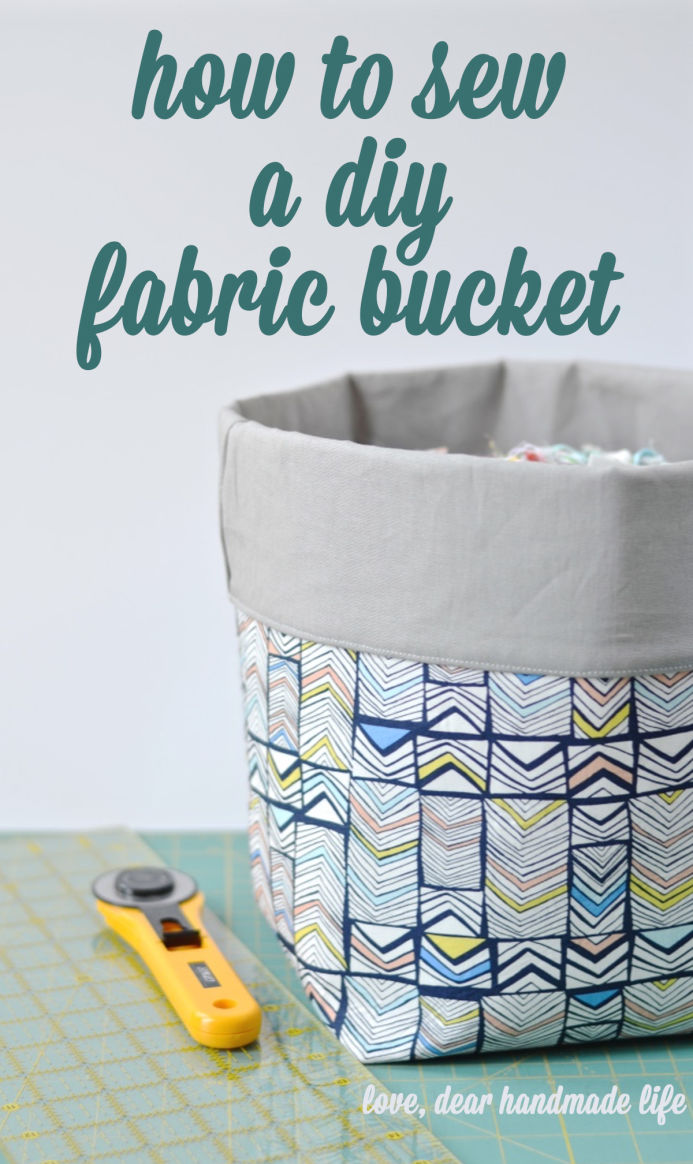
-2 x 18” squares fabric for exterior (We LOVE these Echino fabrics)
-2 x 18” squares fabric for interior
-2 x 18’ squares sturdy fusible interfacing (this is a great heavyweight one)
-ruler
-pencil
-iron and ironing surface
-sewing supplies (pins, scissors, sewing machine)
What to do:
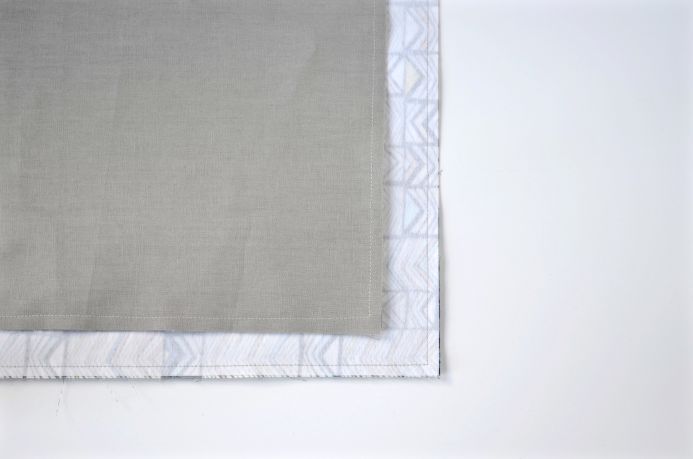
1. Iron on interfacing to the exterior squares following the manufacturer’s instructions.
2. Pin exterior squares together, right sides together. Sew a ¼” seam along three edges. Repeat with interior.
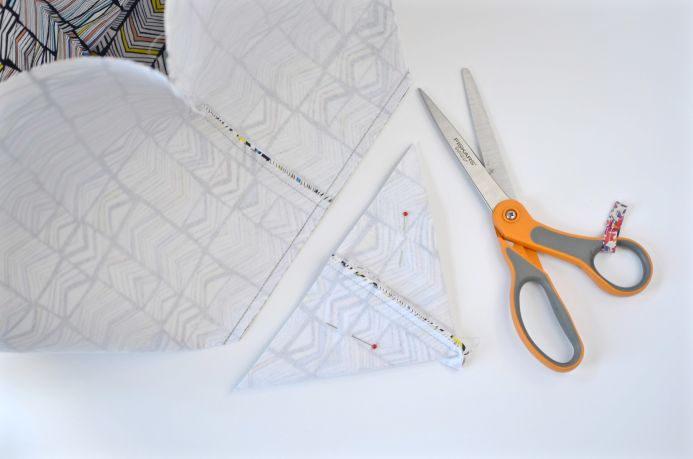
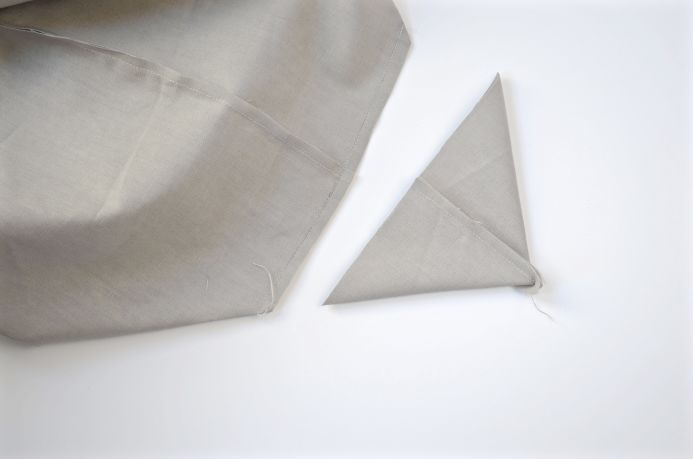
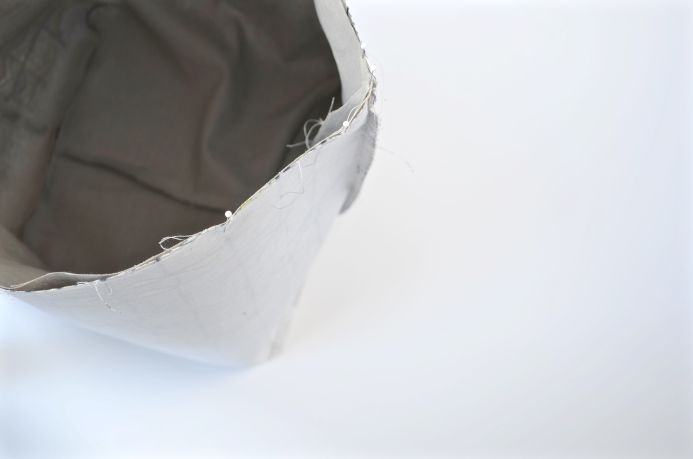
3. Box corners. Use the seams on the inside to line up your corner, and nestle your seams so they fit nicely (seam allowances going opposite directions). Pin. Use a ruler to draw a line that is 4 ½” from the point of the triangle. Sew along this line. Cut the extra, leaving ¼” seam allowance. Repeat for all four corners (two exterior, two interior.)

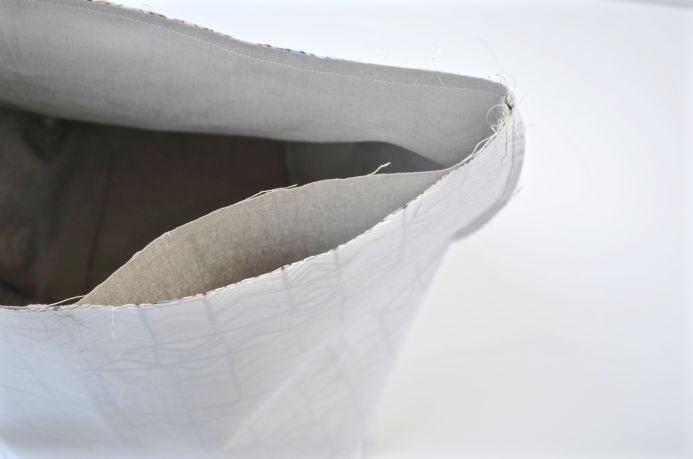
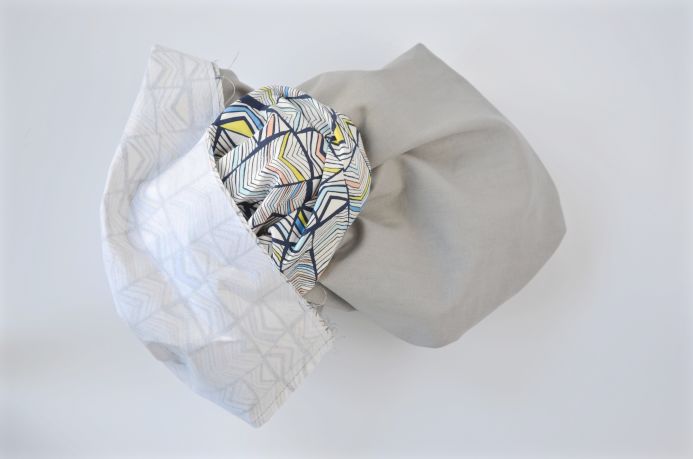
4. Sew together. Place right sides together (a box within a box) and pin. Sew a ¼” seam, leaving a 4” gap for turning.
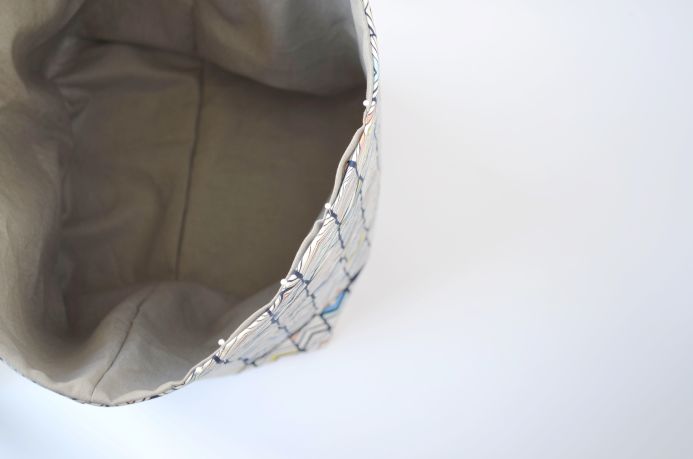
5. Iron around the edge, and use pins and an iron to hide the 4” turning gap. Topstitch. Violà!


I just found this. I love it.I will make a few for gift packages, and nifty containers.
Thank you so much for sharing this
Thank you! I am also going to de stash with these and gift them to loved ones for the holidays 🙂
Great idea! Regift your stash in a beautiful handmade basket! I love it!
What are the dimensions of the cute basket?
Love your honest account of how you got to these fabric buckets! Very inspiring! I’ve done something similar when I downsized a year ago and it was very, very liberating! Now, to the buckets… 🙂
Oh my Goodness! We ARE ALL the same! Throw out anything and EVERYTHING but NOT any piece of fabric.lace. elastic. button – because I might (and do) need it! I actually did throw out some tulle from a project many years ago and believe it. I wanted some the next week!!!
Thank you for this.
Thanks for this lovely idea and for sharing it!
I have one question though. Could you please tell me what size do I have to cut the fabric in inch by inch – or more preferably in cm by cm? The thing is, I don’t really know what “18” squares fabric” means (in my country we use cm-s…) 🙂
it’s 18 inches. 🙂
18 inches is 46 cm so length is 46 cm and width is 46 cm making a square. Hope that helps!
Hi Ashley, this tutorial is fantastic. Is it fair to say one can use a second “less favored” fabric for the inside of both the interior and exterior wall, since they wouldn’t be seen? Thanks!
For sure!
I’m fairly new to sewing so not great at visualizing. Could you tell me roughly the height and width of the basket using the 18” pieces? Considering going larger, unless you feel it will lose it’s support if larger? Thanks for the great idea and tutorial!
You can use a timtex type stiff interfacing for extra support.
I think we are kindred spirits. I have also de-cluttered my house in a ruthless fashion as well. It was a breath of fresh air. I must have signed the same contract, I love my sewing room, and hang on to the left over scraps as well. They are EXTREMELY useful and beautiful.
I will make one (who am I kidding,…. more than one, less than 100 ) . Thank you for your easy bucket. I will have a Bucket- List.
List!
I can totally relate to this! I diligently purge my closets every season, pledge to leave a minimal impact with waste via recycling and composting…. and yet my fabric stash stays sacred and is moved from apartment to apartment. It is untouchable. Off limits. And i wouldn’t have it another way!
Thanks for the tutorial, and the good laugh!
I love this idea. My problem is that I have a plastic basket with handles. It’s so flimsy that you can’t really use it. Could I still use this pattern, but adapt a piece of fabric for the handles?
This is a fast sew, and looks very pretty, thanks, I will indeed be making one of these today, glad to have the dimensions, as sometimes that is all we need to get started, an 18 inch square, sounds good to me, thanks!
I love this idea. Will make a few for all over the house.
THANK YOU FOR YOUR CLEAR INSTRUCTIONS! I REALLY APPRECIATE THE FREE PATTERN
I have a question…. I need to have baskets that are 9 inches by 10 inches… 12 inches high with a cuff of about 4 inches that I fold down….
Any suggestions on what sizes to make the pieces??? It’s not exactly square
Hi Kellt. If you’re still looking for an answer, I think 20.5 high by 19 wide (plus seam allowance), and your “corners” that end up being cut off would be extending from the narrower sides. I believe you would measure up 5 inches from the corner to find where to sew across, if I understand the pattern and have my maths right!
Love this