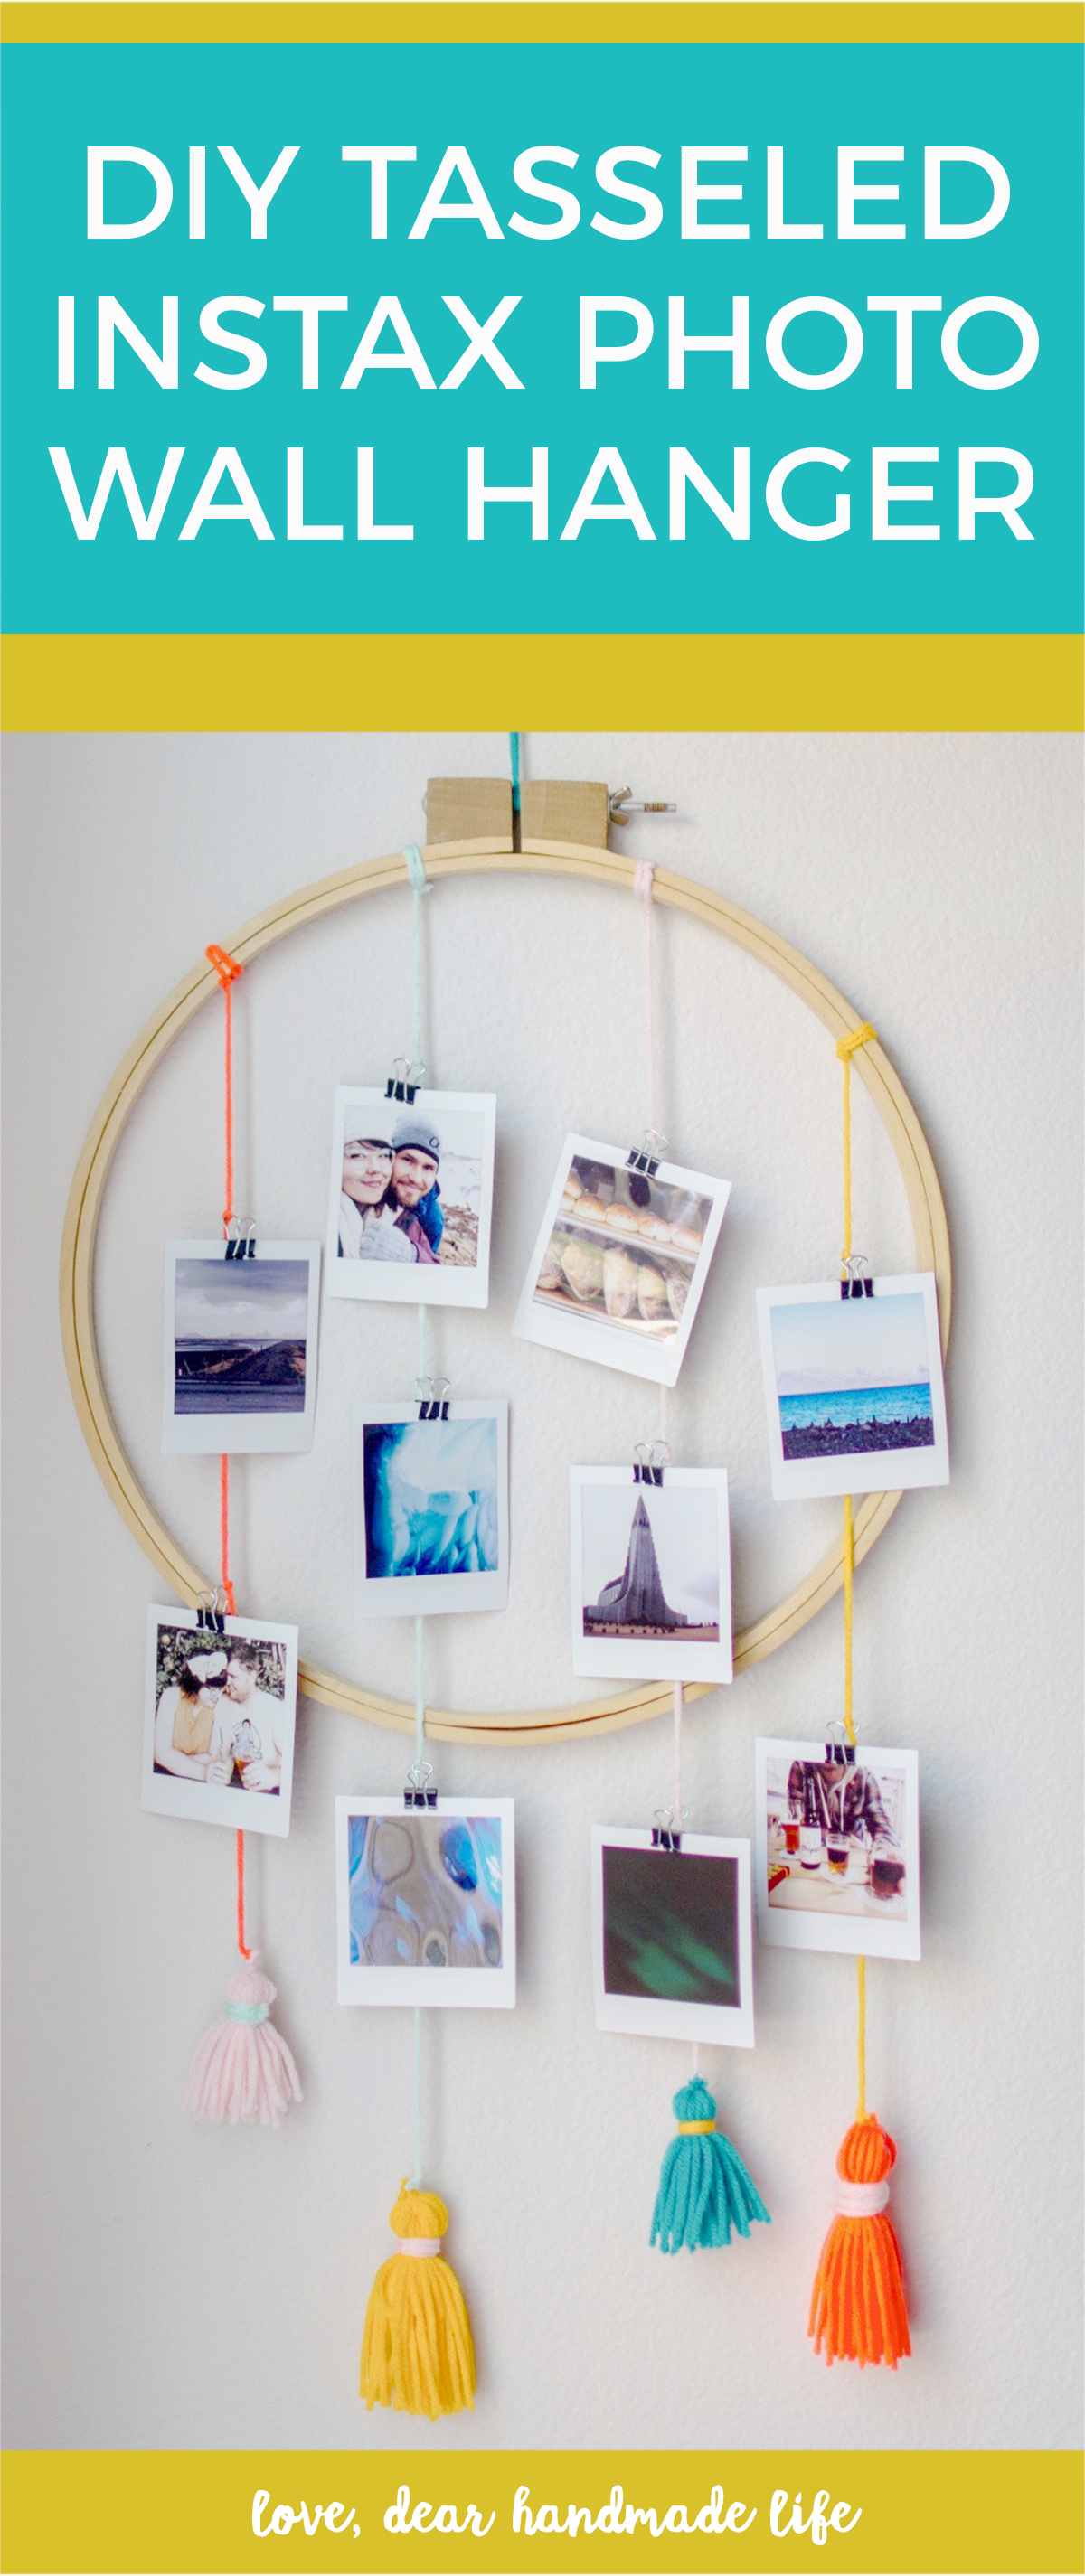
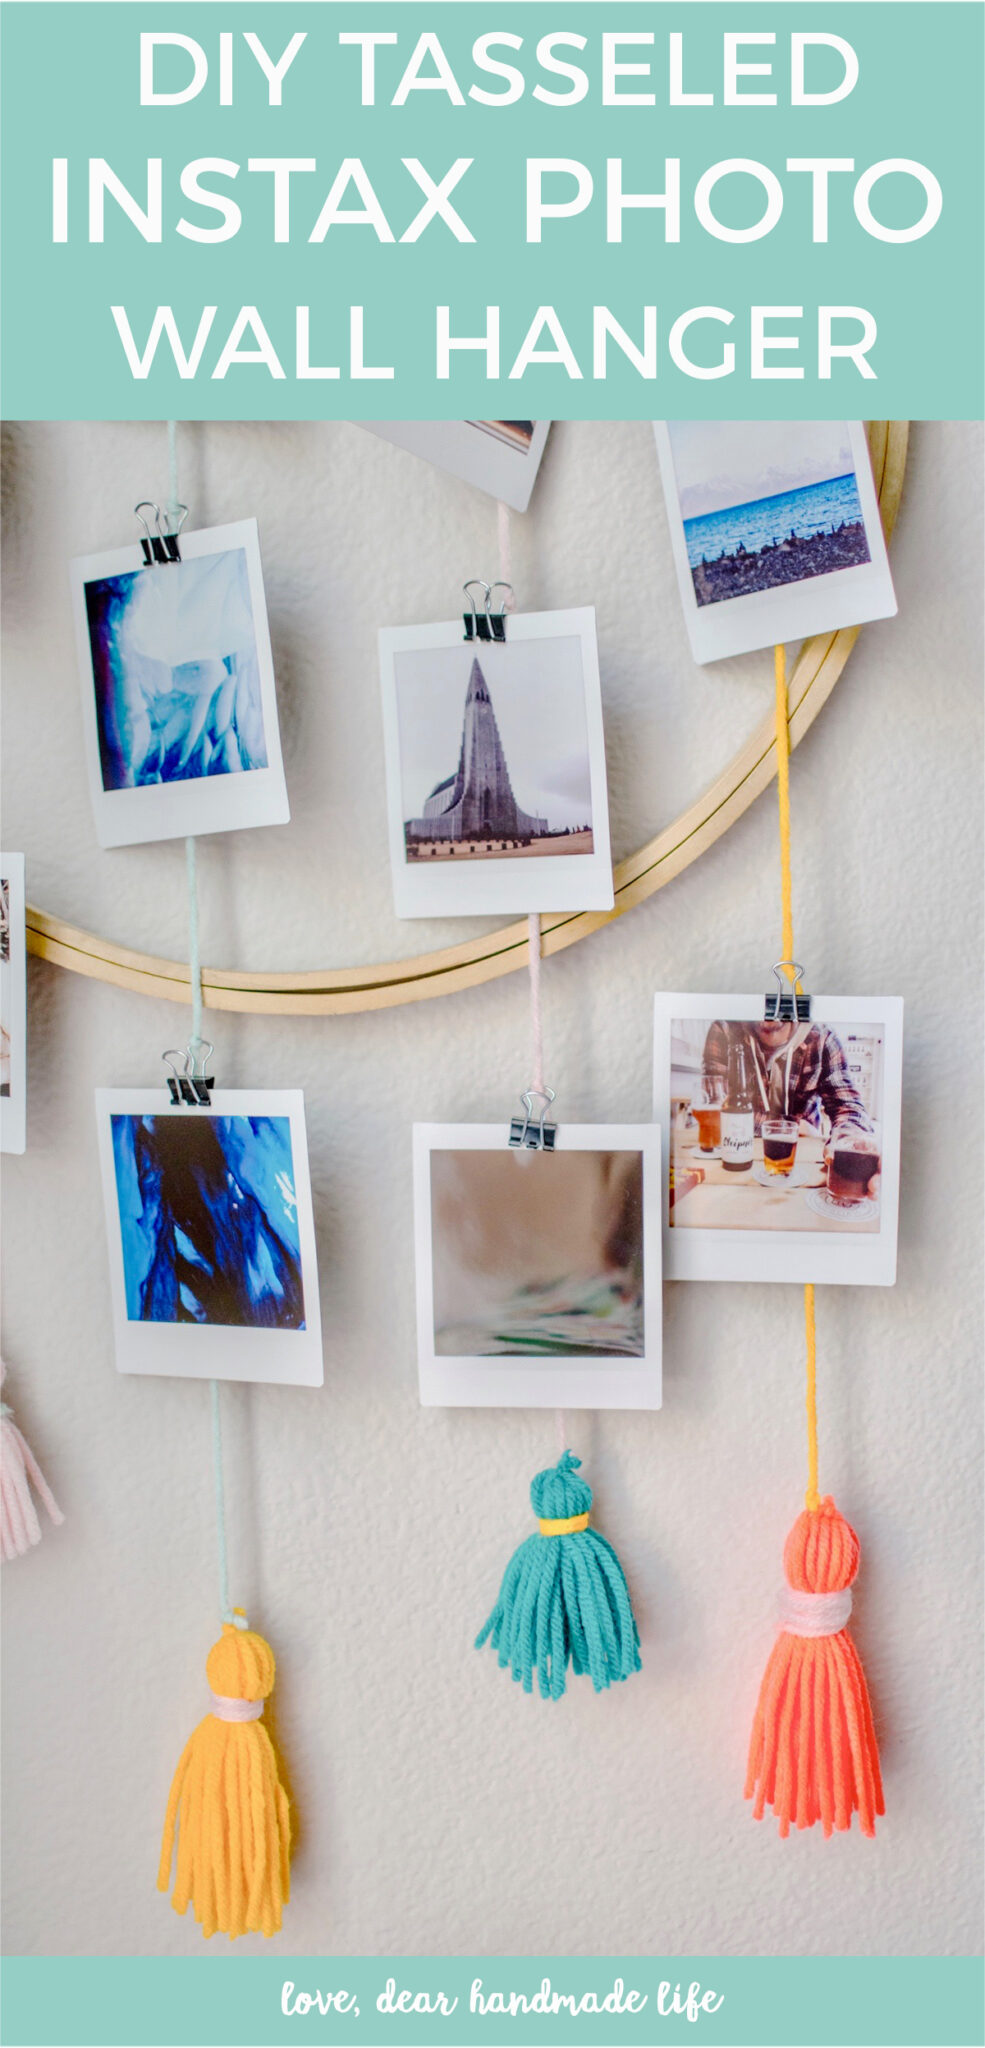
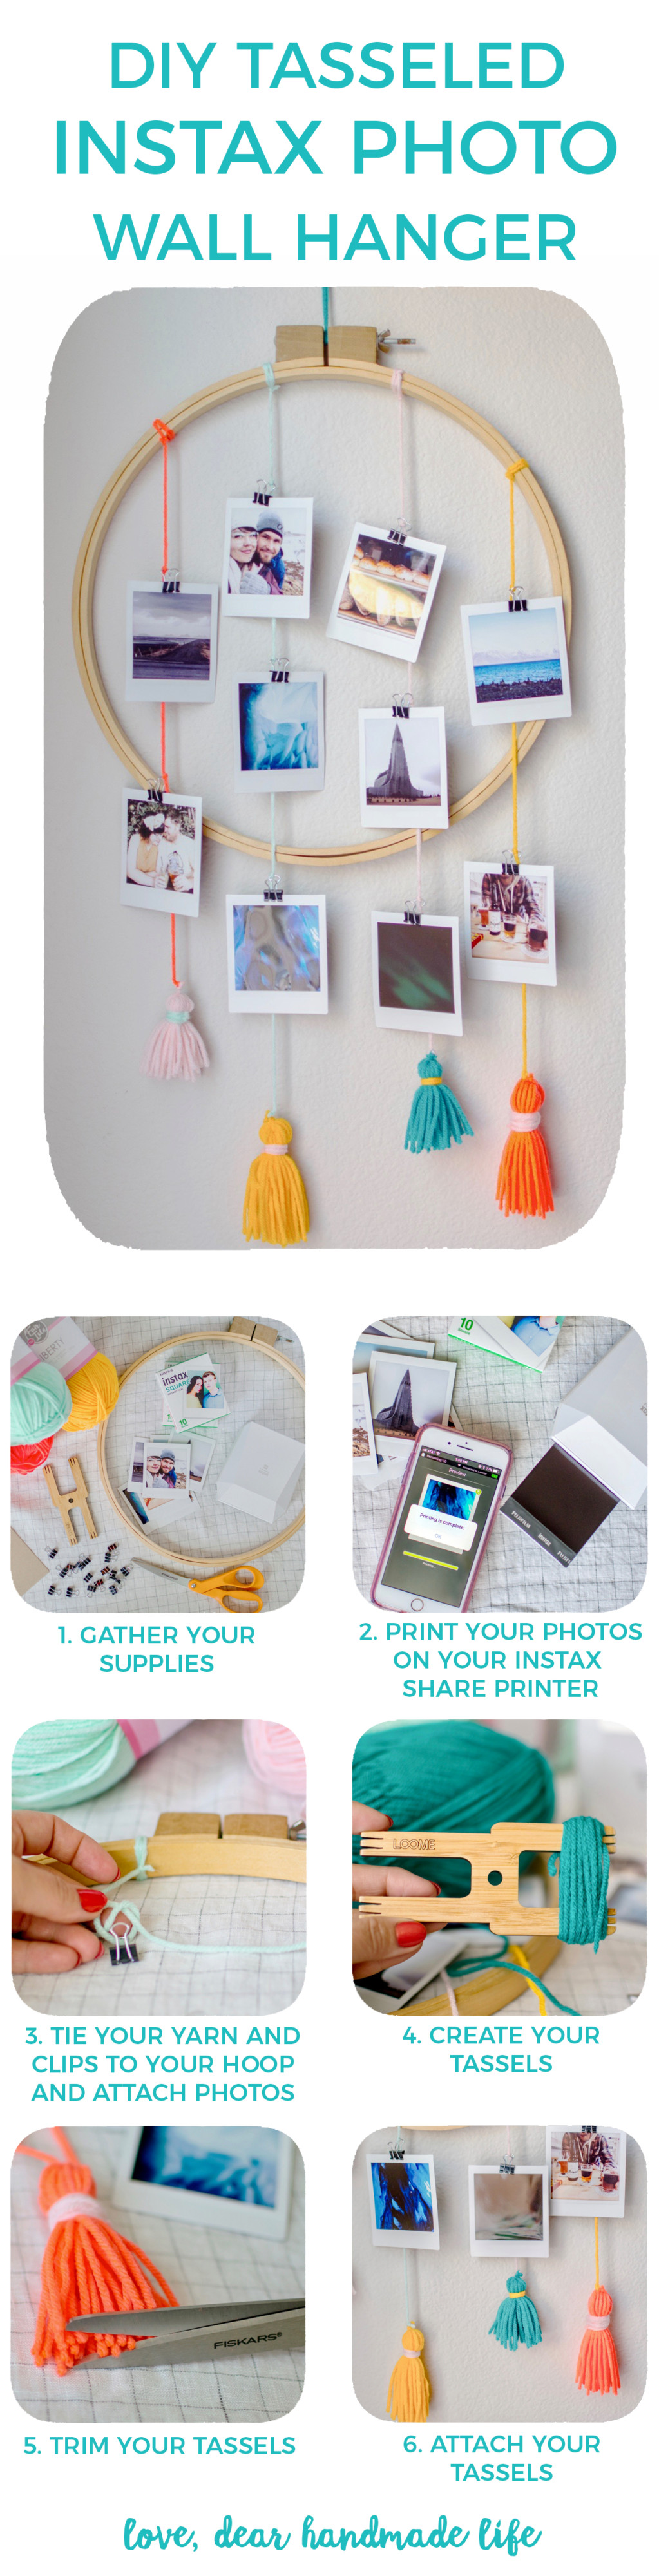
DIY Tasseled instax photo Wall Hanger
DIY Tasseled Instax photo Wall Hanger
By: Nik Vandeventer
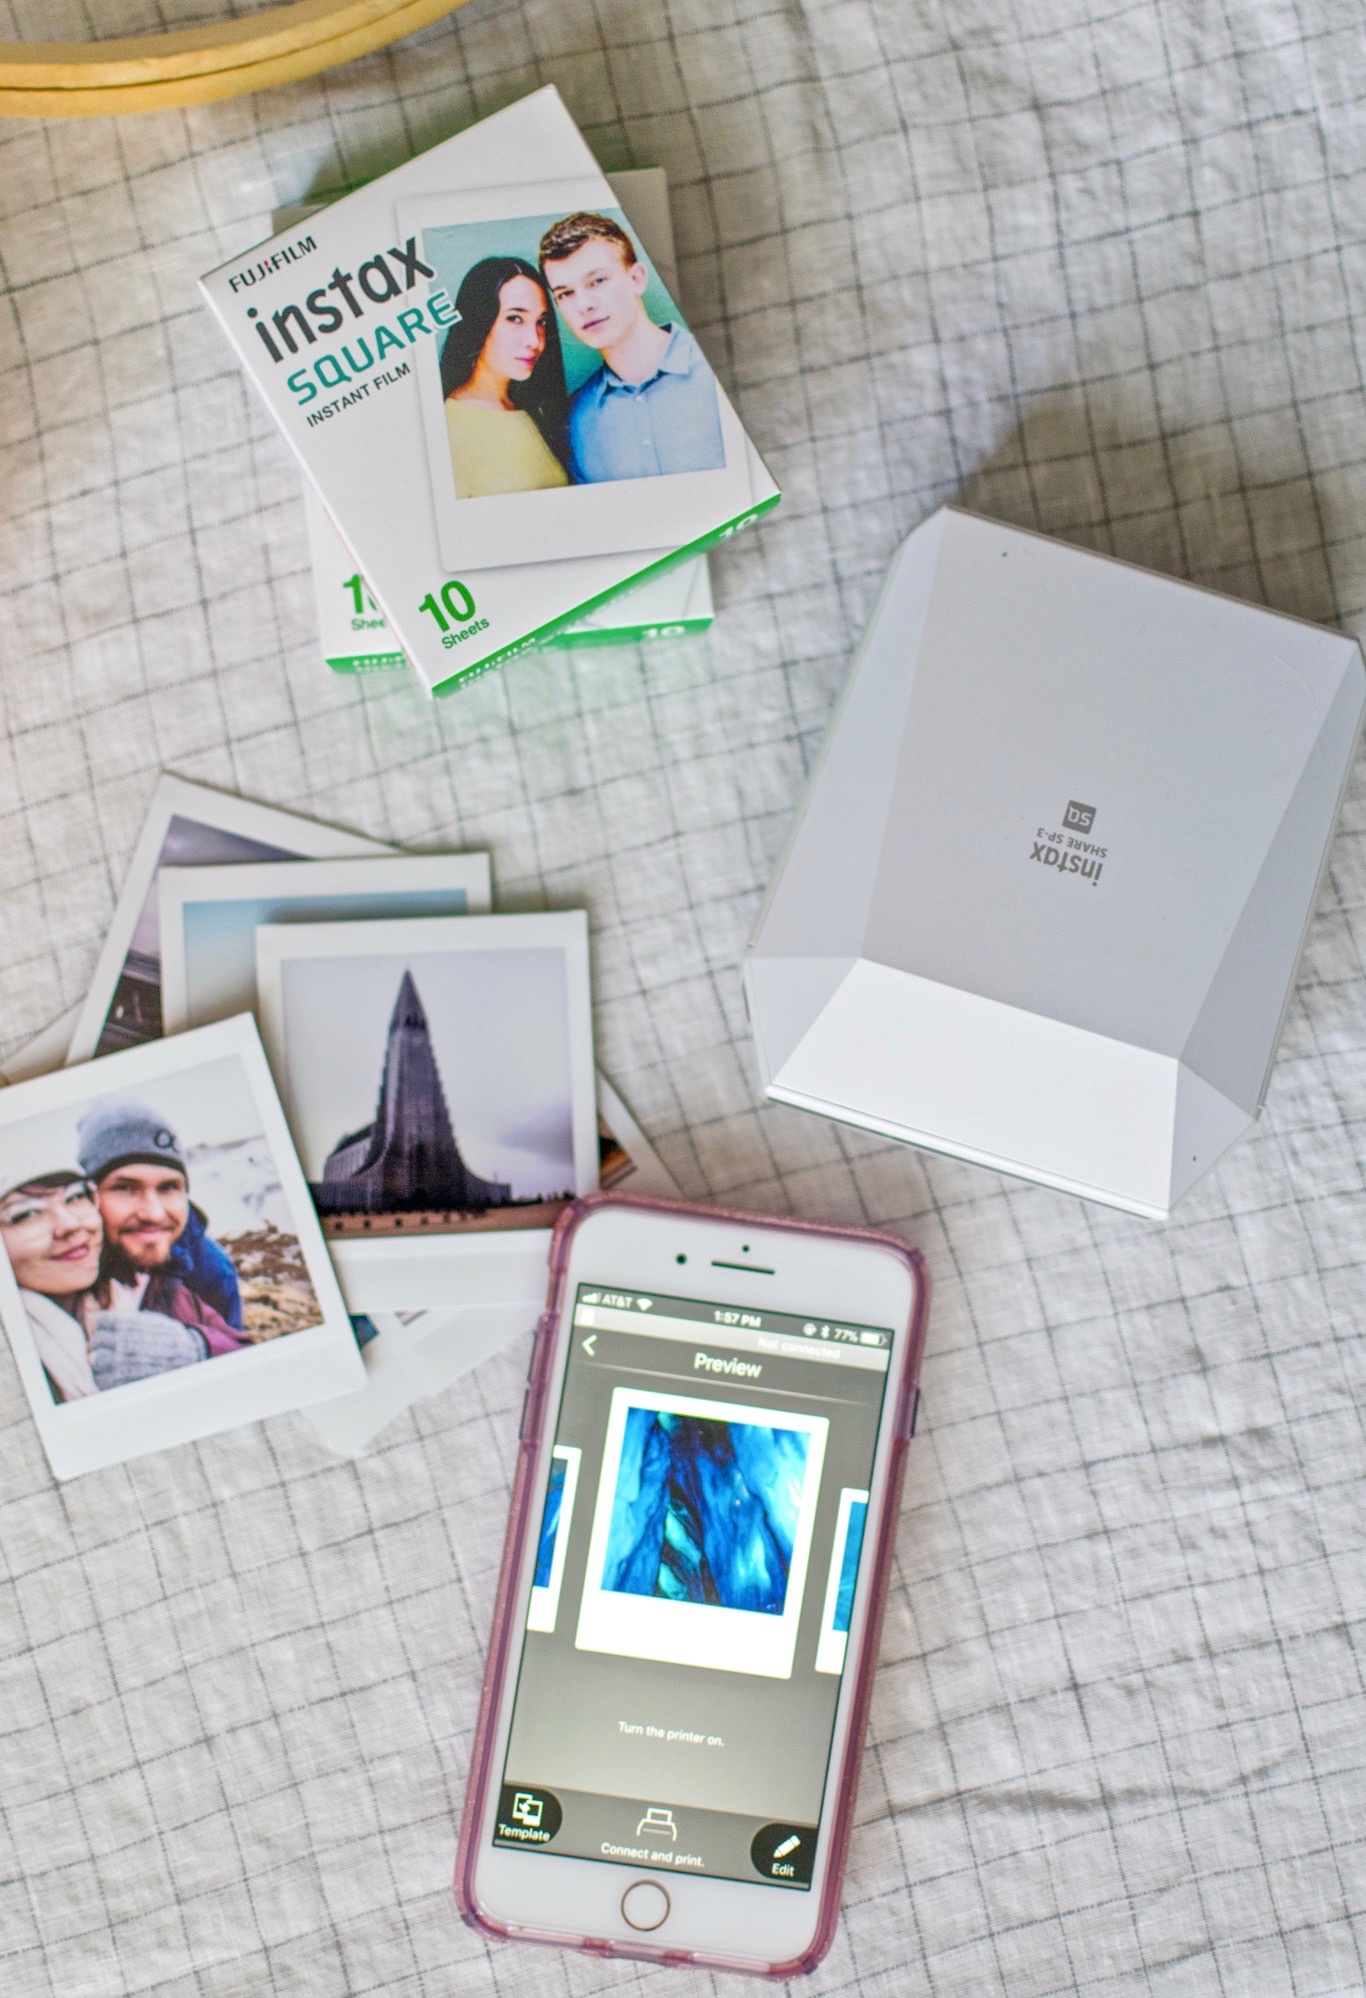
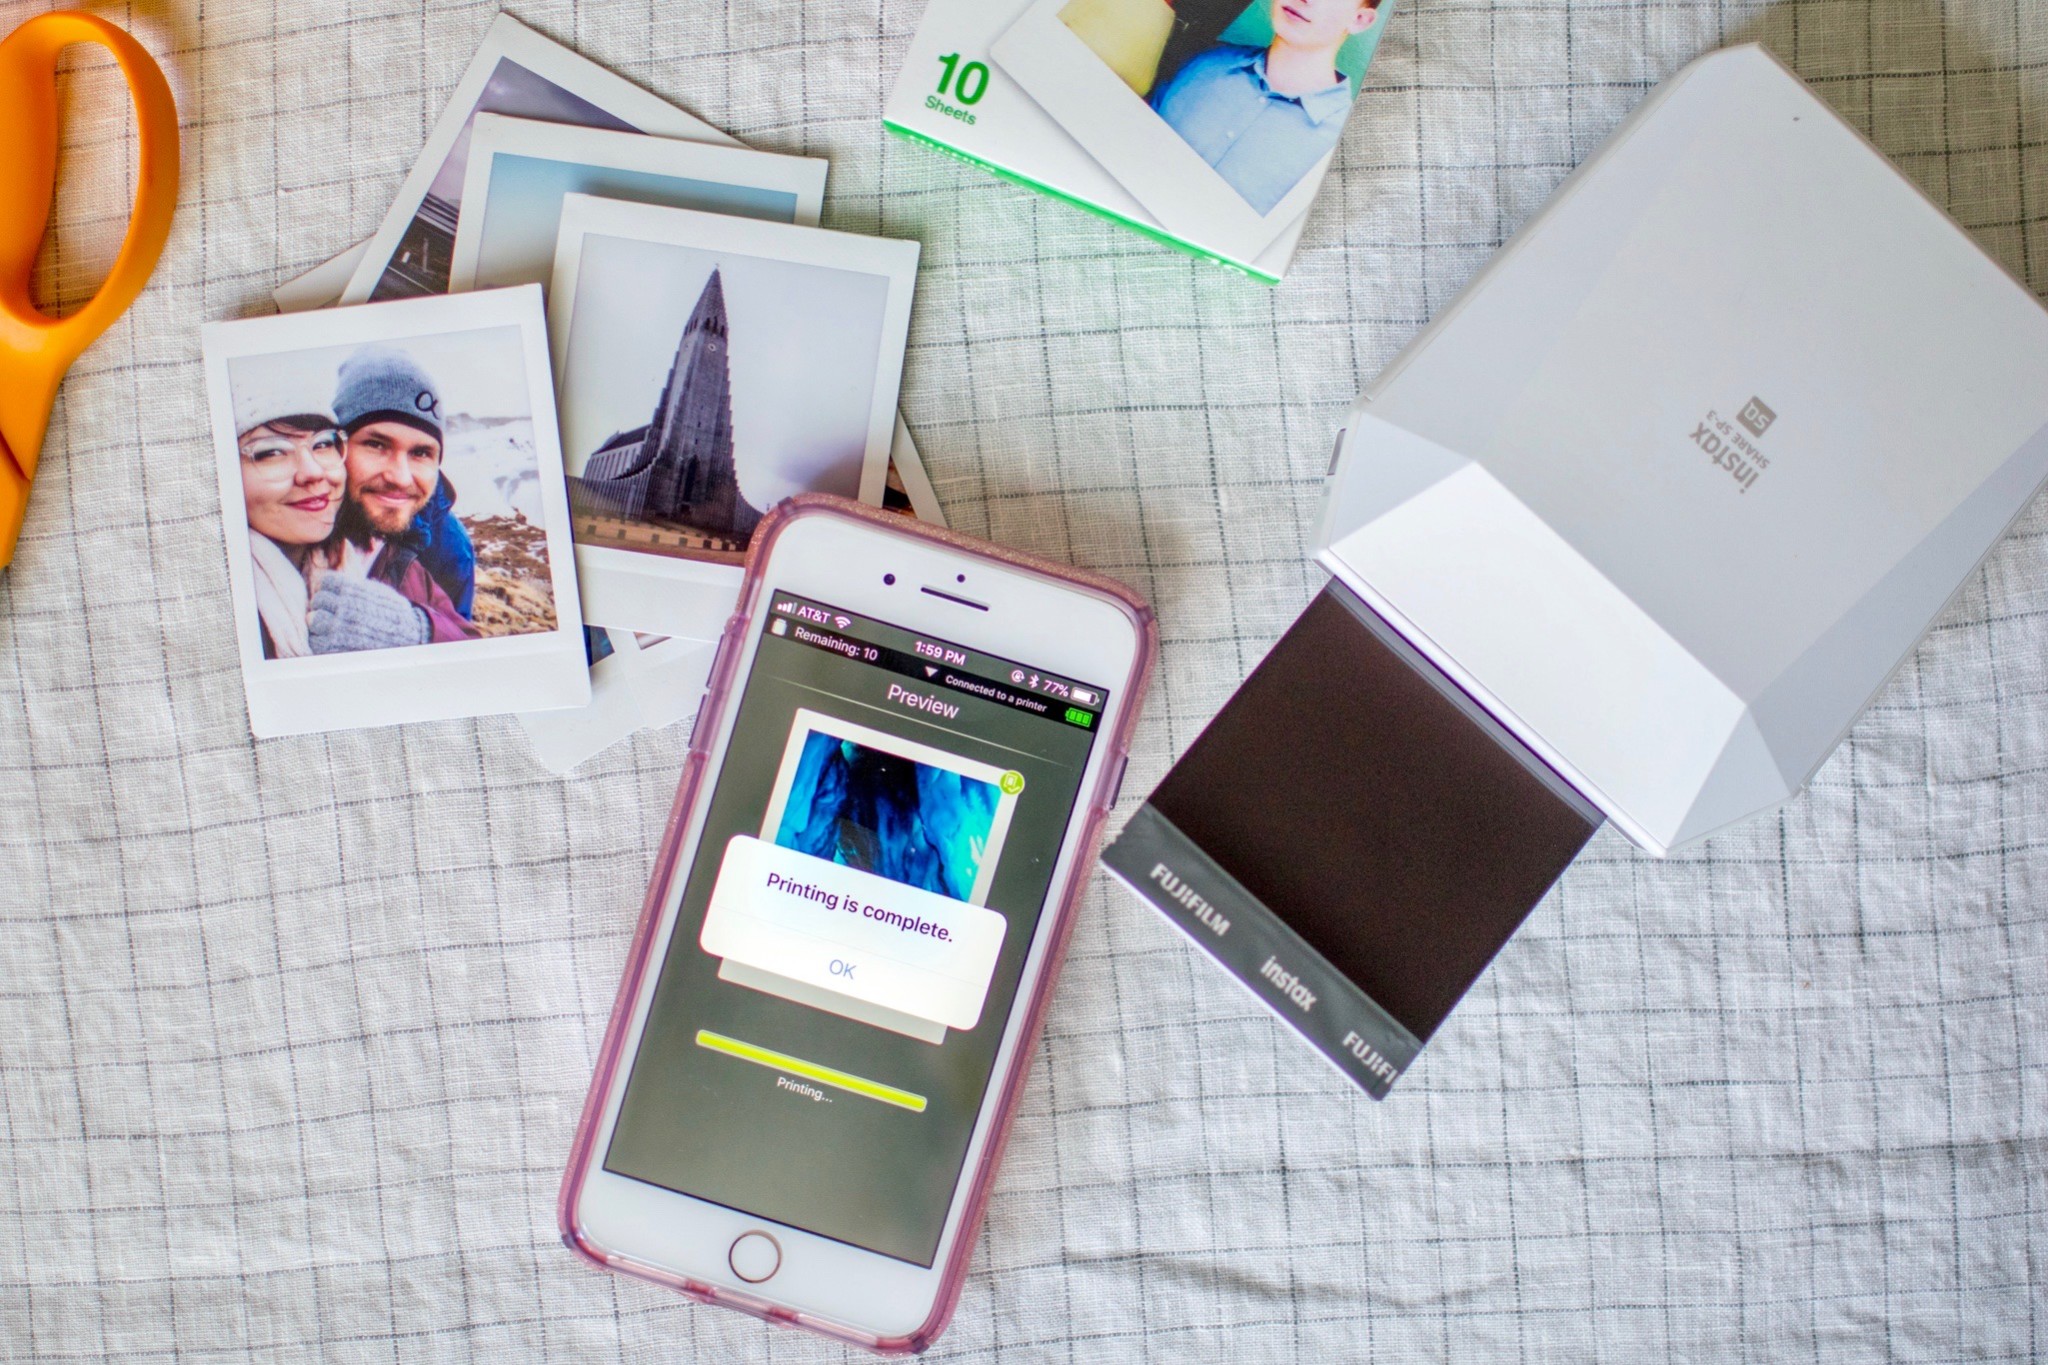
I don’t know about you but I take A LOT of photos, not only as a photographer but just as a human in this world who constantly has a camera at my ready on my phone. And while I’m really good at taking photos and keeping them on my phone, I’m terrible at printing them out & displaying them! Which is why after my epic trip to Iceland last month I decided that had to change. And with the FUJIFILM Instax® SHARE SP-3 SQ printer it’s easier than ever to just print photos at home using their app on my phone! I also wanted a fun way to display them so I came up with this little tassel hoop wall hanger, let me show you how you can make your own too!
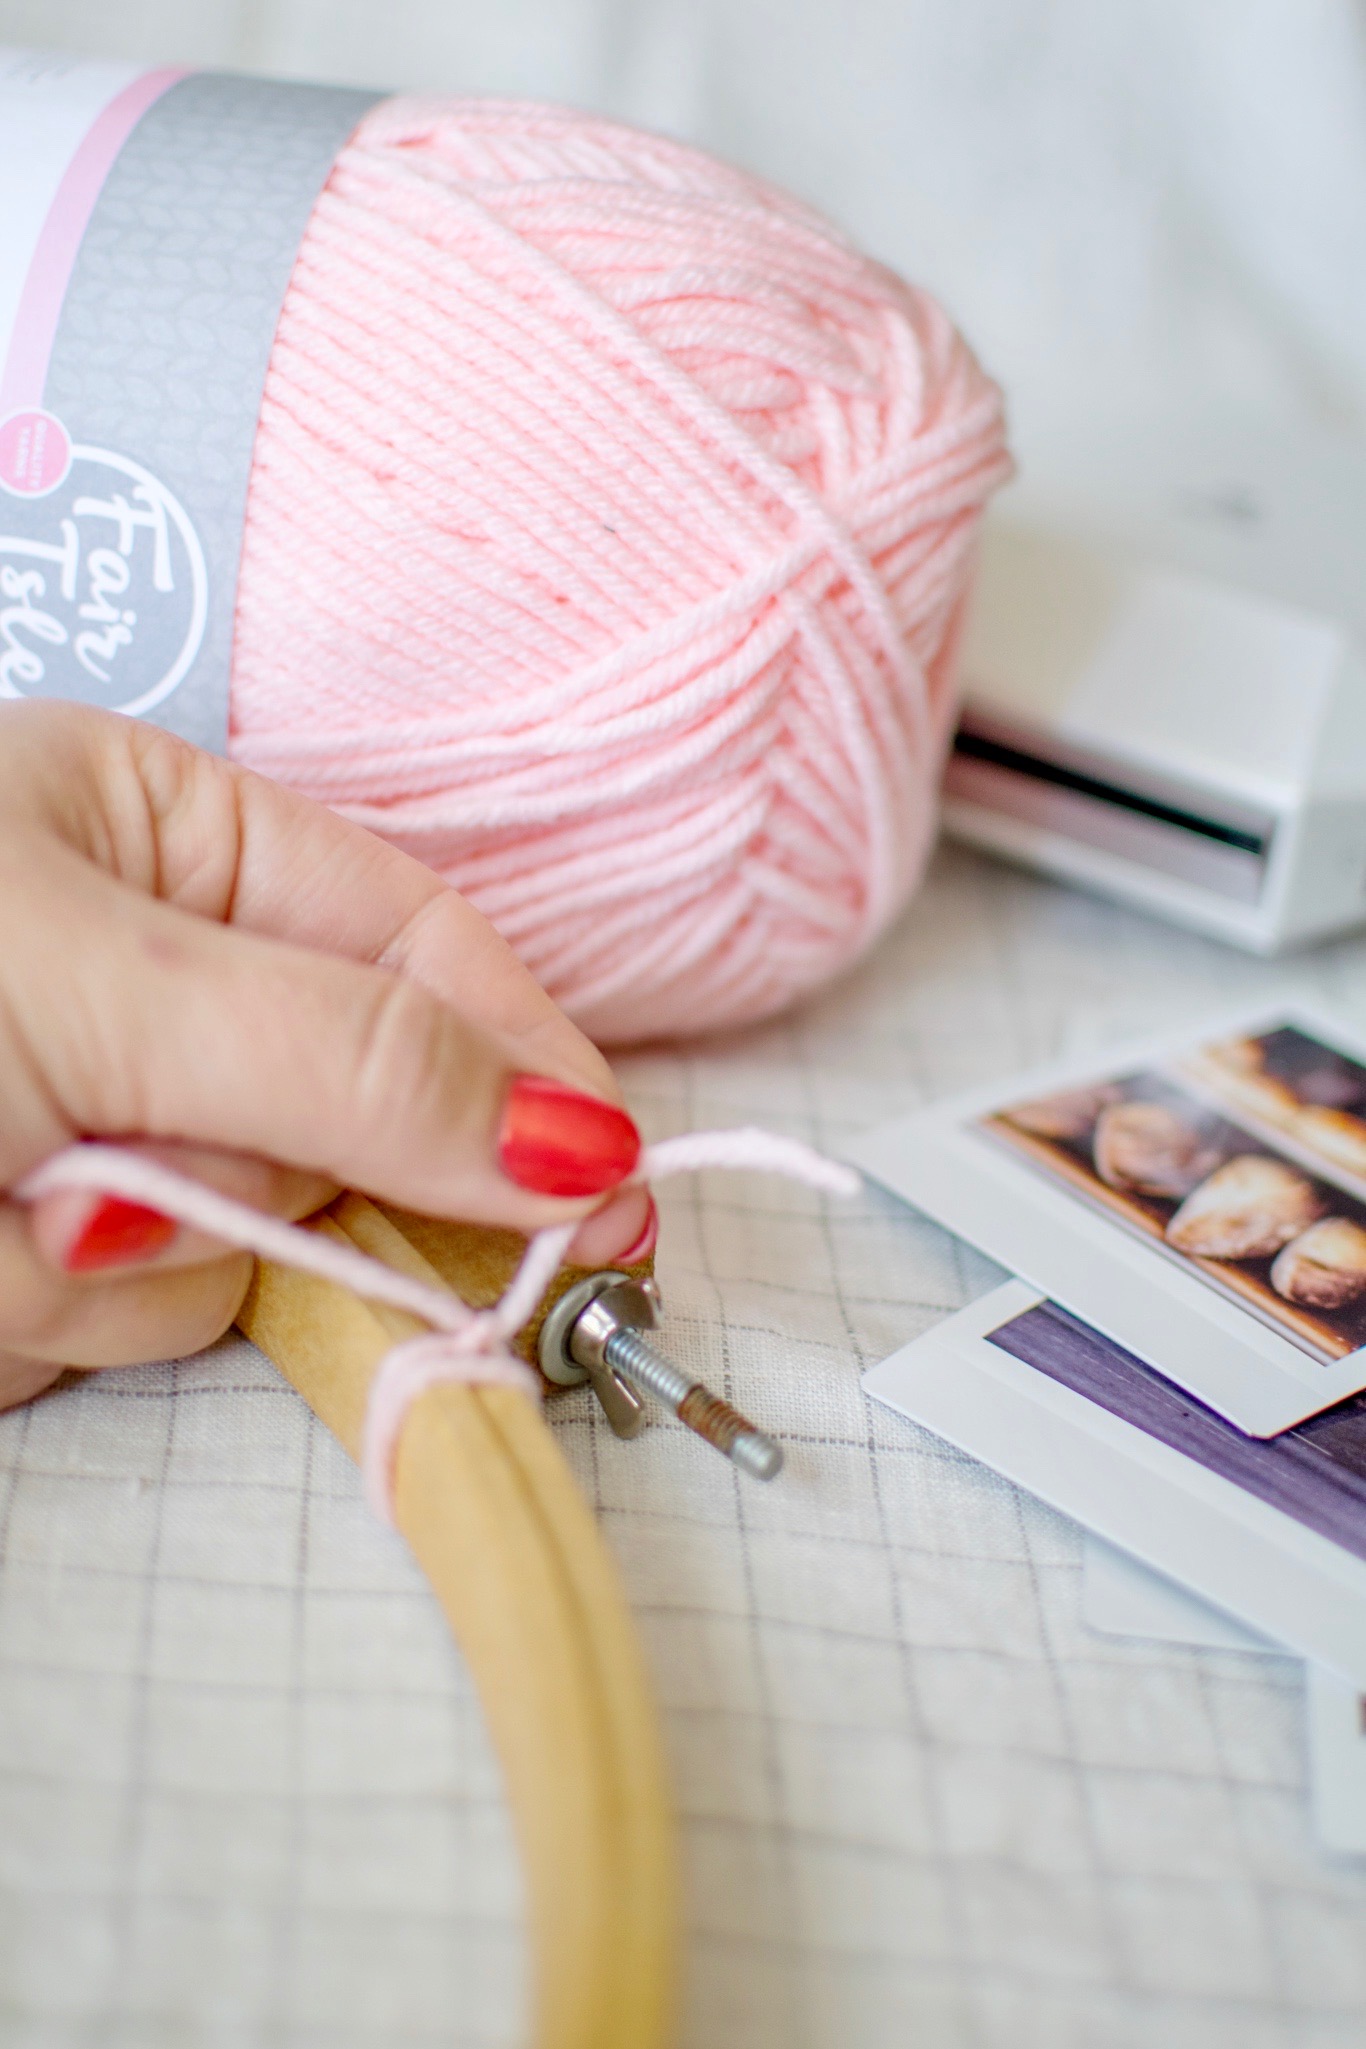
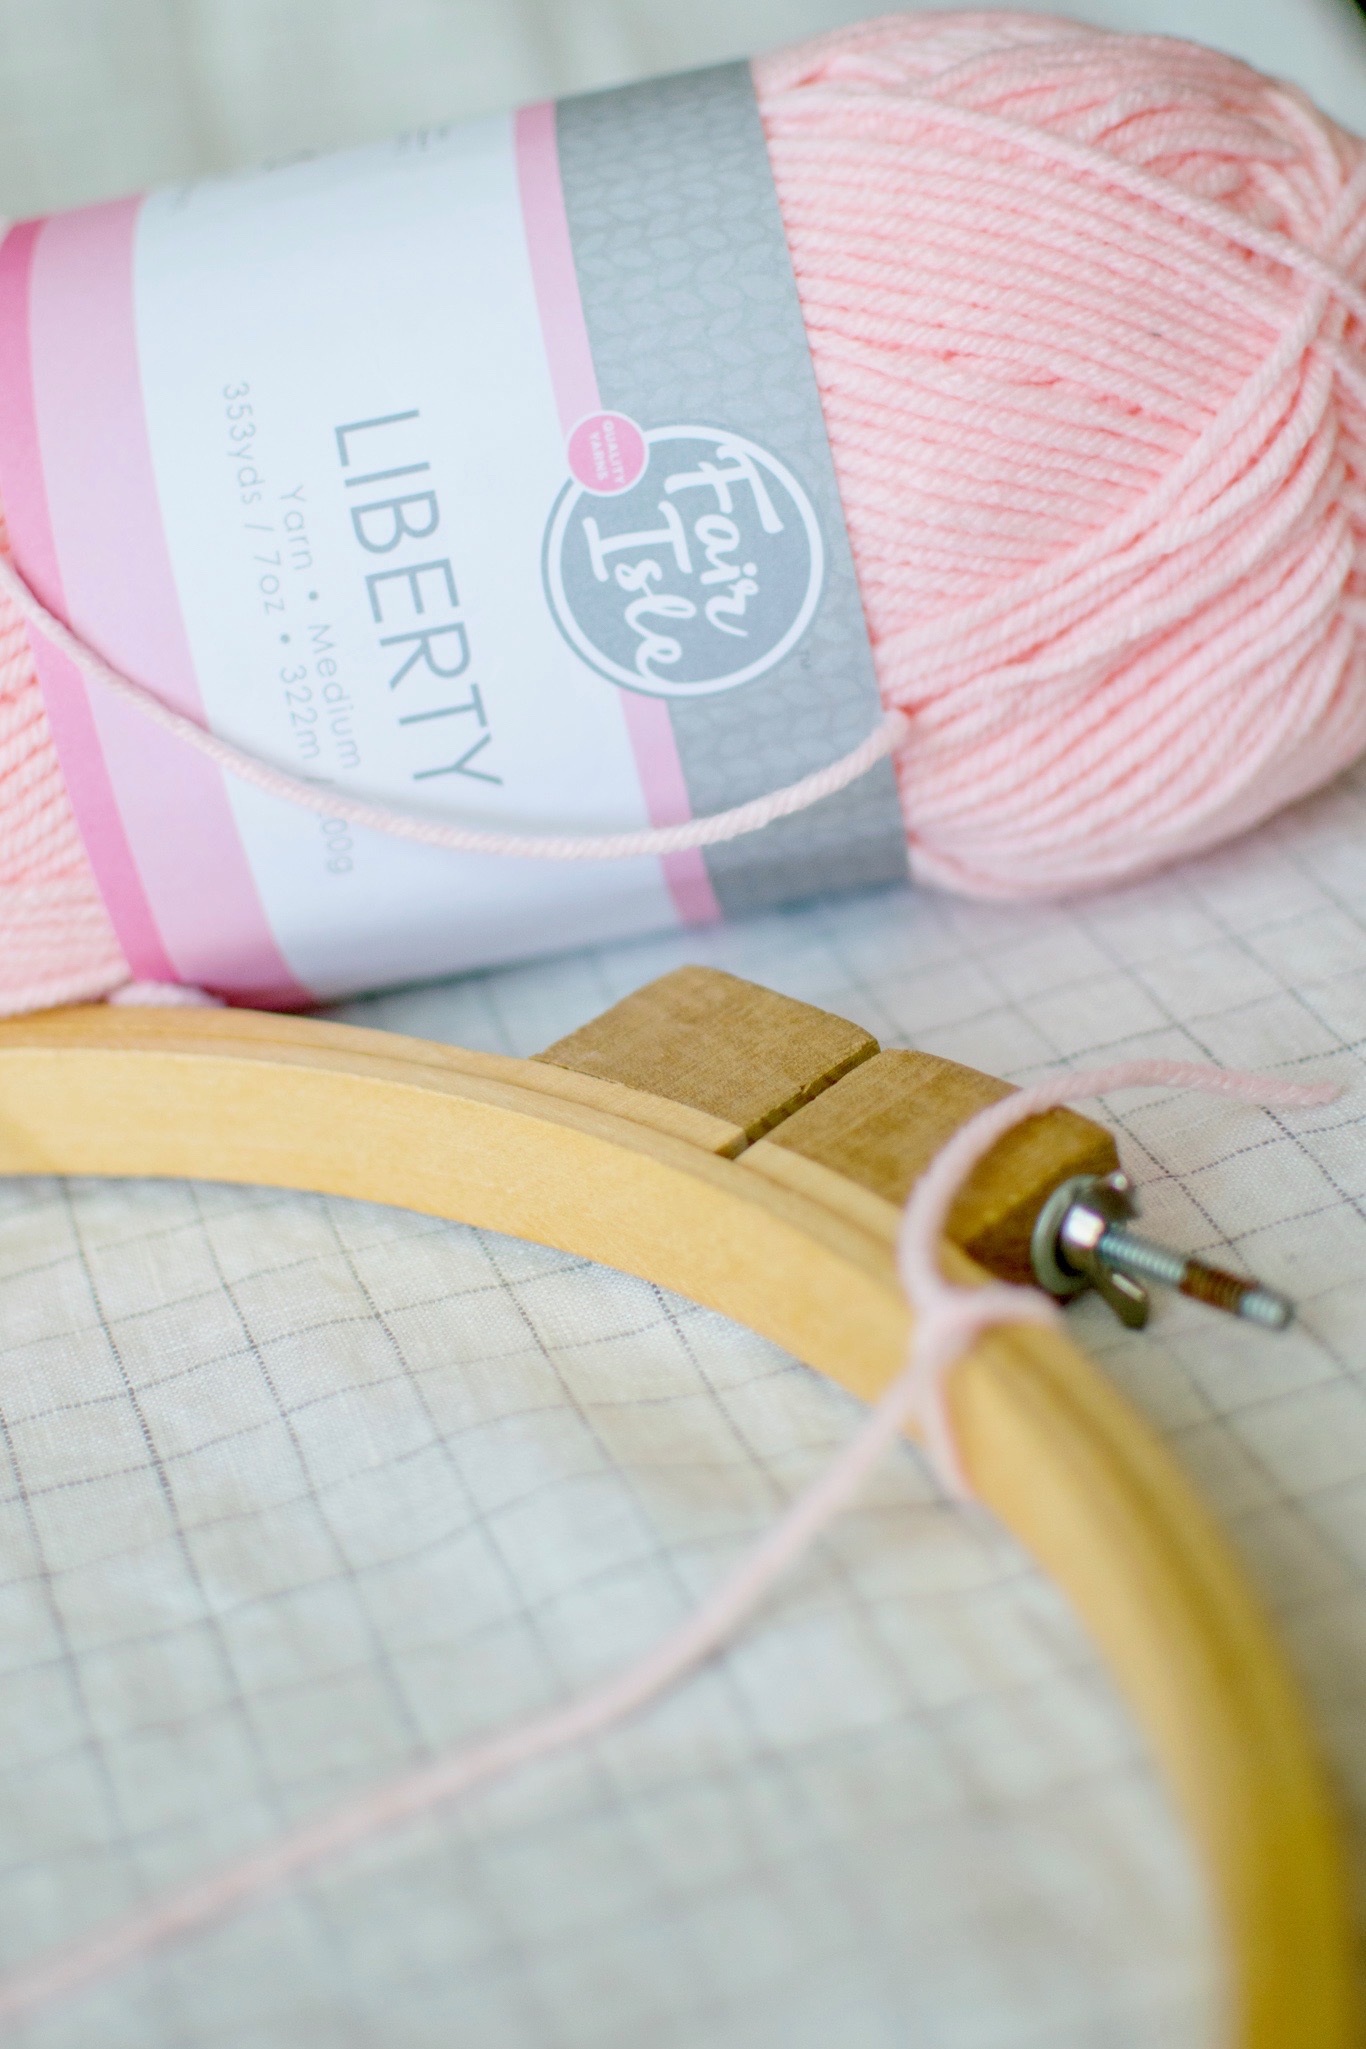
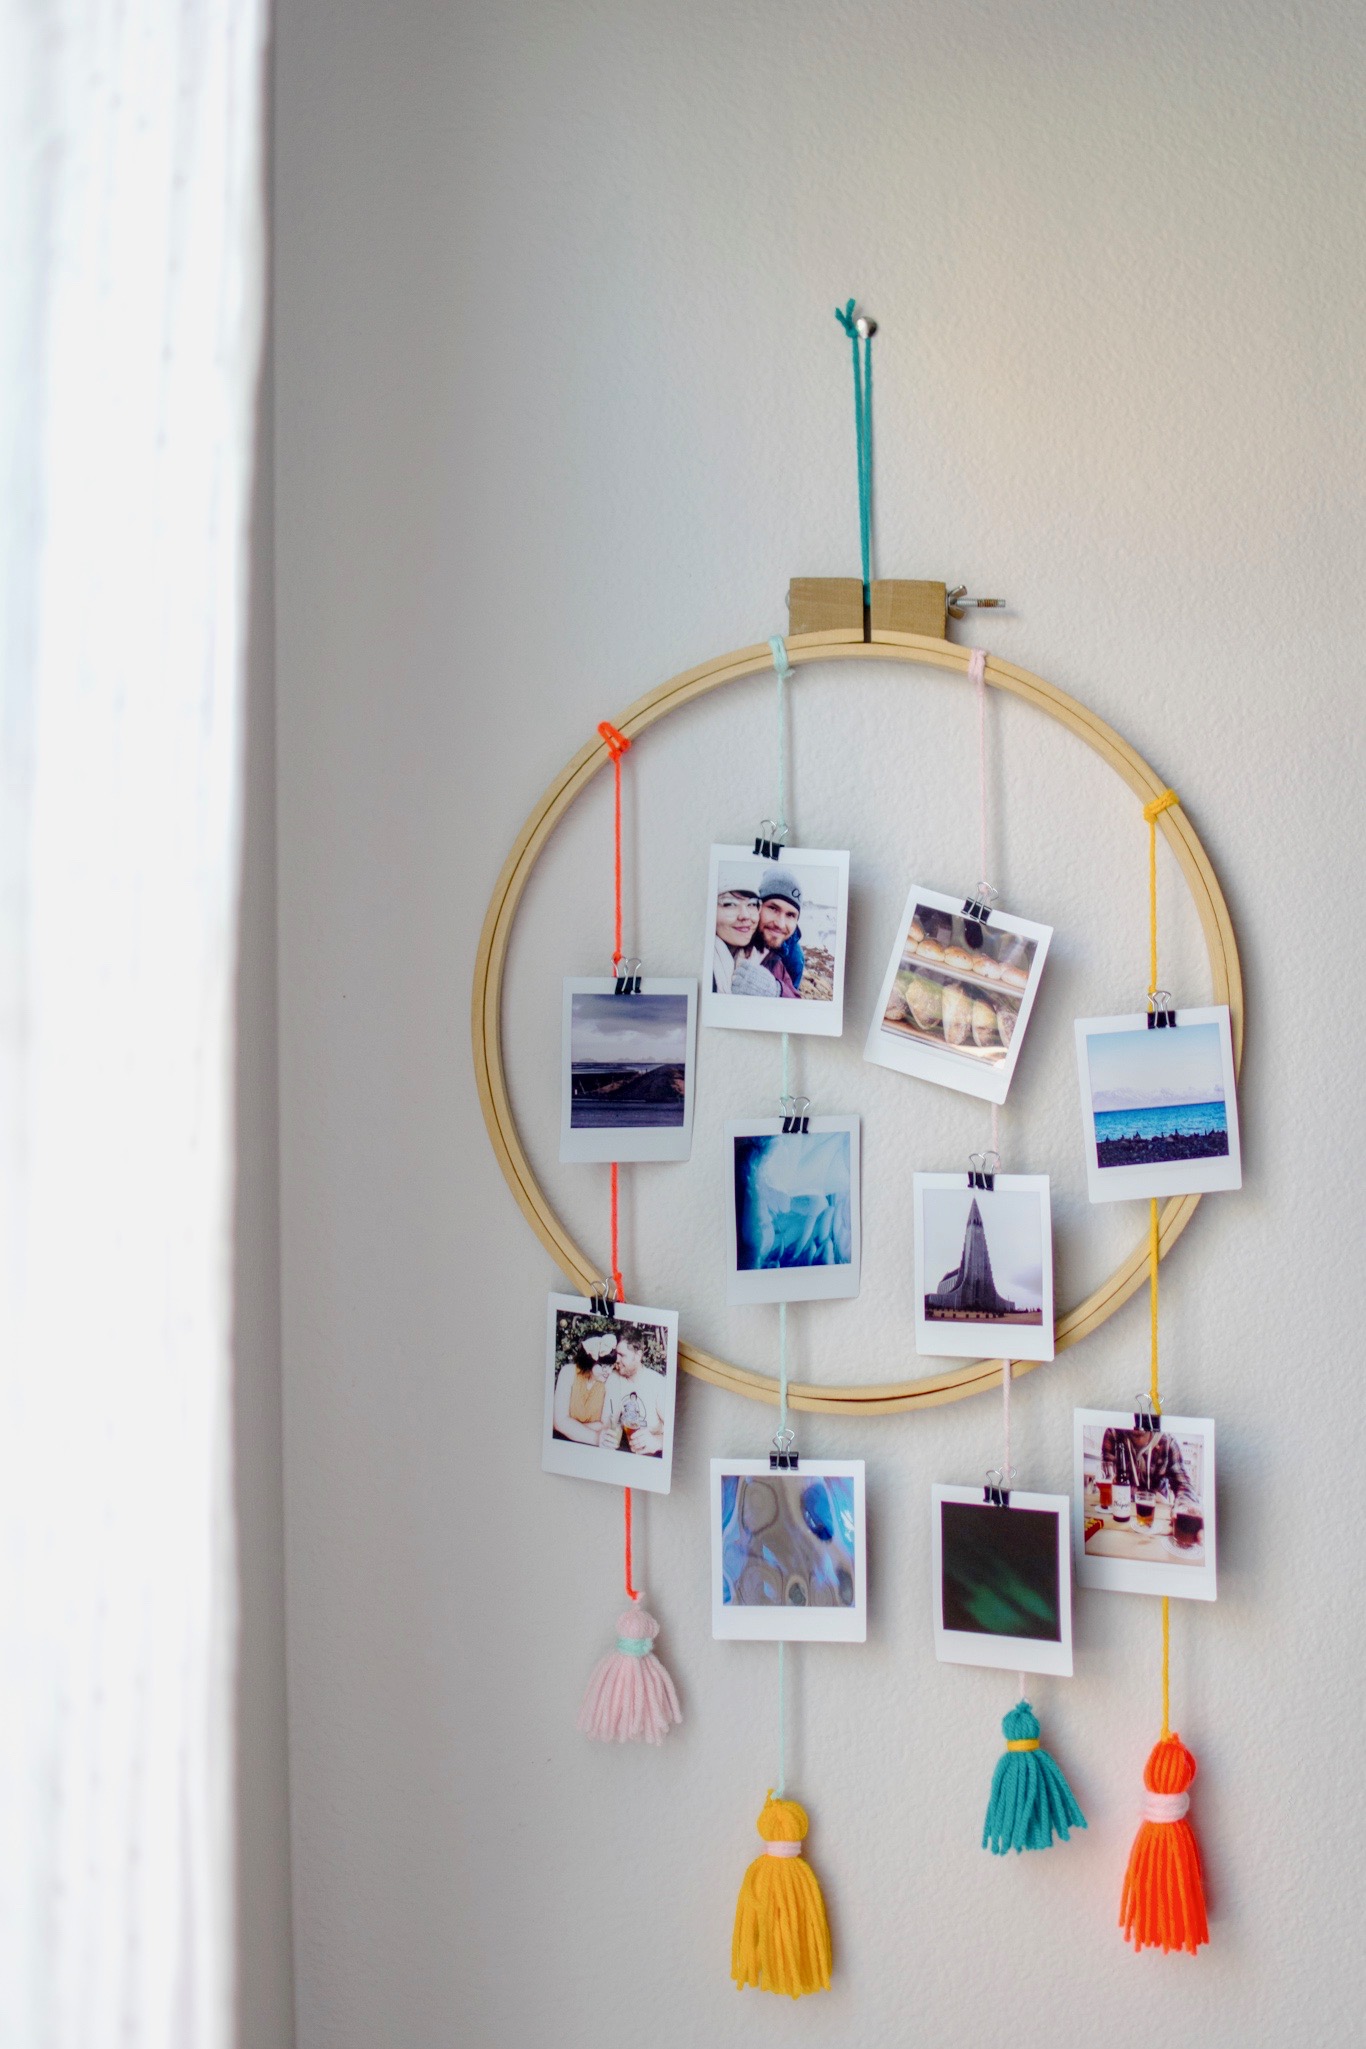
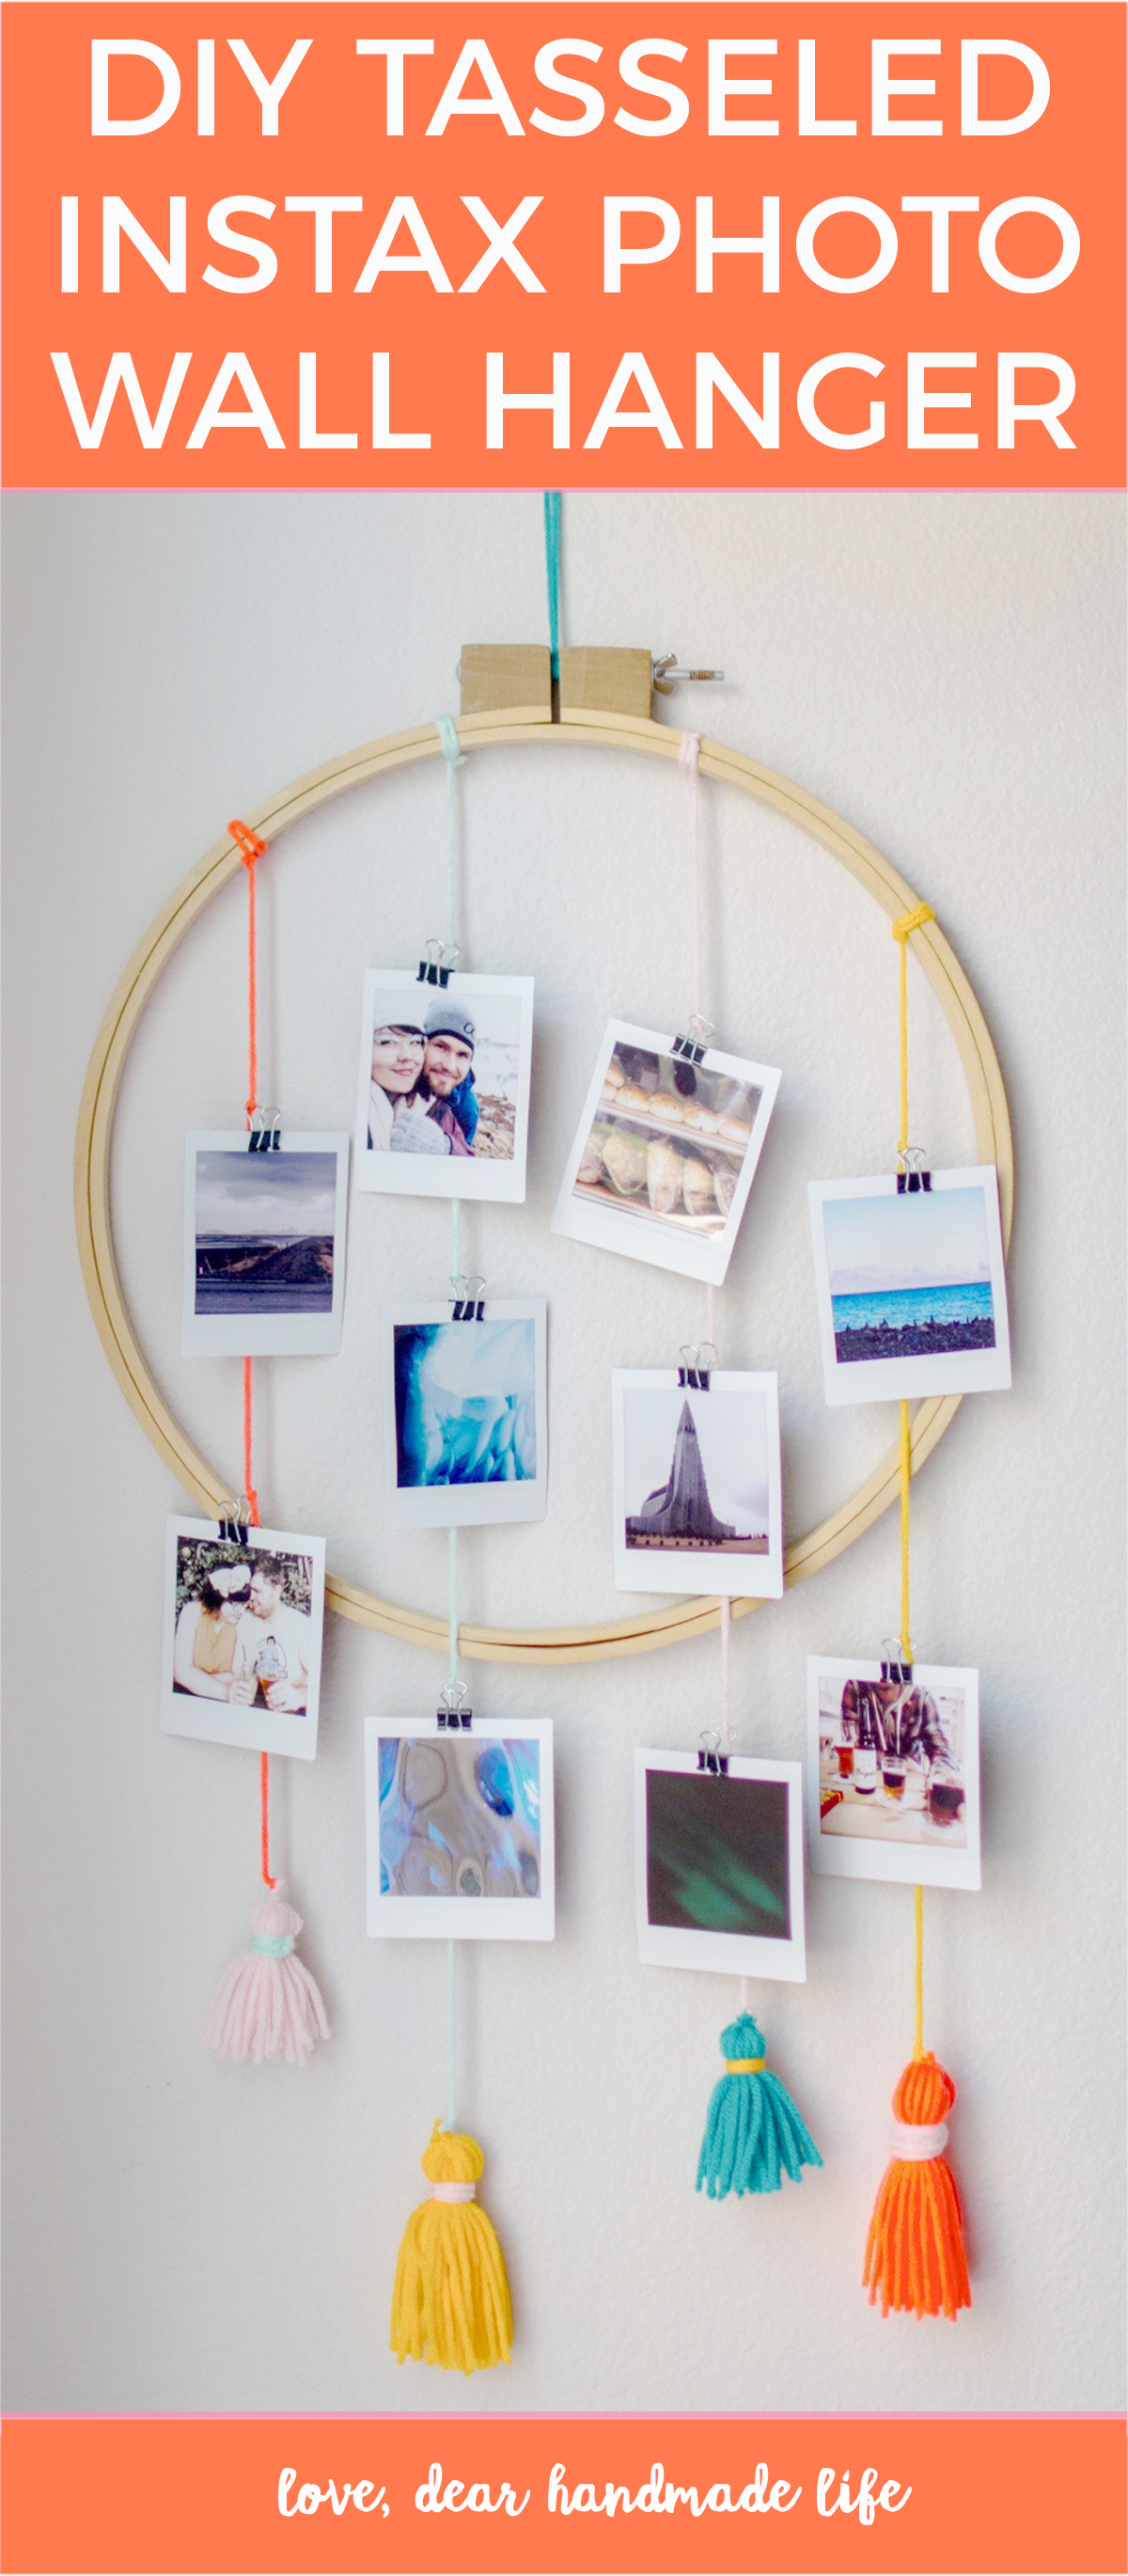
First find something you want to use as the hanging base, I chose this large vintage embroidery hoop because I had a few laying around & wanted to put it to good use! You can use so many different things though, a simple wooden dowel, piece of driftwood, copper pipe, vintage hanger etc.
WHAT TO GET:
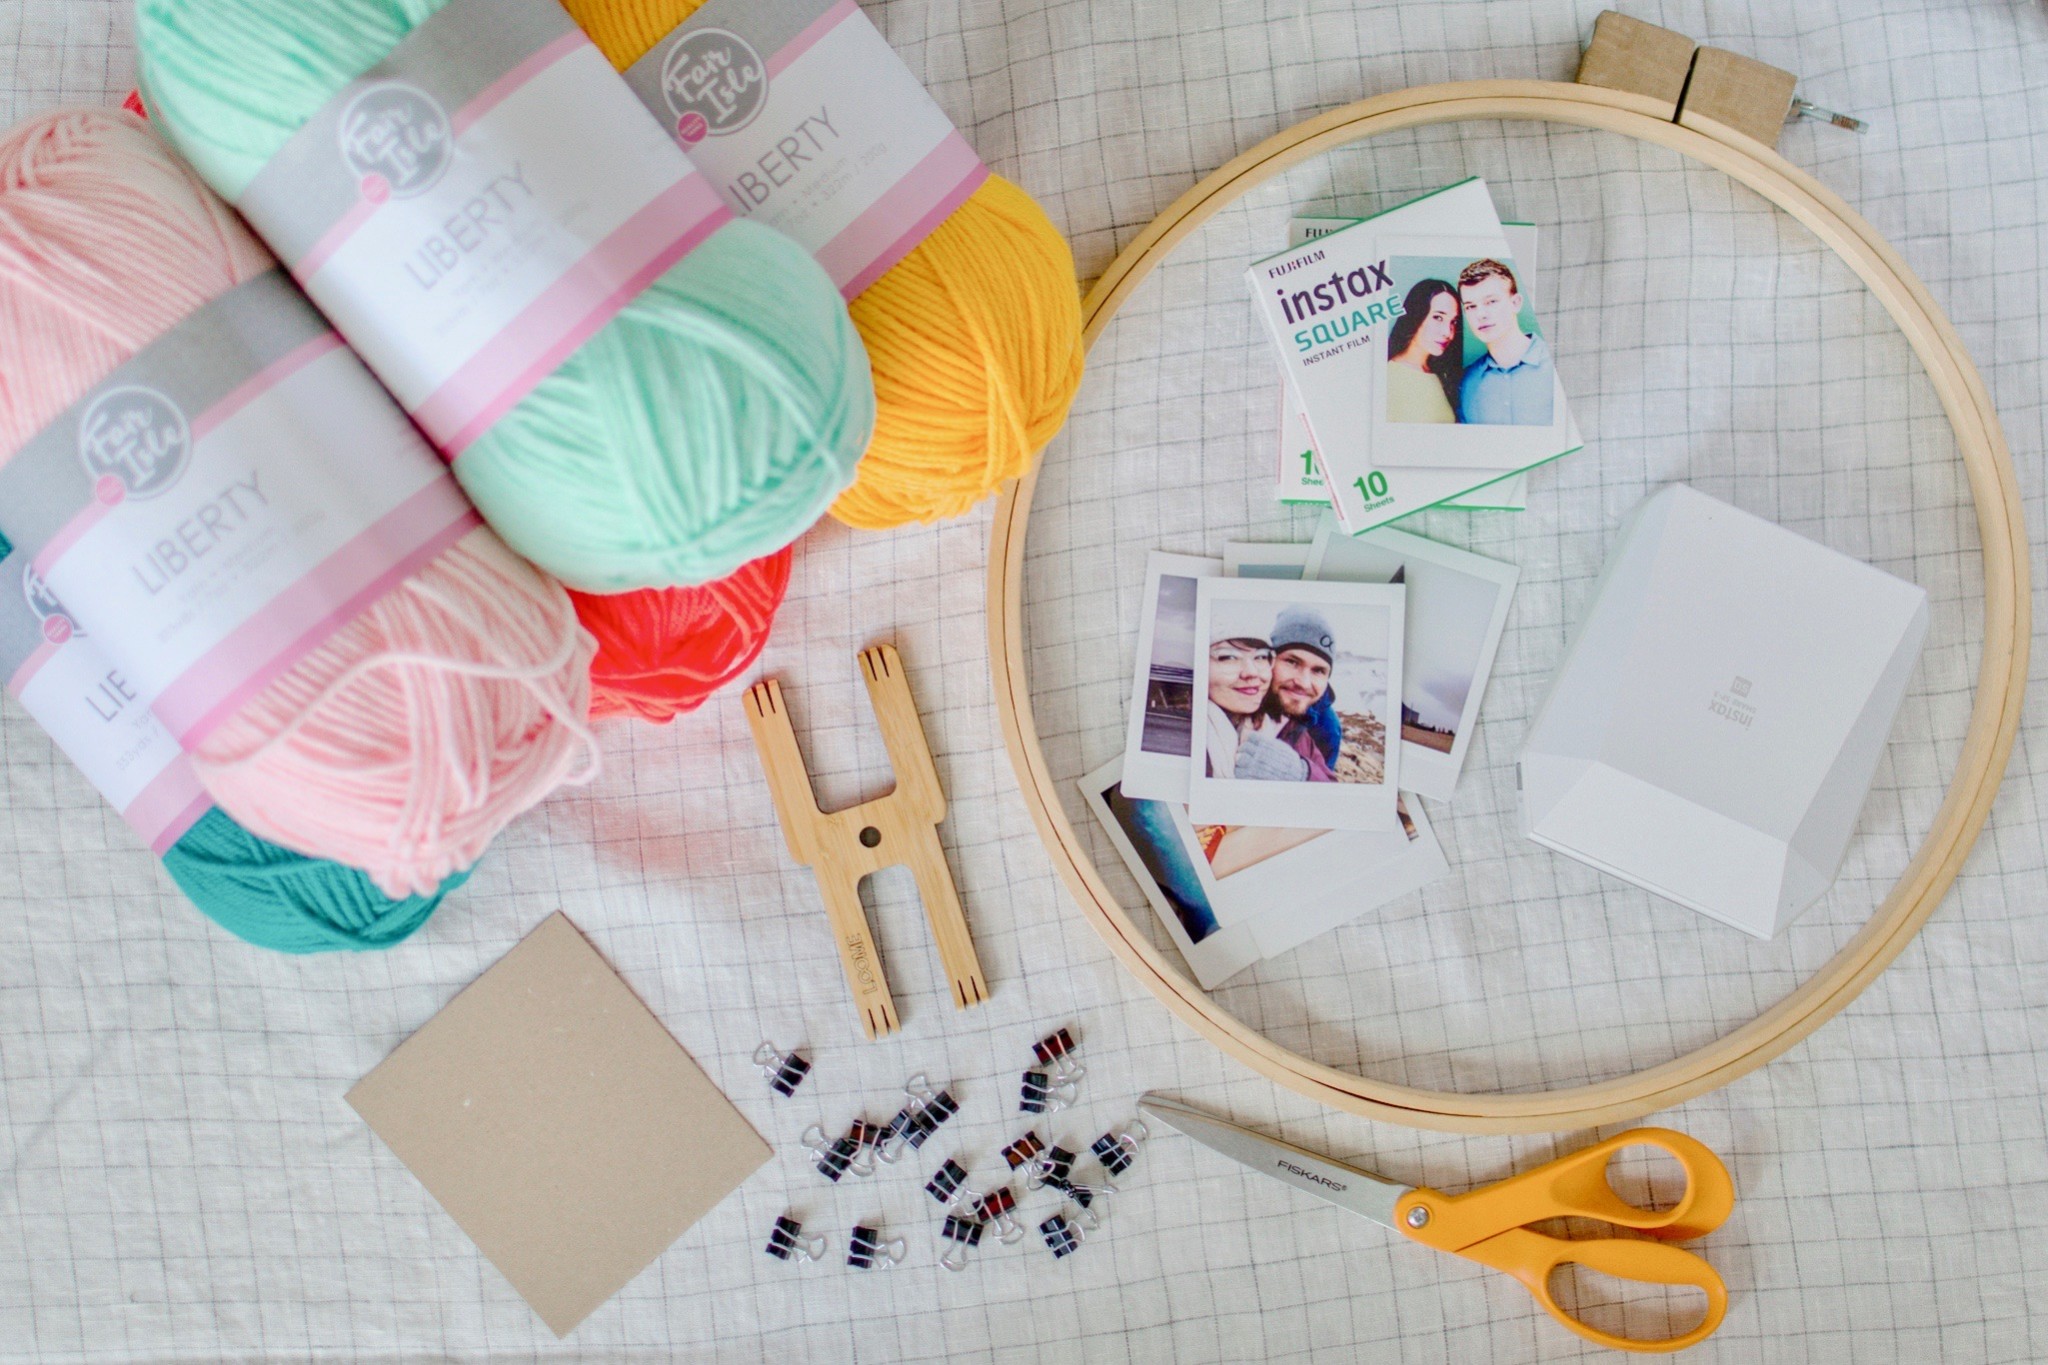
-Yarn – I used a few different colored yarns from Fair Isle Yarn
-Mini metal binder clips (so I will be able to switch out the Instax photos in the future!)
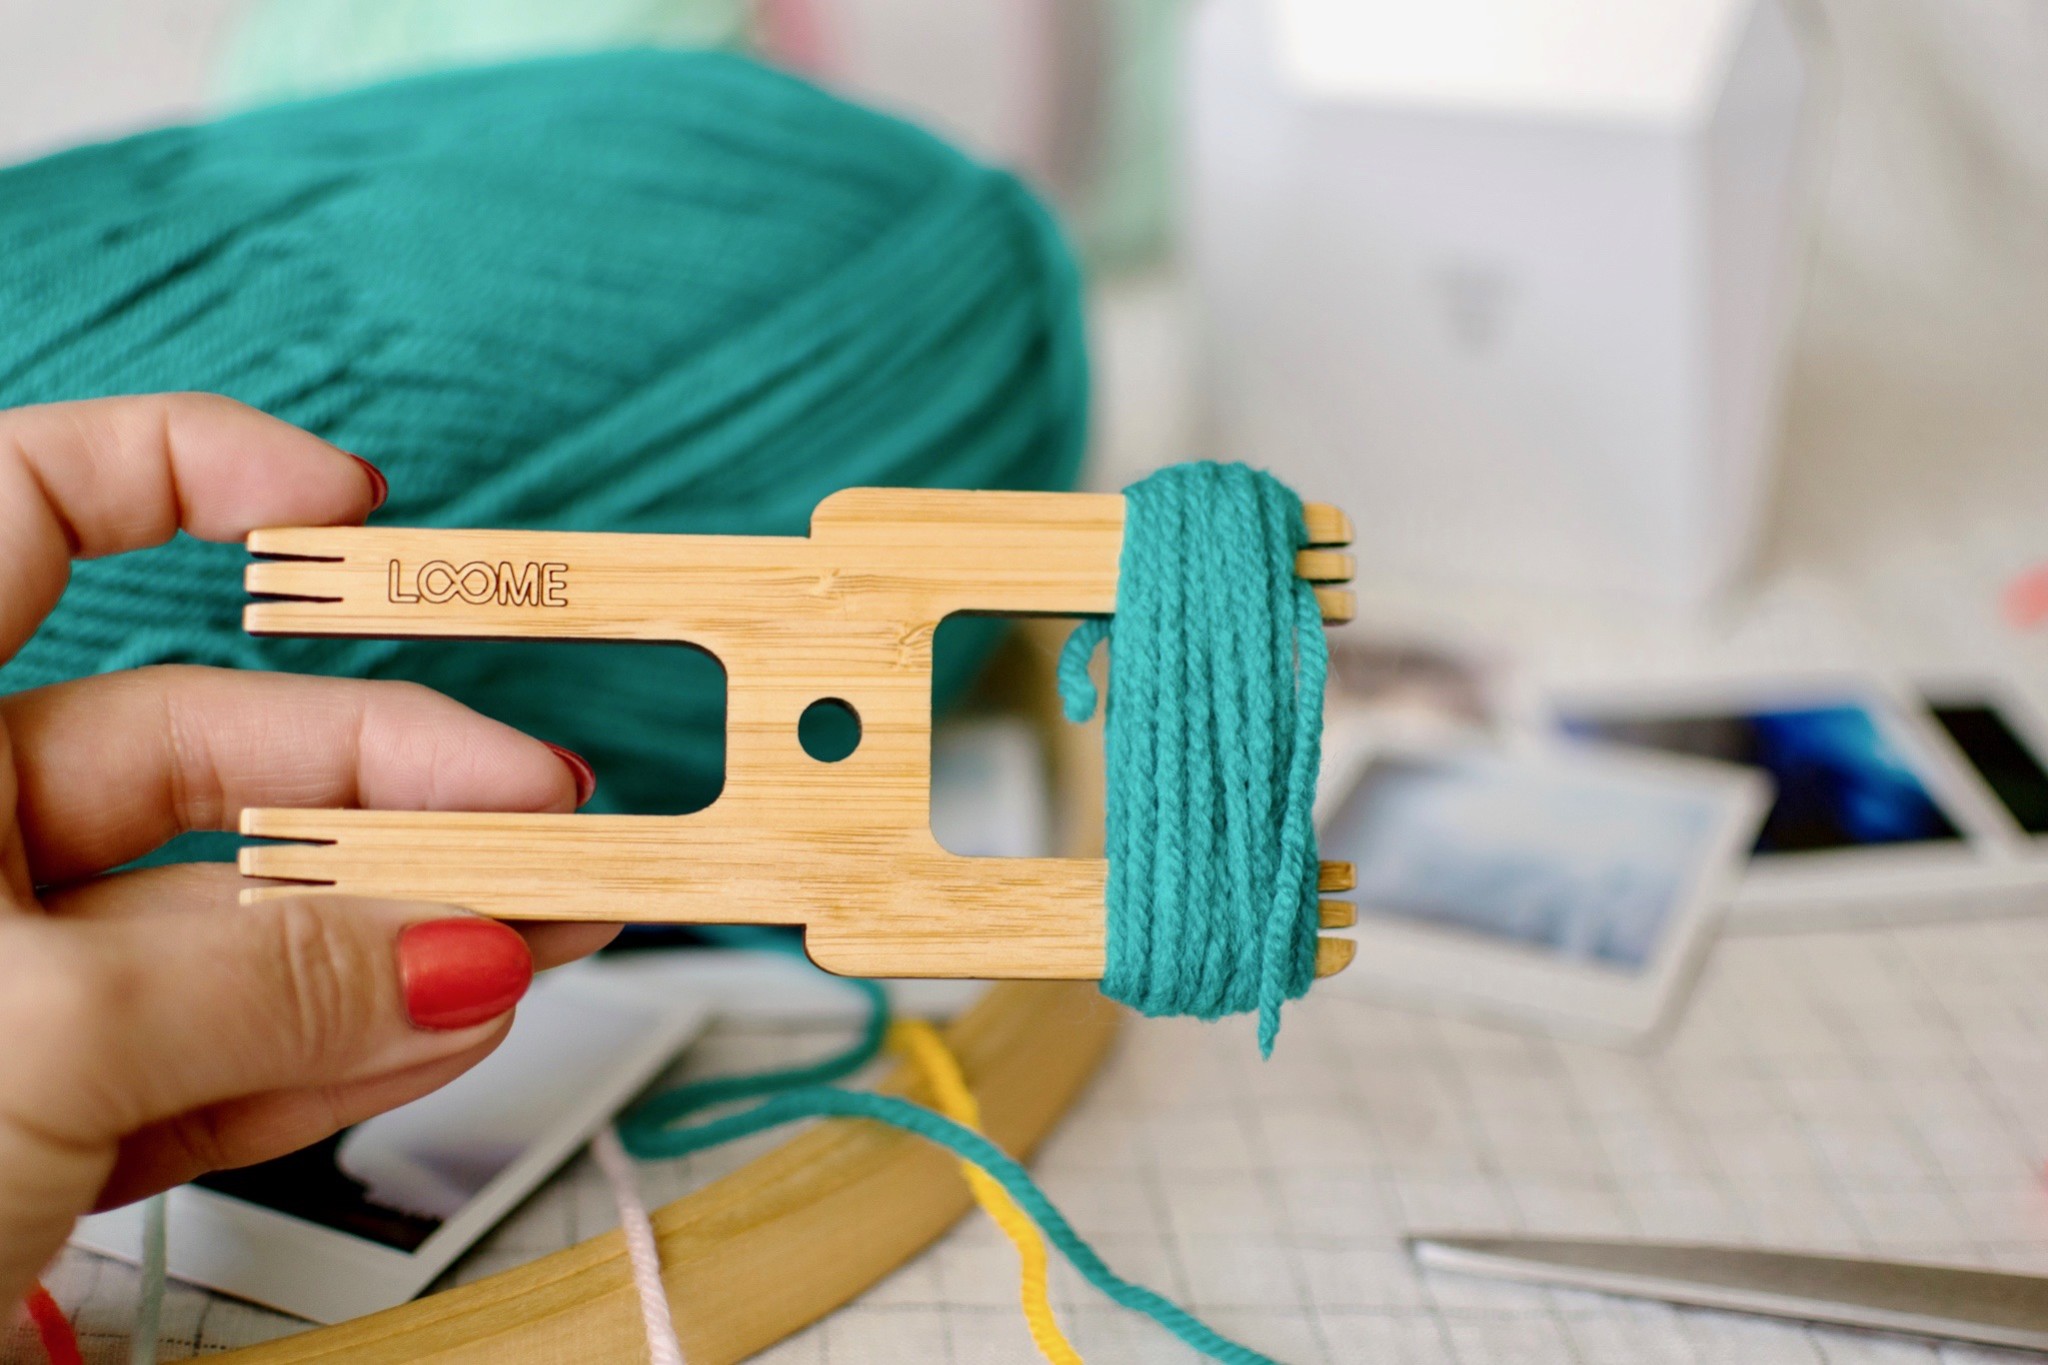
-A piece of chipboard or thick card stock to make the tassels, or you could use the incredibly awesome Loome tool!
-Scissors
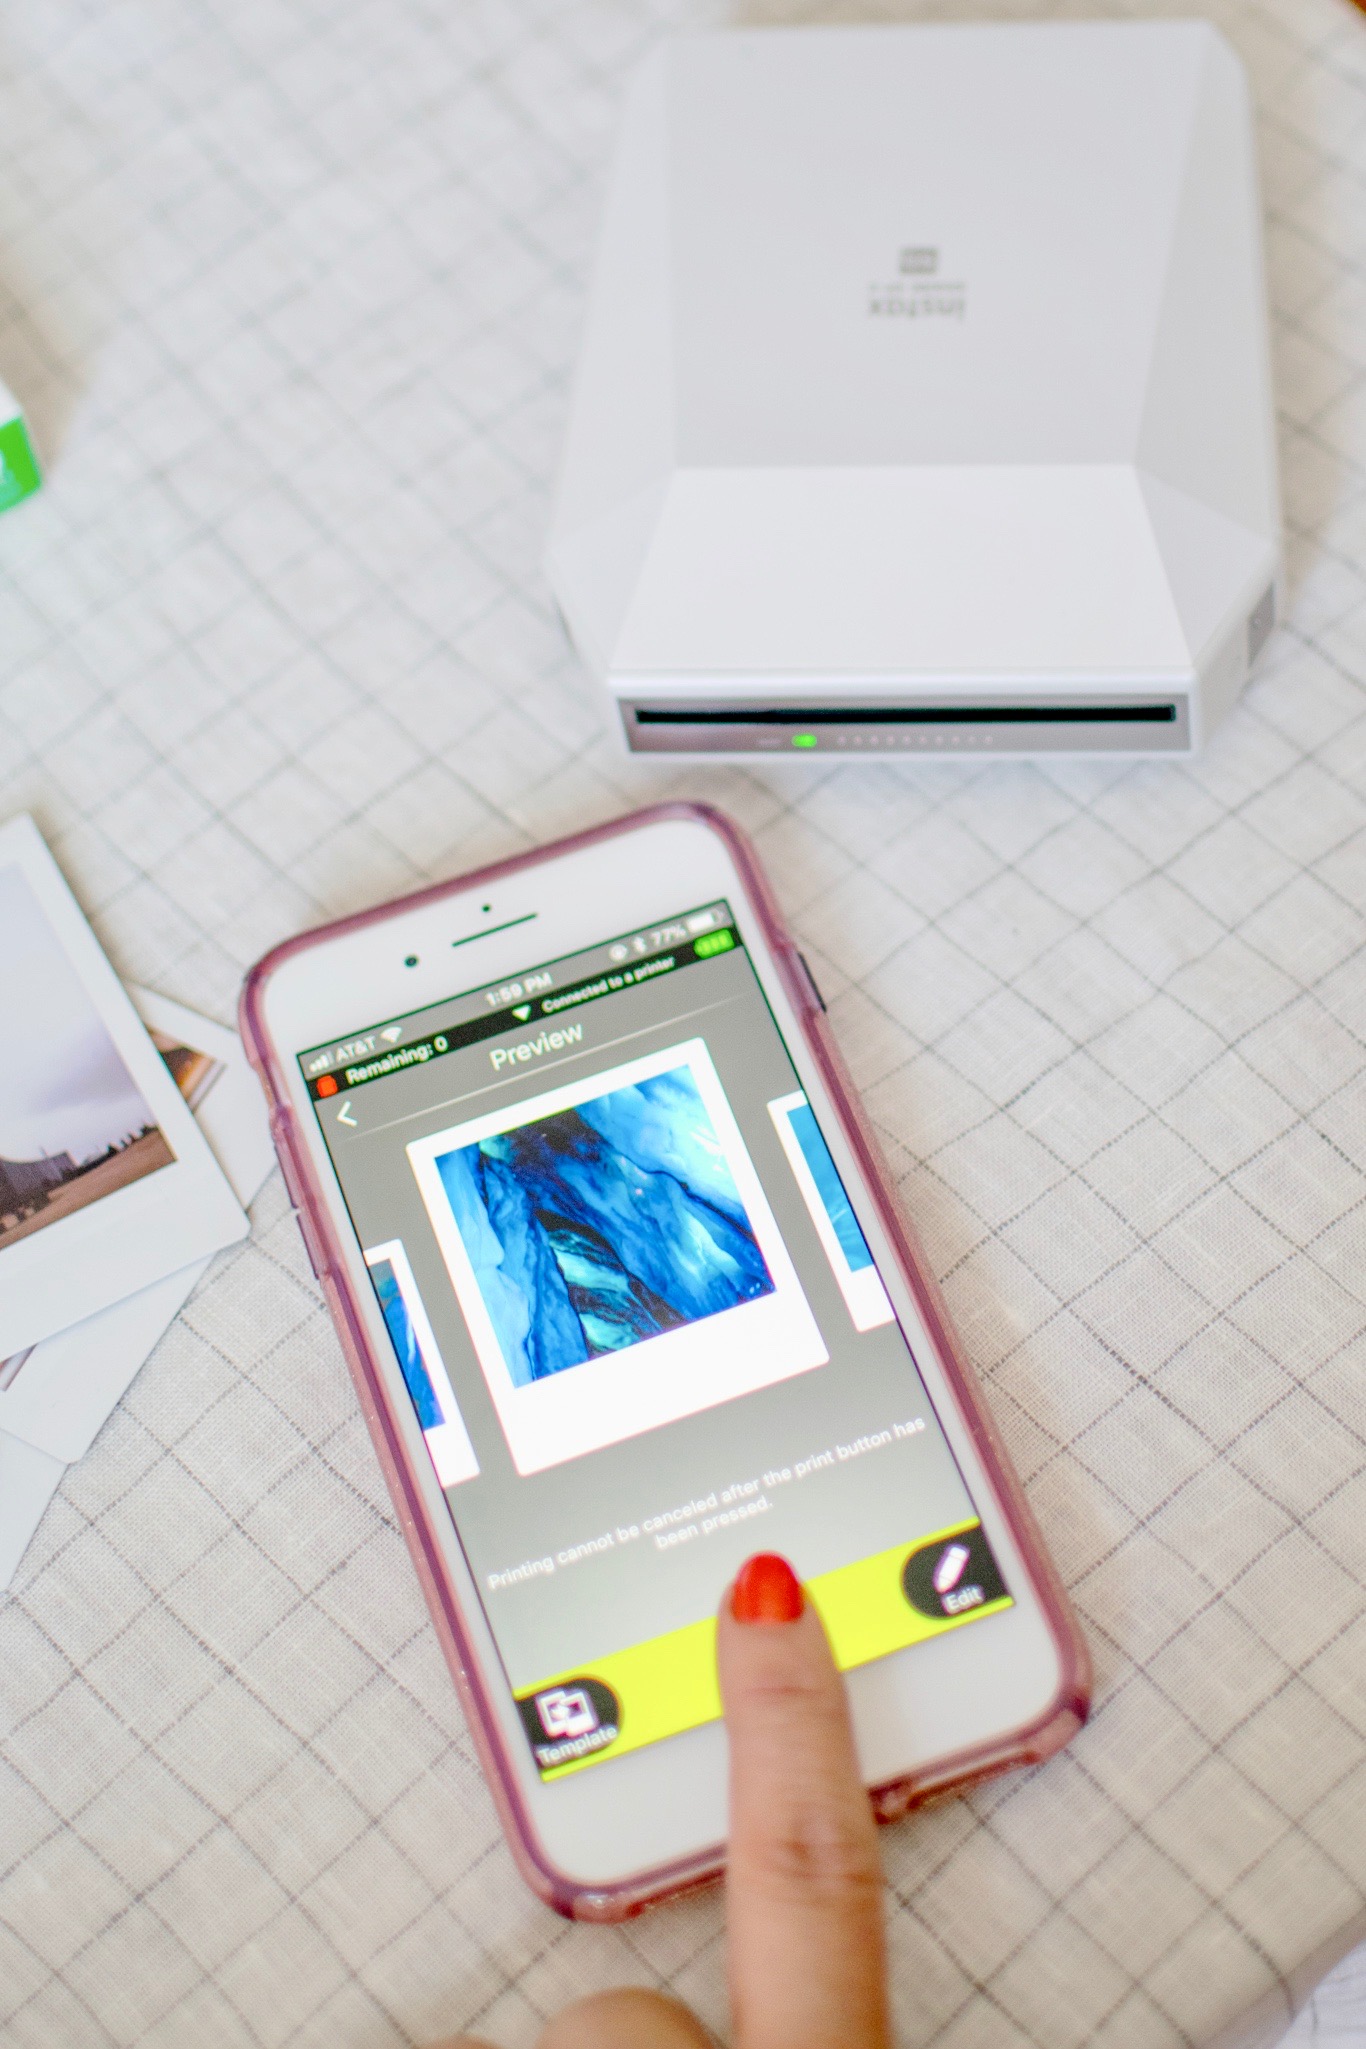
-And, of course… The FUJIFILM Instax® SHARE SP-3 SQ printer + film
WHAT TO DO:
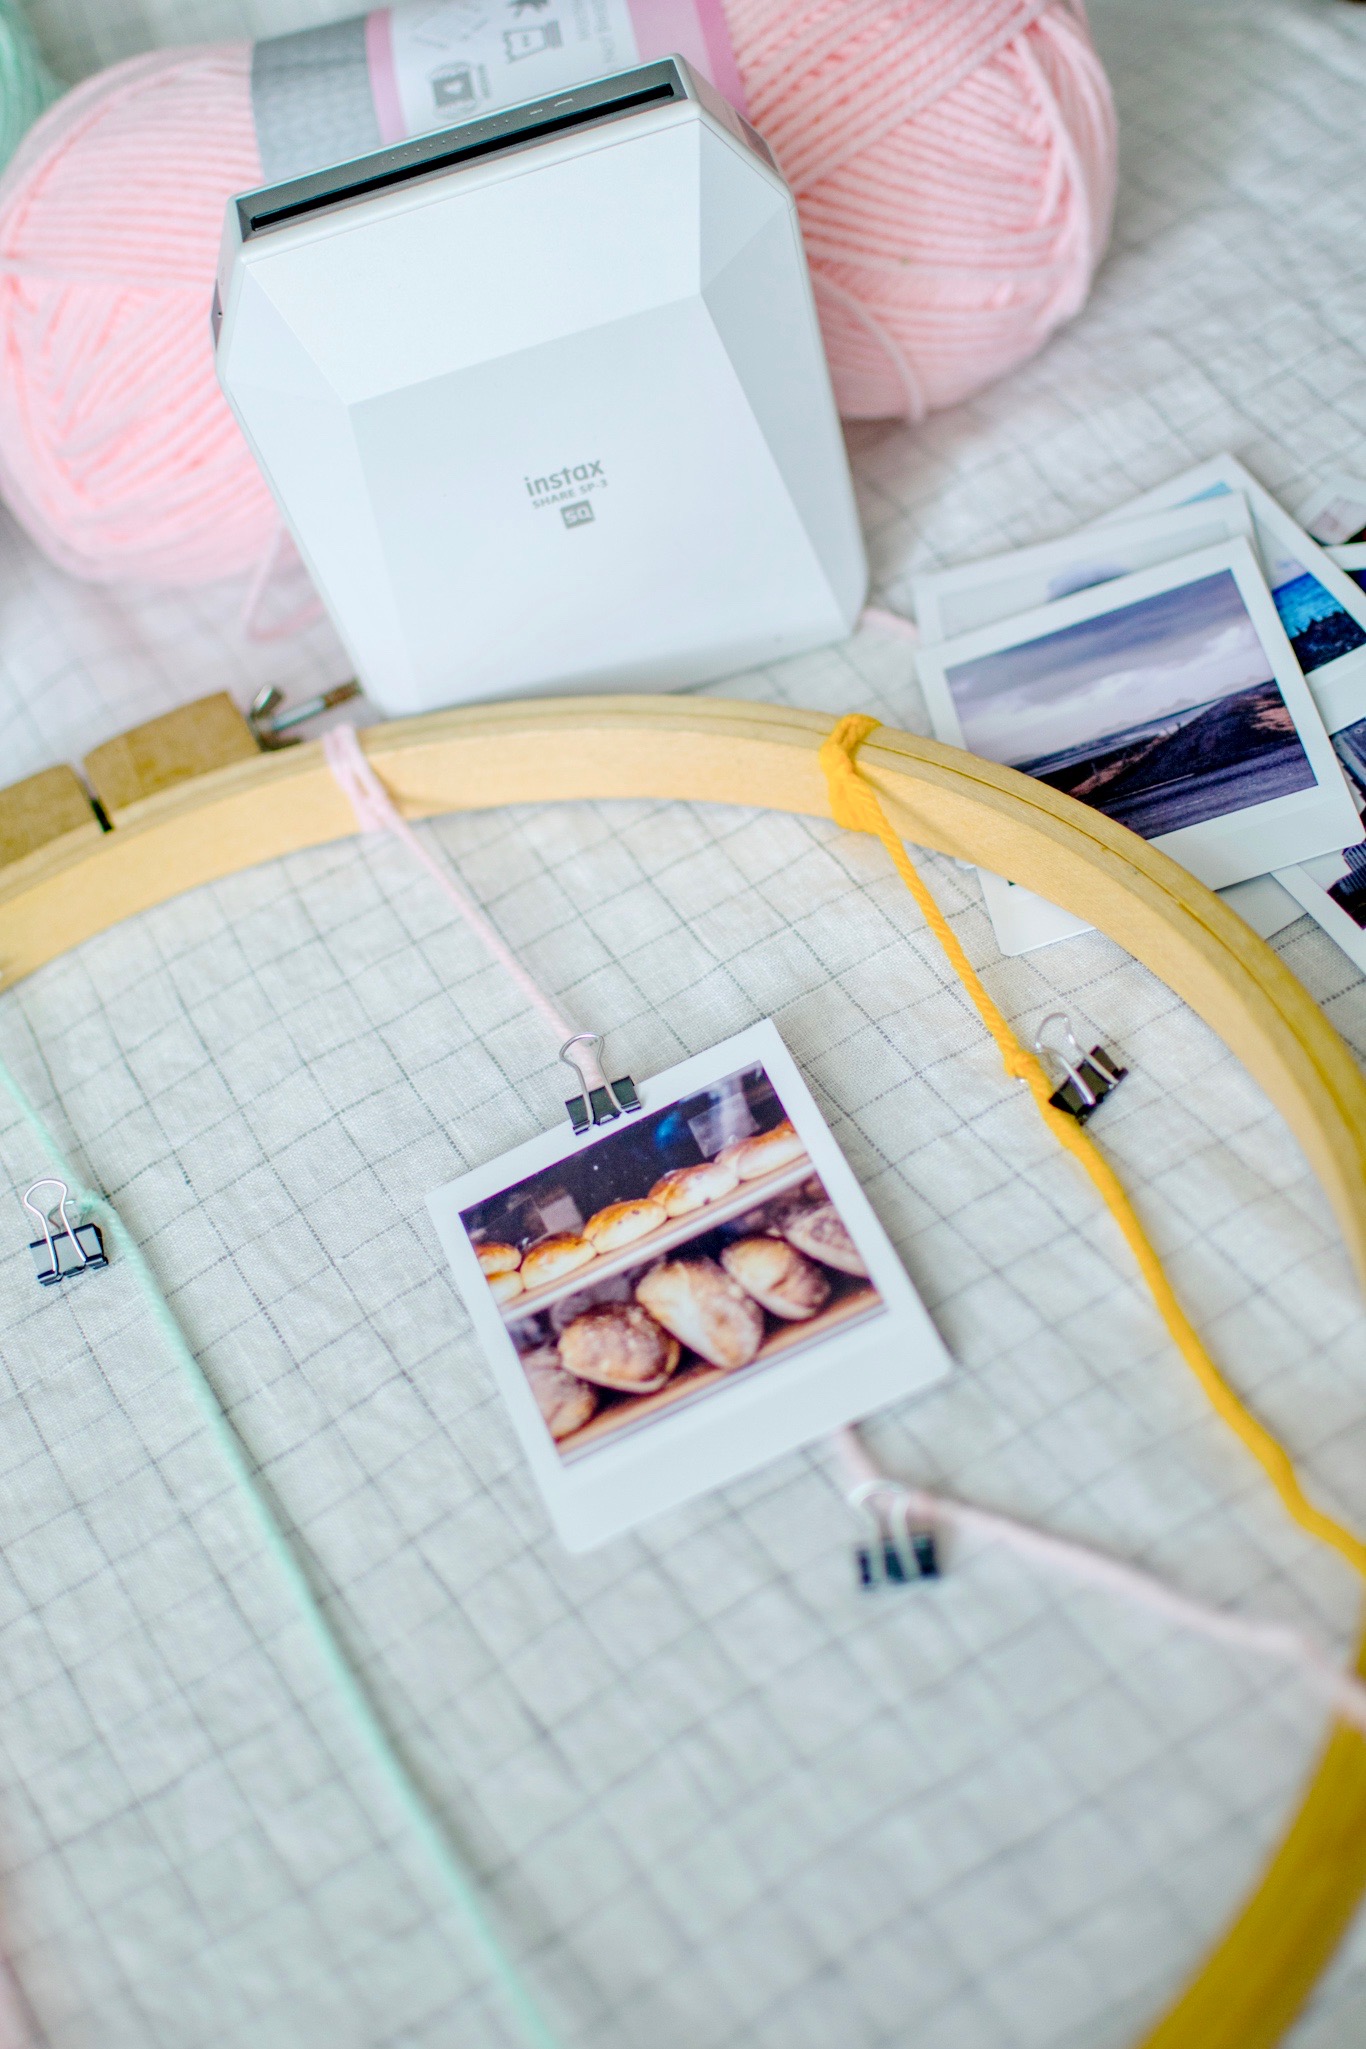
1. Decide which photos you want to display & print them out using the instructions that come with your FUJIFILM Instax® SHARE SP-3 SQ printer.
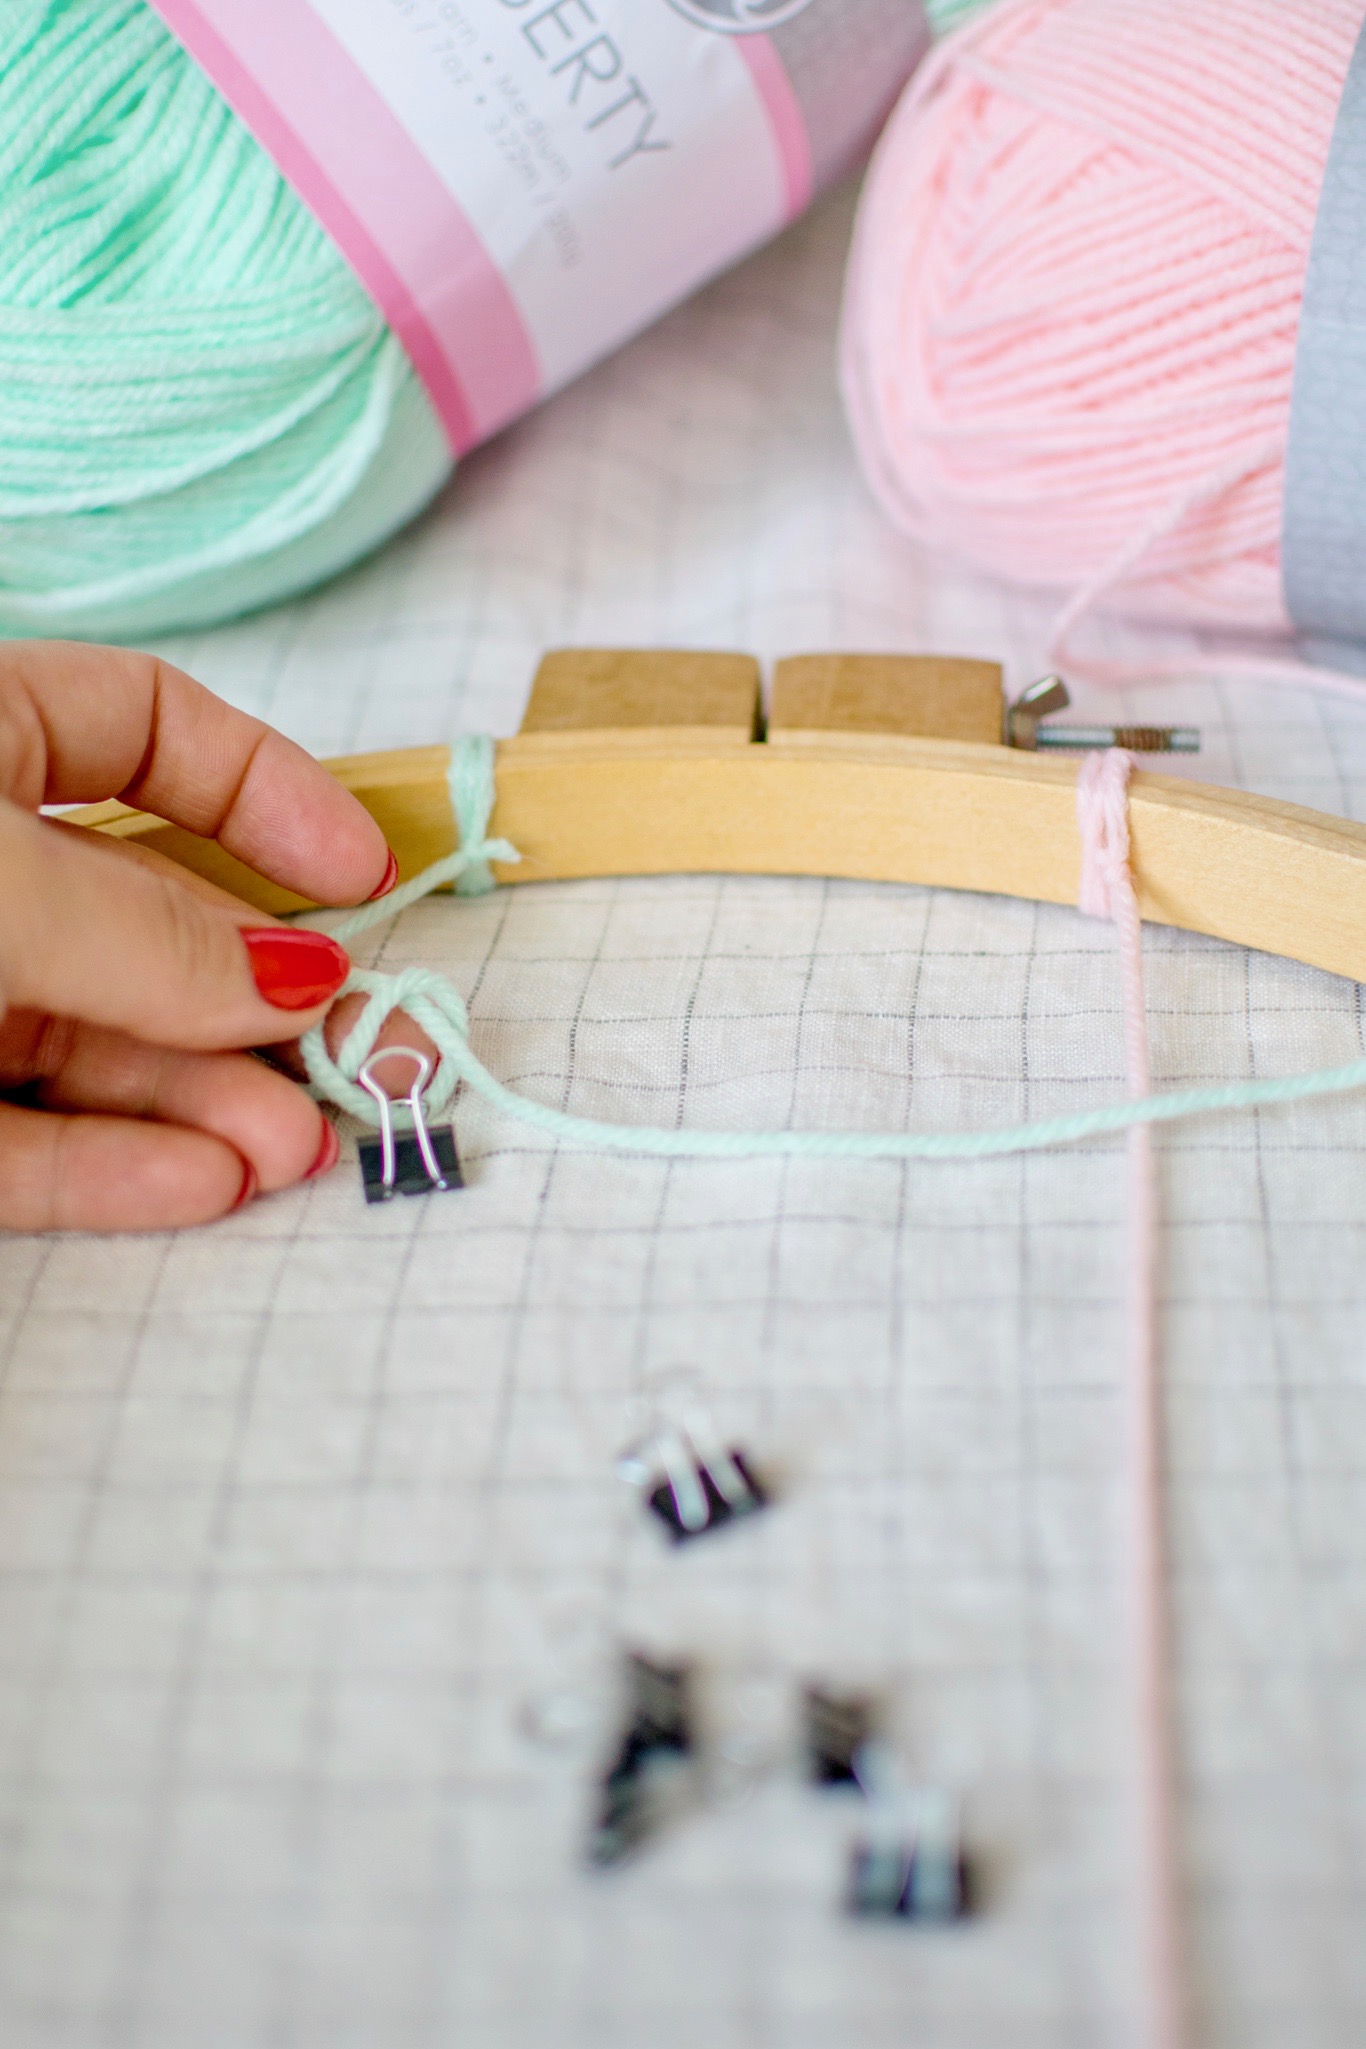
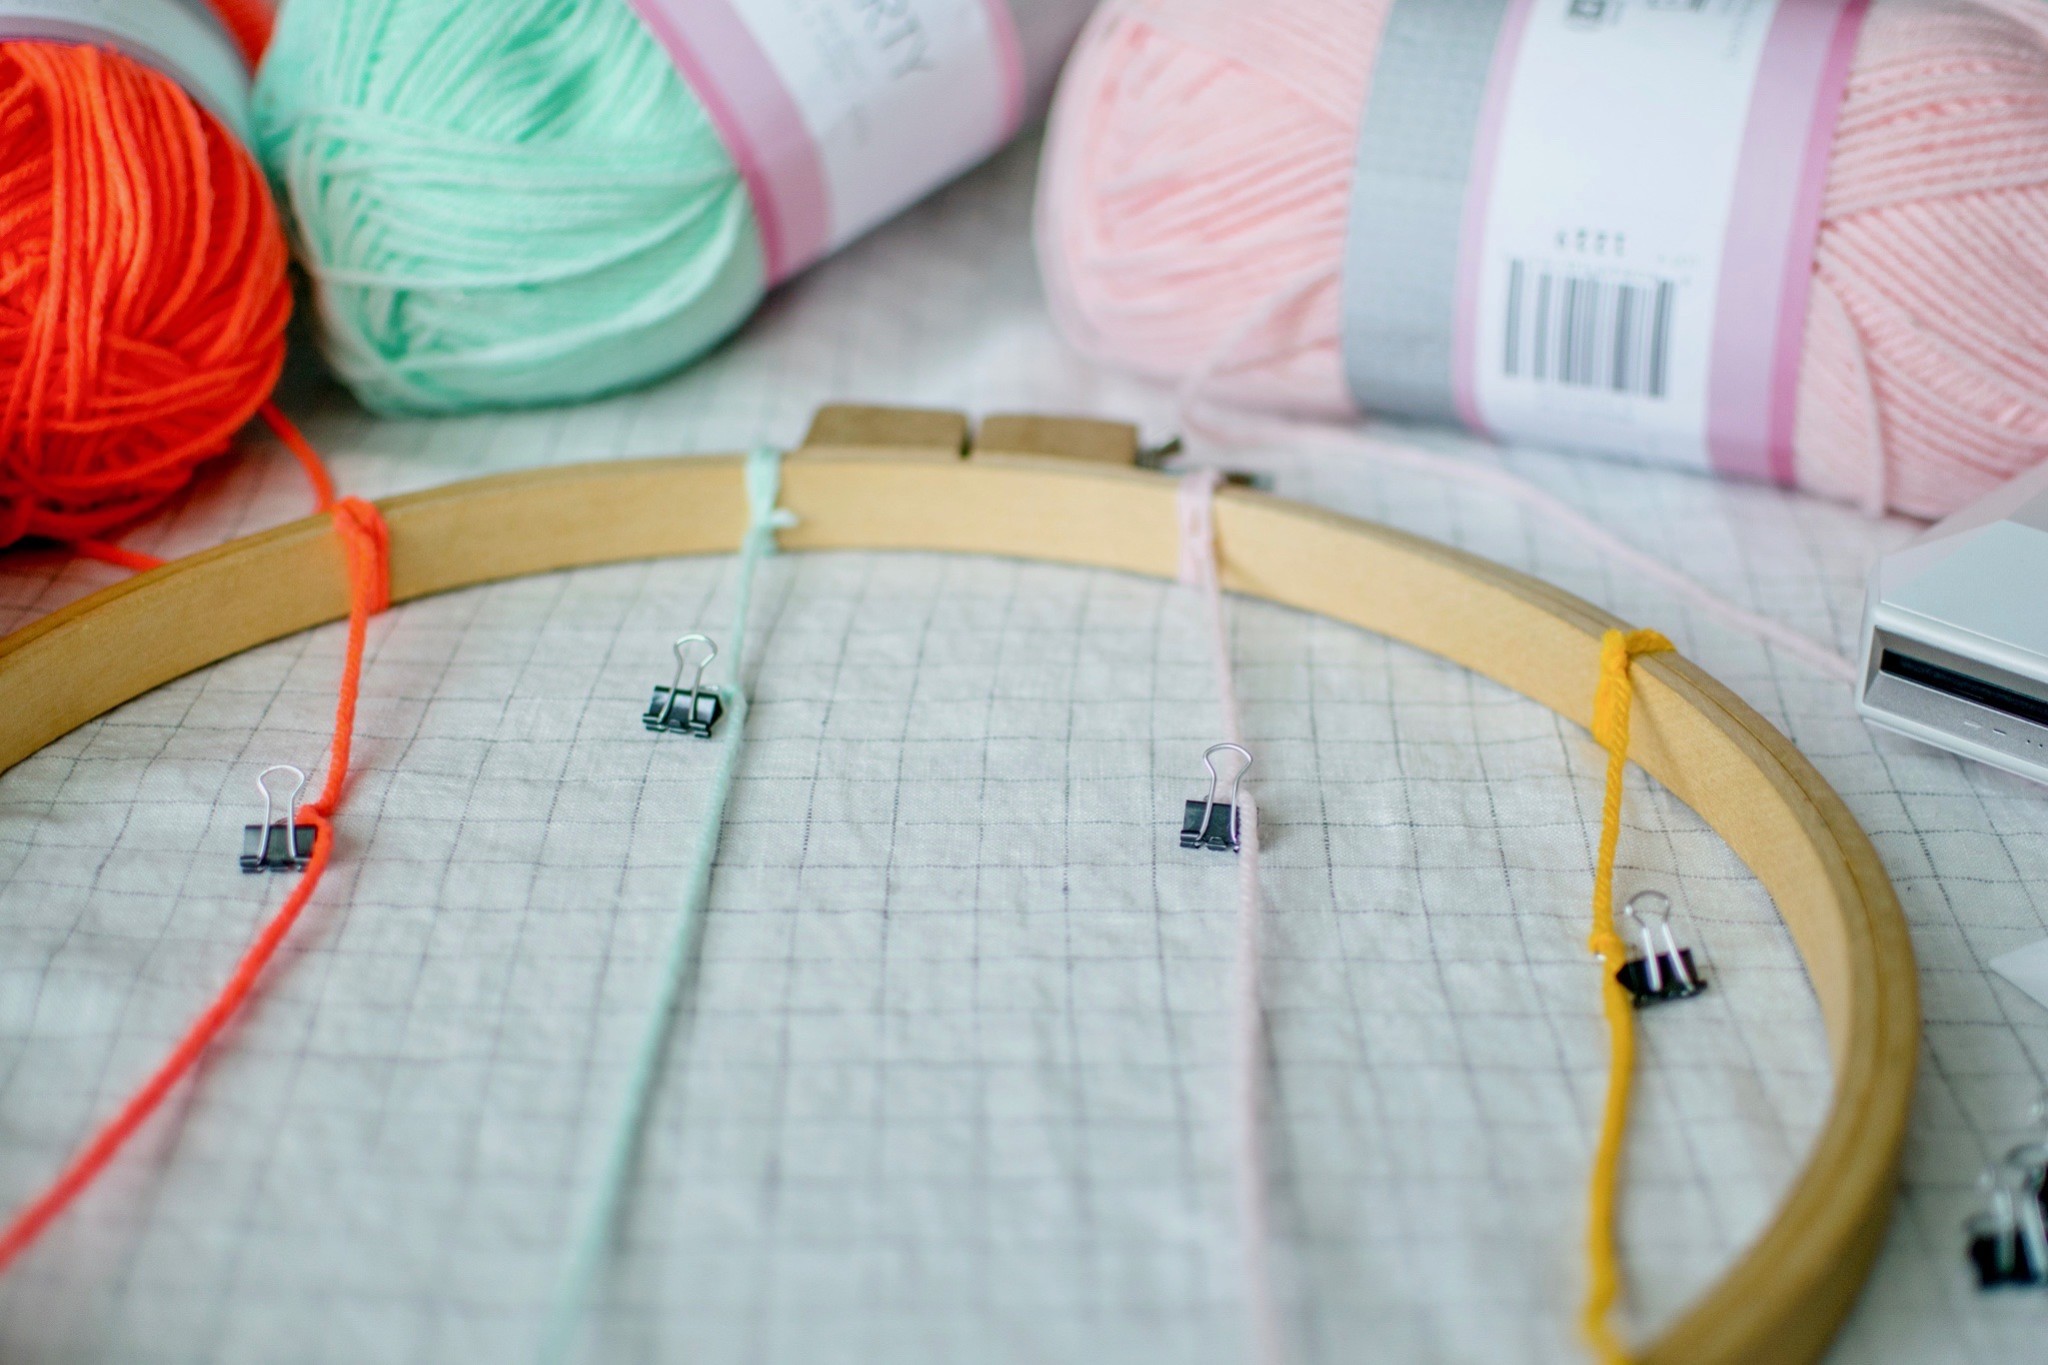
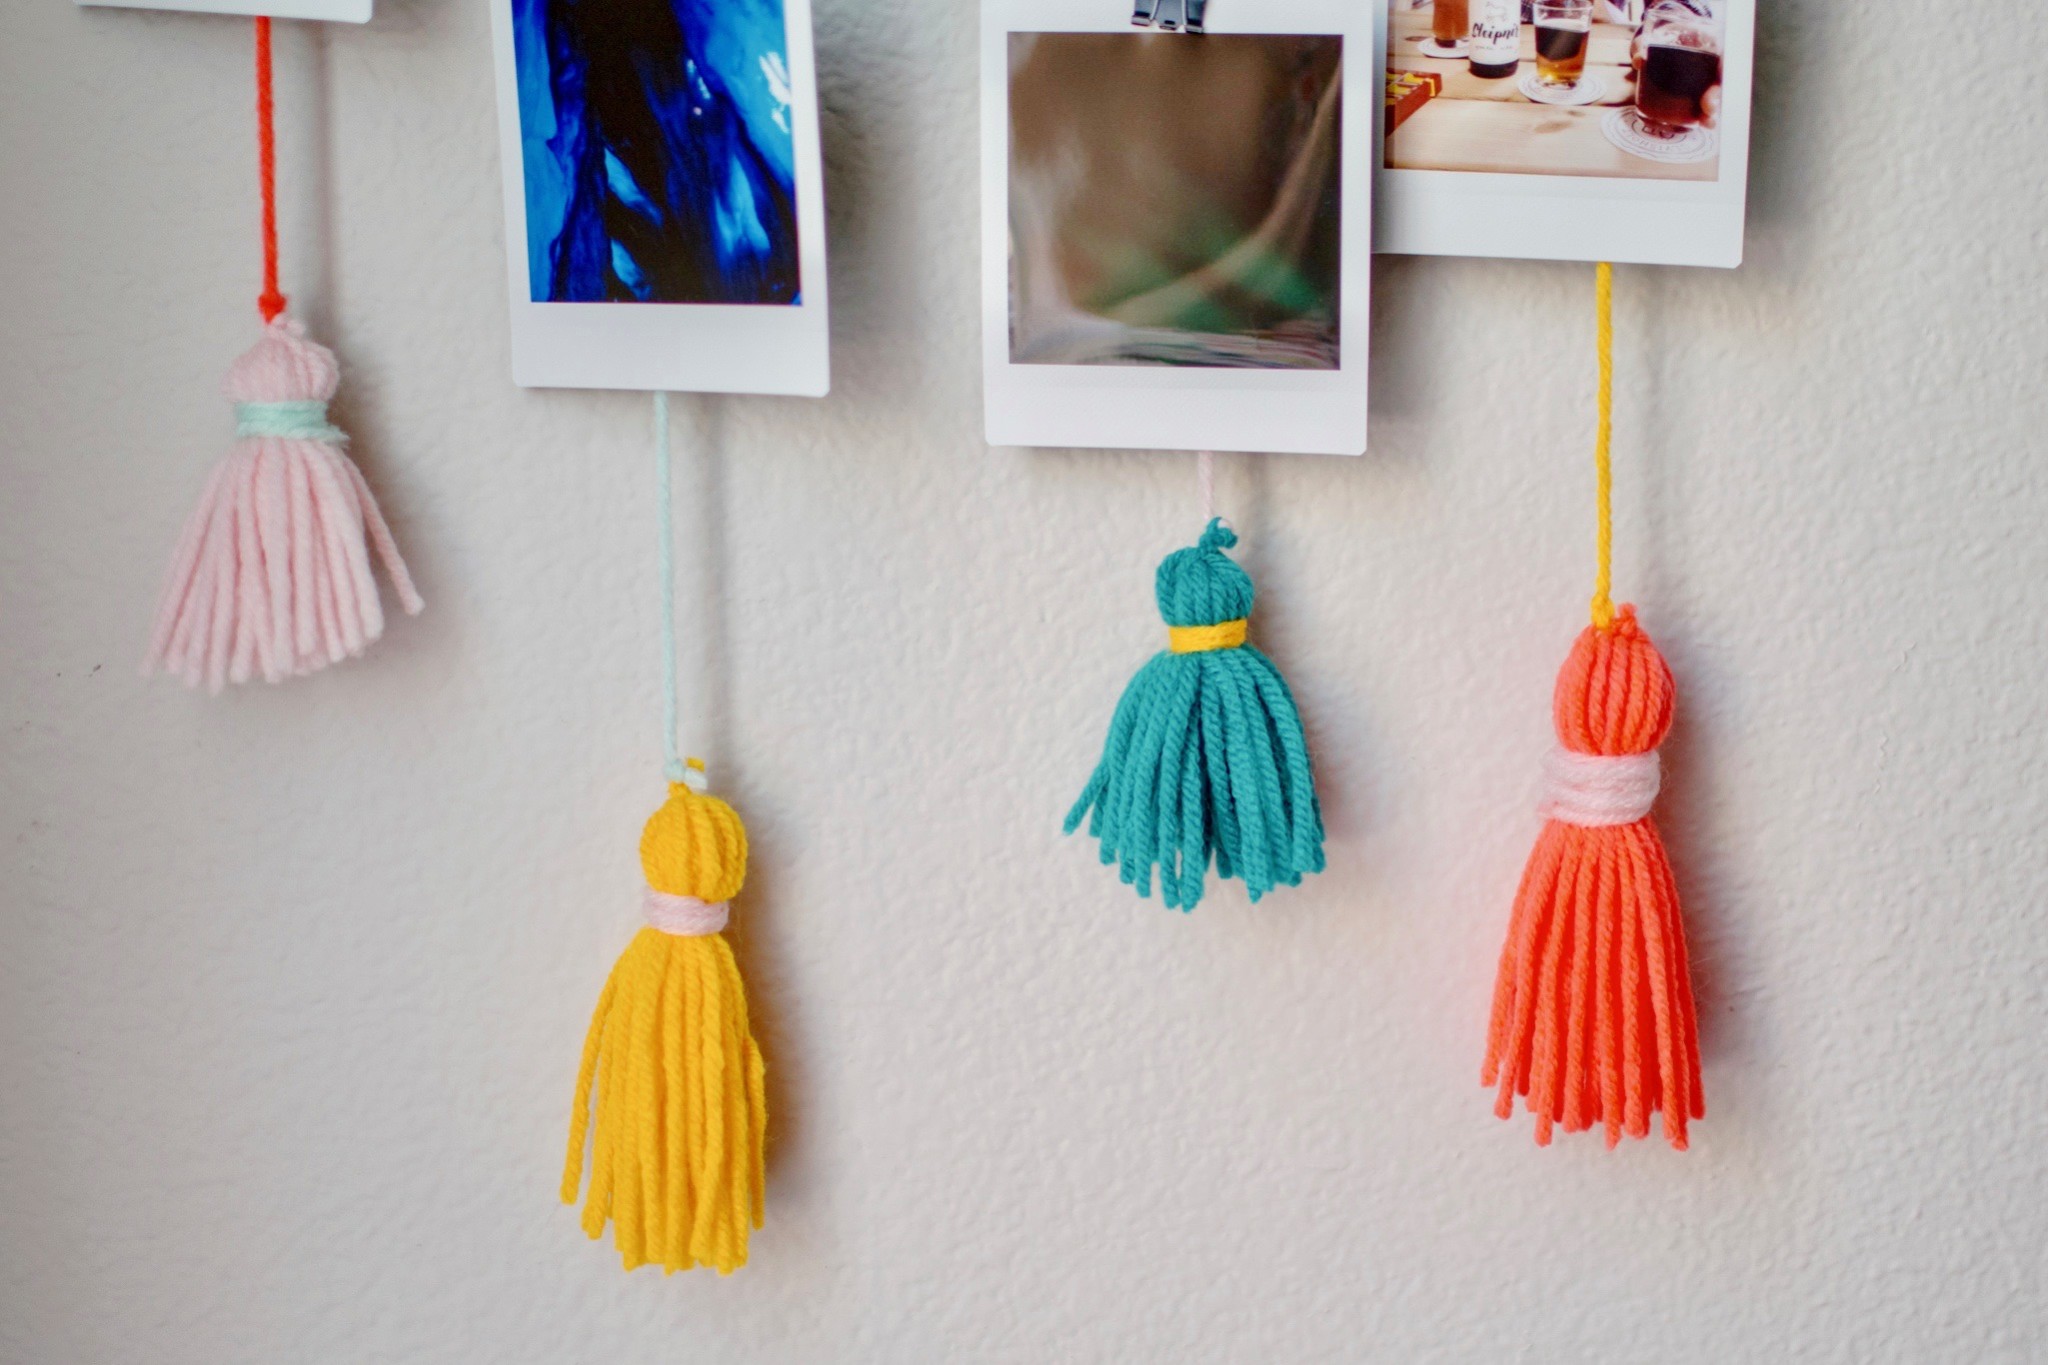
2. Tie your yarn around the base hanger in the locations you want it, I like to double wind & knot it to secure it.

3. Once all of the yarn is in place you can start tying on the binder clips and adding your photos, a simple double knot here works perfect! Where you tie them will be up to you & how you want the final display to look. I started near the top and tied them at different heights so that the photos would hang staggered. When I added my second & third row of clips I used an Instax photo as my guide to make sure I wasn’t putting the clips too close together. Continue until you have the amount you want, you can make it as long or short as you want to!
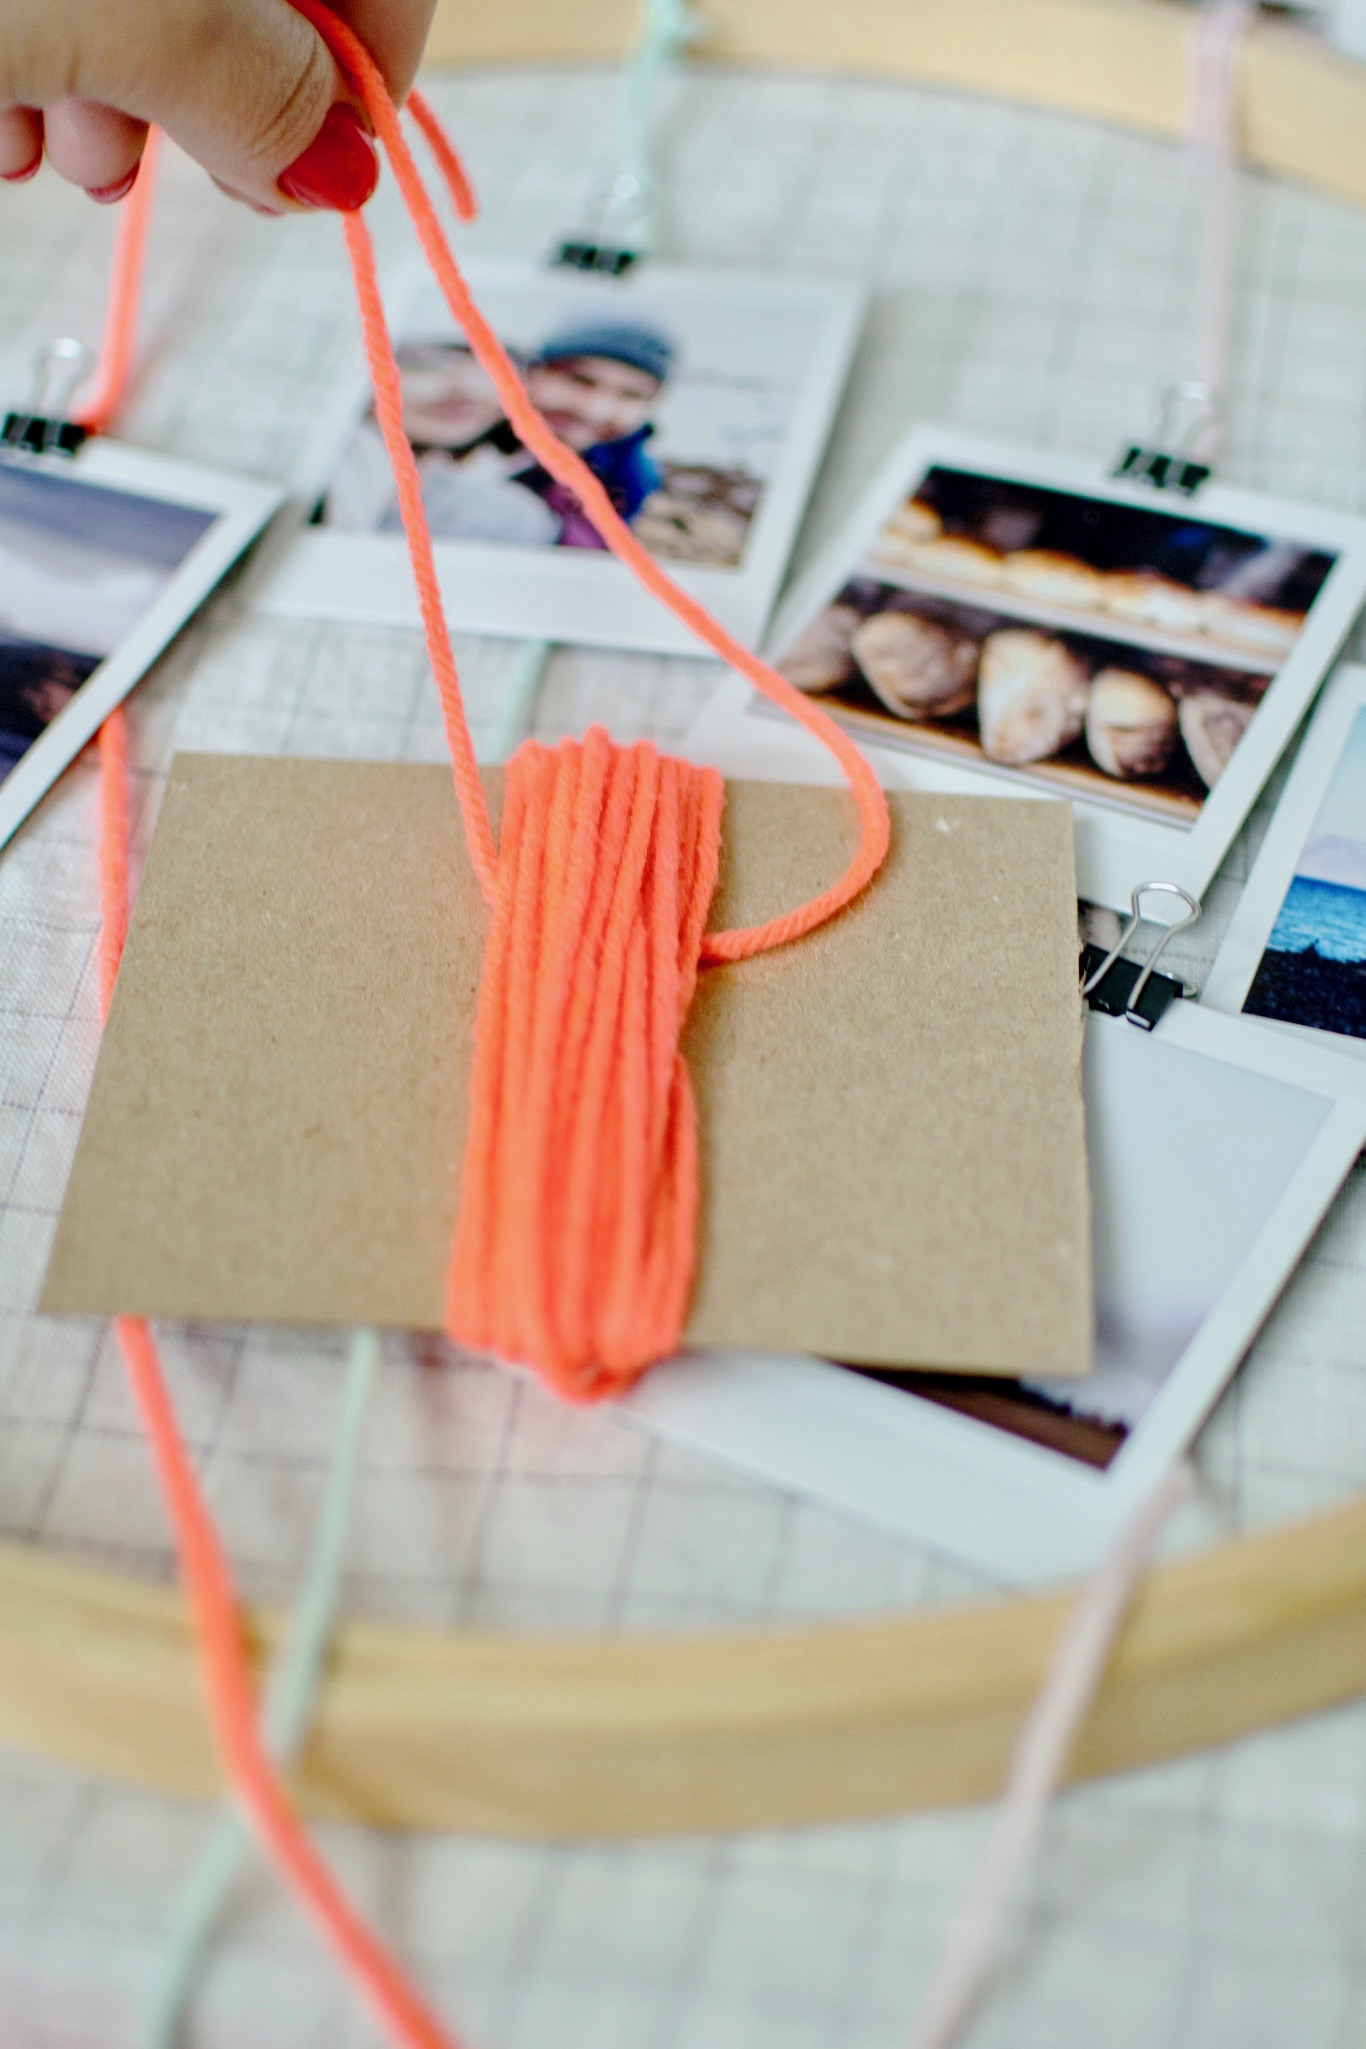
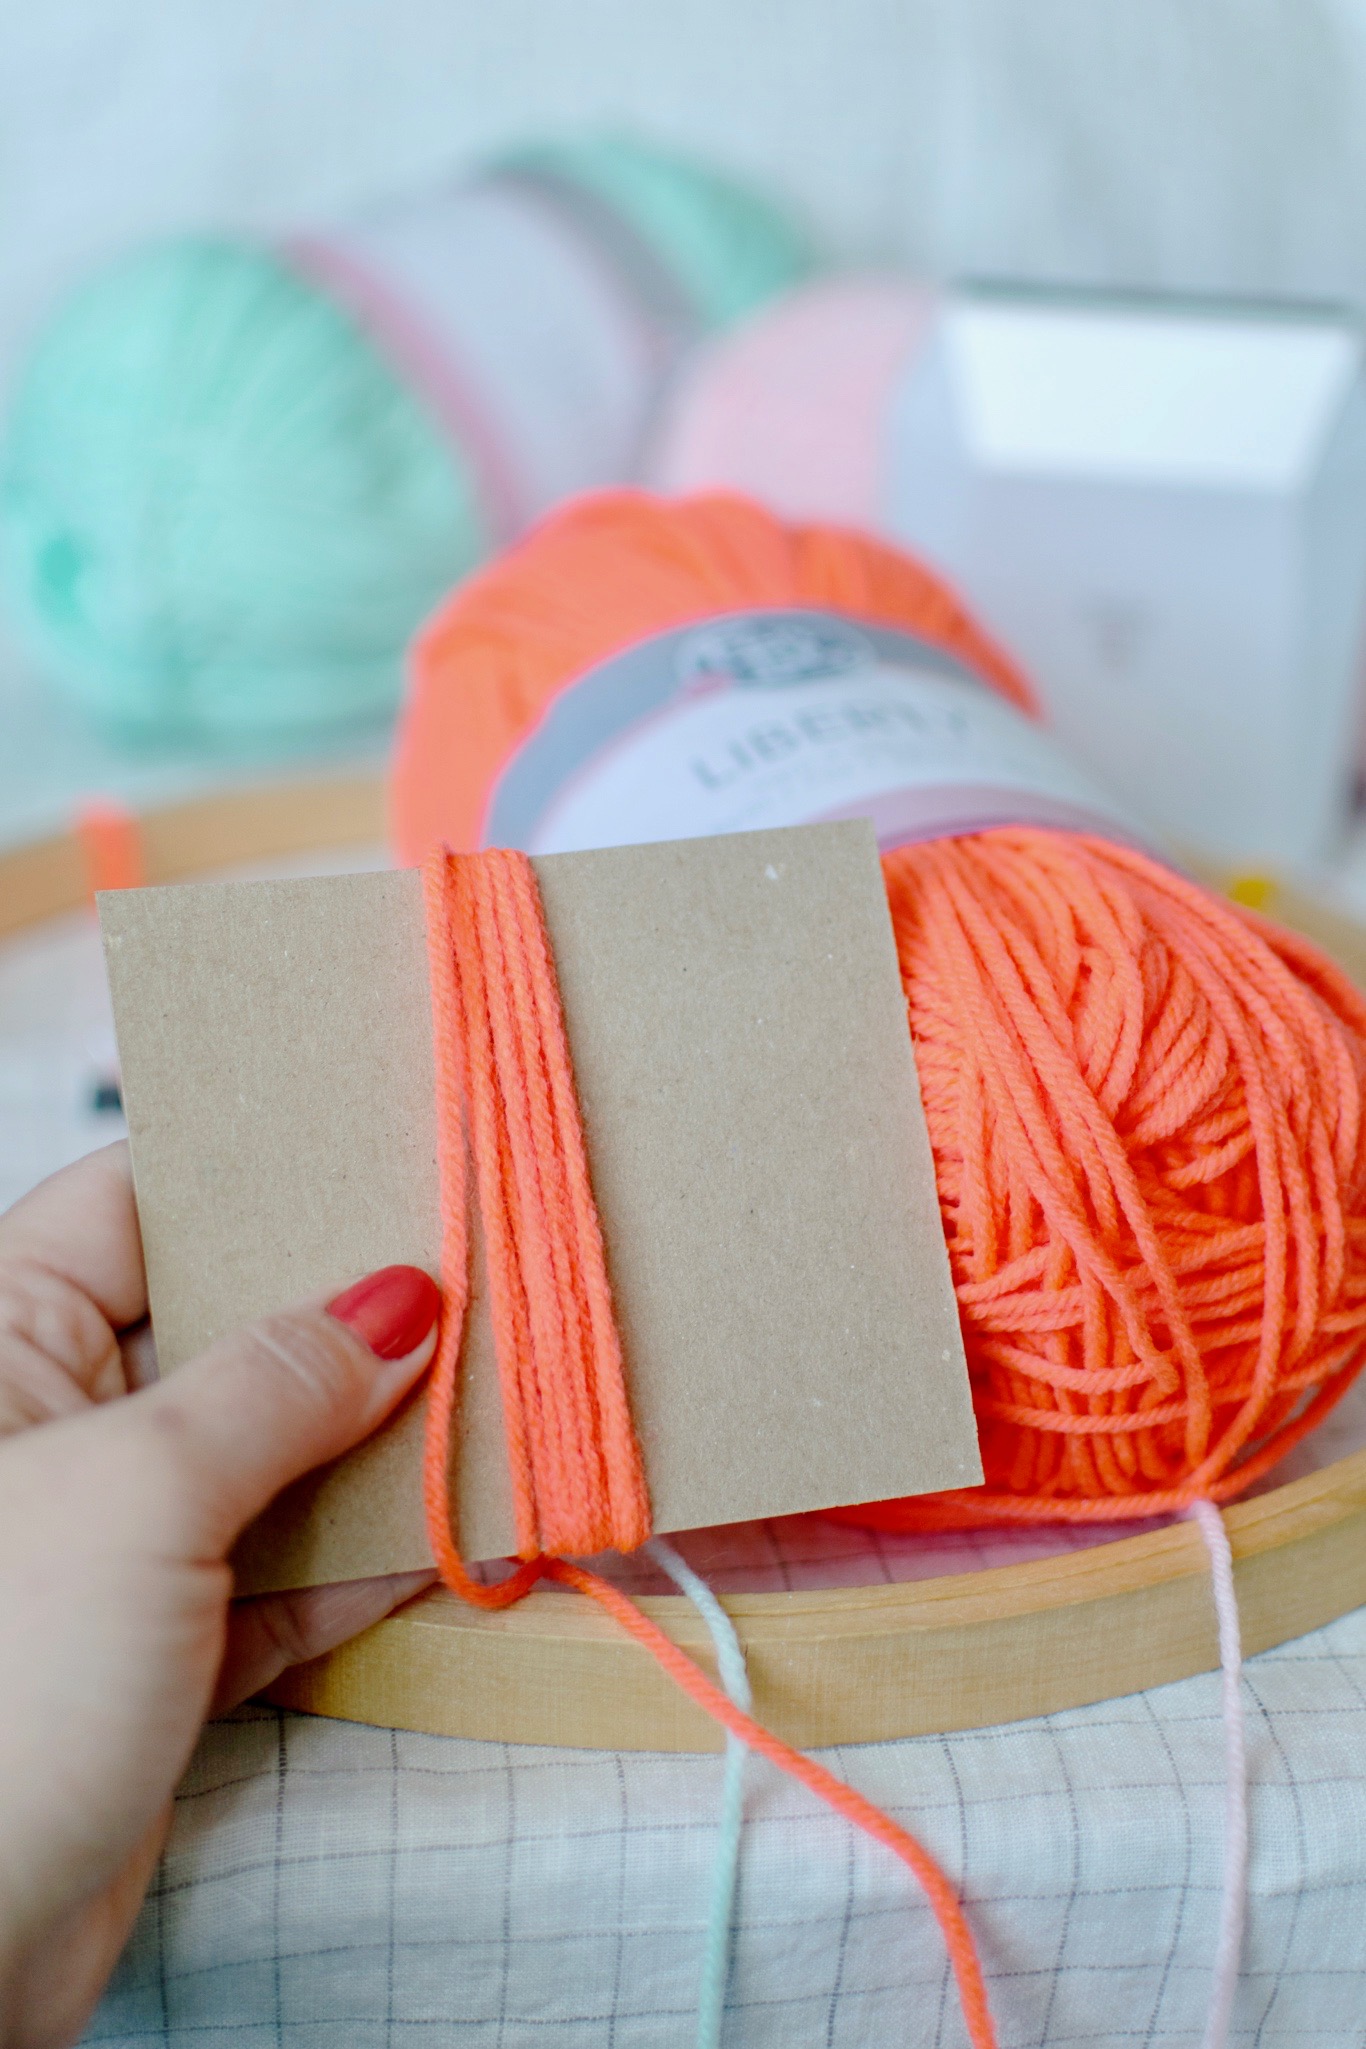
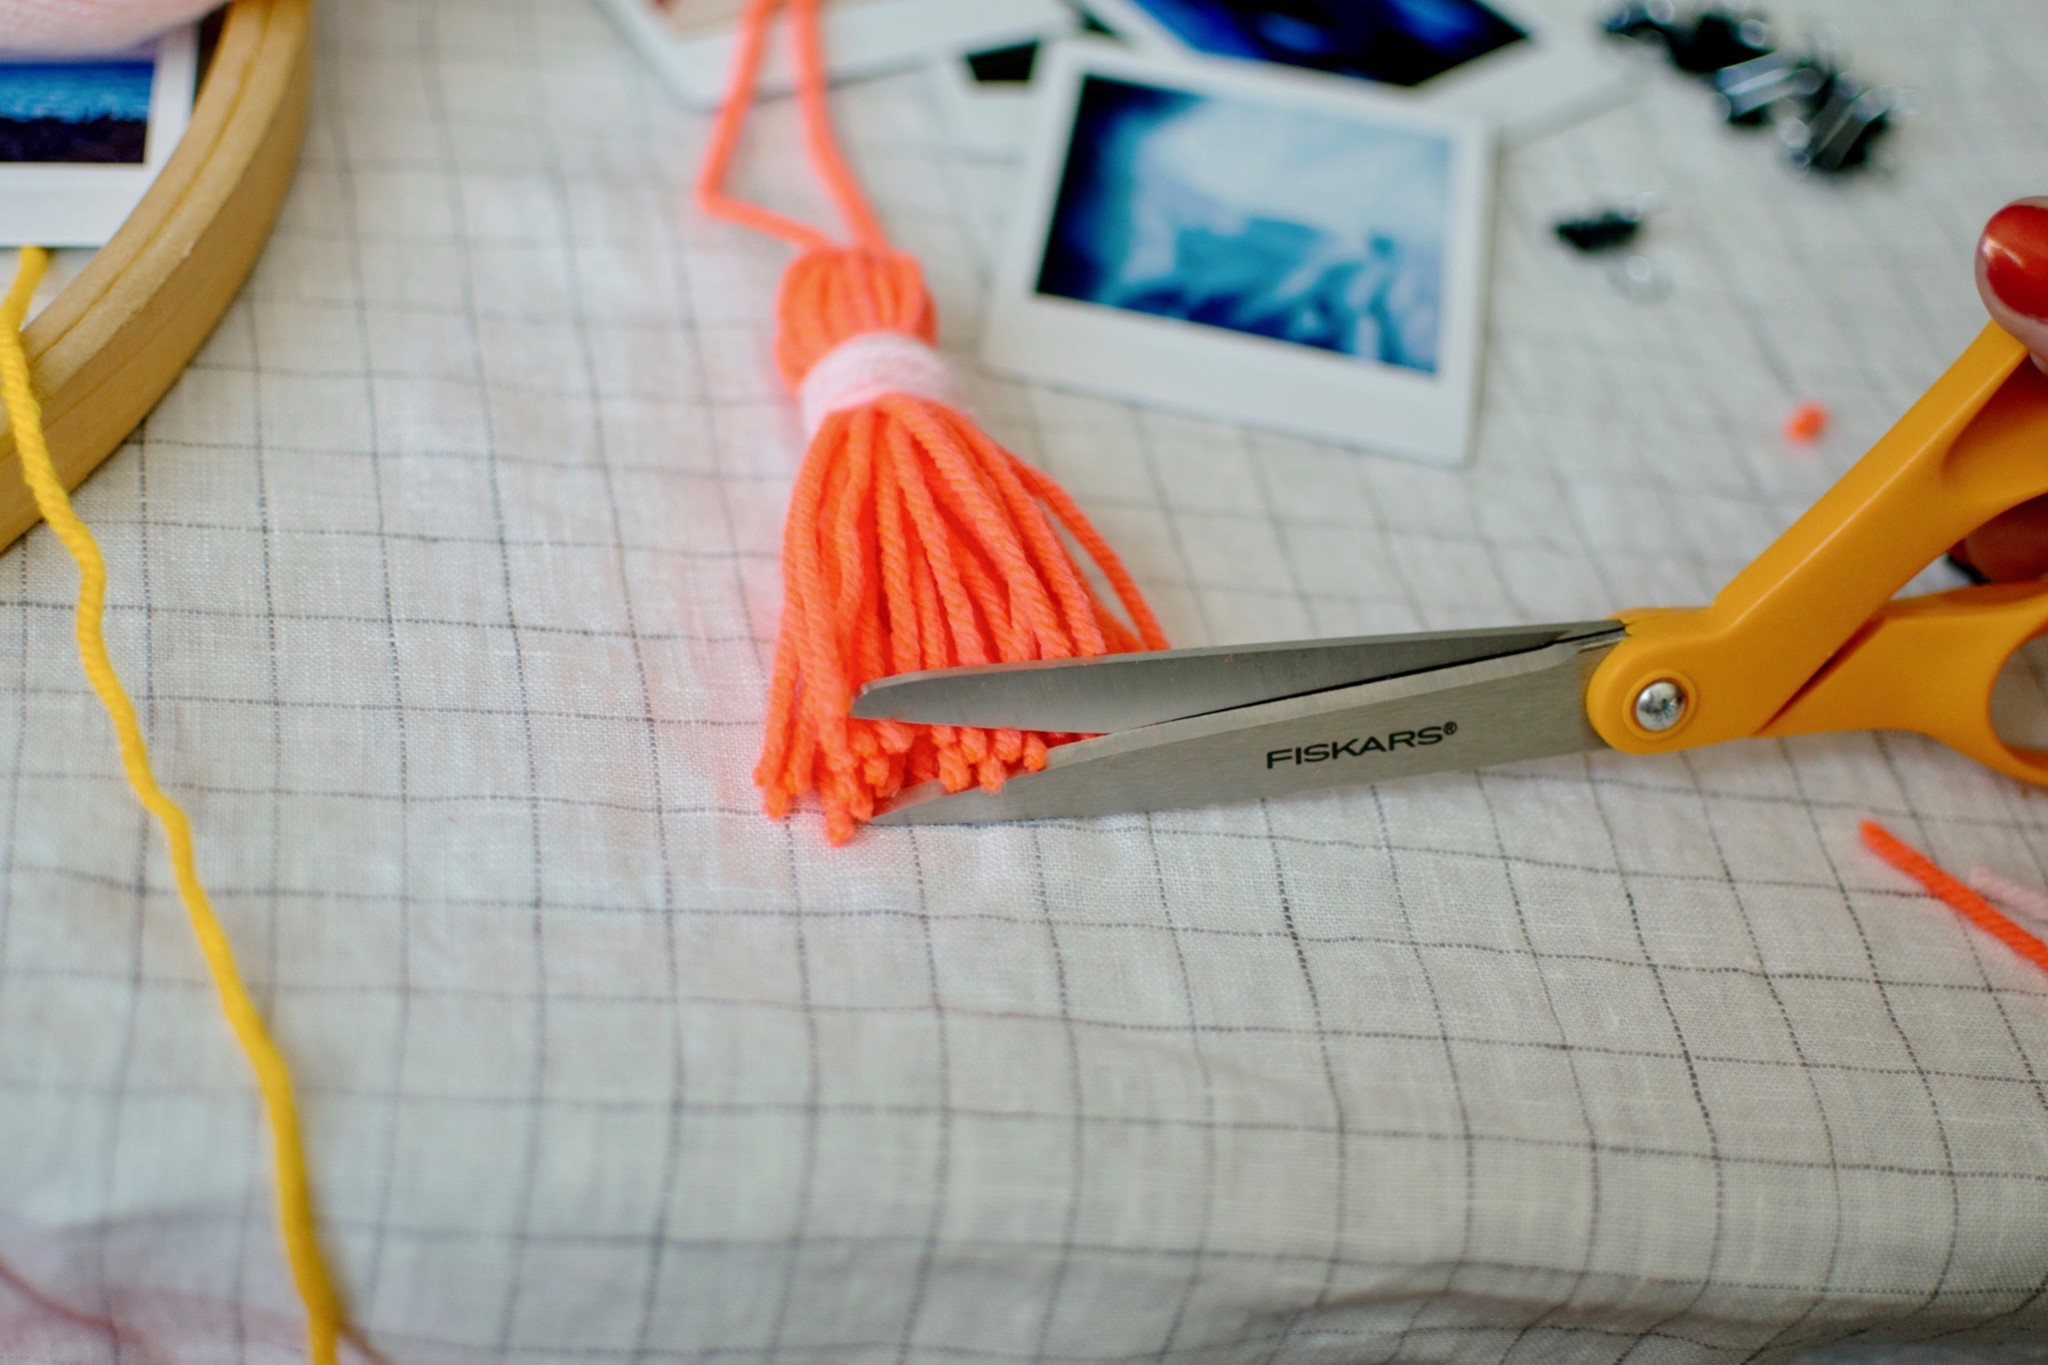
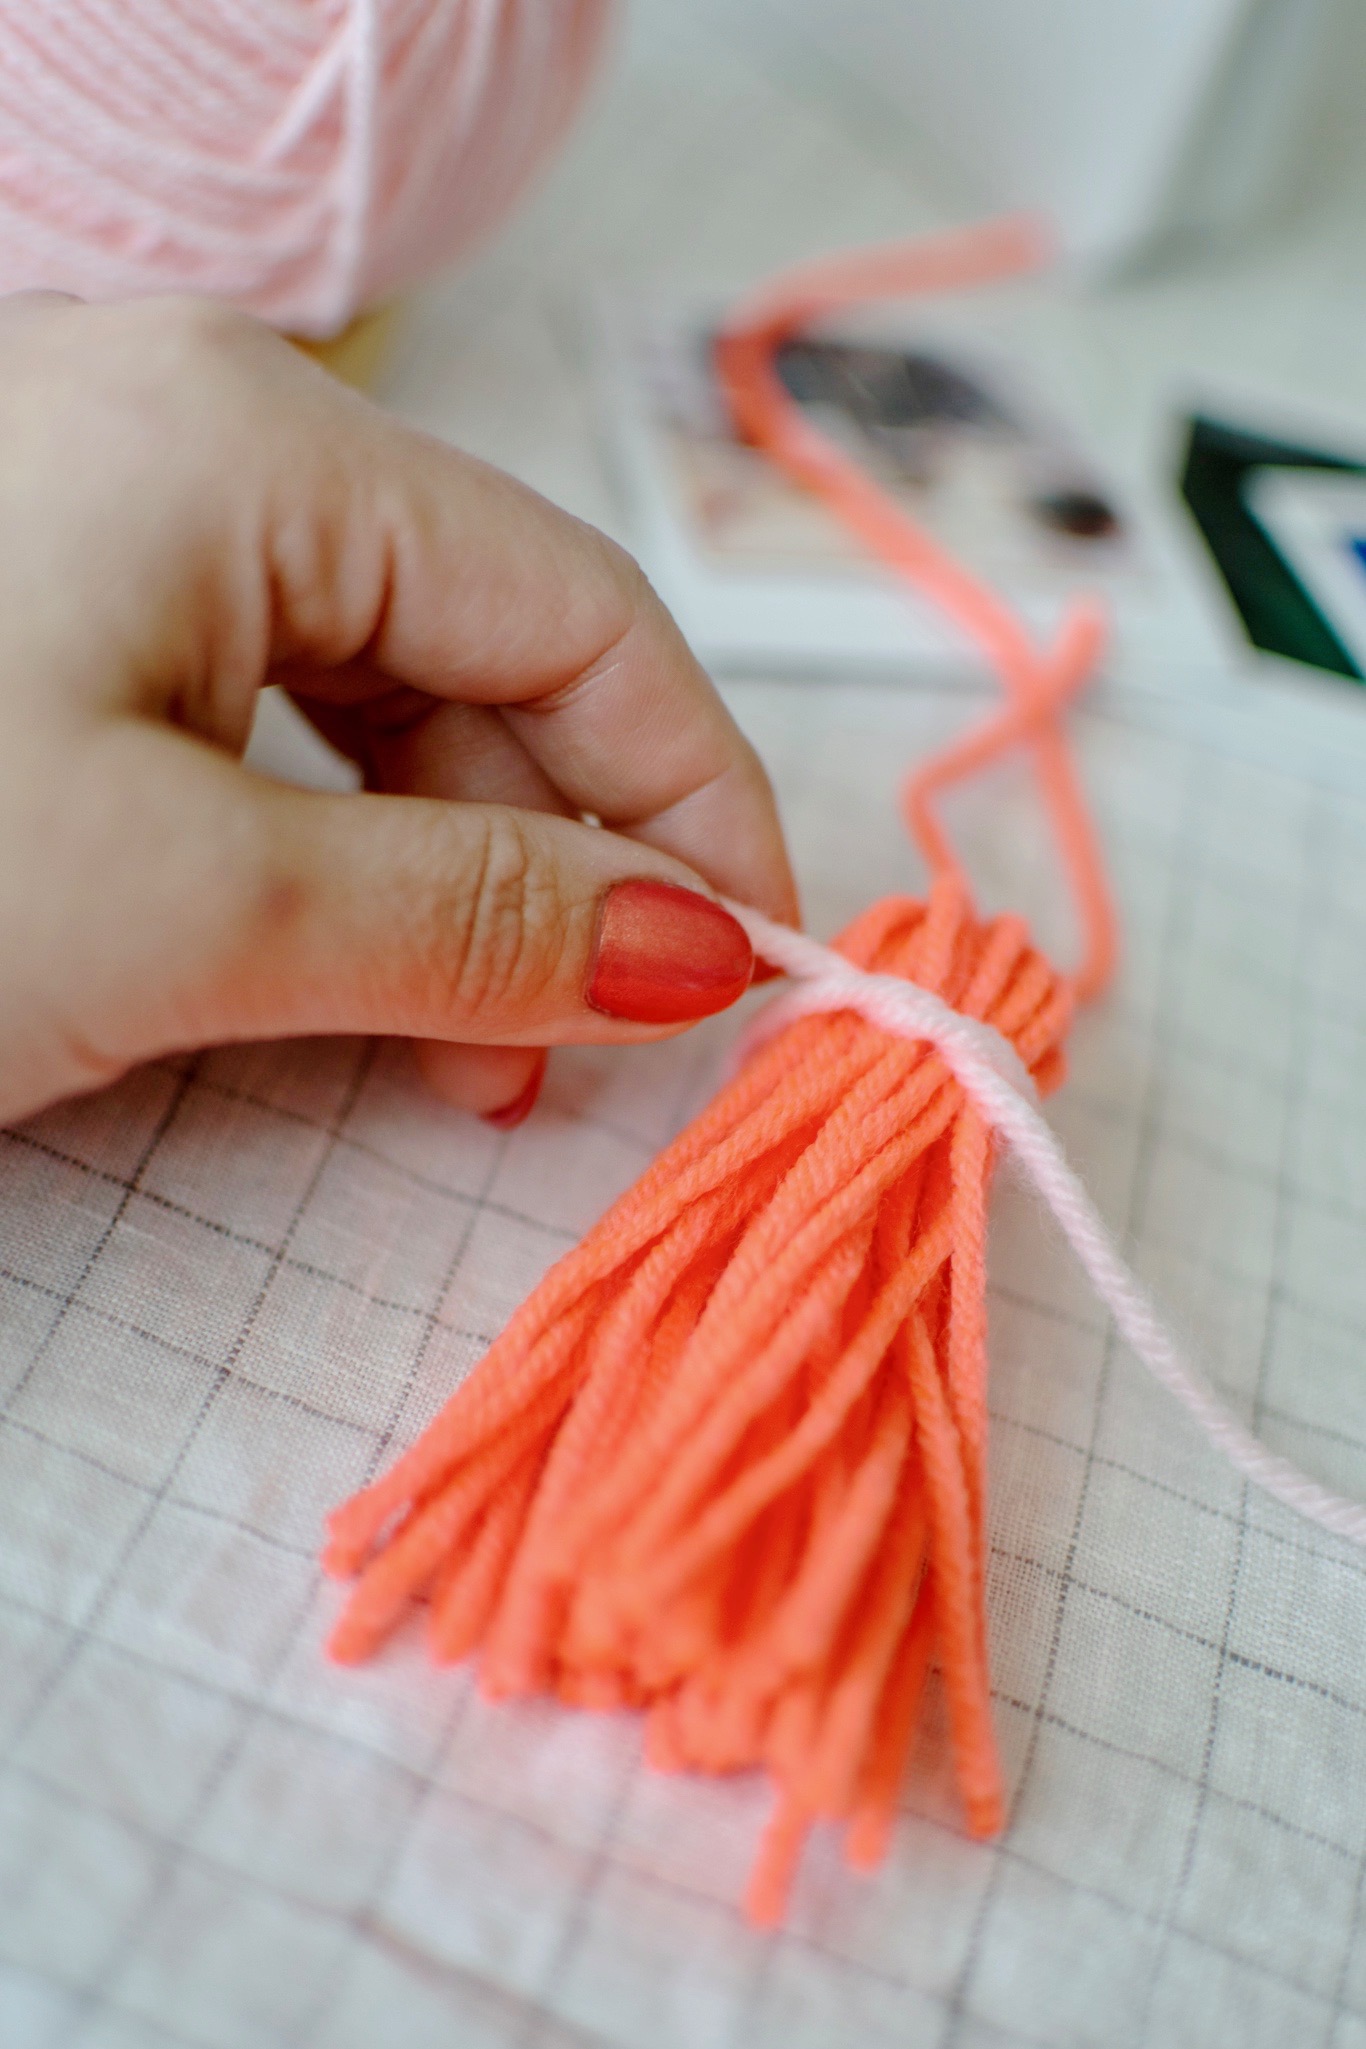
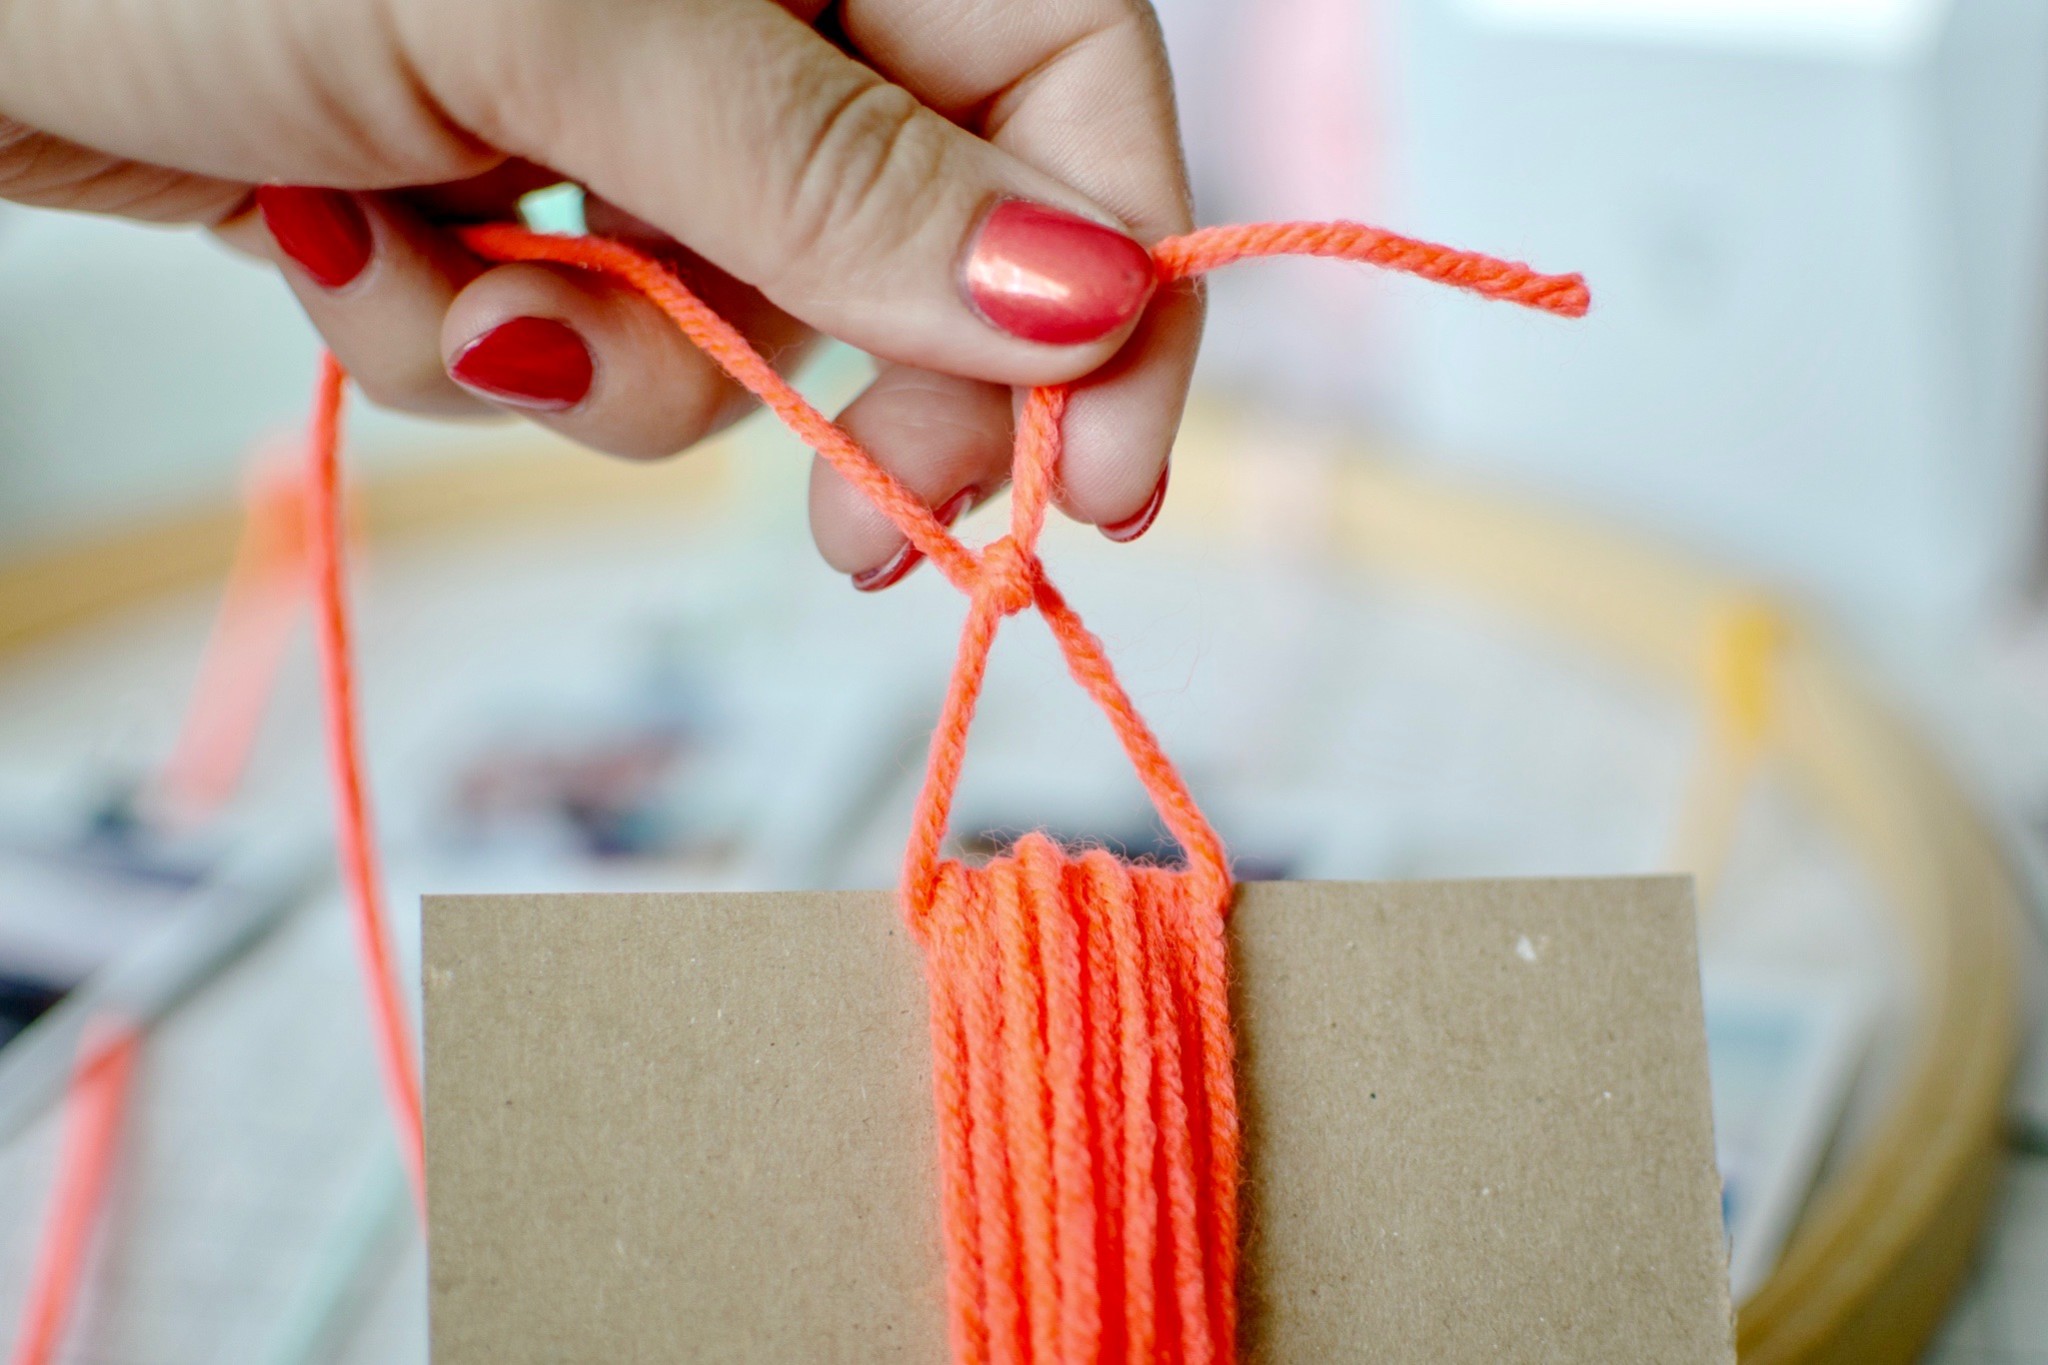
4. Make your tassels! These are super fun & pretty easy with the size and shape being completely up to you. If you have a tassel making tool like a Loome, that makes tassel or pompom making super easy, follow the directions for it or go DIY style and use some chipboard. I cut a piece of chipboard into an approximately 4×4 square, If you want your tassels longer cut the board wider & if you want them shorter you can alway trim them up more. Start by wrapping the yarn around the board until you reach your desired thickness, mine was about 20 turns. Cut a length of yarn, I like to use the same color for this part, about 10 or so inches, push under the yarn bundle and tie a knot at the top. Carefully slide yarn off the board and cut through the loops at the bottom. You can use the same color here but I like to do a contrasting colored yarn, about 15 inches long, tie about 1/2 an inch down from the top of your tassel, I like to make one knot and then wrap the yarn several times and double knot to secure & trim. Then just trim up the bottom to desired shape & length & you’ve got yourself a tassel! If you have a Loome you can use it the same way, I used both in this project for different sized tassels.
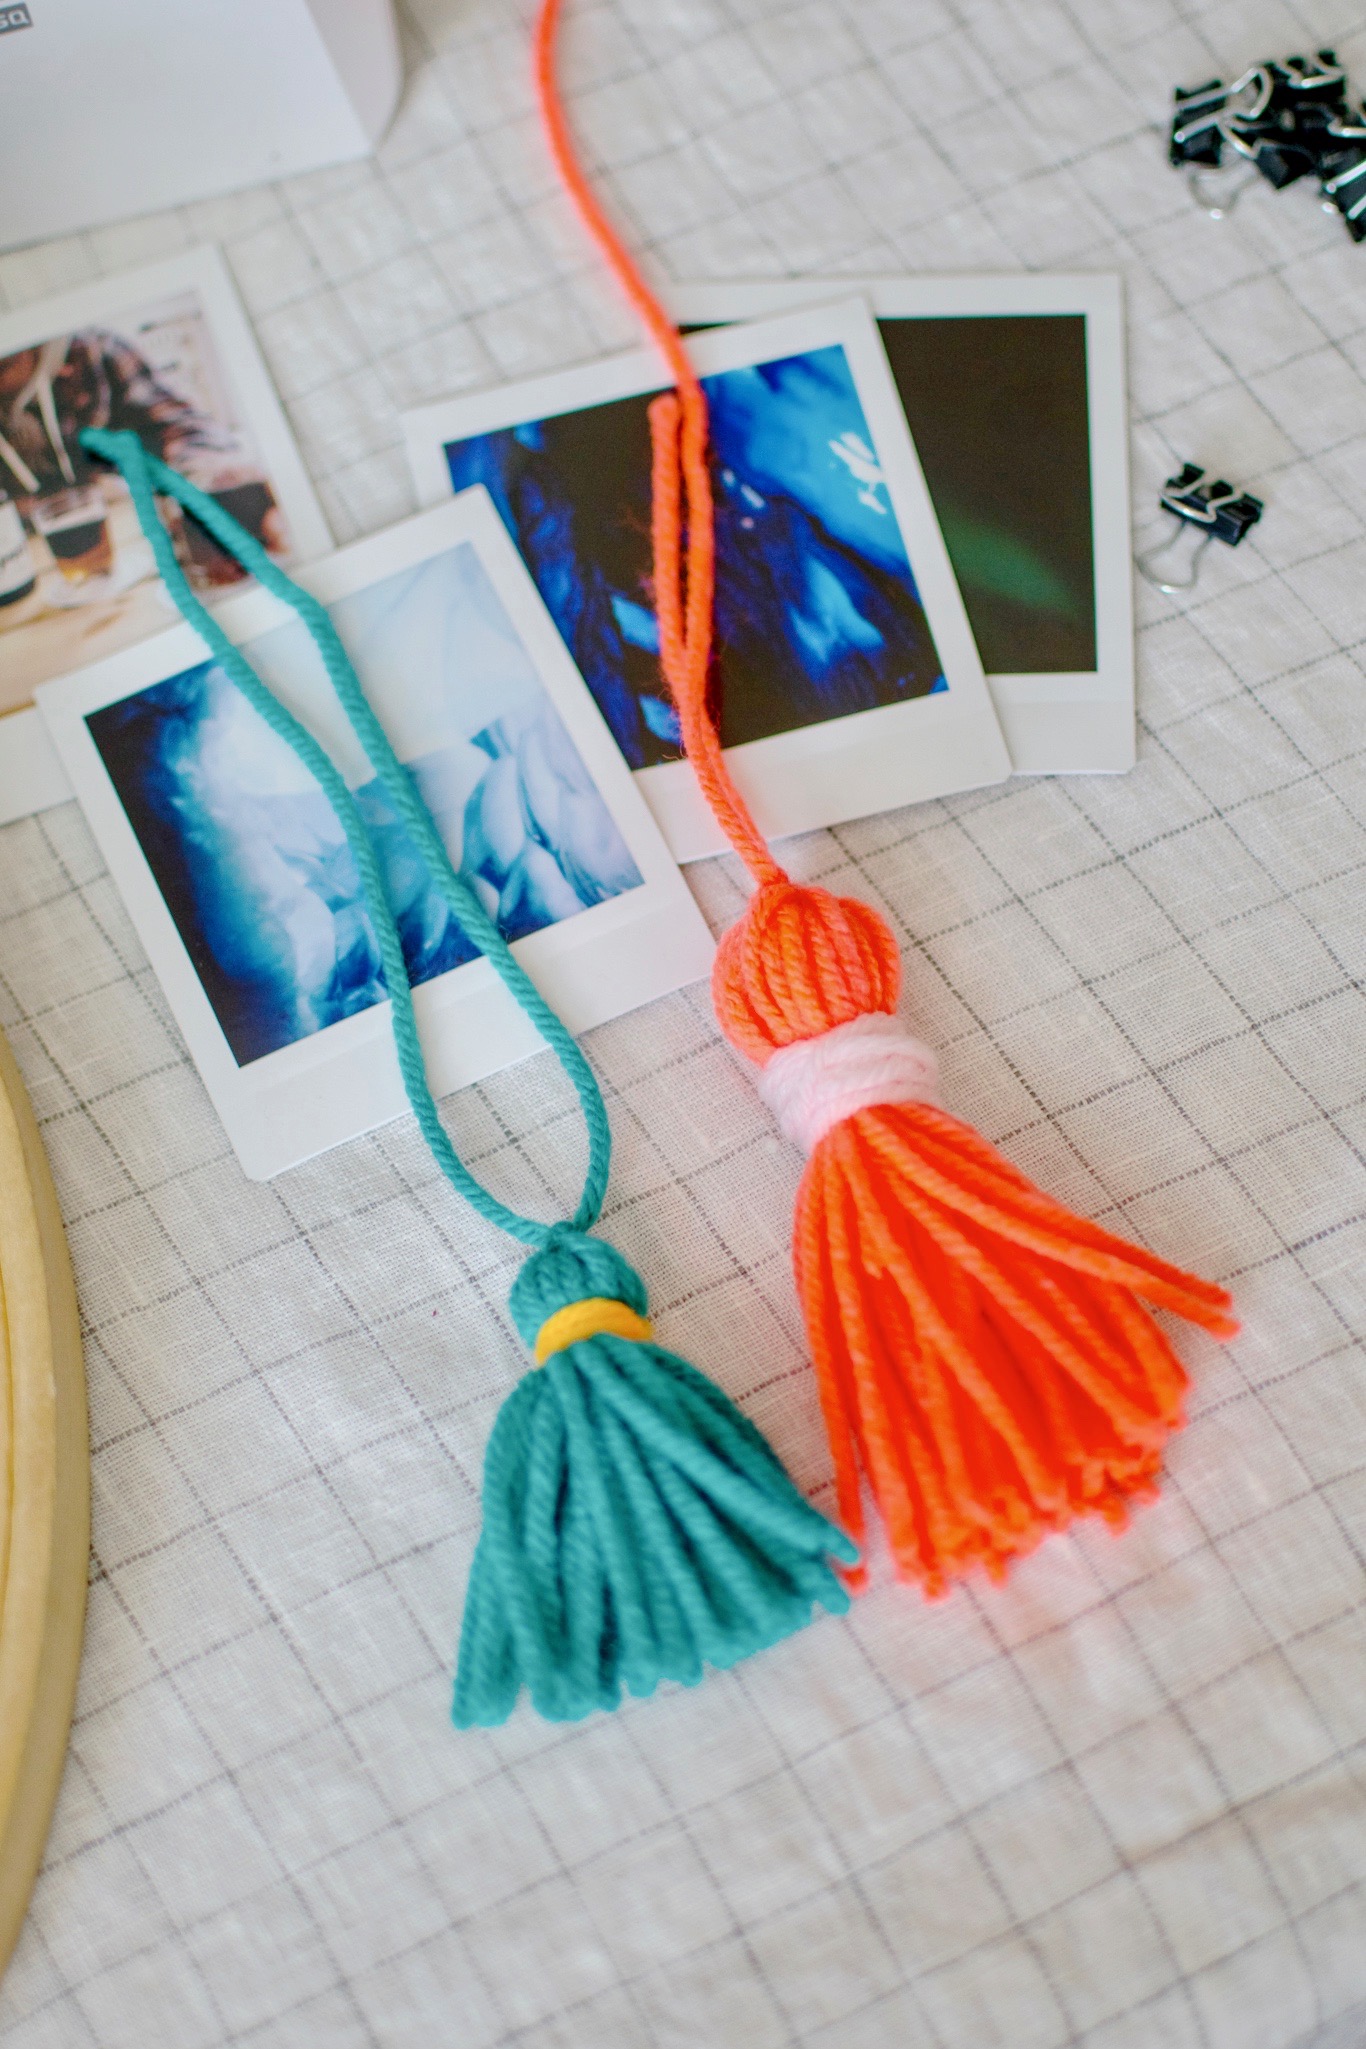
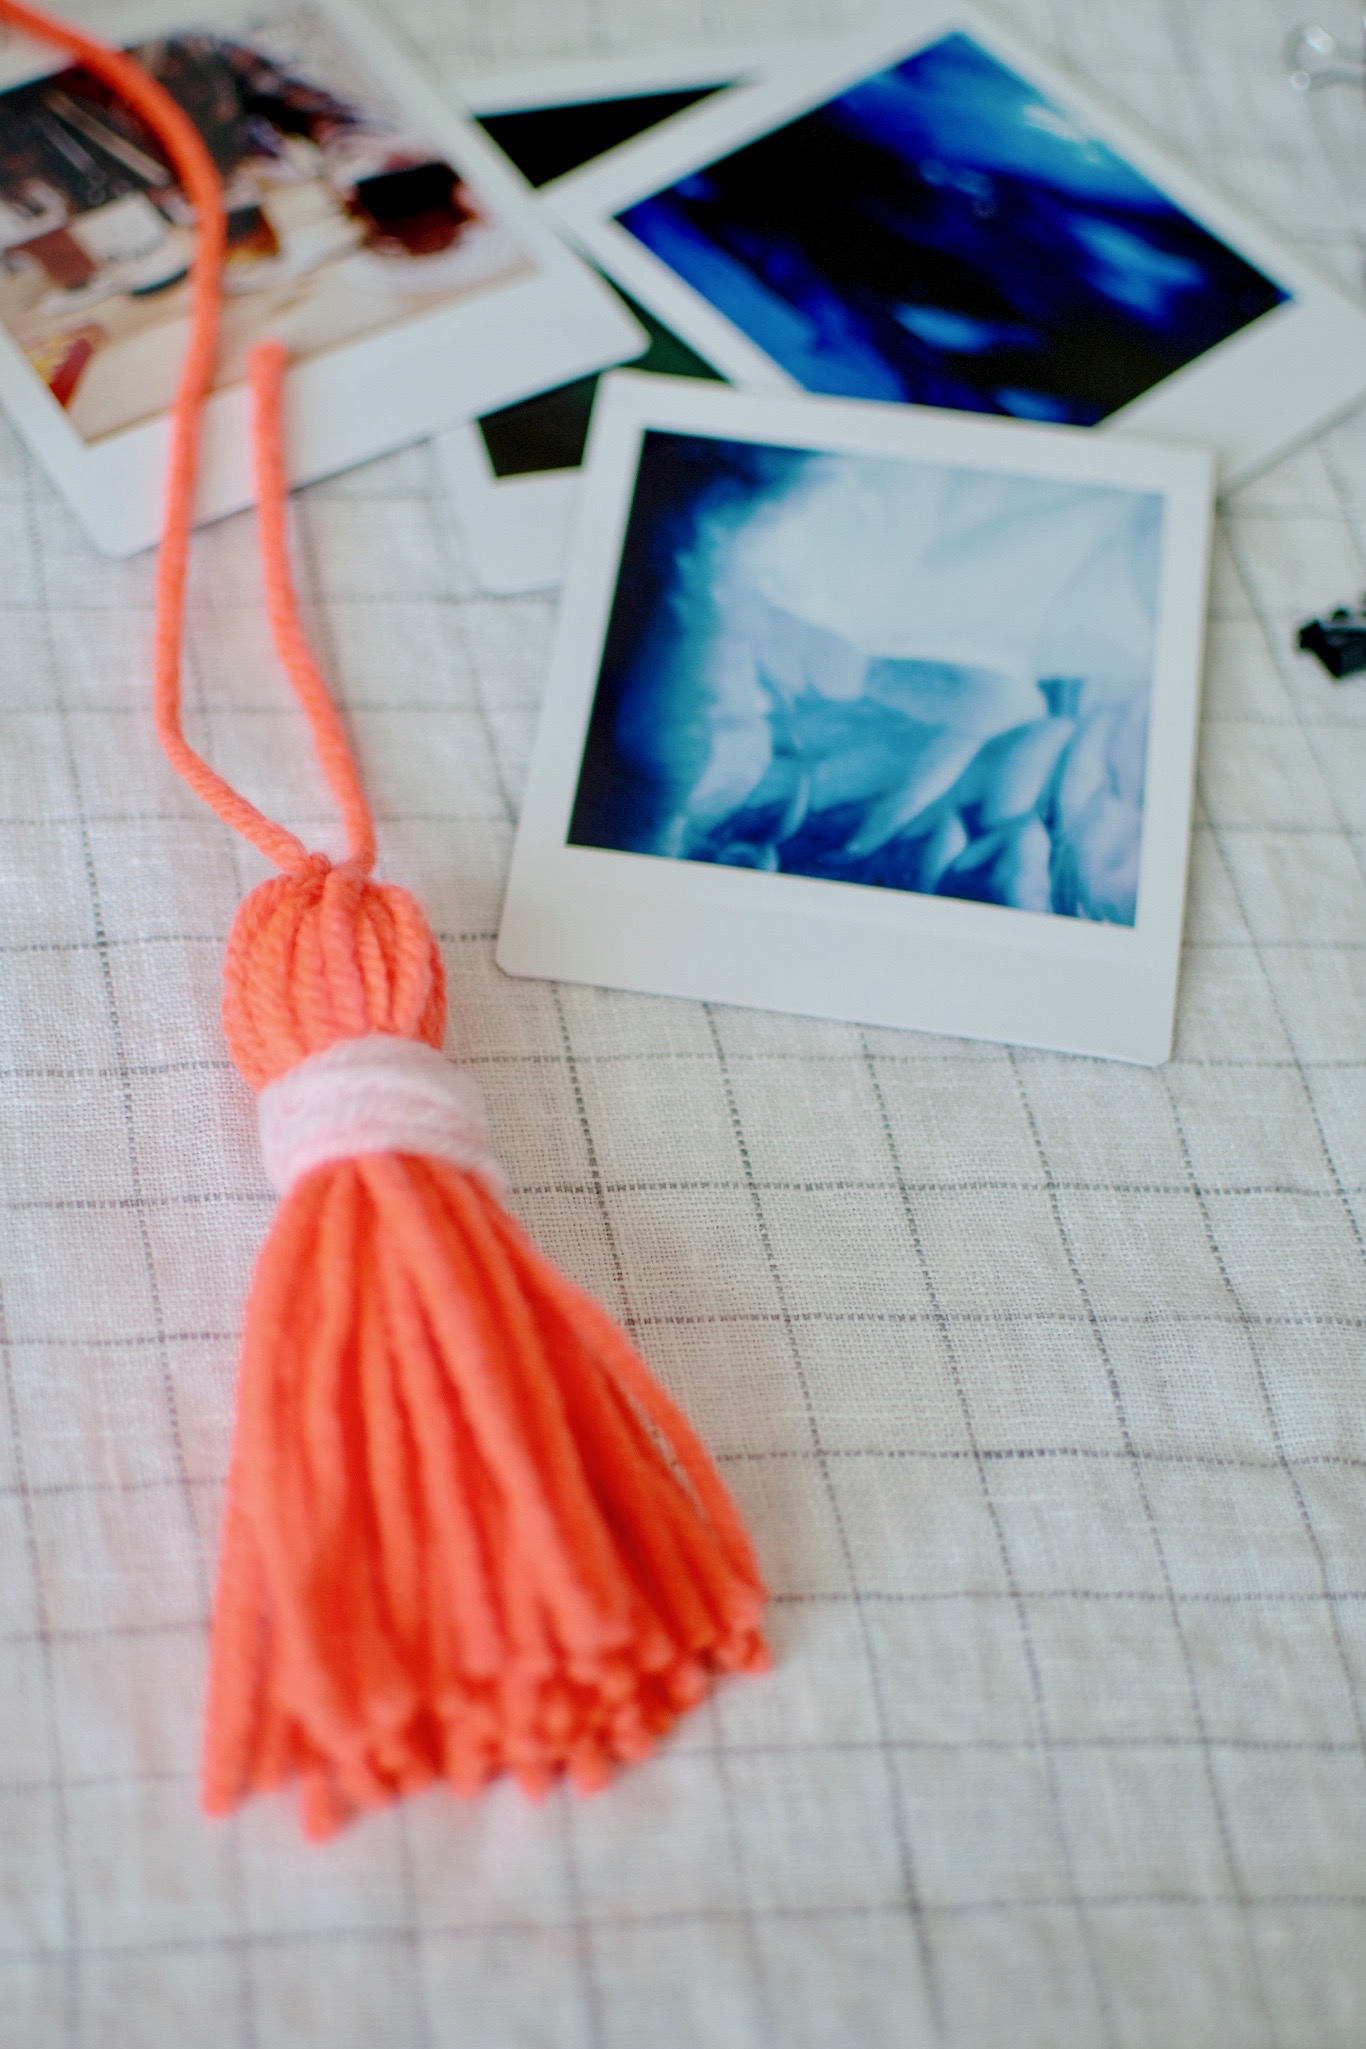
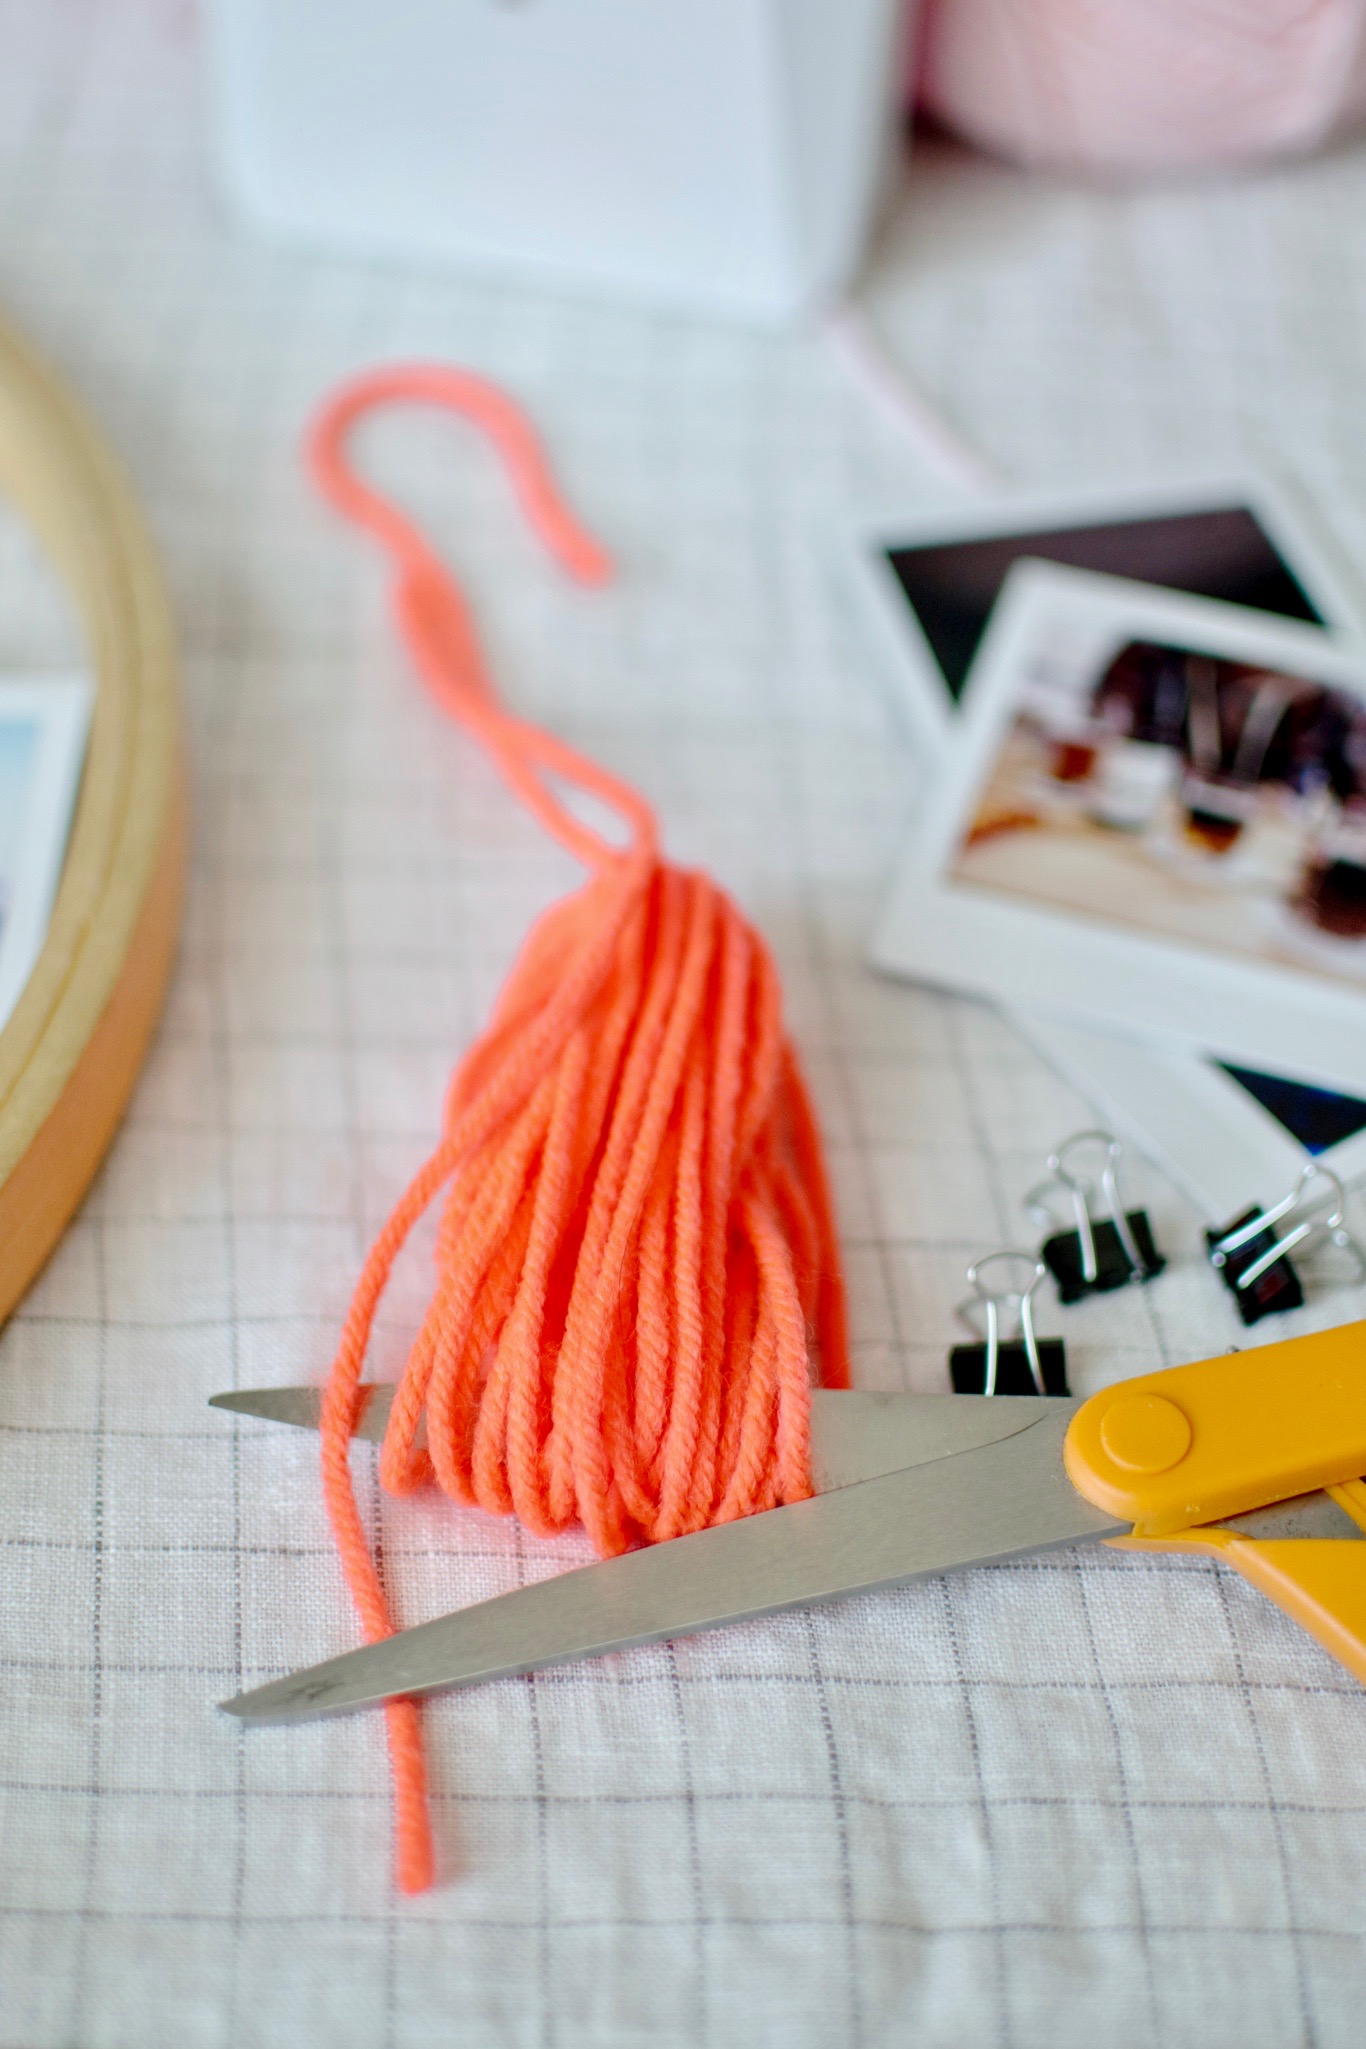
5. Tie your tassels onto the bottom of each piece of yarn attached to the hanger at your desired length, trim off excess, add more if you want! Hang your new piece of wall art proudly in your home & change out the photos as often as you’d like!
ABOUT NIK VANDEVENTER:
Nik is a maker, day dreamer & potty mouth who loves cats, coffee and craft beer. She is a self taught hand embroider and will DIY pretty much anything she can get her hands on. She is head Boss Bitch behind Wasting Thyme creating & selling naughty hand embroidery and sassy greeting cards. You can find her products at justwastingthyme.etsy.com. She lives in Long Beach with her husband and her three awesome cats (that she can’t shut up about).