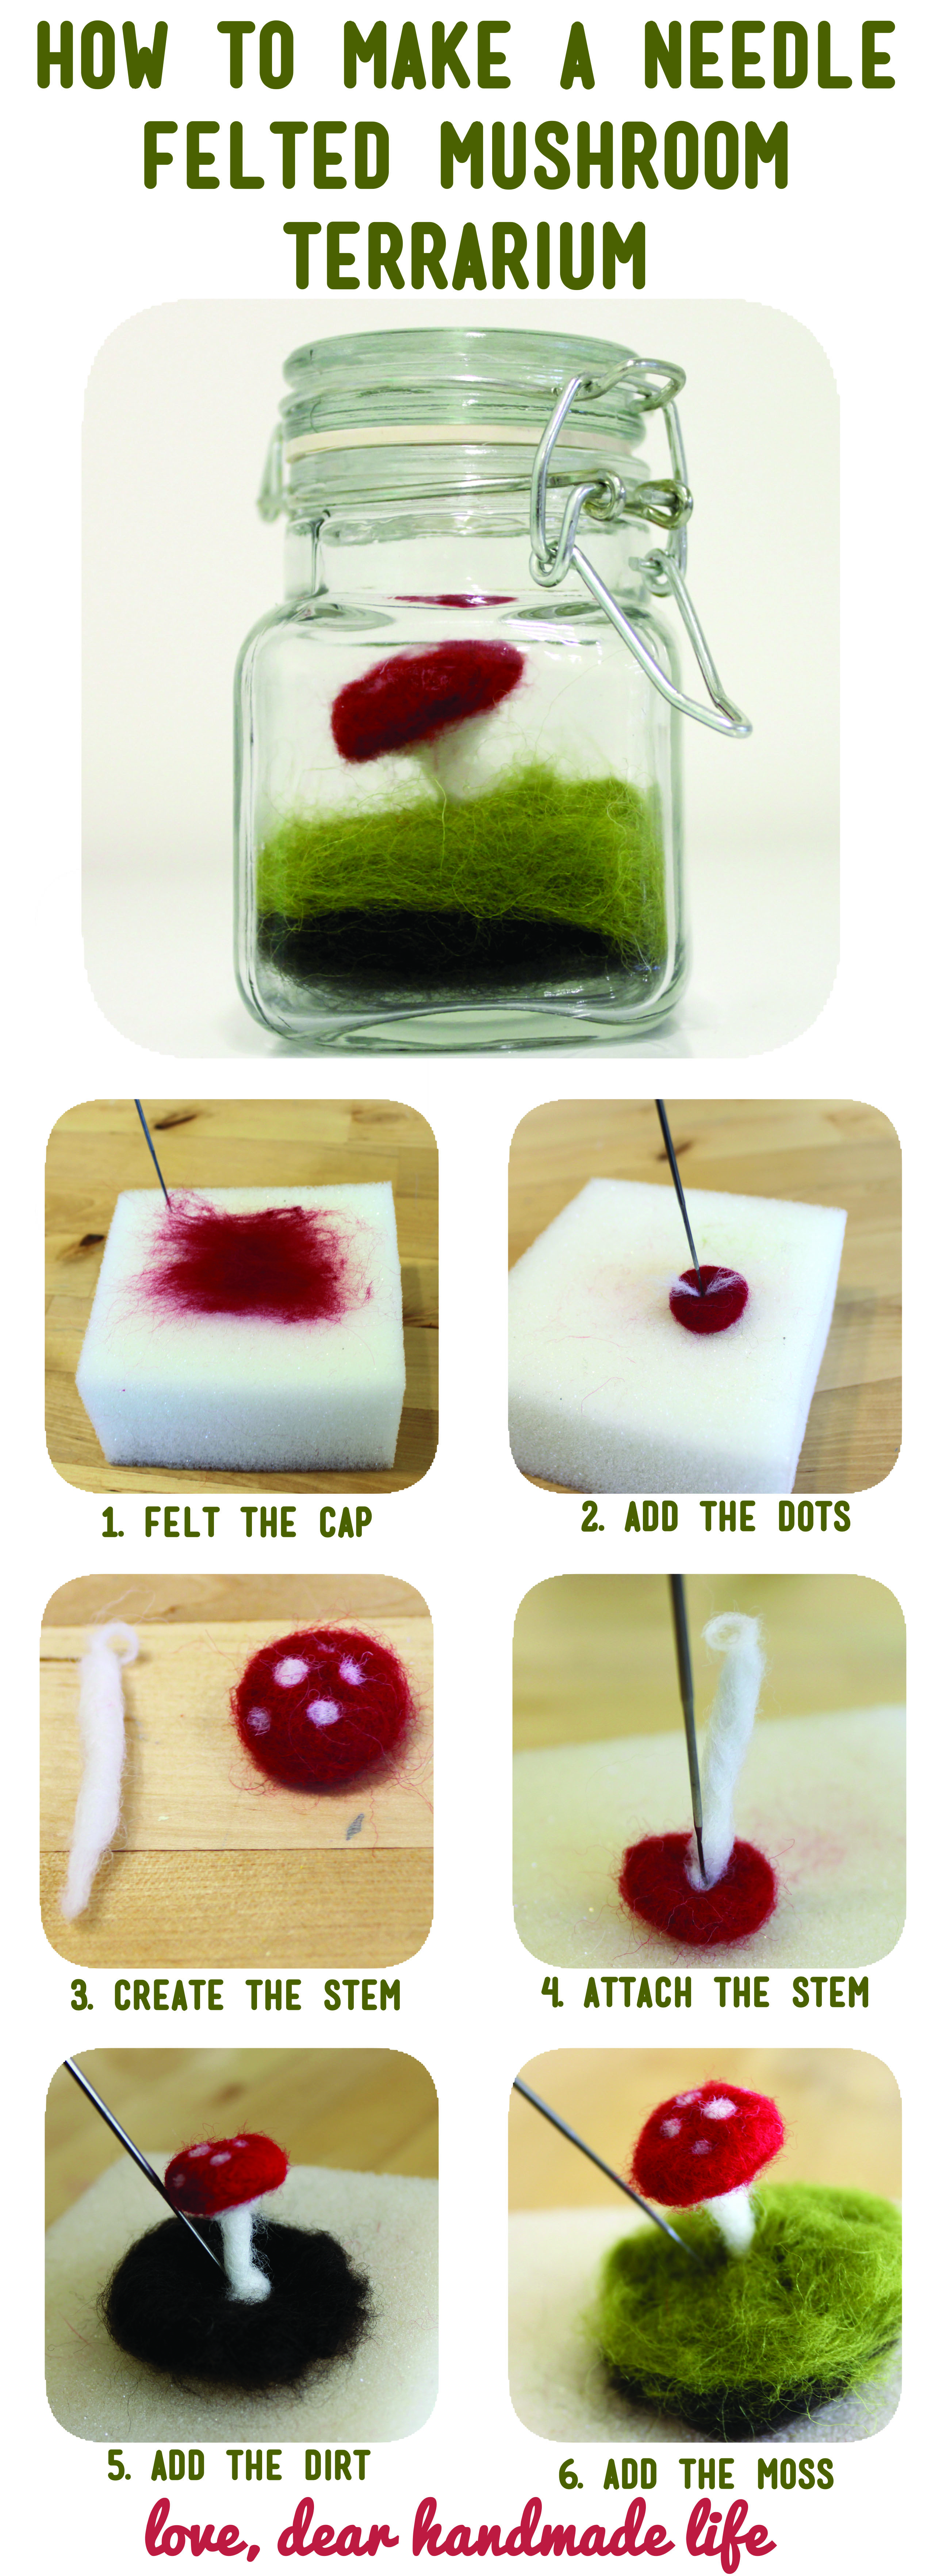
how to make a needle felted mushroom terrarium
The holidays are definitely in full swing at The Makery. Between teaching a series of handmade gift workshops, making and installing studio decor and creating and assembling a new line of studio craft kits, I have been putting in some seriously long hours at work. But as much as I have on my plate, I still like to set aside some time to slow down and make some of my holiday gifts.
Given that I don’t have much free time, I love projects, like this needle felted terrarium, that could easily be completed in 30 minutes or less. And I mean, c’mon, it’s adorable! And the best part is that it will still look great years from now, which makes it the perfect gift for busy brown thumbs such as myself 🙂
what to get:
Felting needle
Foam pad
Roving (red, green, brown and white)
Small glass vessel
Wood dowel
Detail scissors
what to do:
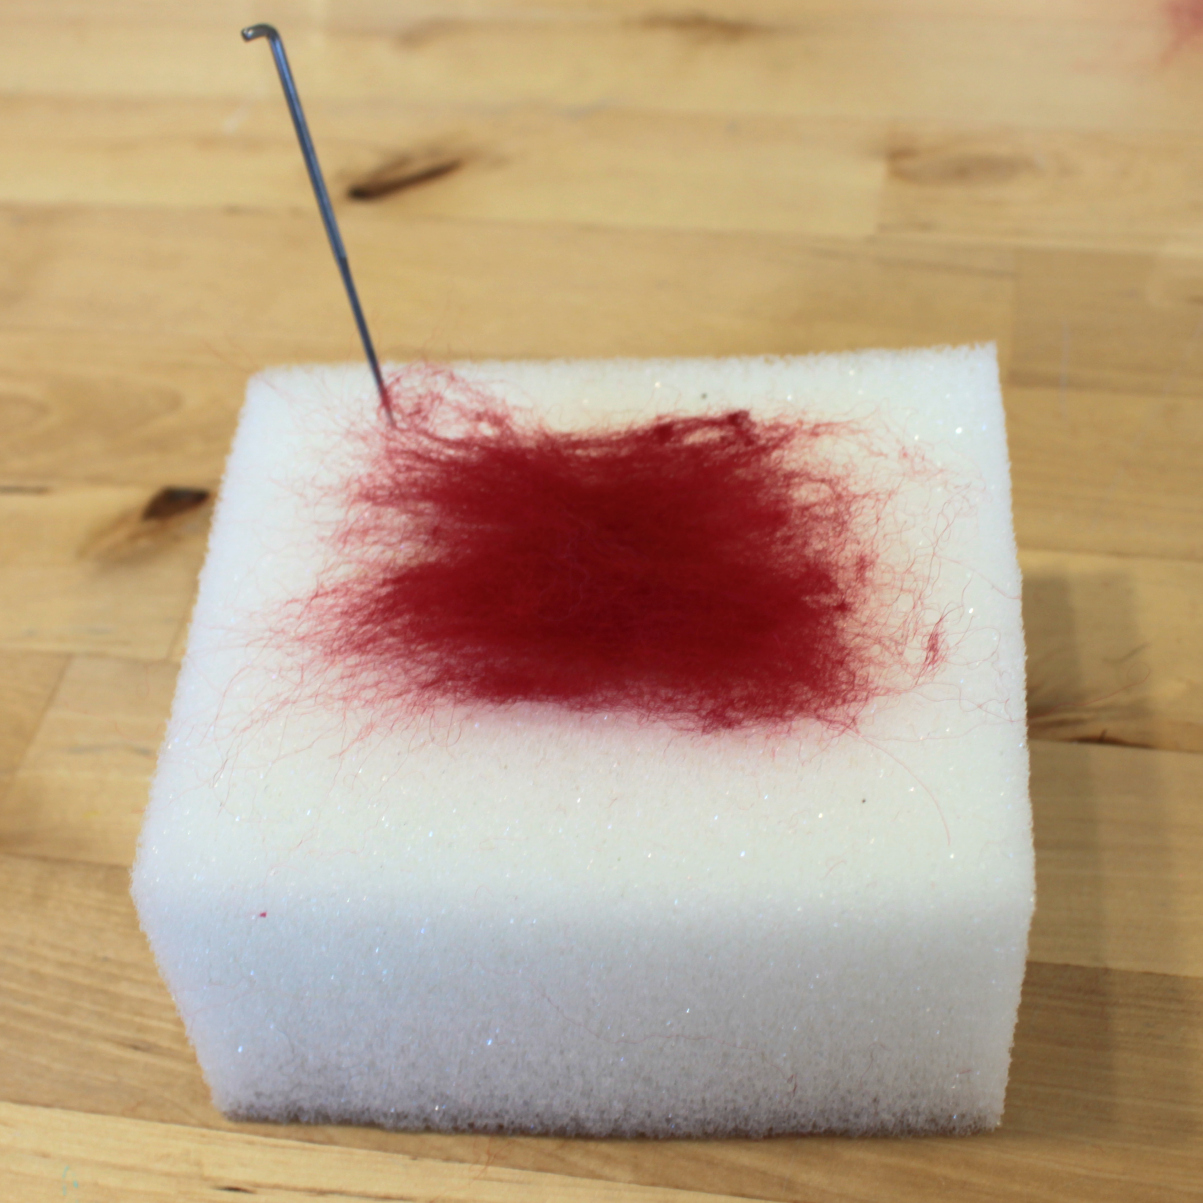

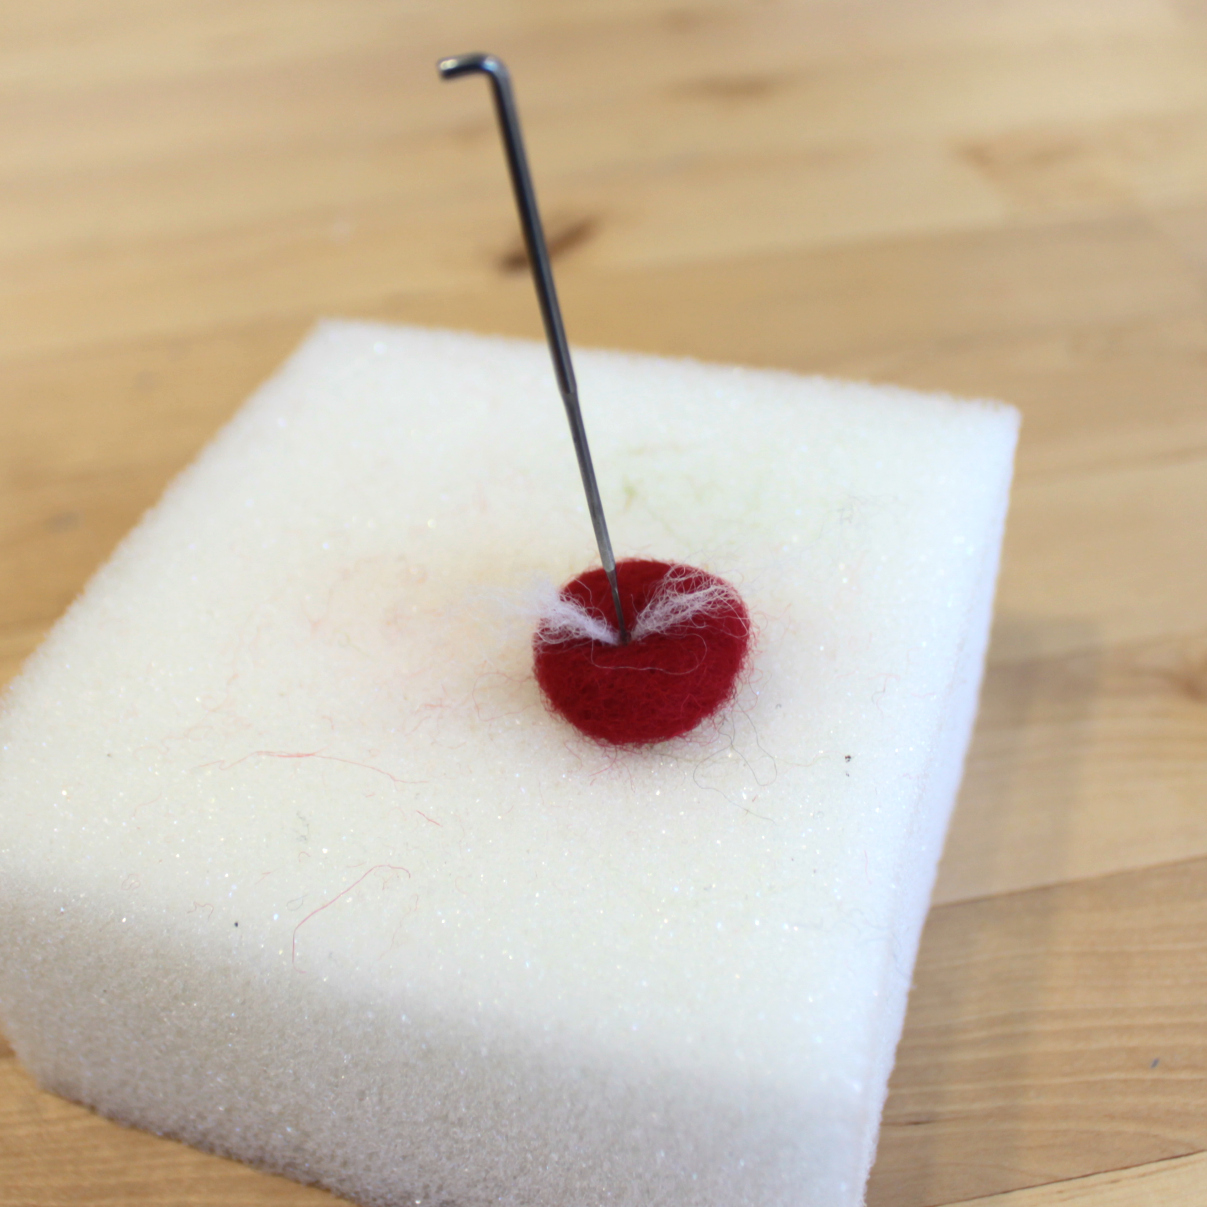
1. To begin a mushroom cap, pull of a tuft of red wool roving, about 2” x 2” and lay it on your foam pad. Fold each of the corners in toward the center of your roving, creating a circular shape. Poke with gentle, shallow pokes in the center of the circle. Continue felting the top portion (facing upward on your foam pad) and the sides of your mushroom cap. Once your project feel densely matted, turn your mushroom cap over and place back on your foam pad.
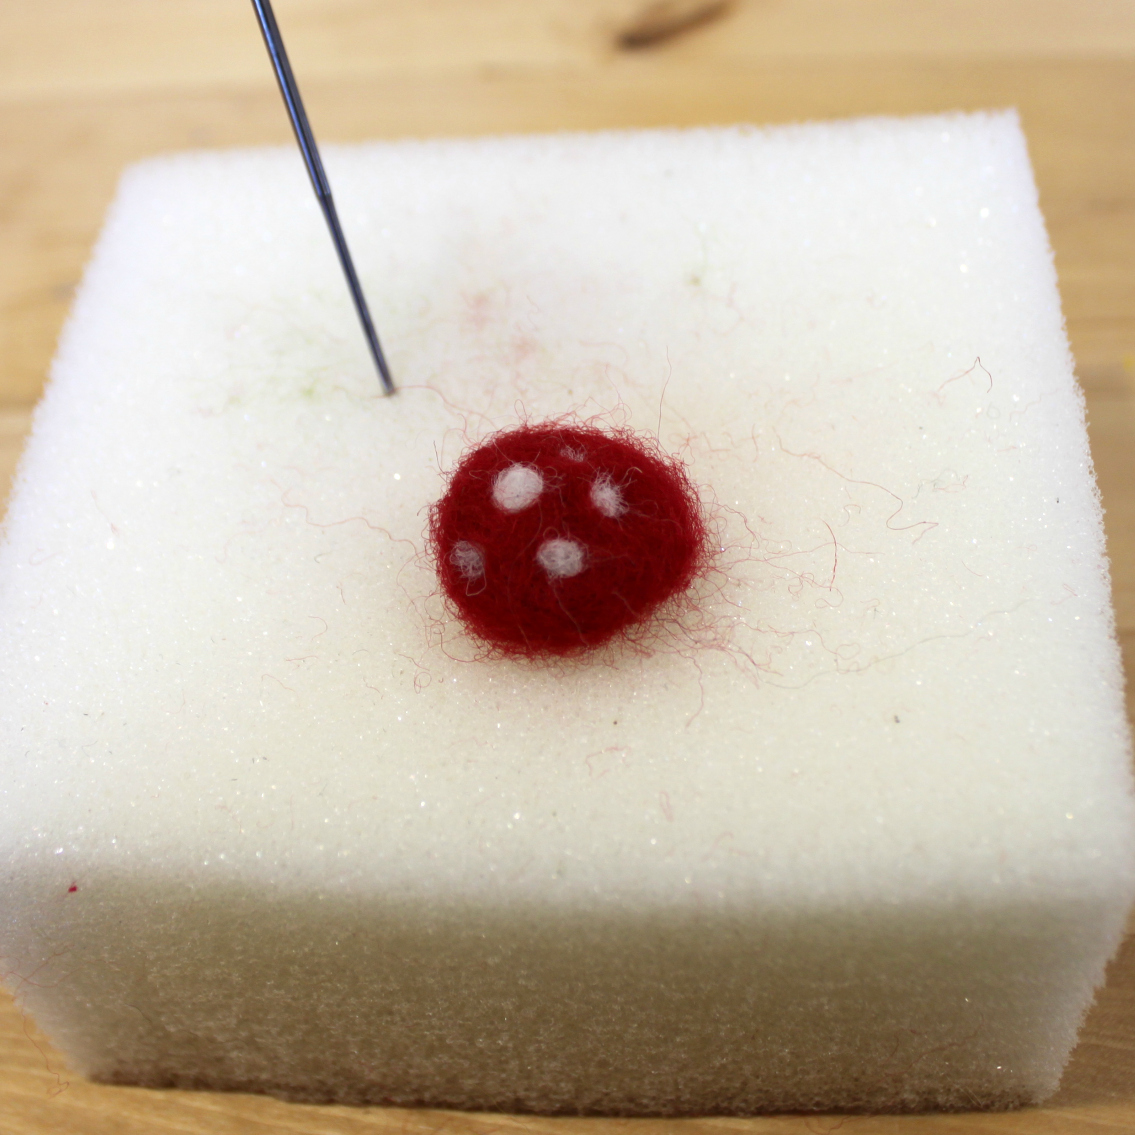
2. To add polka dots to your mushroom cap, pull off a small and skinny tuft of white roving and place on the top of your mushroom cap. Gently poke directly up and down in the center of your white roving until you have formed a small polka dot. Guide any loose white fibers to the center of your dot with your needle and poke away. Repeat this process to create more. Have fun experimenting with placement and different sized dots!
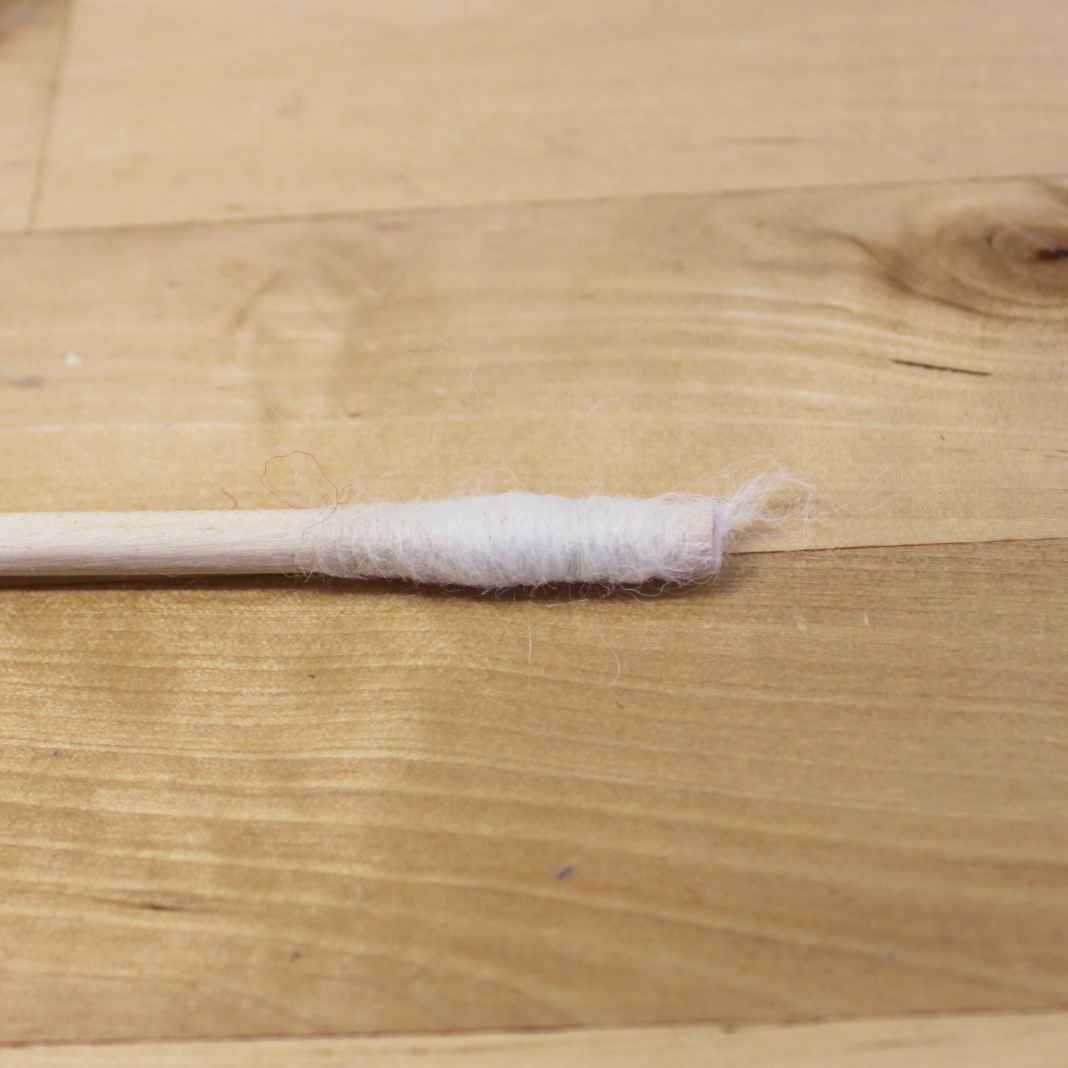
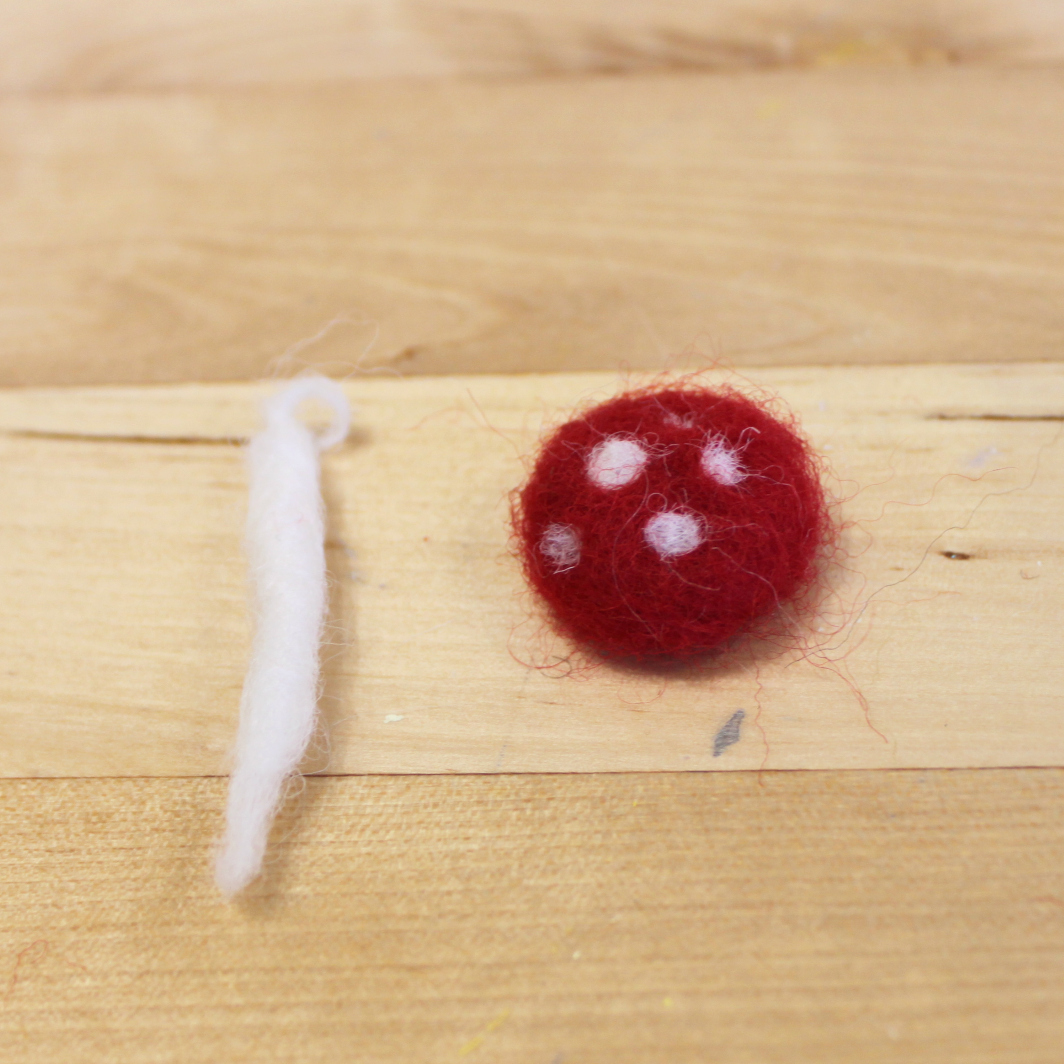
3. Make the stem of your mushroom by wrapping a thin piece of white roving tightly around a small wooden dowel. Slide roving of the dowel and transfer to your foam pad to begin felting. Felt around the center and leave the wool fibers at booth end of the stem loose.

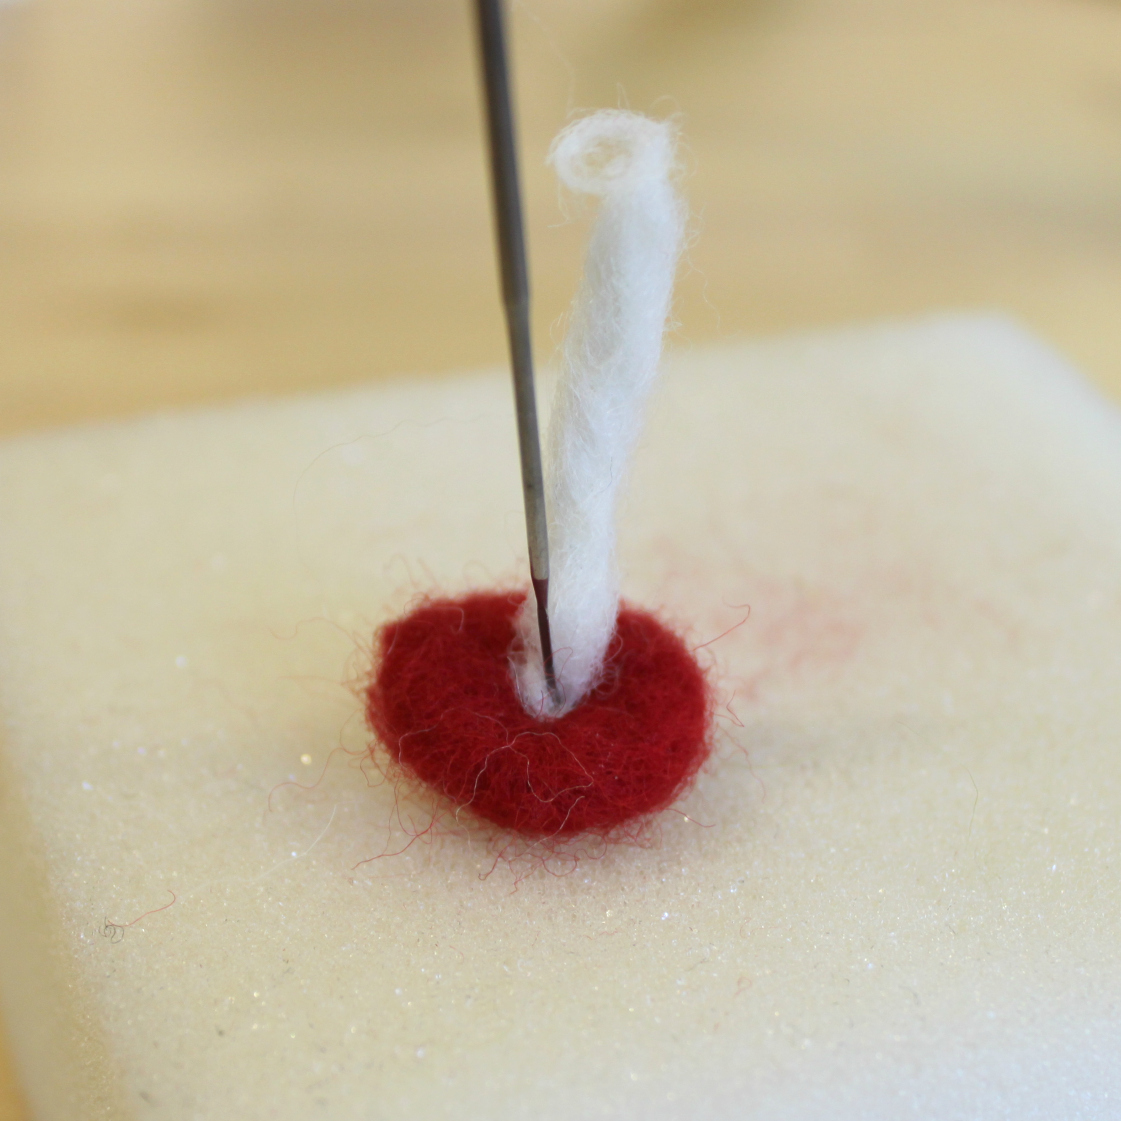
4. Attach the stem to the underside of the mushroom cap by place the loose fibers of the stem to the center of the cap and use shallow pokes. If you apply too much pressure, the white fibers from the stem may show on the top of the mushroom cap. Finish your mushroom by felting a thin strip of white roving around the stem on the underside of the mushroom cap. Again, use shallow pokes as to prevent seeing unintentional white fibers on the top of the mushroom cap.
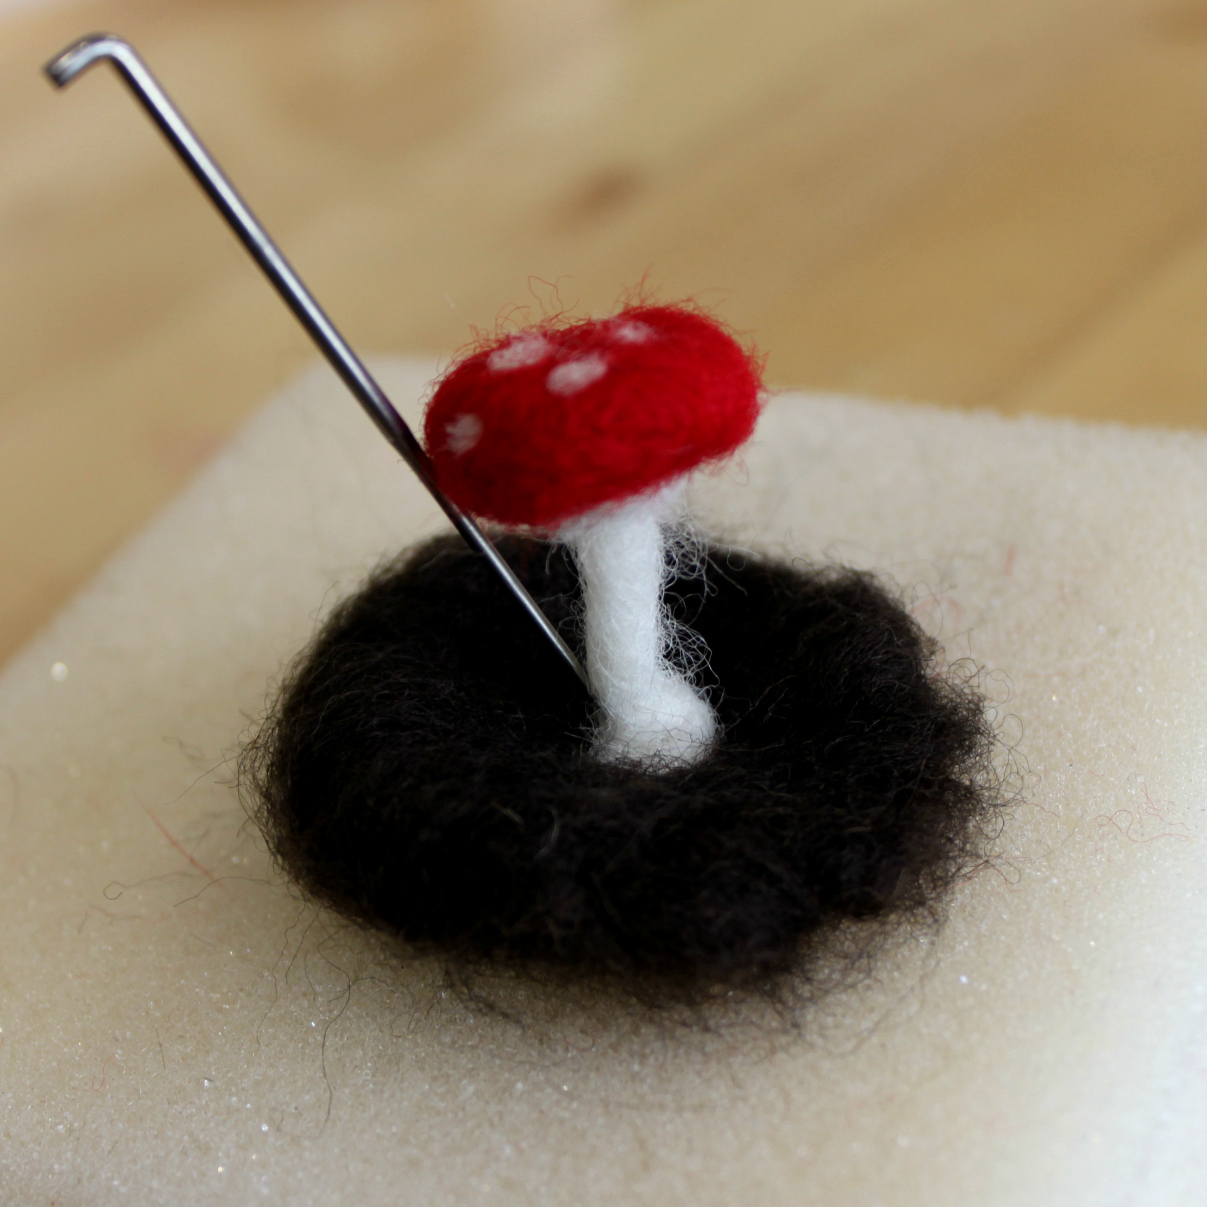
5. Create the ‘dirt’ layer by pulling off a tuft of roving just slightly larger than the diameter of the bottom of your glass vessel, and felt a circular shape like we did for the mushroom cap in step 1. Periodically place your dirt layer in the vessel to make any adjustments to the shape or size. When you’re ready to attach your mushroom, place the bottom of the stem of the mushroom in the center of the dirt layer and begin felting.
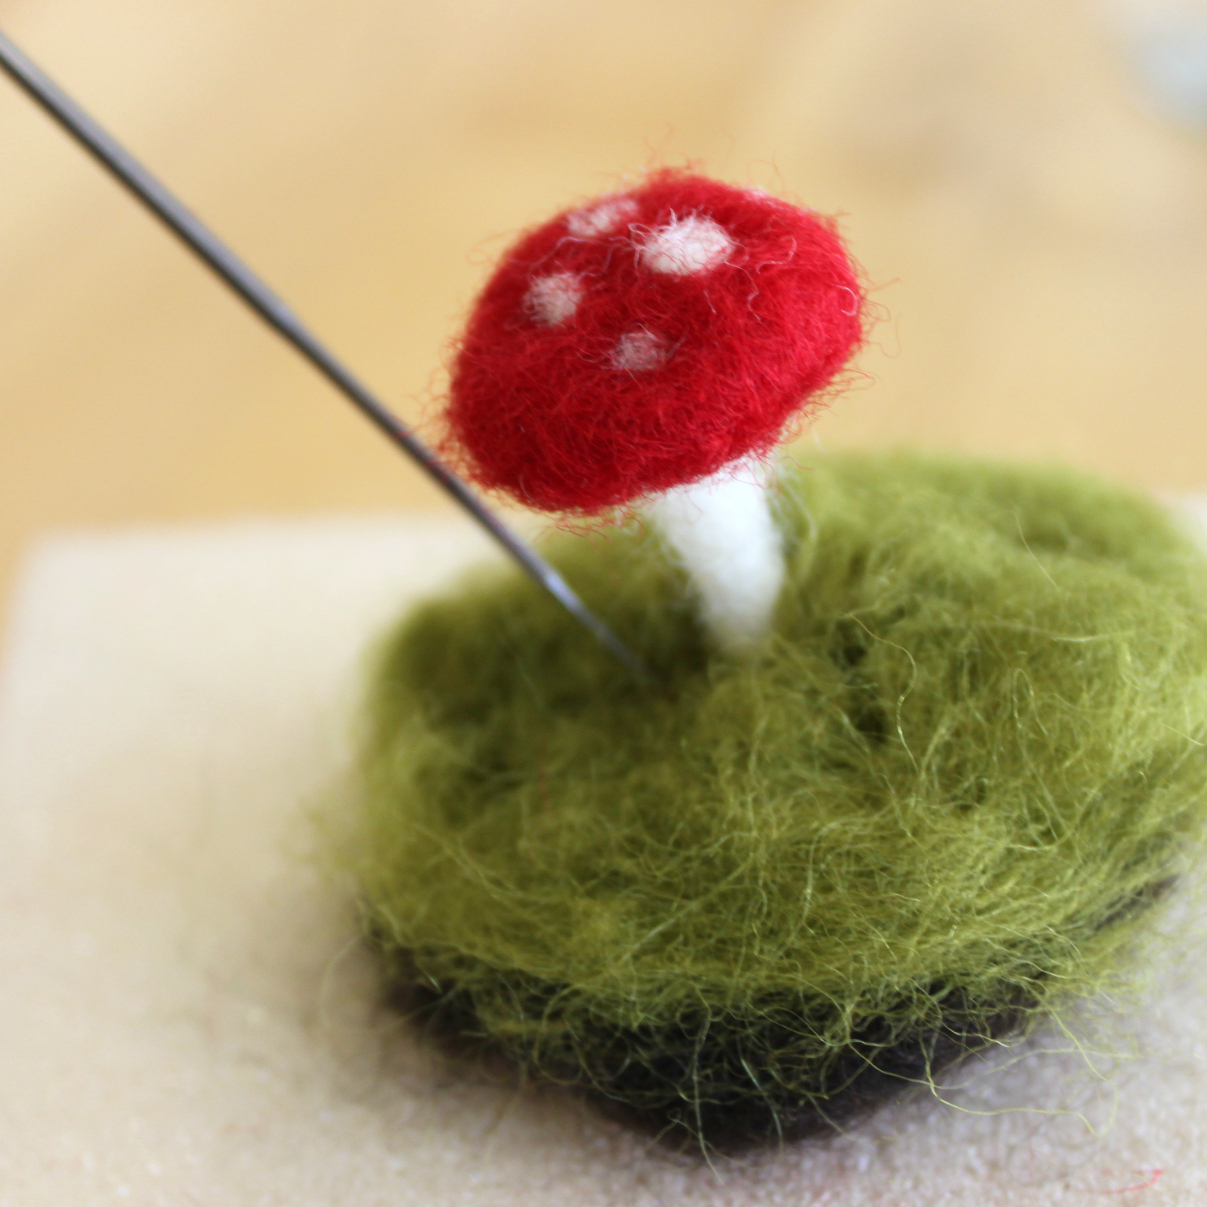
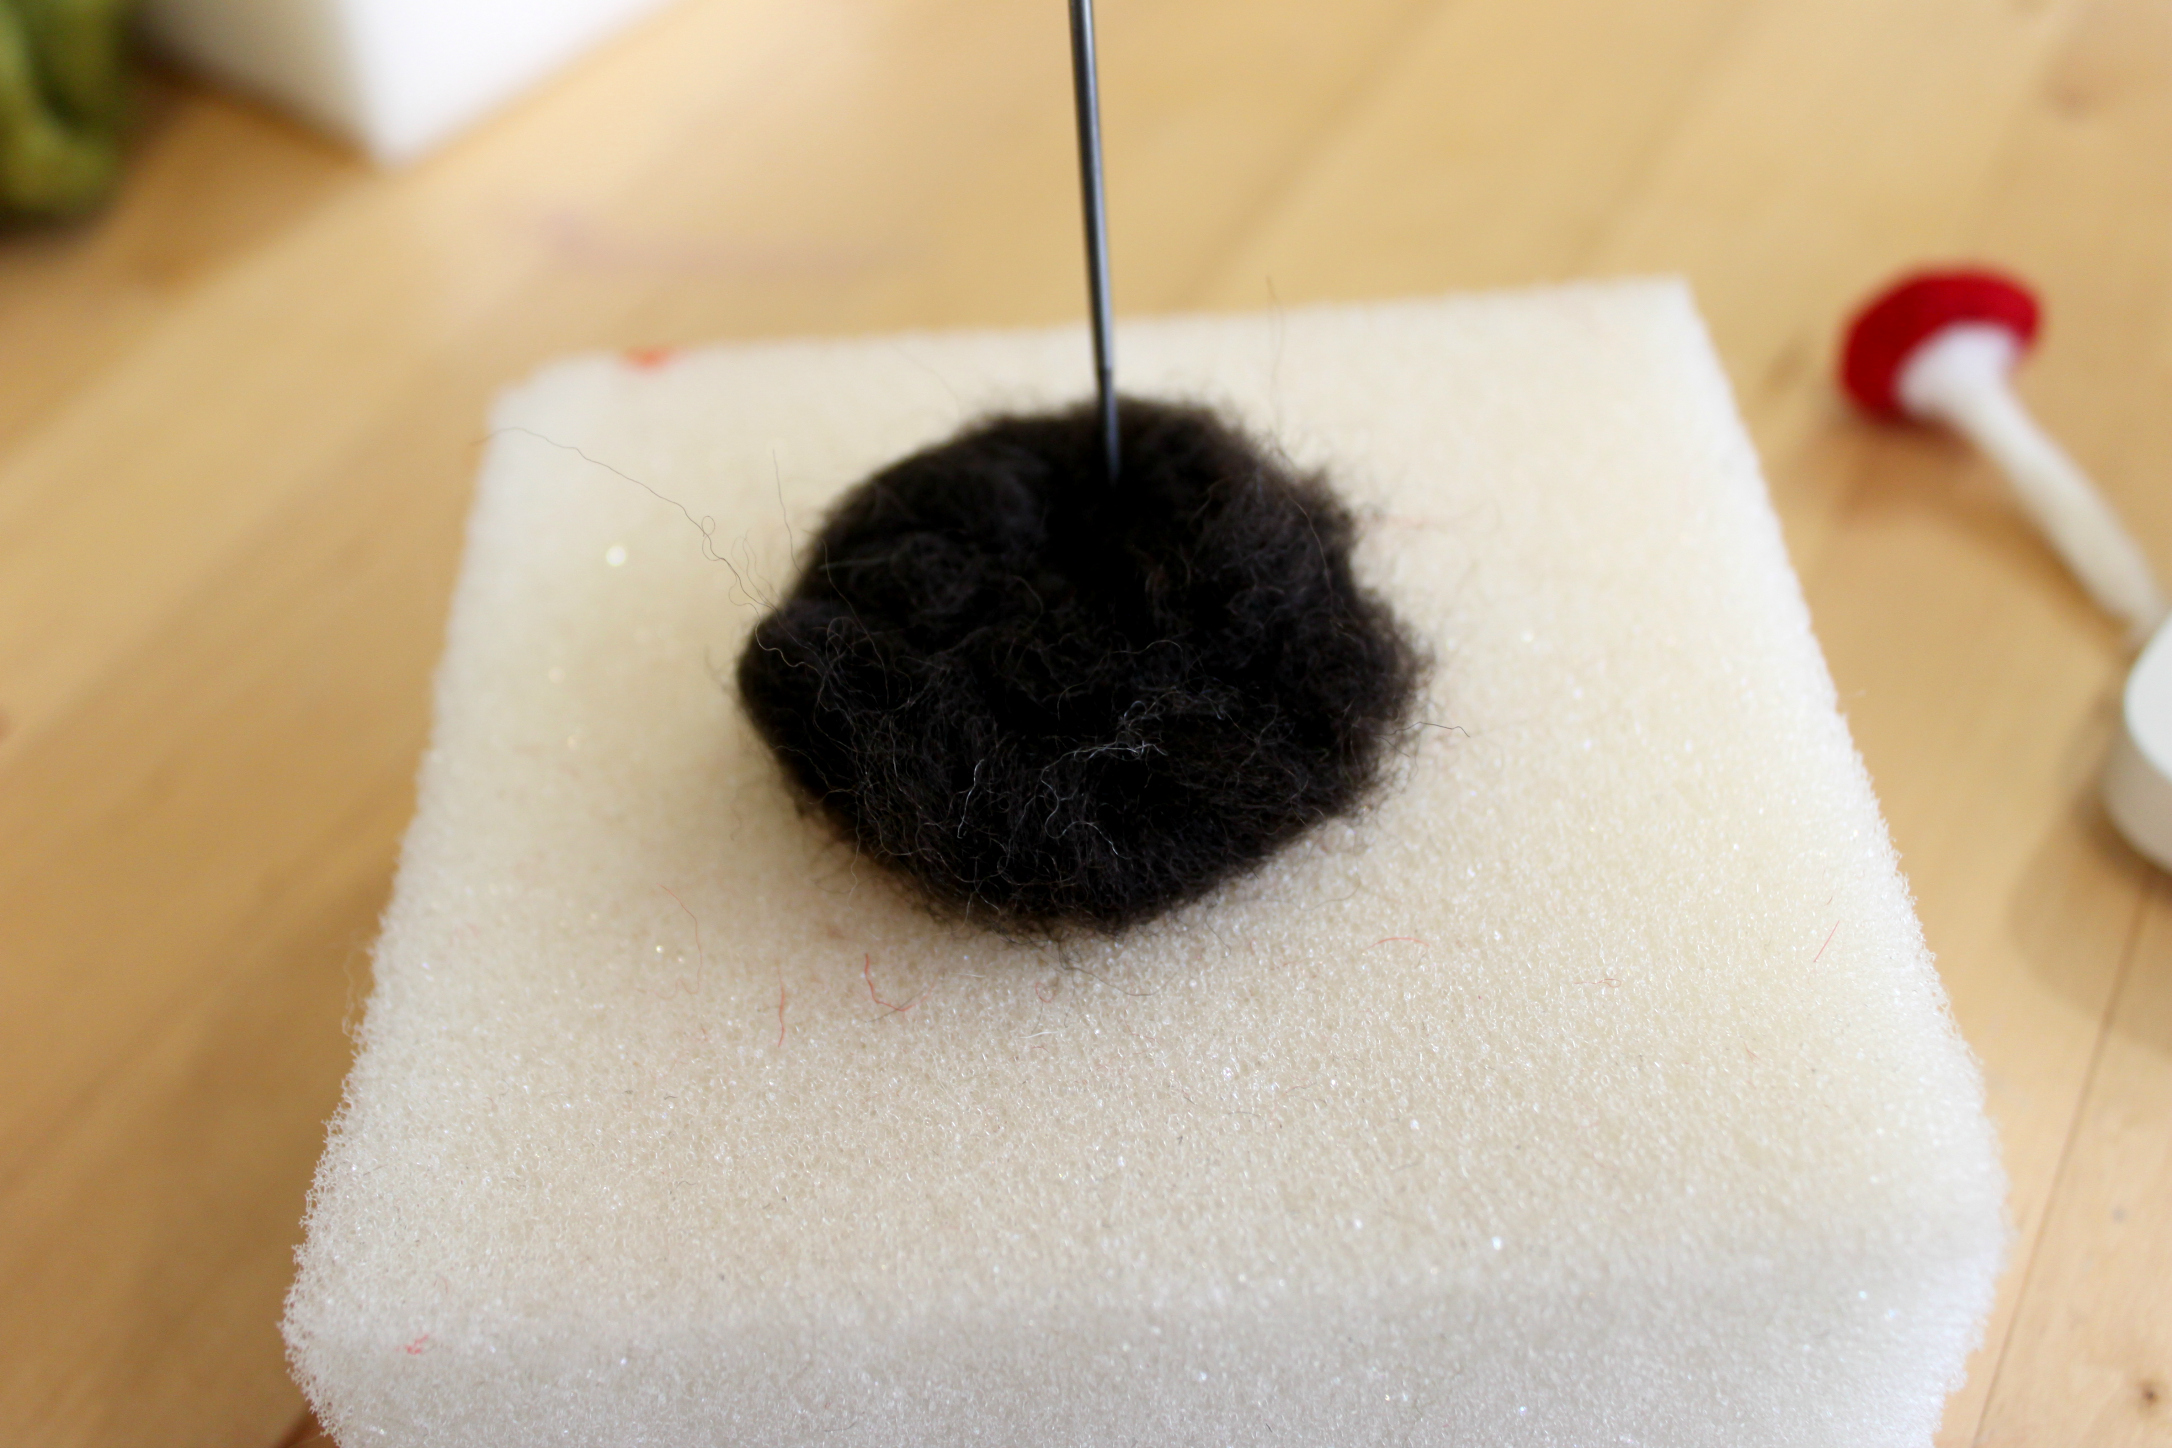
6. To create the mossy layer, pull off a tuft of green roving and wrap it loosely around the stem. Felt the moss to the dirt layer and the bottom of the mushroom stem. After the moss as been loosely felted, fluff up the green roving with your fingers to give it a more natural looking appearance.

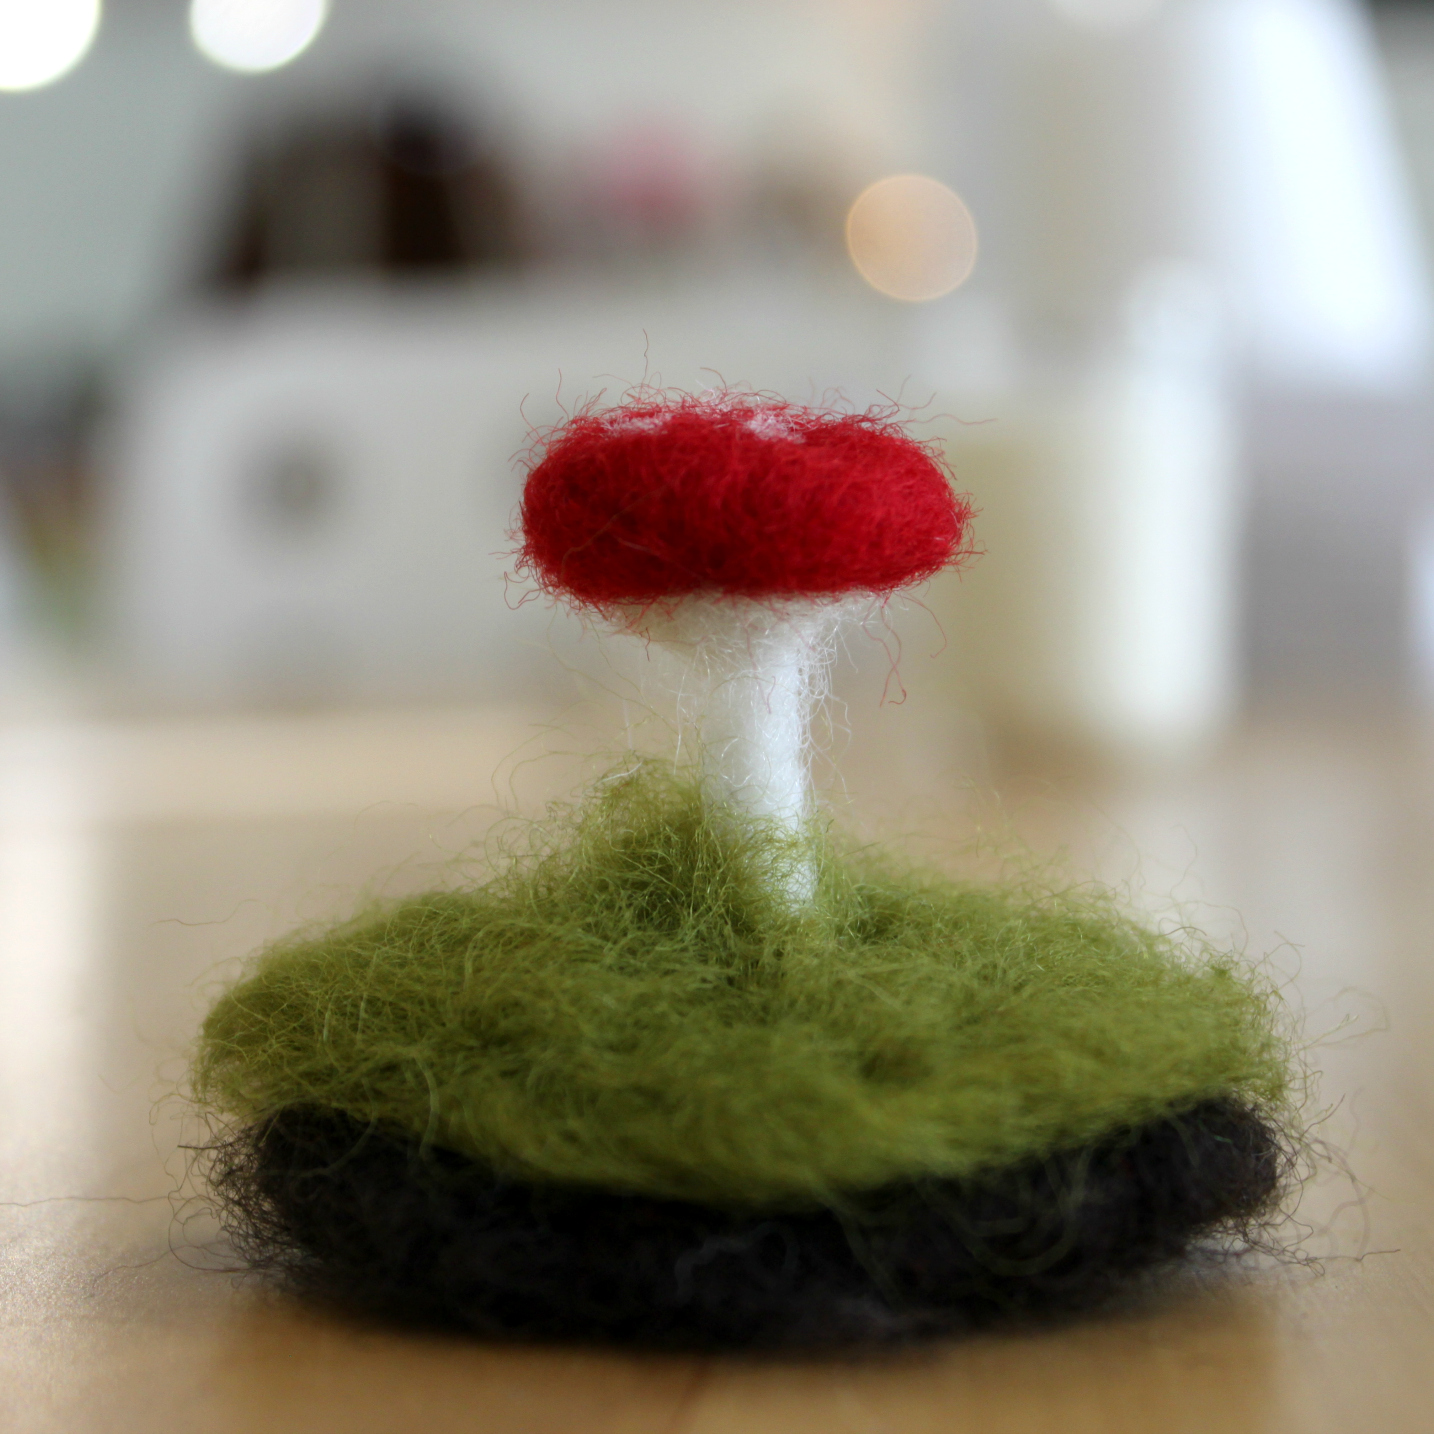
7. Place your creation in your glass vessel and enjoy!
-lisa rios
about lisa:
“If you had asked my 12-year-old self what I wanted to be when I grow up, I probably would have had a perfectly sensible answer. Like a circus trapeze artist or an outer space explorer. Never in my wildest dreams could I have imagined that I would craft for a living. But fast-forward 20 years and I’m the owner of The Makery, a walk-in craft studio located in Anaheim. In addition to teaching and organizing local creative workshops, planning craft parties and designing handmade craft kits, I also design for Whimsy and Ink, the handmade biz I share with my rad hubby. My work has been featured in Real Simple, Brides Magazine, Bust, The Huffington Post, Orange Coast Magazine, Sunset Magazine, in Etsy’s Featured Sellers series, and in my mom’s emails to Grandma.”


I love your profile description. How did you get started with your Makery? I would love to do the same where I live. I’d love to pick your brain , your site is stellar. Stay true to you .
Best wishes
hi millie!
you can email lisa directly Lisa Cherry Lisa@themakerysocal.com 🙂
-nicole
Hello! These are absolutely adorable! And beautiful!
What size did they turn out to be? And the jar? I’m going to try to make these, but I don’t have experience in needle felting!
Thanks for your time!