
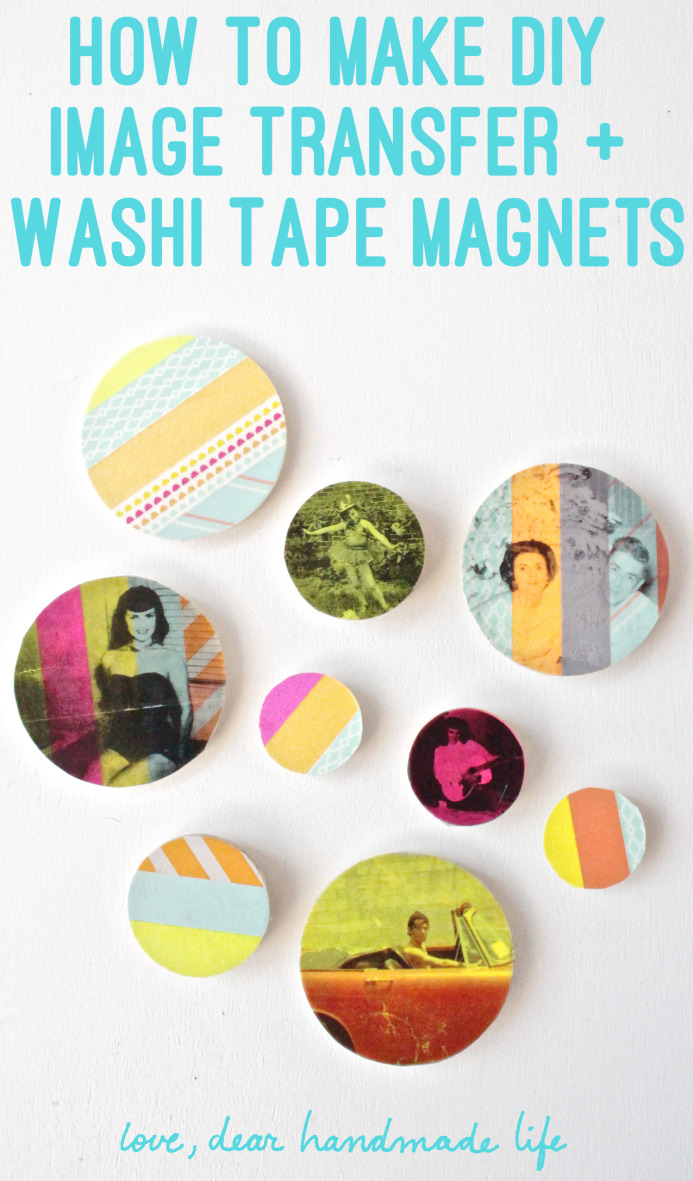
How to Make DIY Image Transfer and Washi Tape Magnets
 I’ve moved over 18 times. My love for relocation has had an effect on the way I decorate my house. For the most part I have small lightweight furniture that can be arranged to fit various room shapes. Plus with the exception of my bed and couch, I have a rule that if I can’t carry it by myself I won’t buy it or have to be willing to part with it on my next move. One of the other things I’ve had to pare down is what I hang on the wall. I have an awesome collection of original art that I don’t always have the wall space for, so I rotate pieces every six months or so. I always wanted to have photographs of family and friend on the wall so a while back I made photocopies of my favorites and framed them in some inexpensive raw wood Ikea frames that I painted. A few moves later, I was getting weary of repainting the frames each time I moved to match the color scheme of my new digs so I put all the photos in a box and donated the frames to a thrift store. Recently I’ve really been missing getting to look at all those photos of loved ones but knew that framing them all again wasn’t the solution.
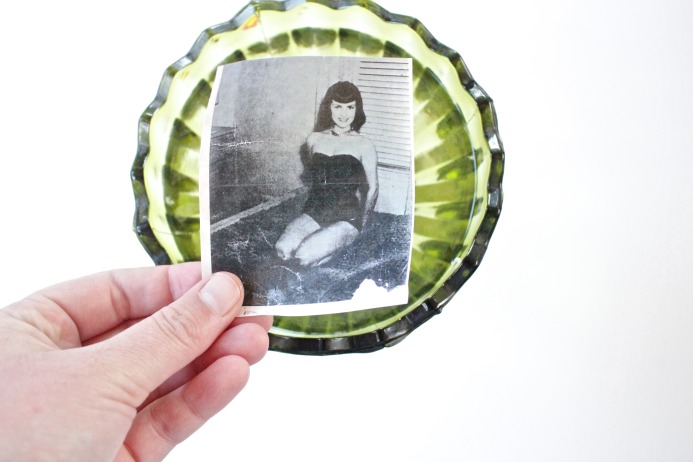
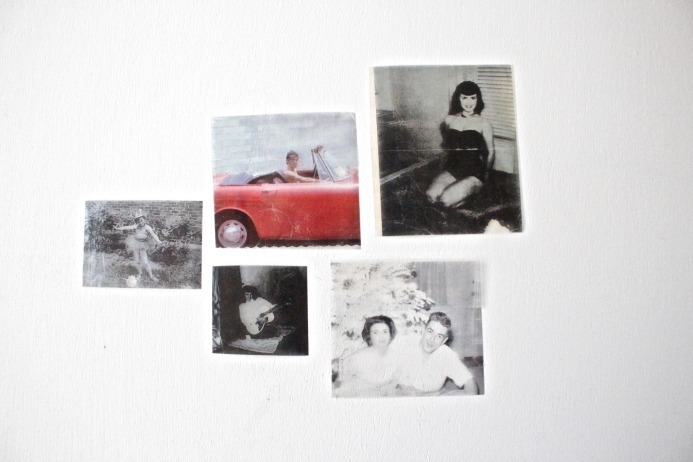
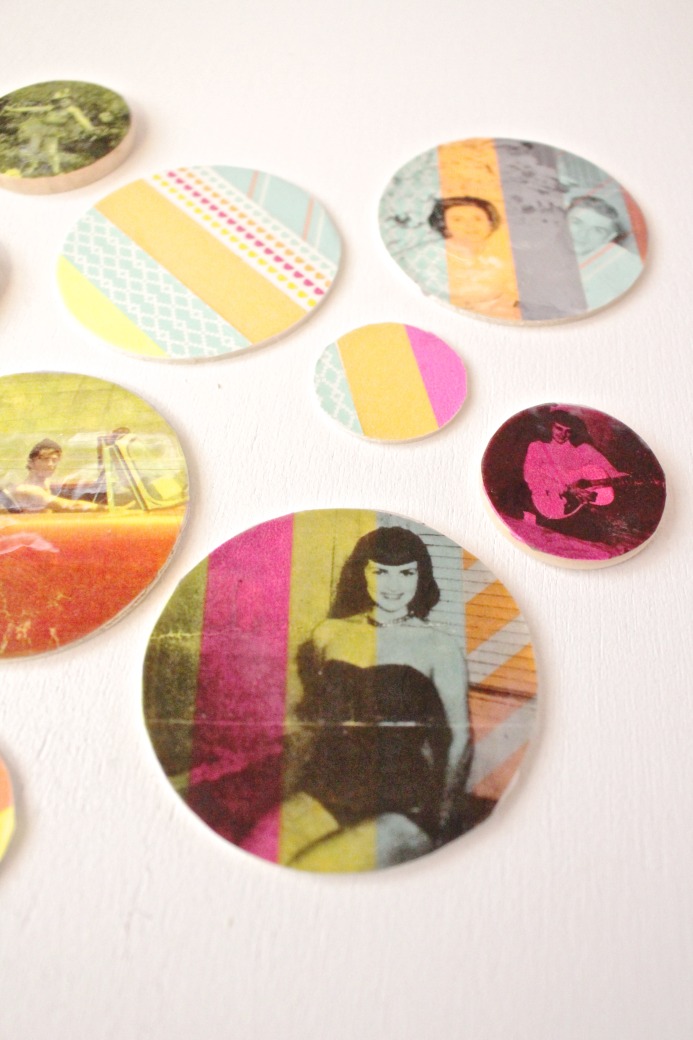
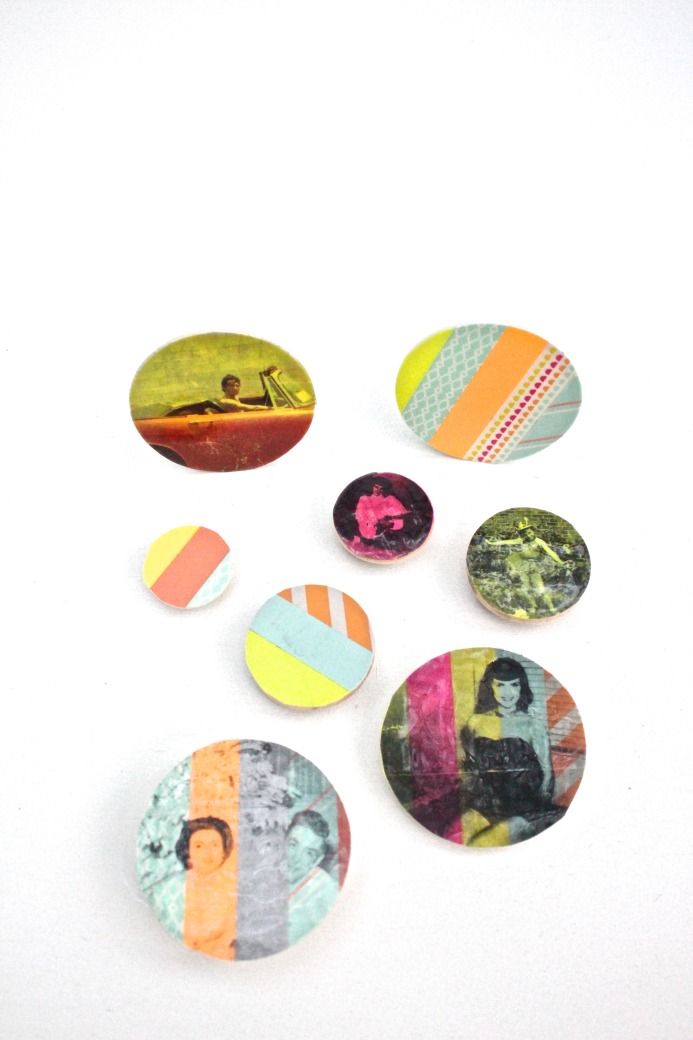
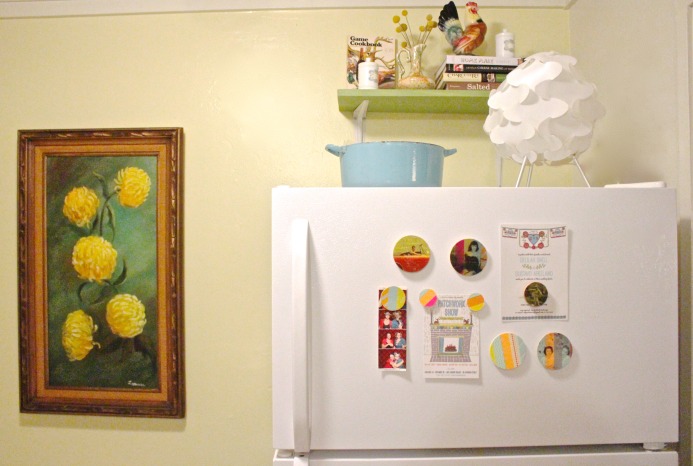
Then I thought about the image transfer candle DIY project I did a few months ago and pulled out Craftcation presenter Courtney Cerruti’s book Playing with Image Transfers and got to work coming up with a way I could look at those photos daily as well as seamlessly transport and display them the next time I move. What part of my house do I see every single day? The refrigerator! Now every time I reach for a snack I get to fondly remember my grandmother (who passed away a few years ago) in the photograph of her playing guitar and the other one of her looking like a pin-up girl, the one of my dad looking so slick in a convertible, the one of my mom in a ballerina princess costume and the one of my grandmother and grandfather (Papa – aka Delilah’s dad) on Christmas morning in the 1950s. You can use photocopies of family and friends like I did or you can create these with images from a magazine. Either way, they’re the perfect way to add some color style to your kitchen.
If you don’t have a massive collection of washi tape on hand like I do, don’t worry! We’re giving some away.
-Nicole S.
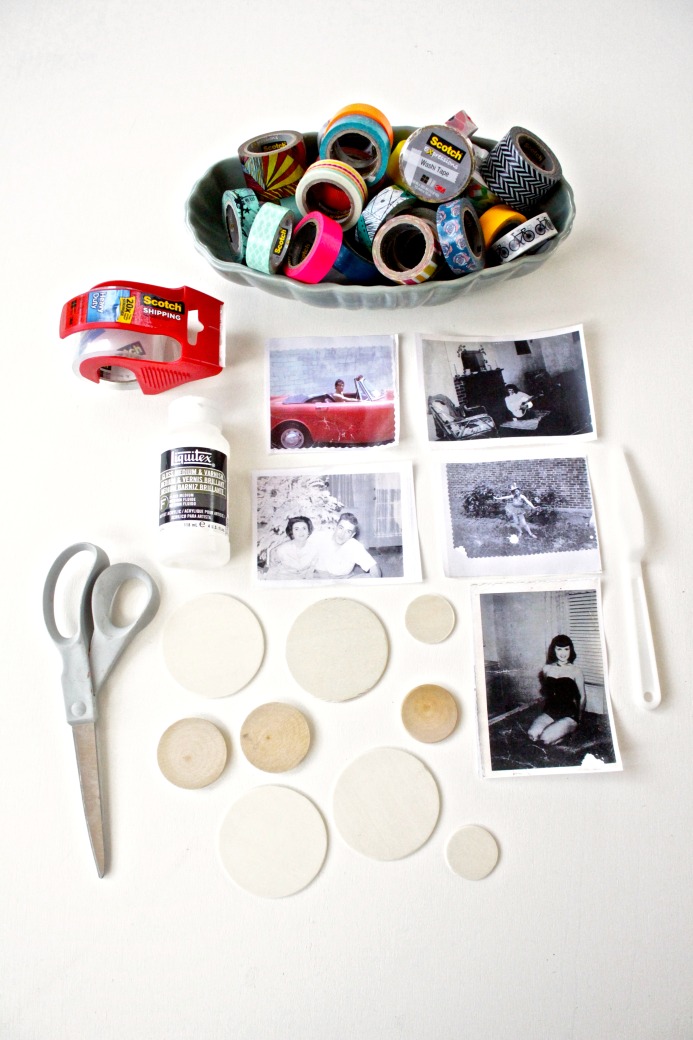
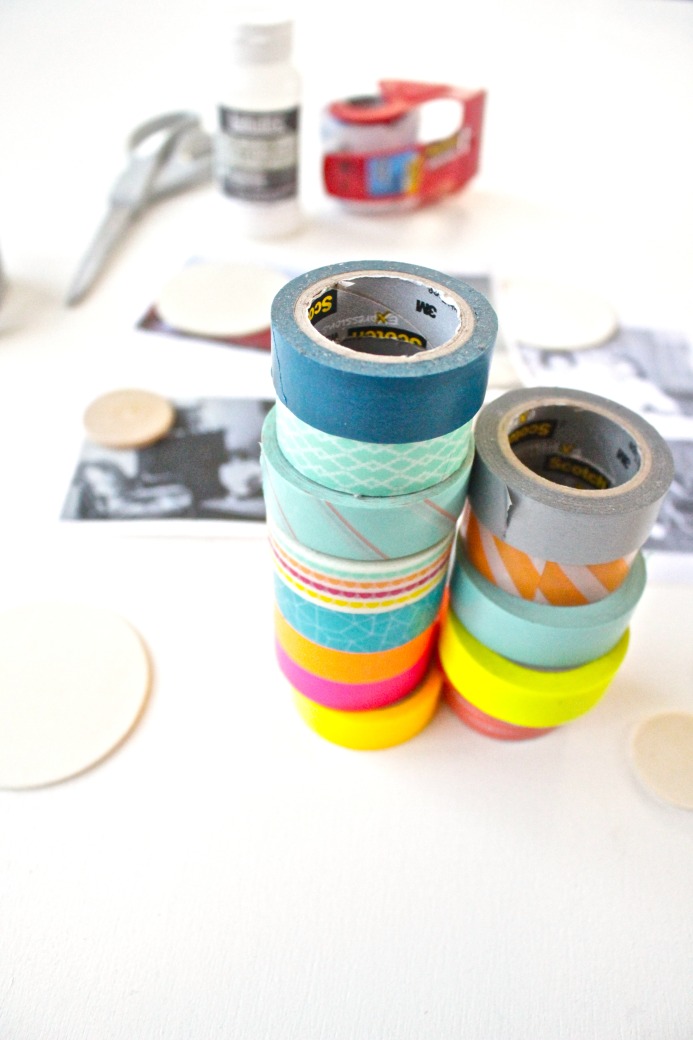
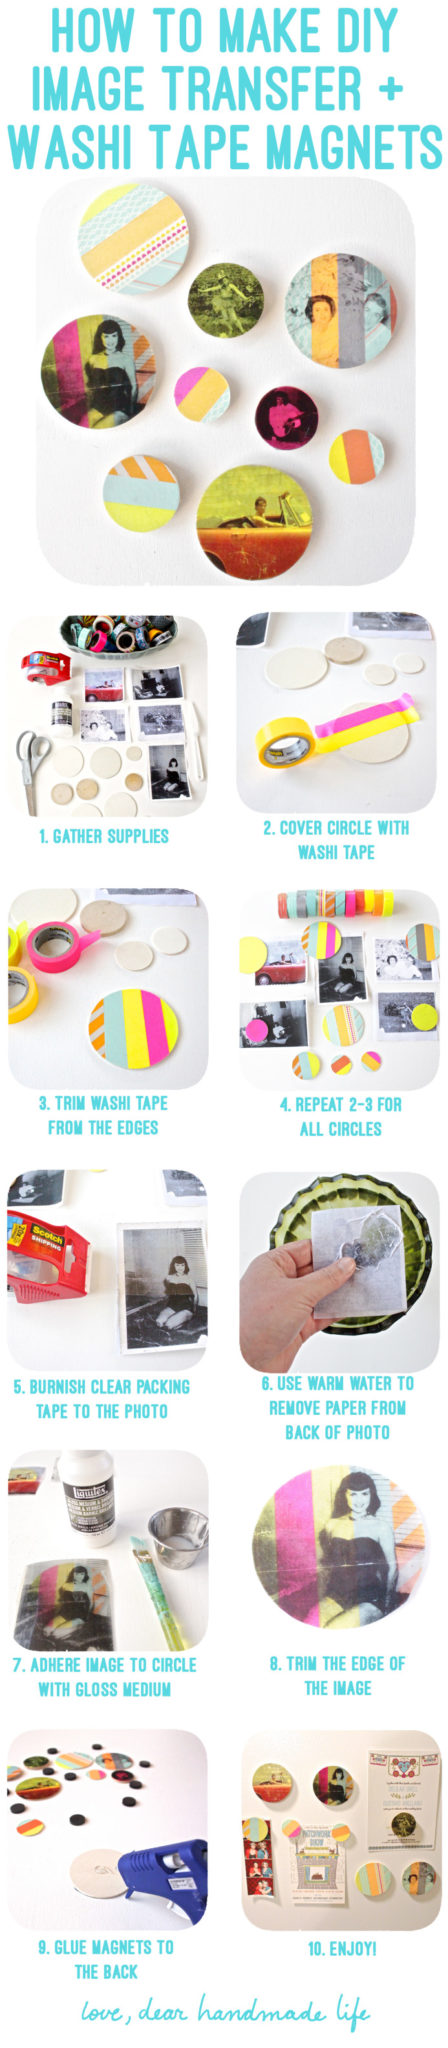
WHAT TO GET:
-Washi tape (We love Scotch Expressions washi tape)
-Scissors
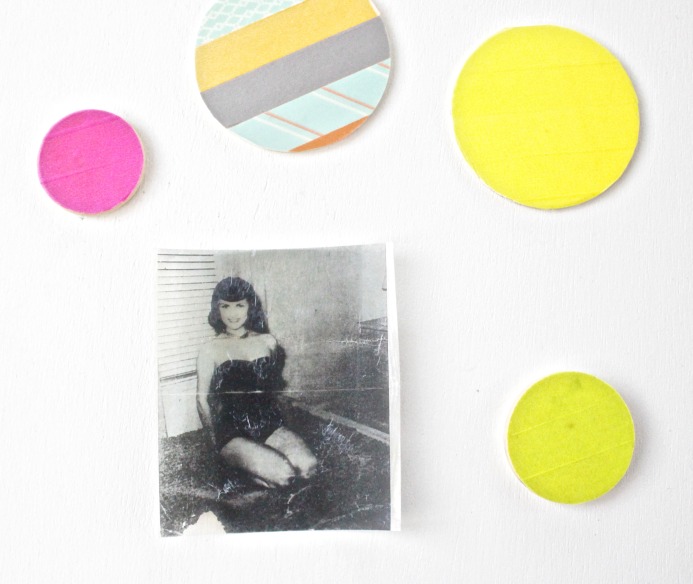
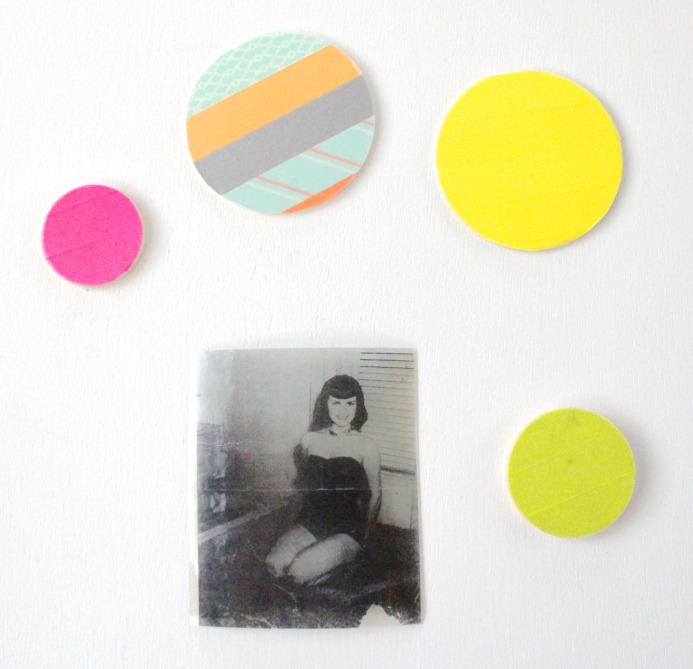
–Unfinished wooden craft circles
-Palette knife, bone folder or something hard to burnish the tape to the photo
-Photocopies of photographs
-Glue gun + glue sticks
-Paint brush

WHAT TO DO:
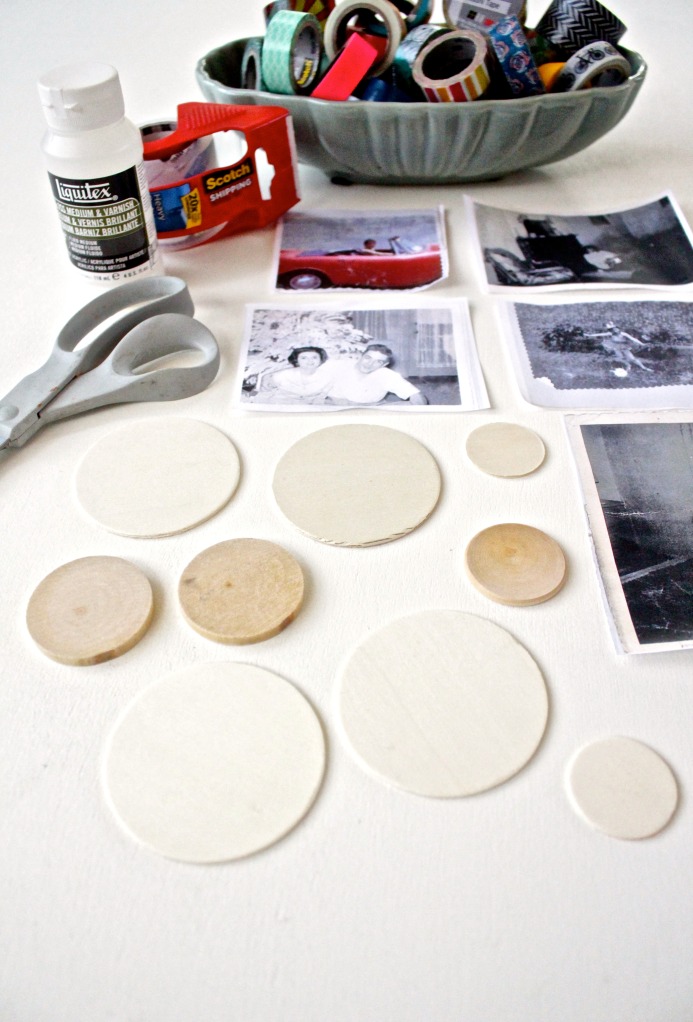
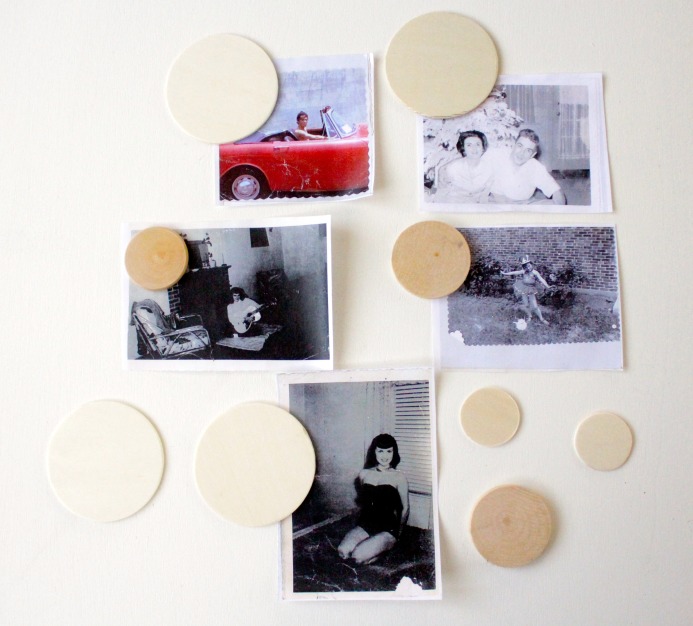
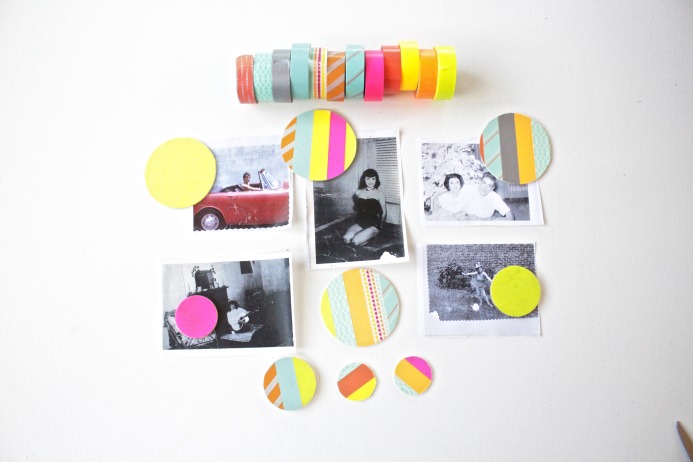
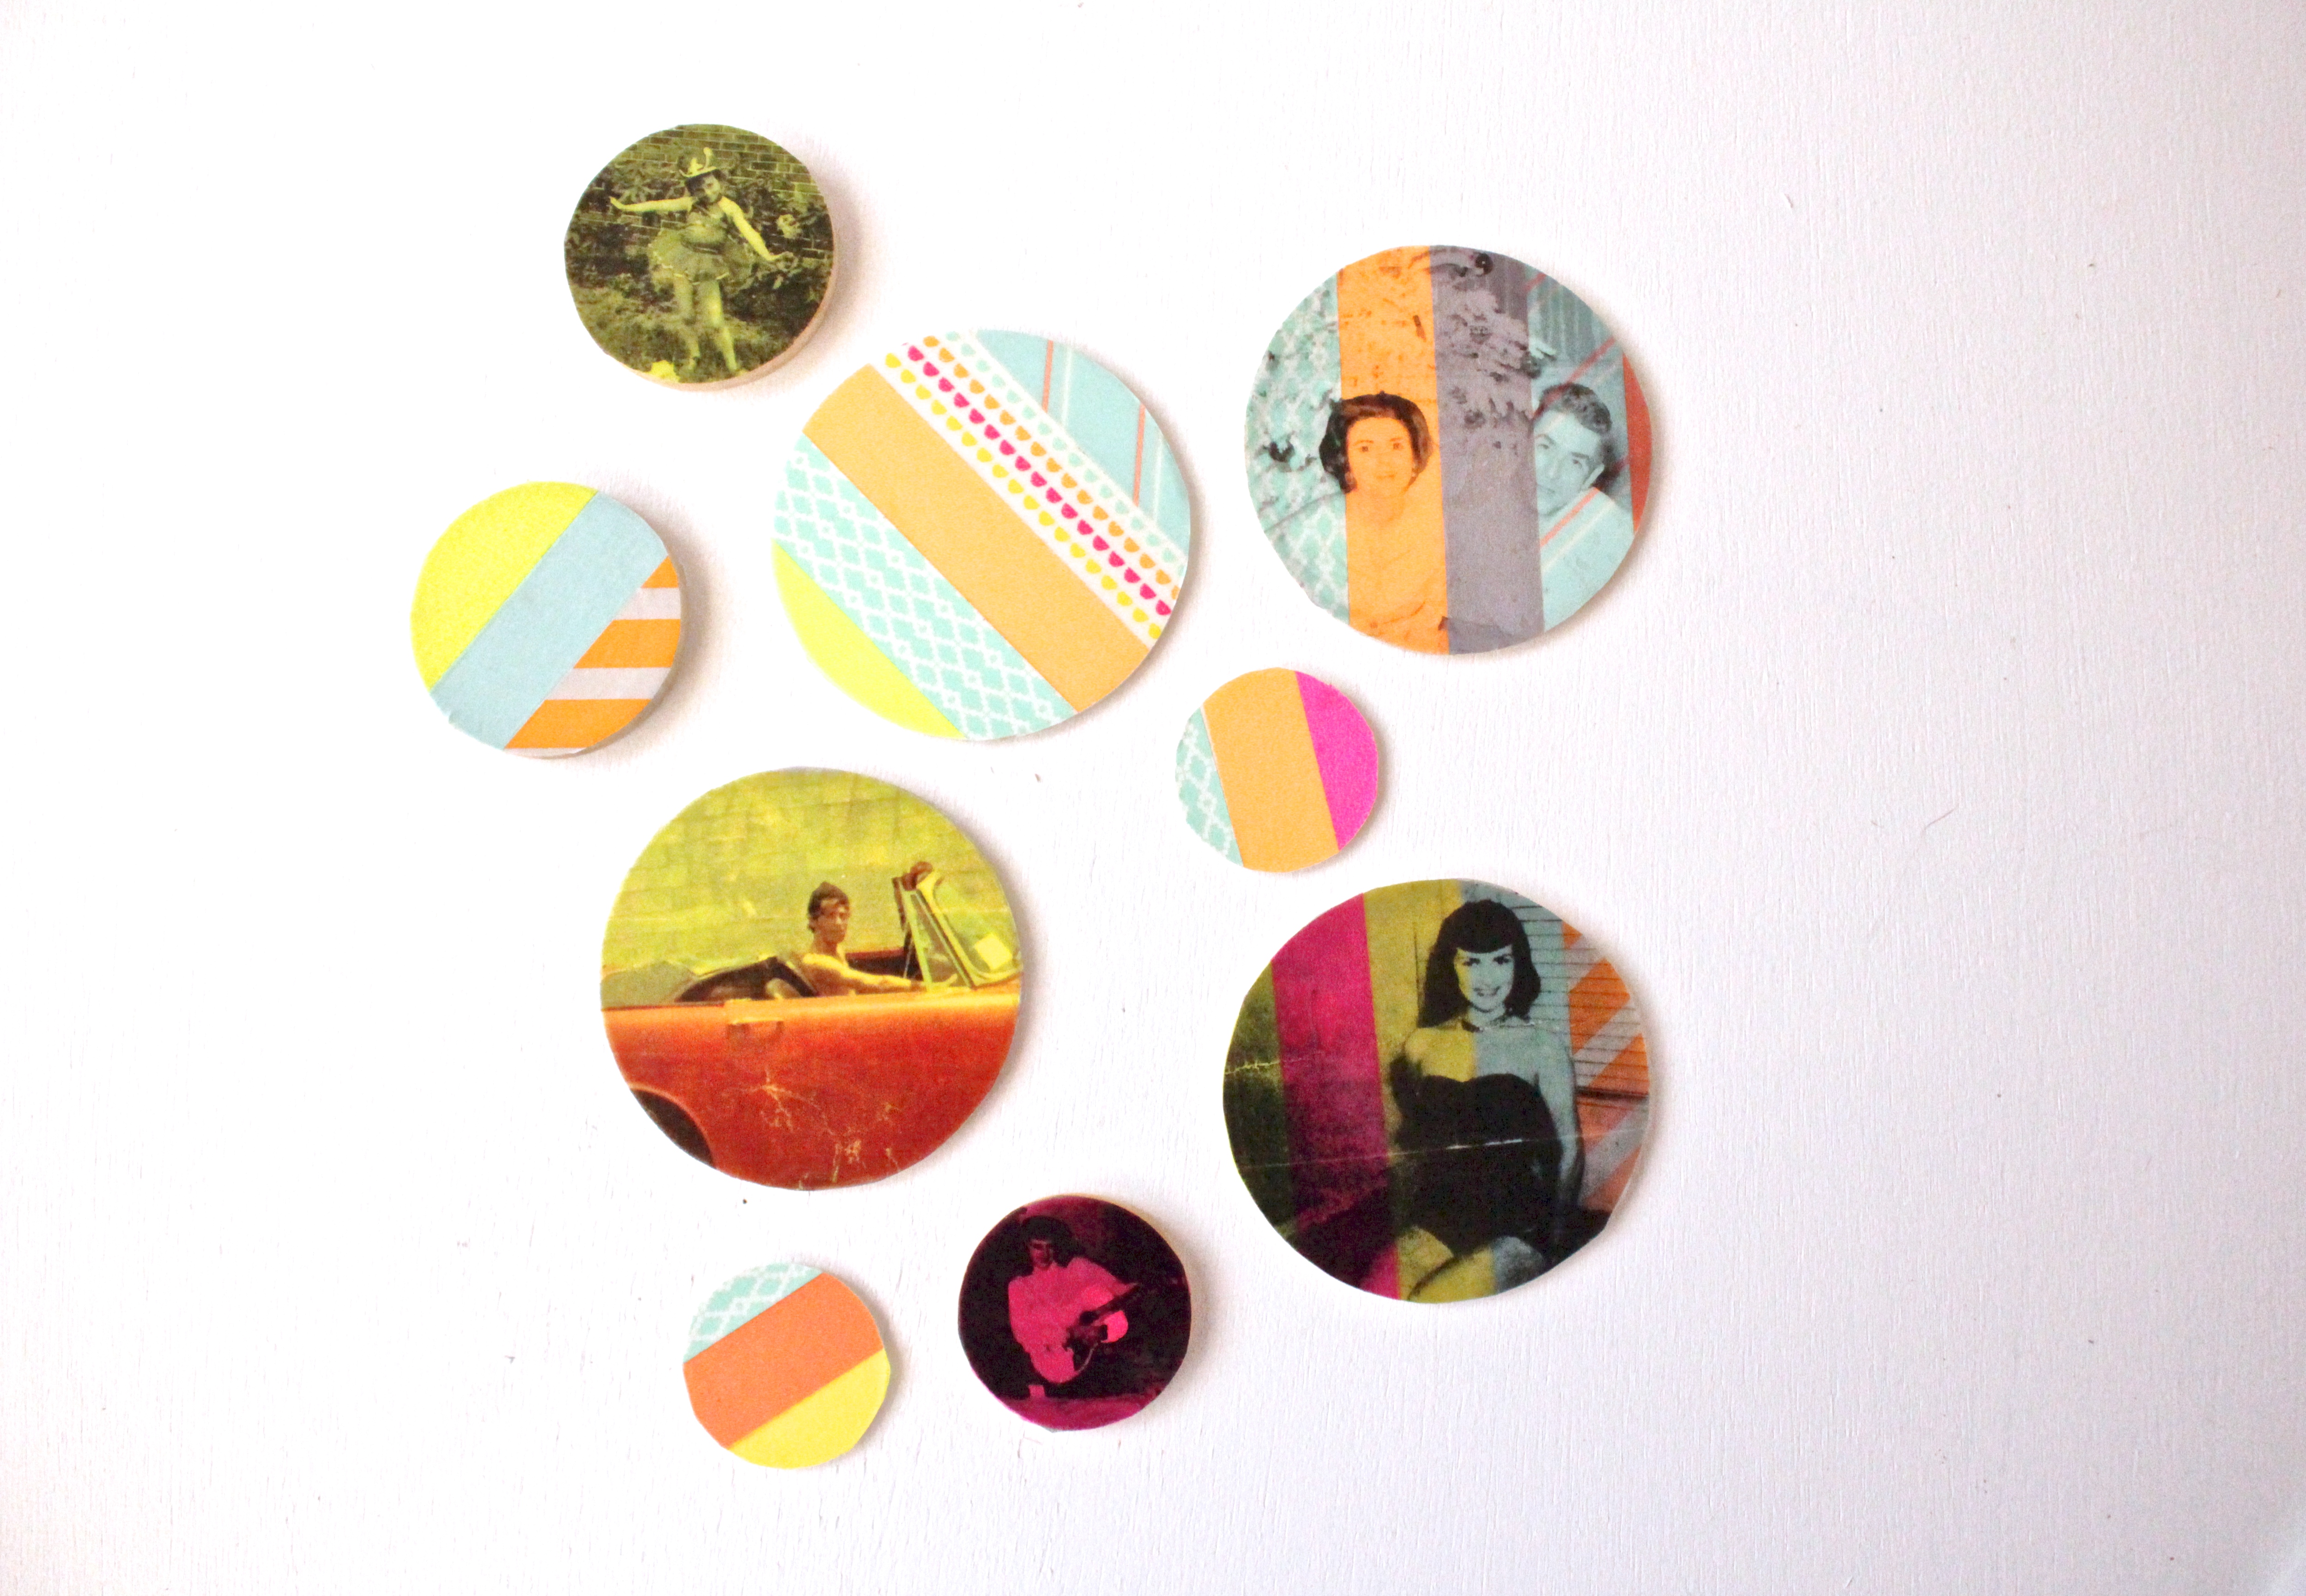
1. Decide which wooden circles fit best with each photo.
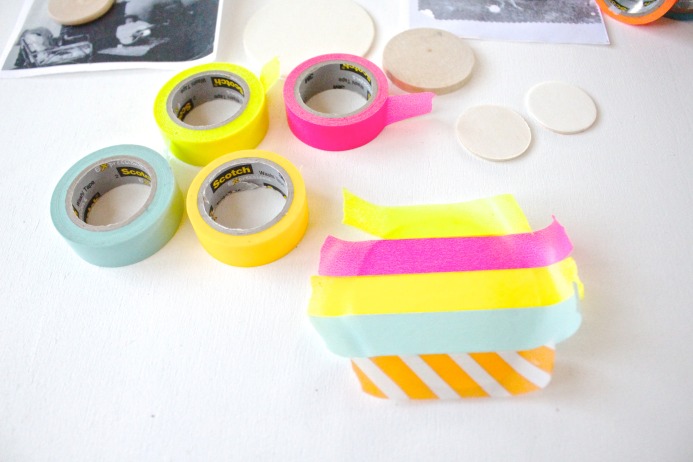
2. Decide on which washi tapes you’re going to use.
3. Add strips of washi tape to the wooden circles. I did a combination of using different colors and patterns on some wooden circles and doing all one color on others.
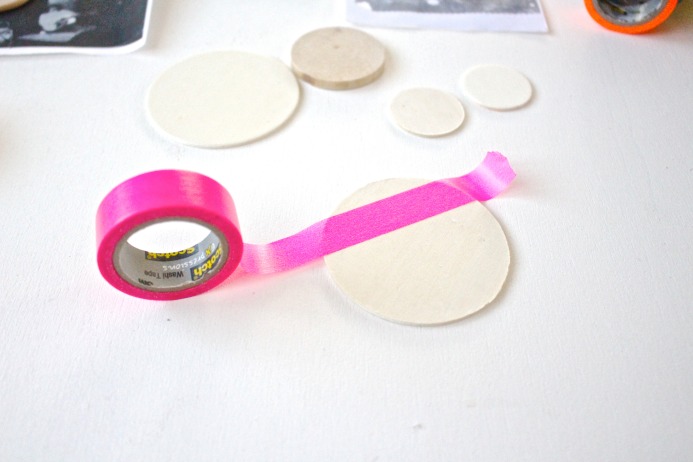
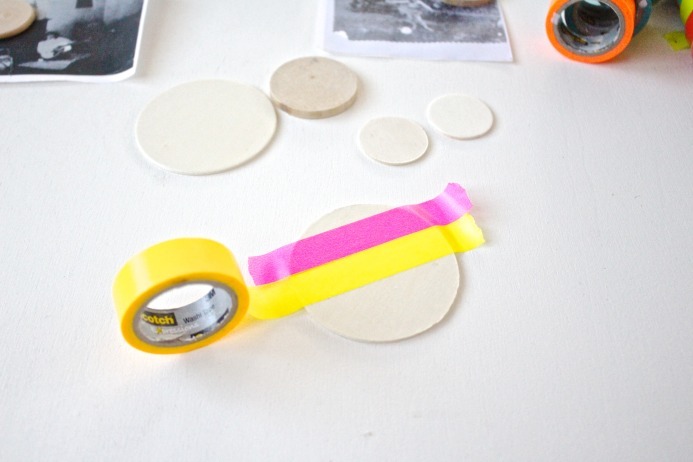
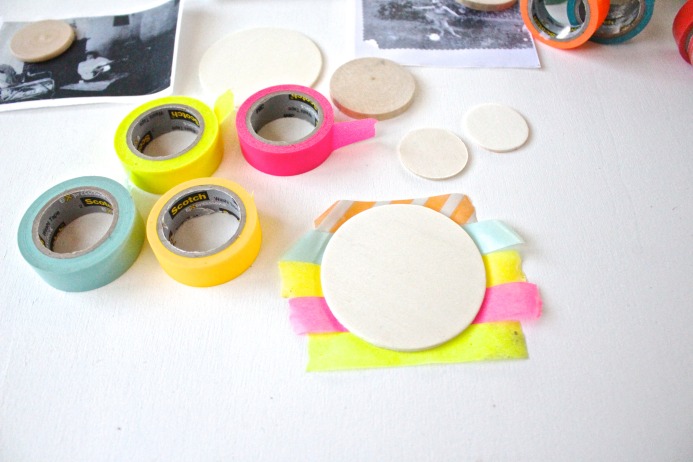
4. Trim the excess washi tape from the edge of the wooden circle.

5. Repeat steps 3-4 until all your wooden circles are covered with washi tape.
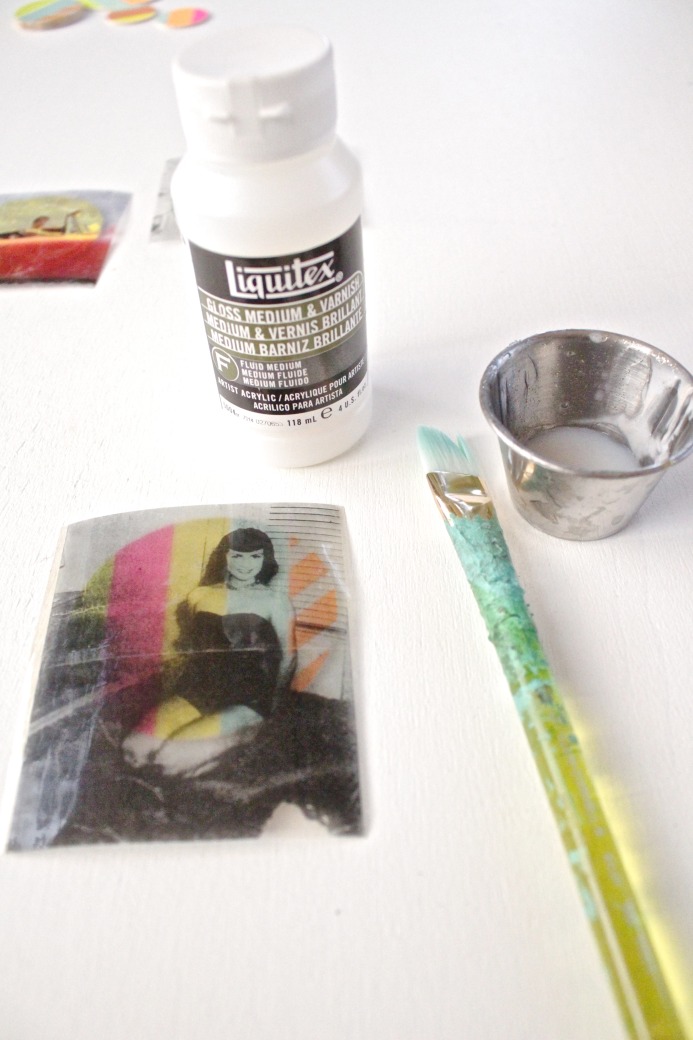
6. Create your image transfer: Put a strip of clear shipping shape over the part of the image you want to use. If you image is wider than the tape, use two pieces of tape and overlap them a tiny bit.
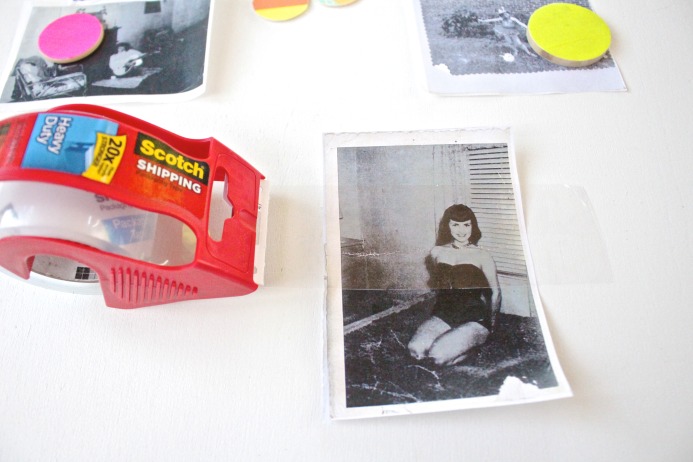
7. Using a bone folder (or similar tool) press the tape down hard on the image. When you first put the tape down it will look a bit cloudy but after you press the tape down (burnish) it completely, the image will be clear and shiny.

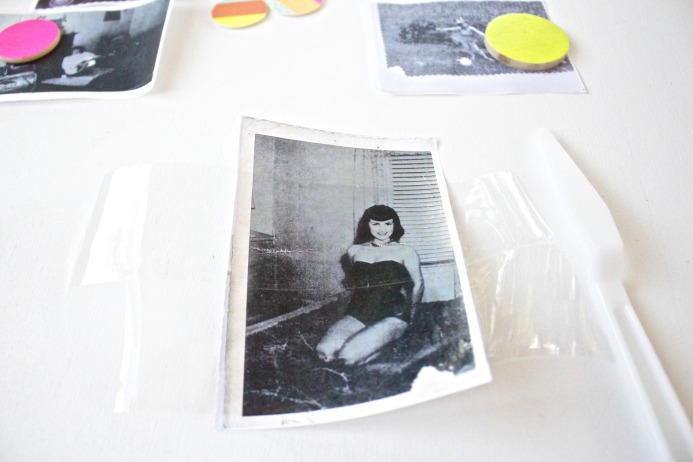
8. Trim any excess tape from the image.
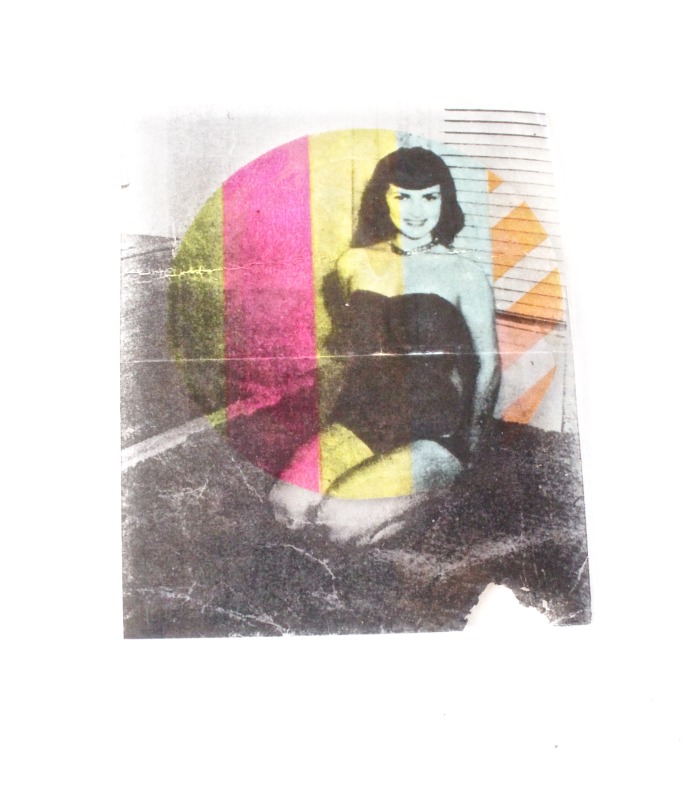
9. Using warm water, dissolve the paper part of the image. You’ll need to rub it off with your finger but don’t scratch it off or use any tools to remove the paper.


10. Once all the paper has been removed, your image will be transparent.
11. Repeat steps 6-10 for all of your images.
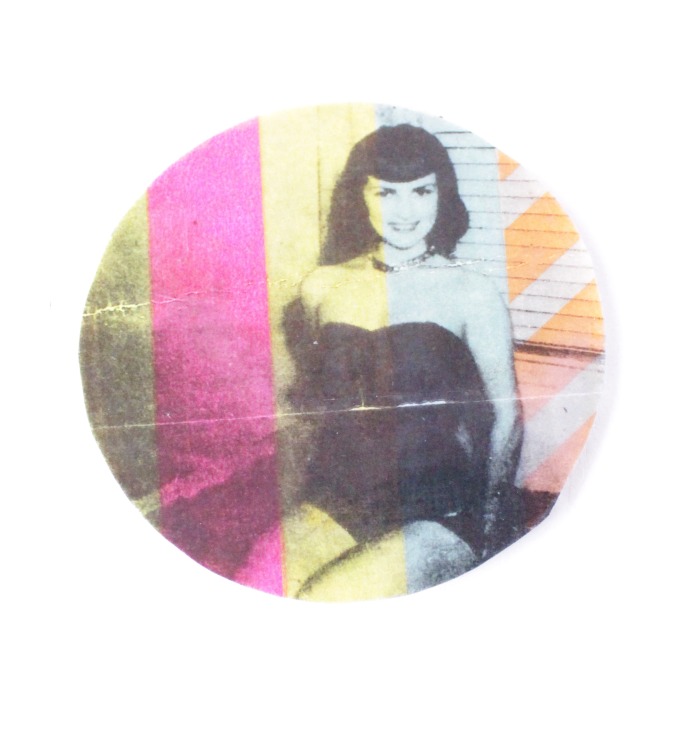
12. Apply some gloss medium to the washi taped side of one of your wooden circles.
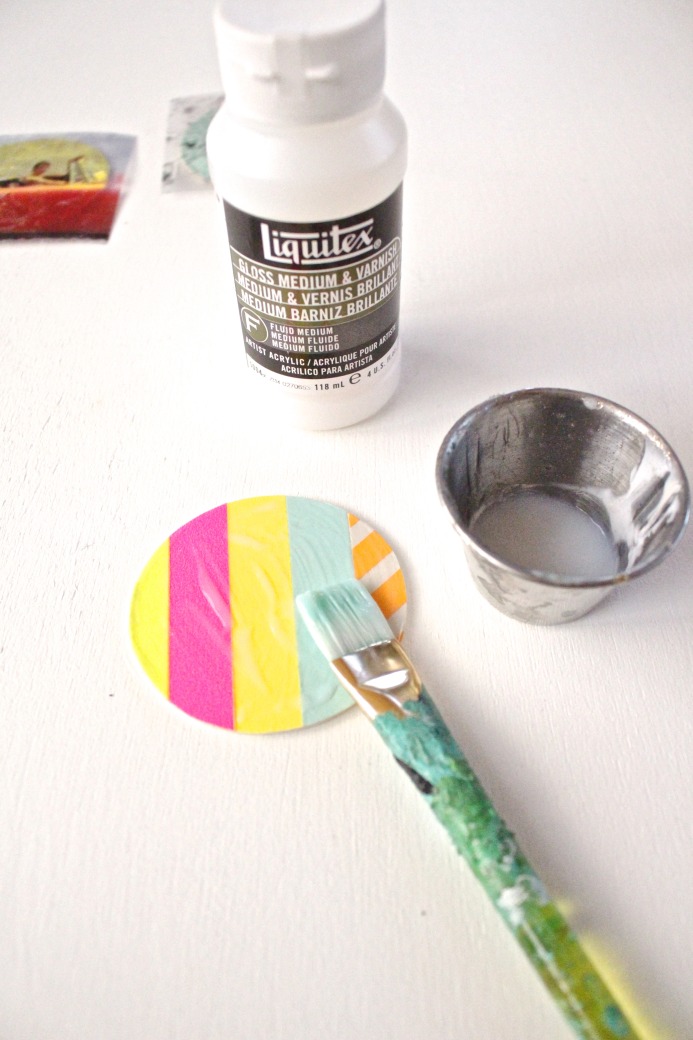
13. Place the image on top of the gloss medium and press down to adhere it.
14. Trim off the excess image transfer from the edges of the wooden circle.
15. Repeat steps 12-14 for the rest of your images. I didn’t put images over all of the wooden circles since I like the contrast of having some with just washi tape.
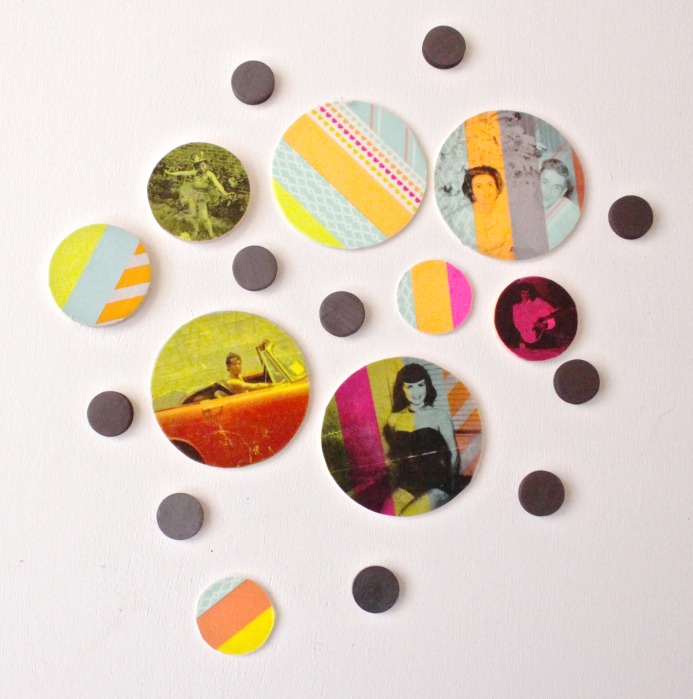
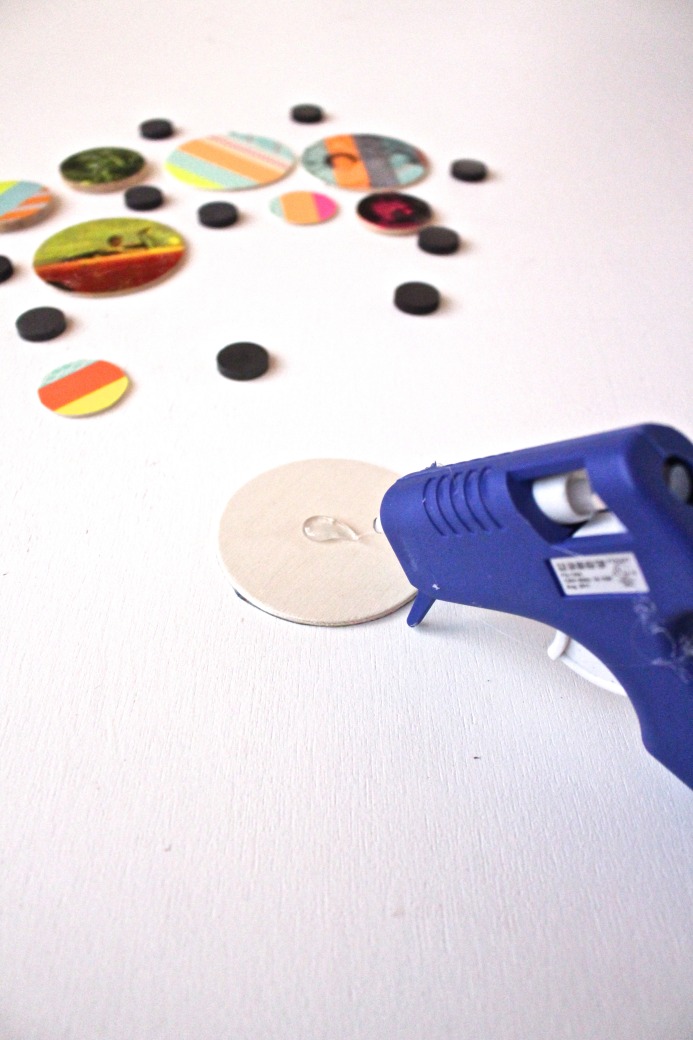
16. Using your glue gun, glue a magnet to the back of each circle.

Right now most of our family photos are sorted in archival boxes. I have been looking for new ways to display photos in our home. We have lived in our home for about two years, but our walls are very bare! Before we bought our own house I would display photos on twine clipped with clothes pins to minimize the holes in the rental walls!
I love pictures hung on string!
I want to put out a shallow wooden box with an assortment of photos for people to browse through at will. Of course I will put in ‘copies’ of delicate old prints, not the originals. Eventually I want a dining room table made of a glass paned door that I can have a small vignette under each pane which can be changed out at will.
What a great idea!
My favorite way is on clothespins or clips!
Clothespins are like the duct tape of the craft world. SO. Many. Uses.
I’ve gotten a hold of my grandmother’s photos from way back and combined them with new images of family and locations into a Shutterfly book.
(Presents to celebrate my grand parents 70th anniversary. Awesomeness!)
Then, I took a page scanner and made each page into a scrap book page for each of the families with individualized sayings and images that were appropriate for that family. I’ve used my Washi tape to transfer the sayings so the pop out next to the Images, some pictures I Xeroxed (wont work with laser ink jet) and used a blender pen to “antique” it using the reversed page.
On some, I made a mat of Washi tape and transferred the image back to original, but now in color! BTW, I Love the thicker Washi rolls, like the passport tape. Yeah, dawg!
What a sweet gift!
I display them strung by a wire through the hallways!
Love that!
I have a room divider that holds 8×10 prints. I try to swap old for new every six months, but it’s usually about 12 months – just in time for Christmas or another big family get-together – before I actually print new pics. Love the image transfer / refrigerator idea. Will definitely give that a try.
The fridge is like a blank canvas! Perfect for pictures!
I love pictures. They are little glimpses of our lives. I have photos all over our house. I love to take polarids and put them on our fridge and decorate the edges. I also love to make collages of all of our favorite pictures to put in frames as well.
Your pictures are beautiful Jana!
I make photo books every 6 months for each of my kids (which includes pictures of the rest of the family and close friends too), so there’s always up to date photos in our living room for people to look through.
What a great thing for your kids too! I’ve been trying to do a yearly book…..trying….
We love photos, especially the random ones! Black and white ones of relatives we don’t actually know the names of, candid pics of events, a chosen work from the child who received her first camera this last Christmas…all framed in dollar store/goodwill find, metal frames on my super out-of-place, handicap blue “accent wall” (that my Lubby otherwise despises!). It’s a compromise we have come to so I don’t have to repaint! I’ve convinced my family that we have achieved some sort of artistic, gallery-esque exhibit that the curator of MOMA would be jealous of…all for the love of photography!!
Hanging pictures is a whole lot easier then repainting!