
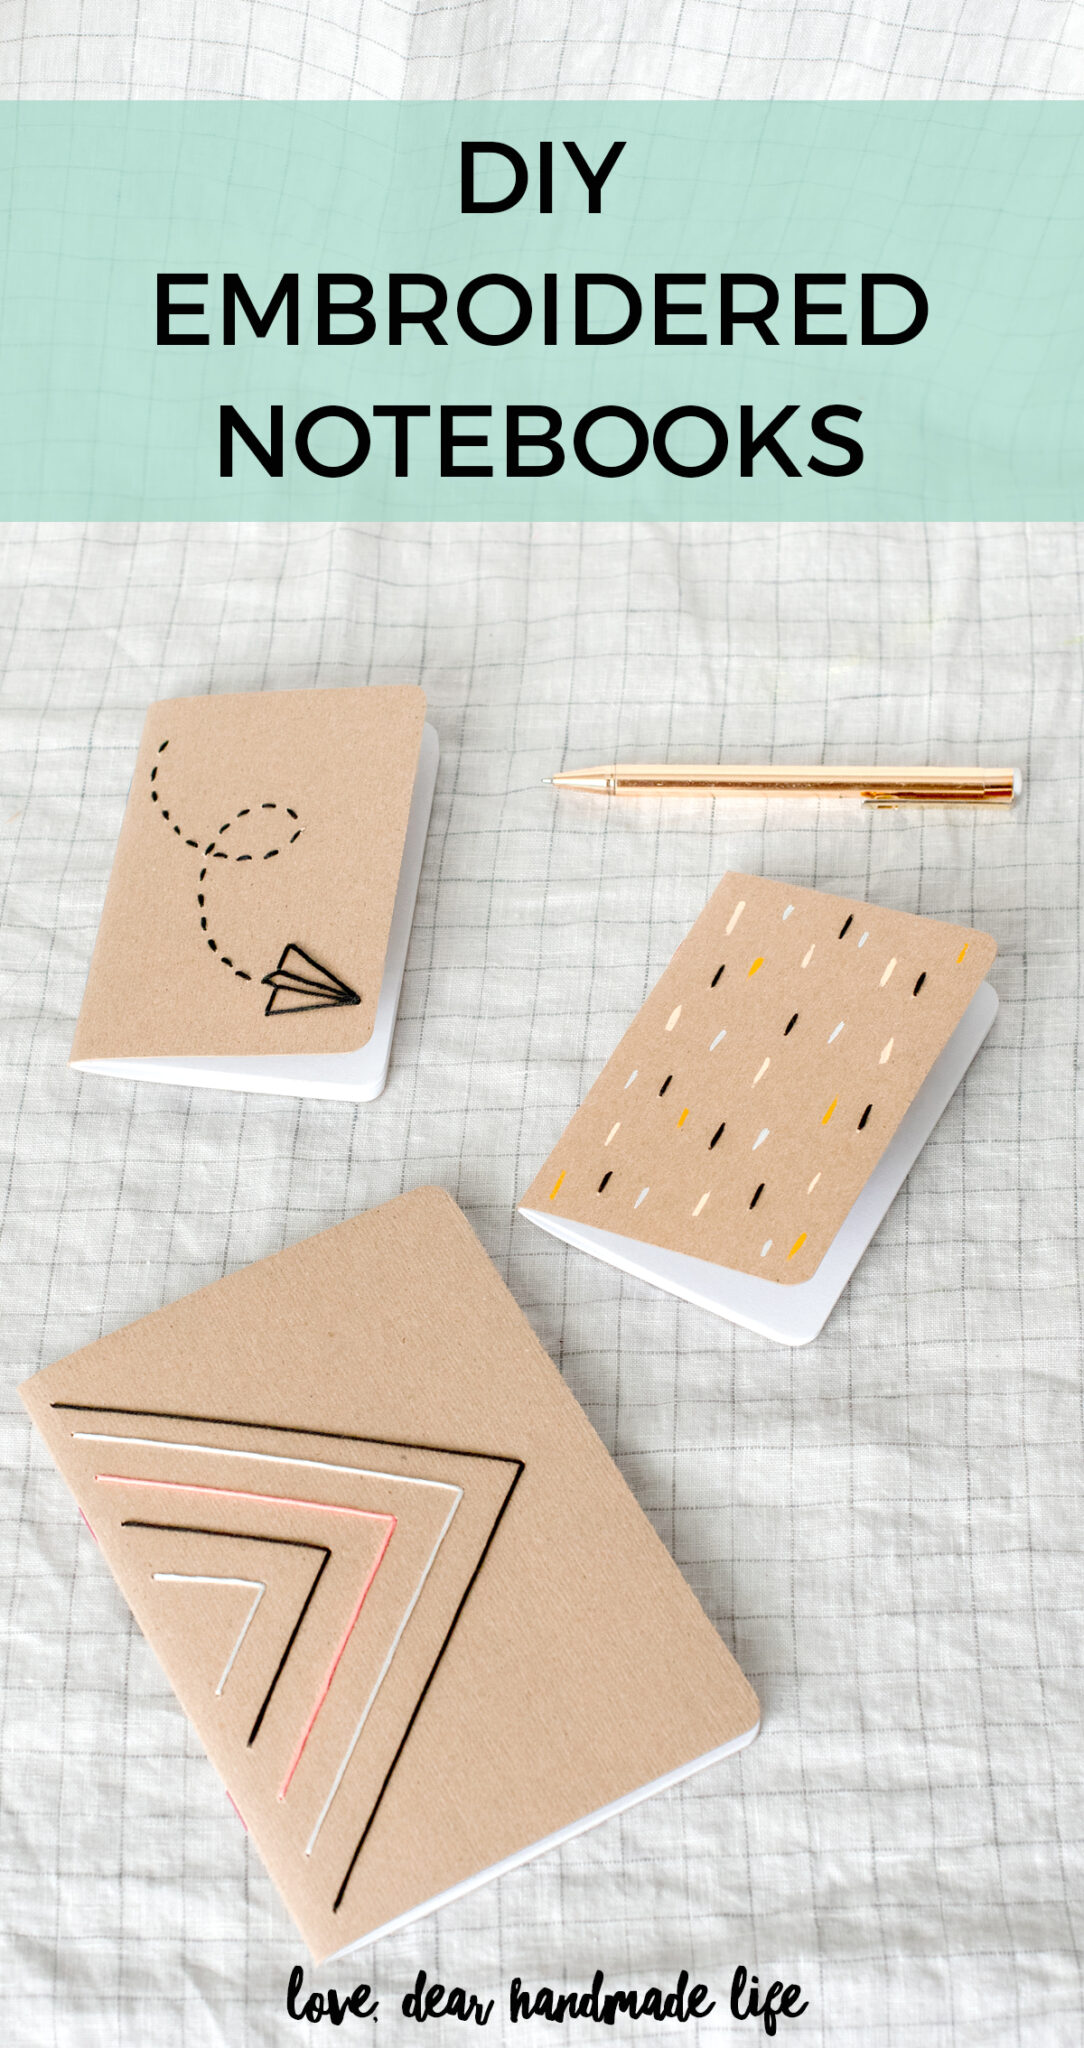
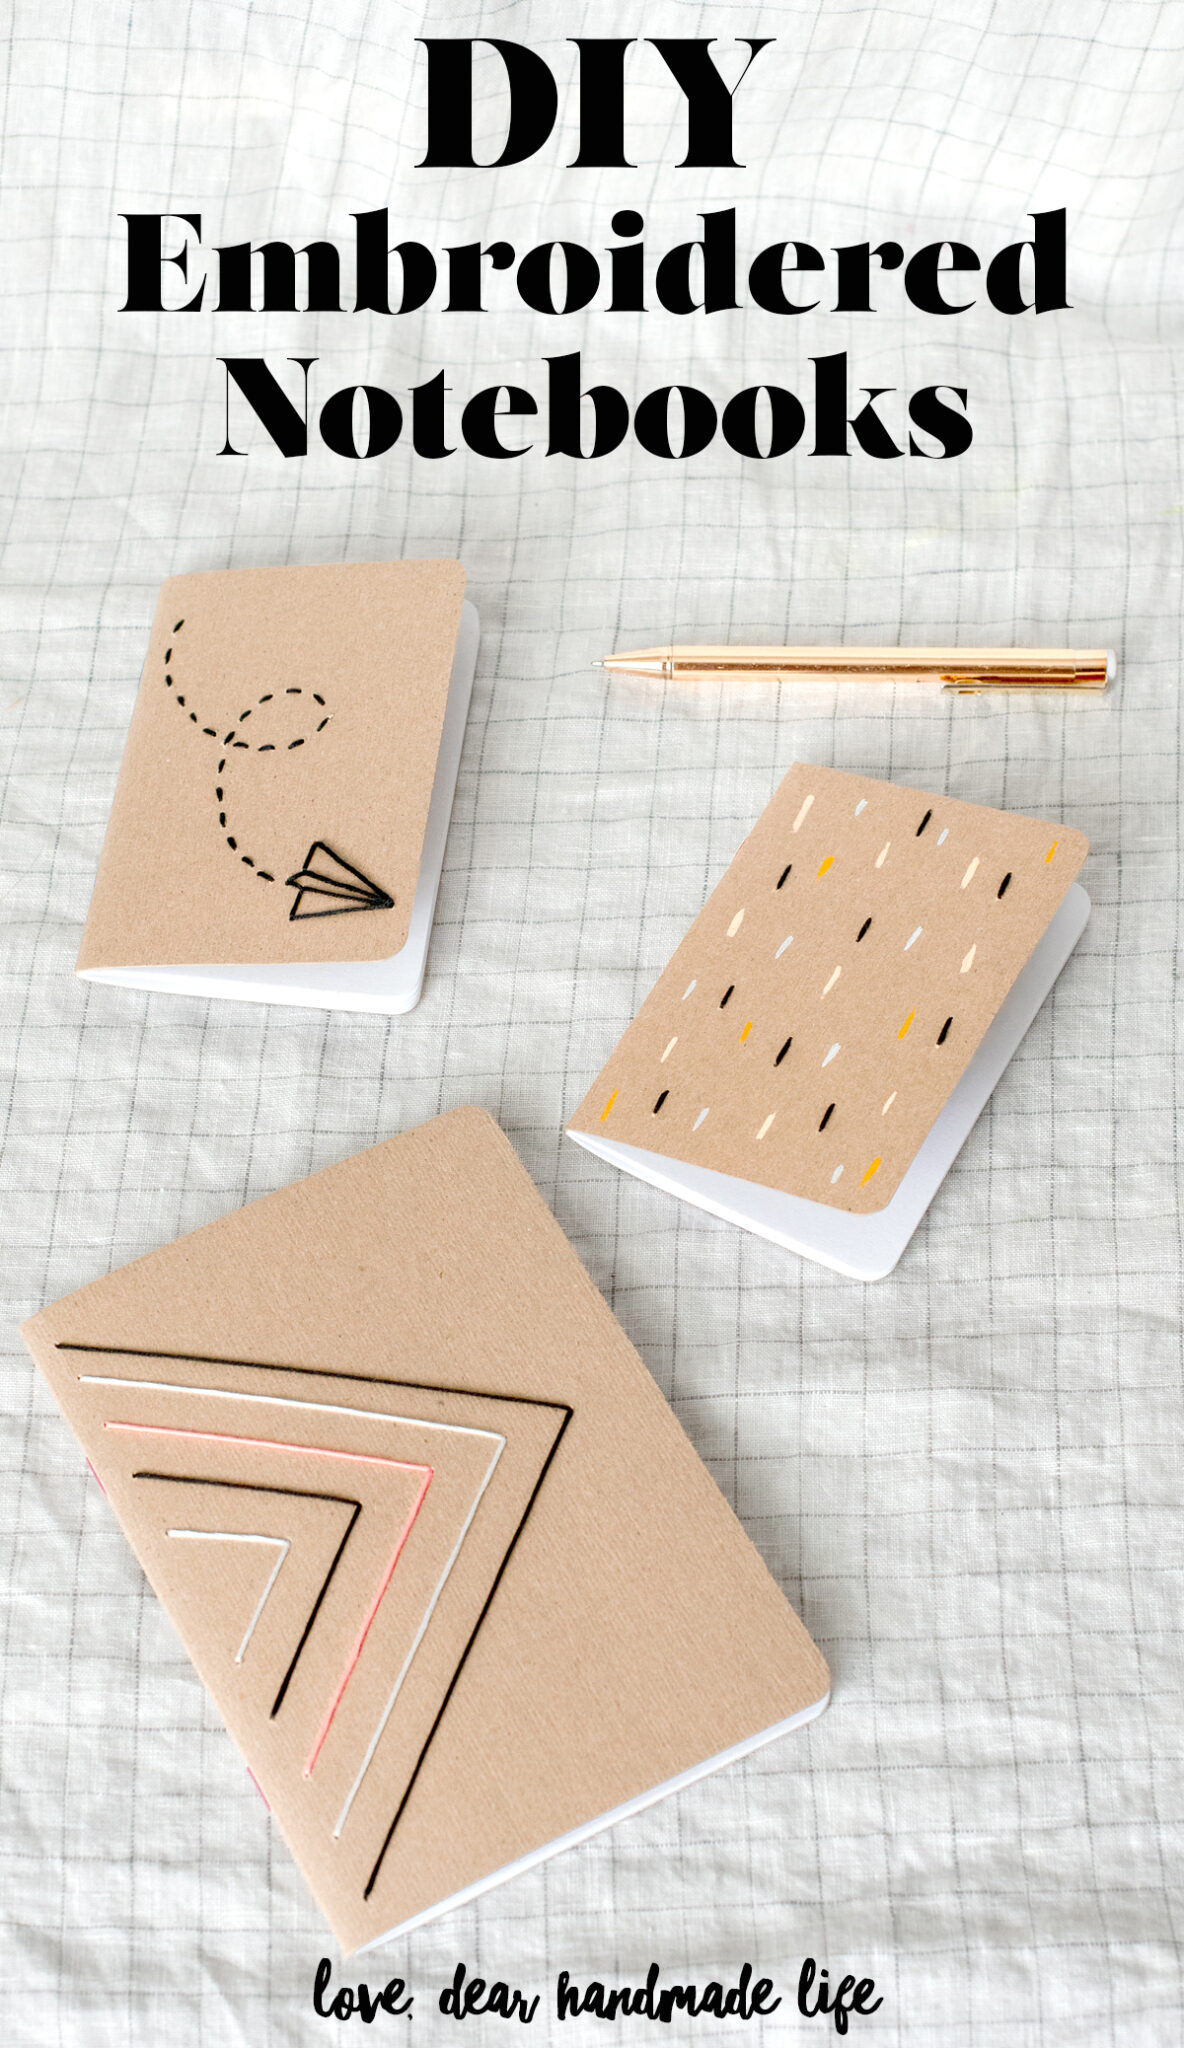
DIY Embroidered Notebooks
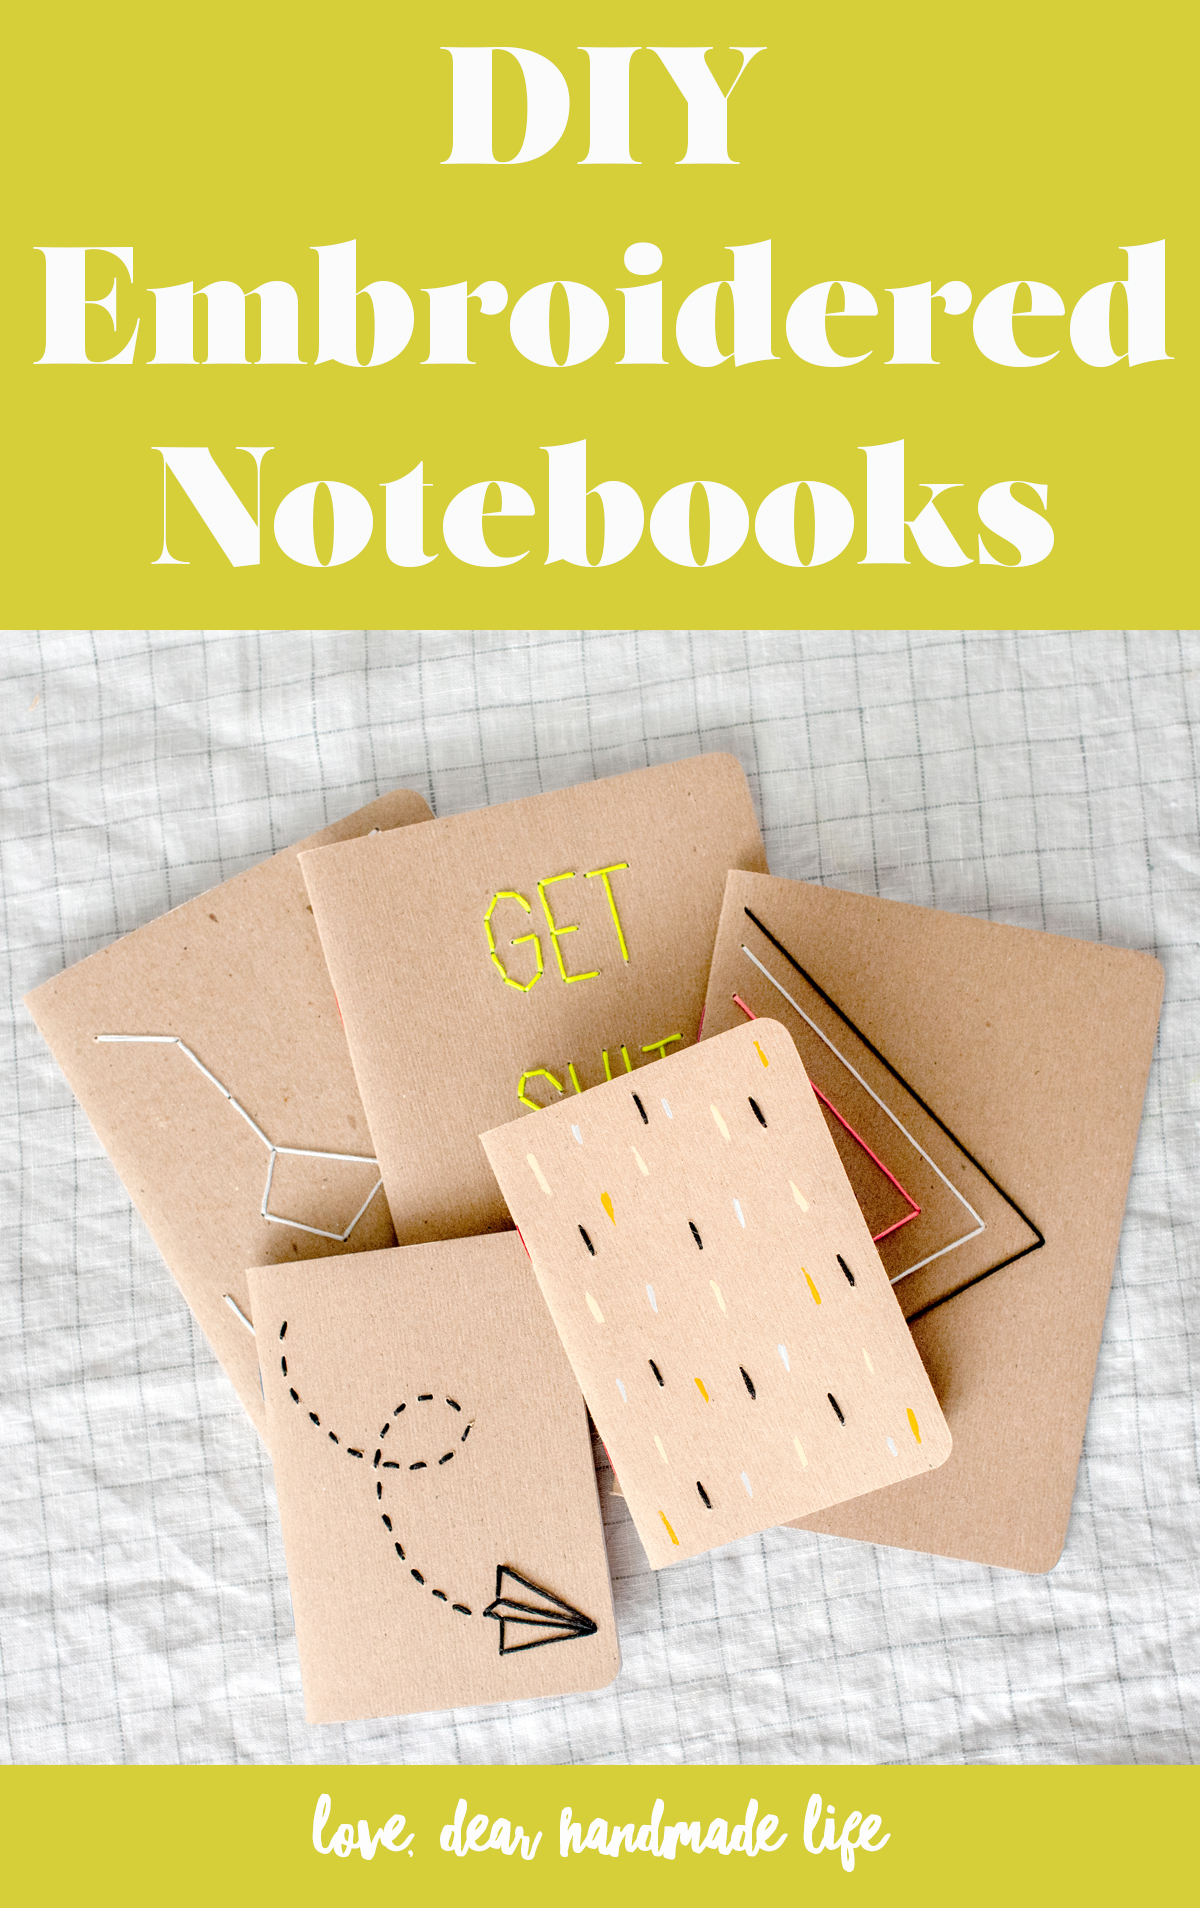
I don’t know about you but I feel like I’m constantly drowning in a sea of To Do lists. As someone who works from home, I can find it challenging to stay on task with so many distractions around, hello three cats! Since I am such a visual person one thing that helps me stick to my To Do list is having them in a pretty notebook, so I decided to craft up these DIY Scout books with some simple hand embroidery. The best part is they are the perfect size to throw in a bag and keep with me on the go! Let me show you how I did it.
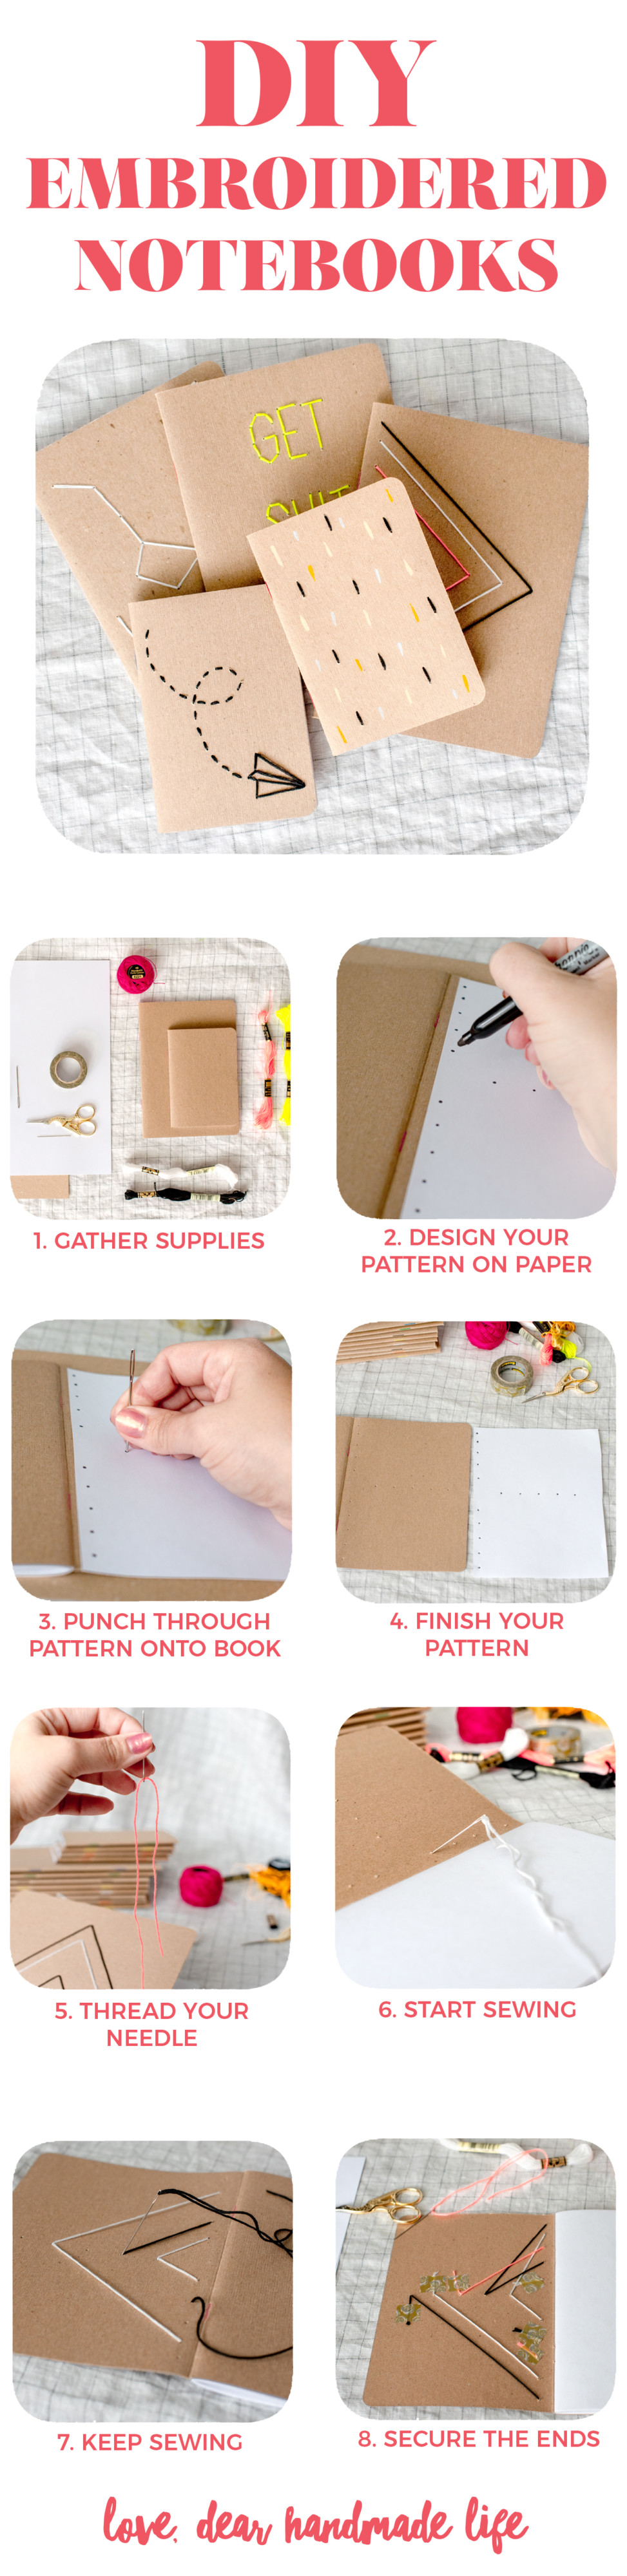
WHAT TO GET:
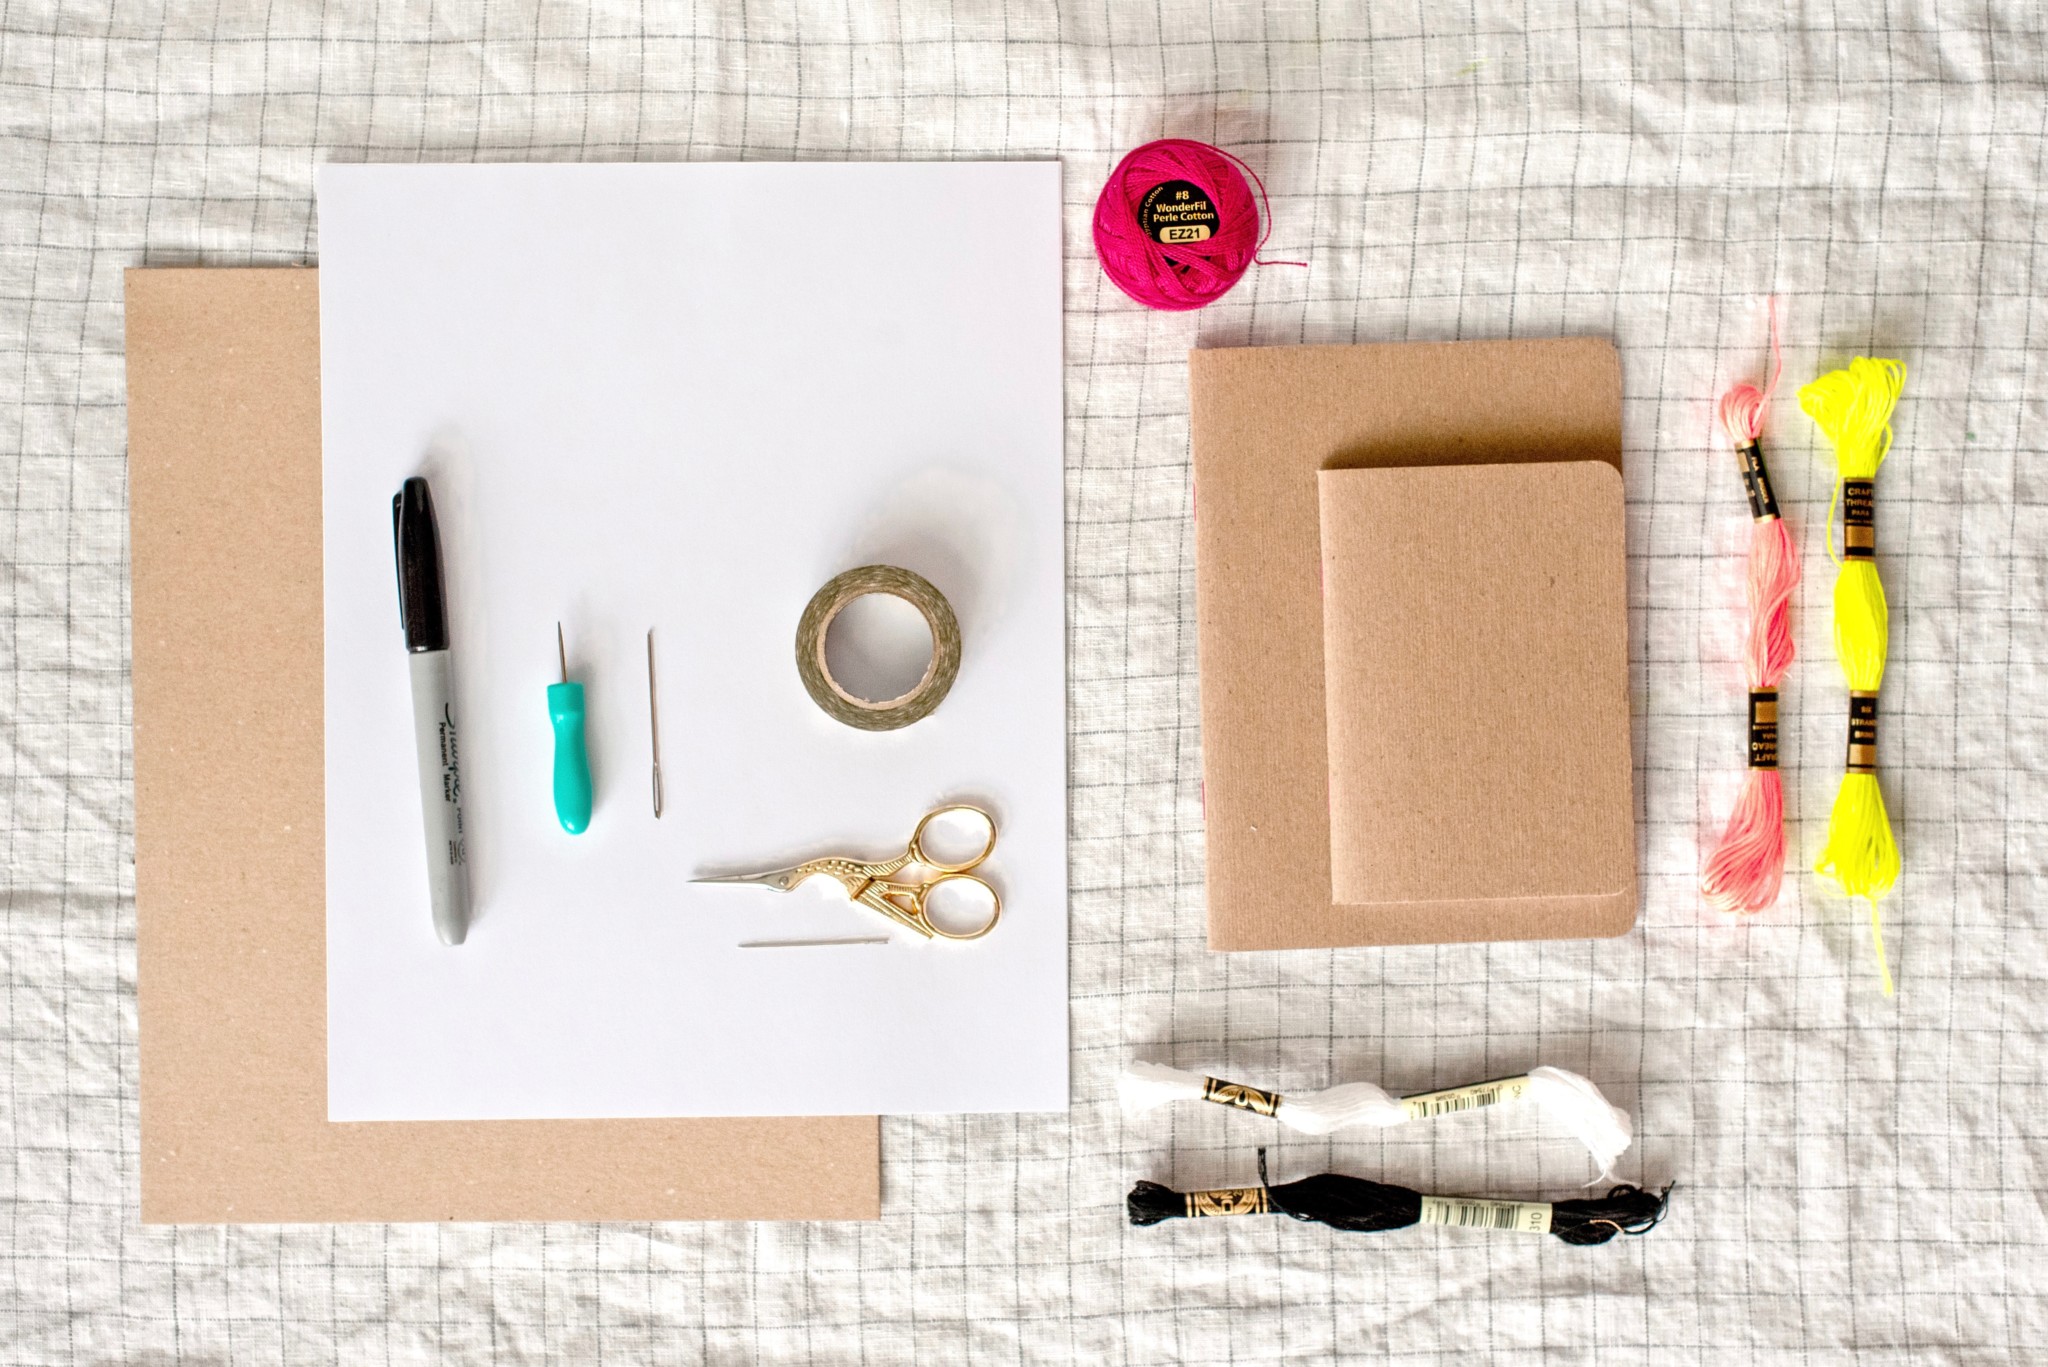
-Plain notebook with thin paper cover. I used this in both the pocket & mega size.
–Embroidery needle
-Embroidery floss (this is a great assortment)
-Scissors
-Paper Piercing tool or thick crewel needle (my tool is from Amy Tan)
-Sharpie/writing utensil (I love this dual tip one)
-Scratch paper
–Cutting mat/cardboard/chipboard (something to protect your surface when you punch the holes)
–Washi Tape
WHAT TO DO:
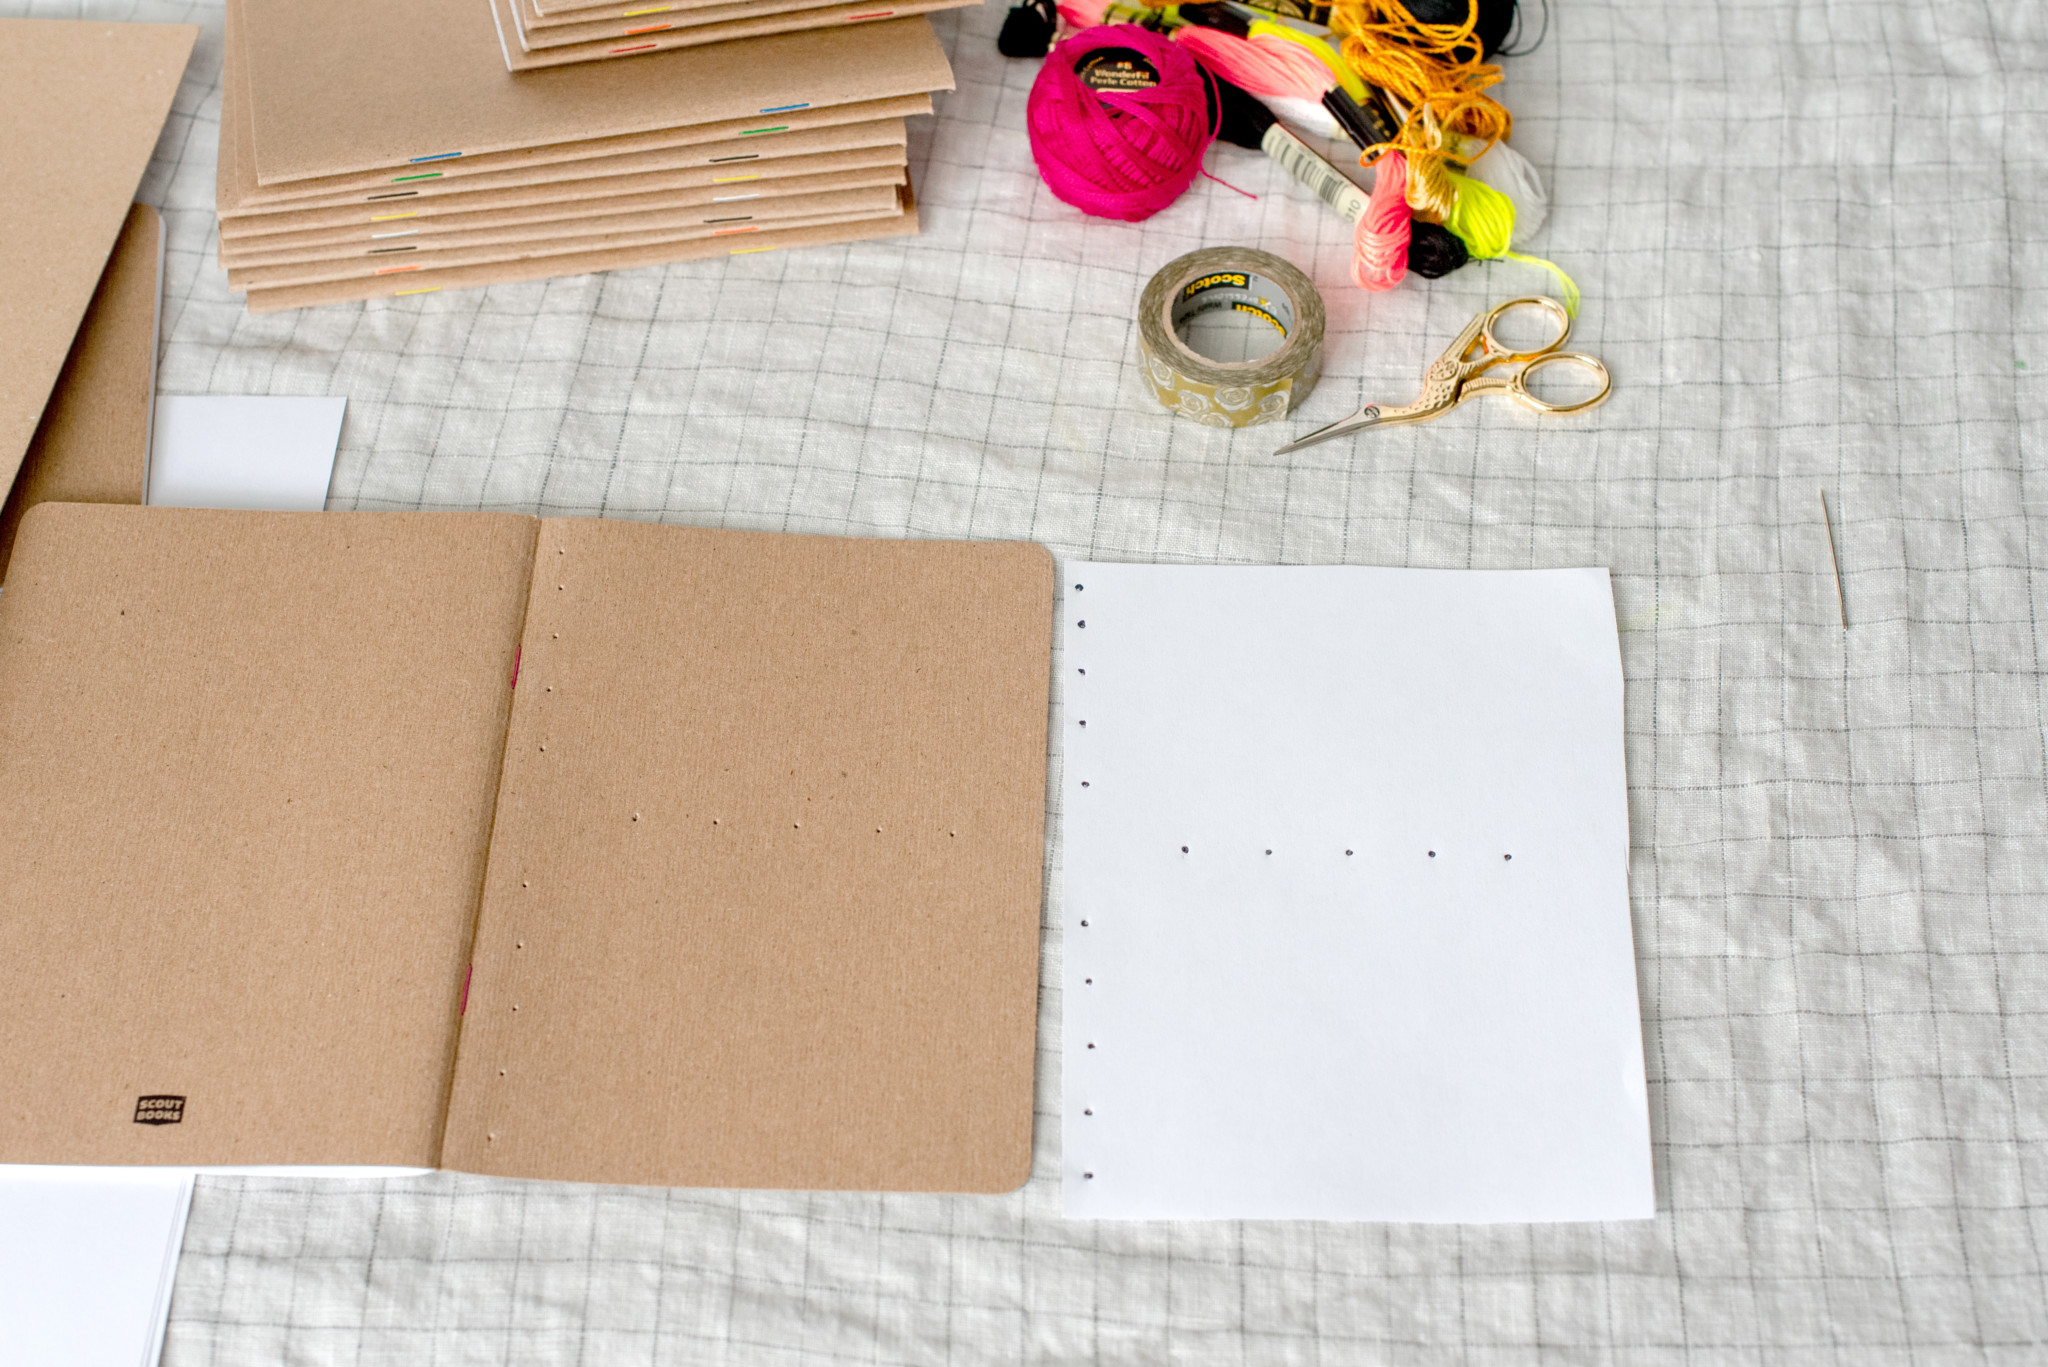
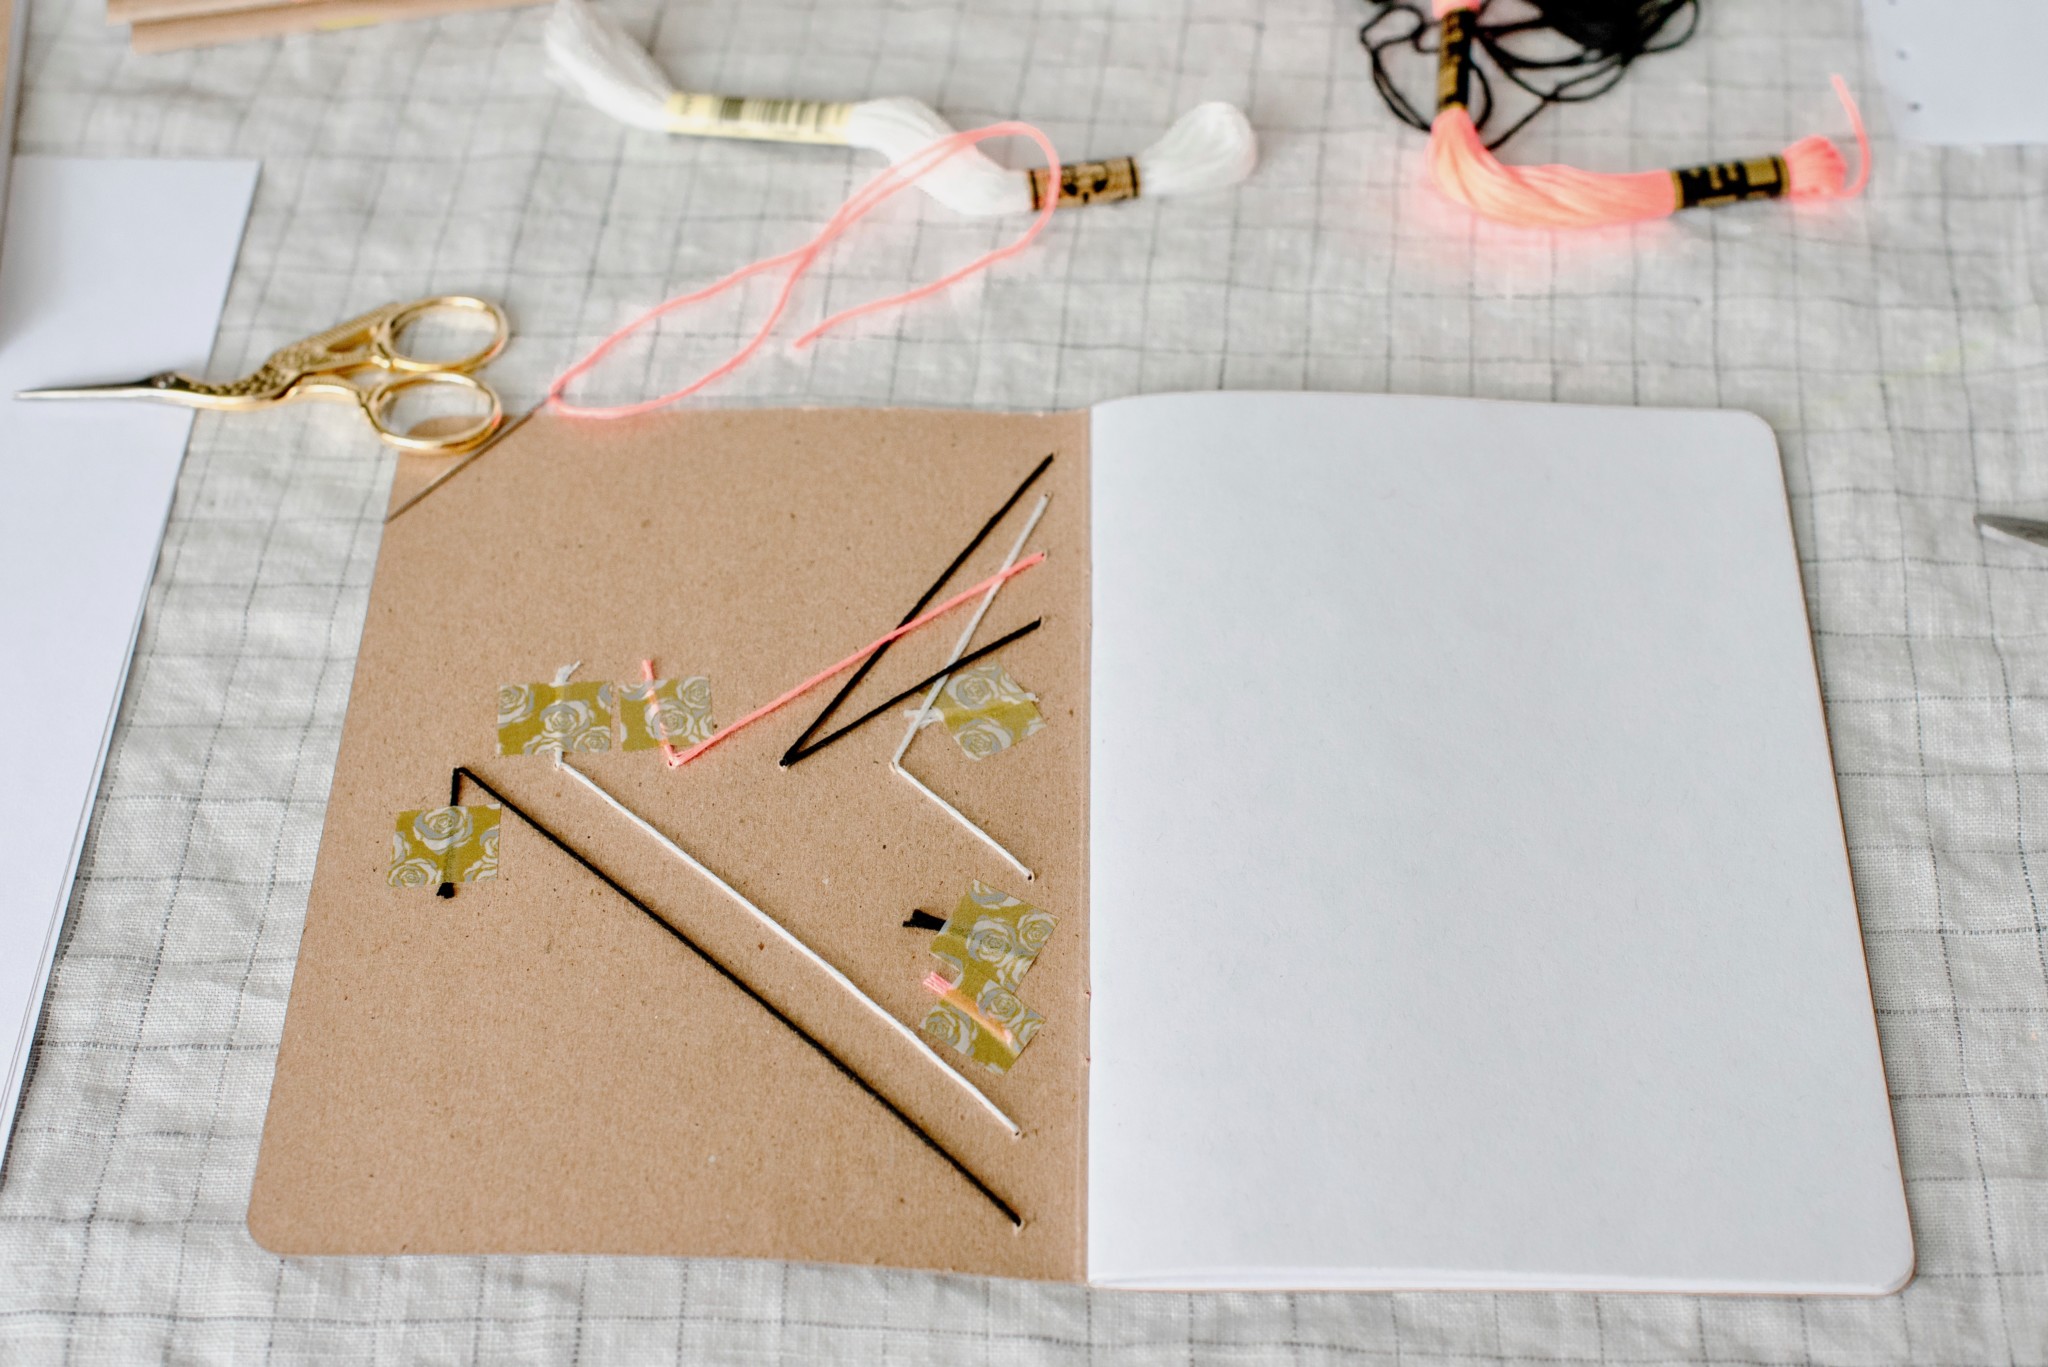
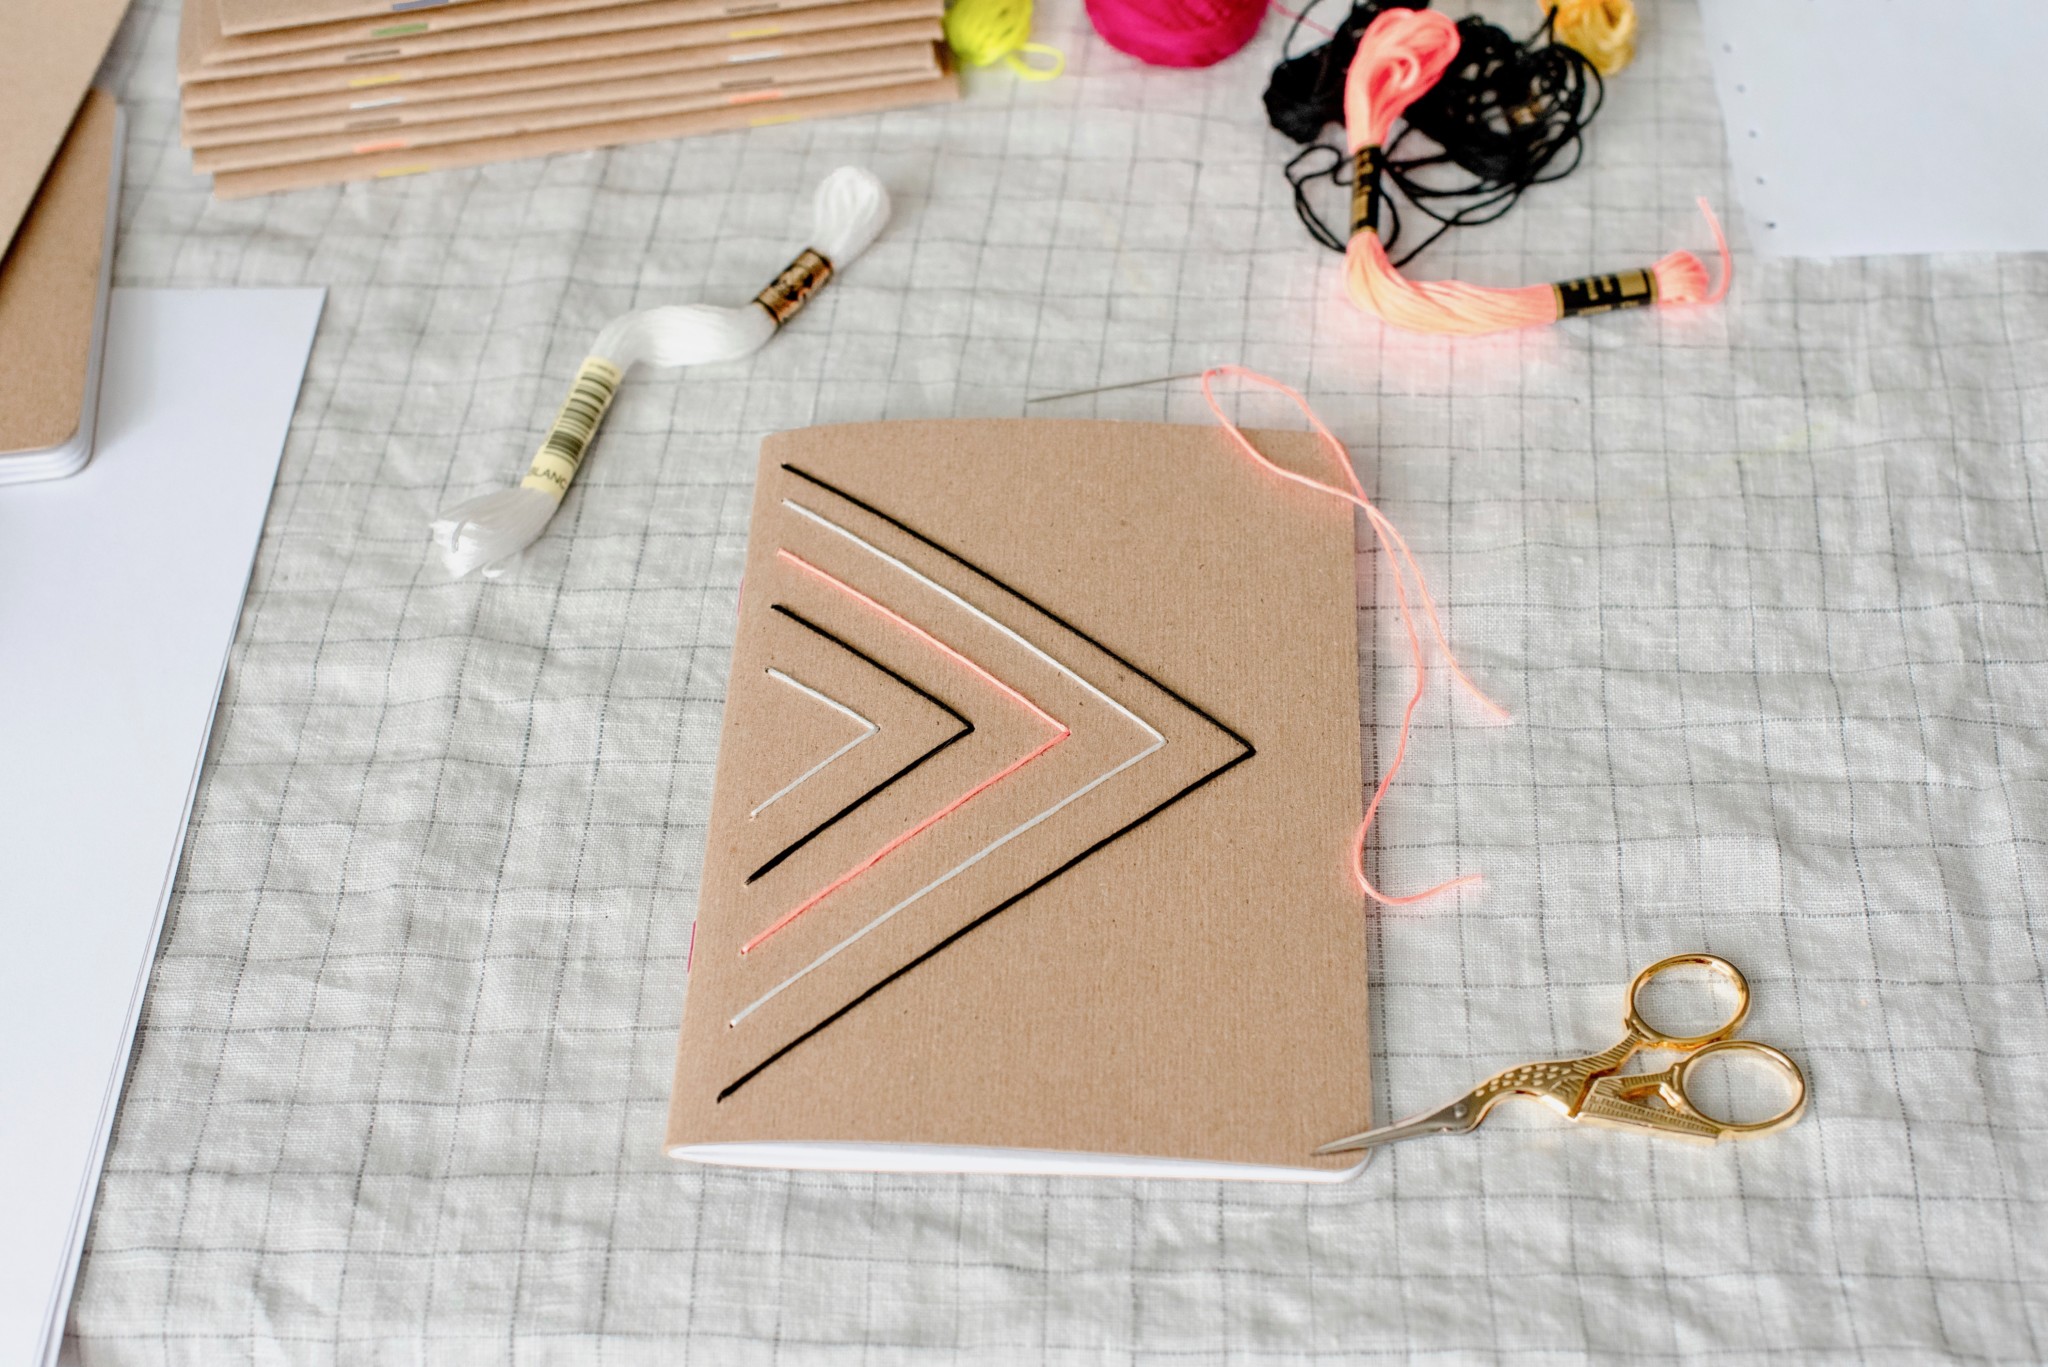
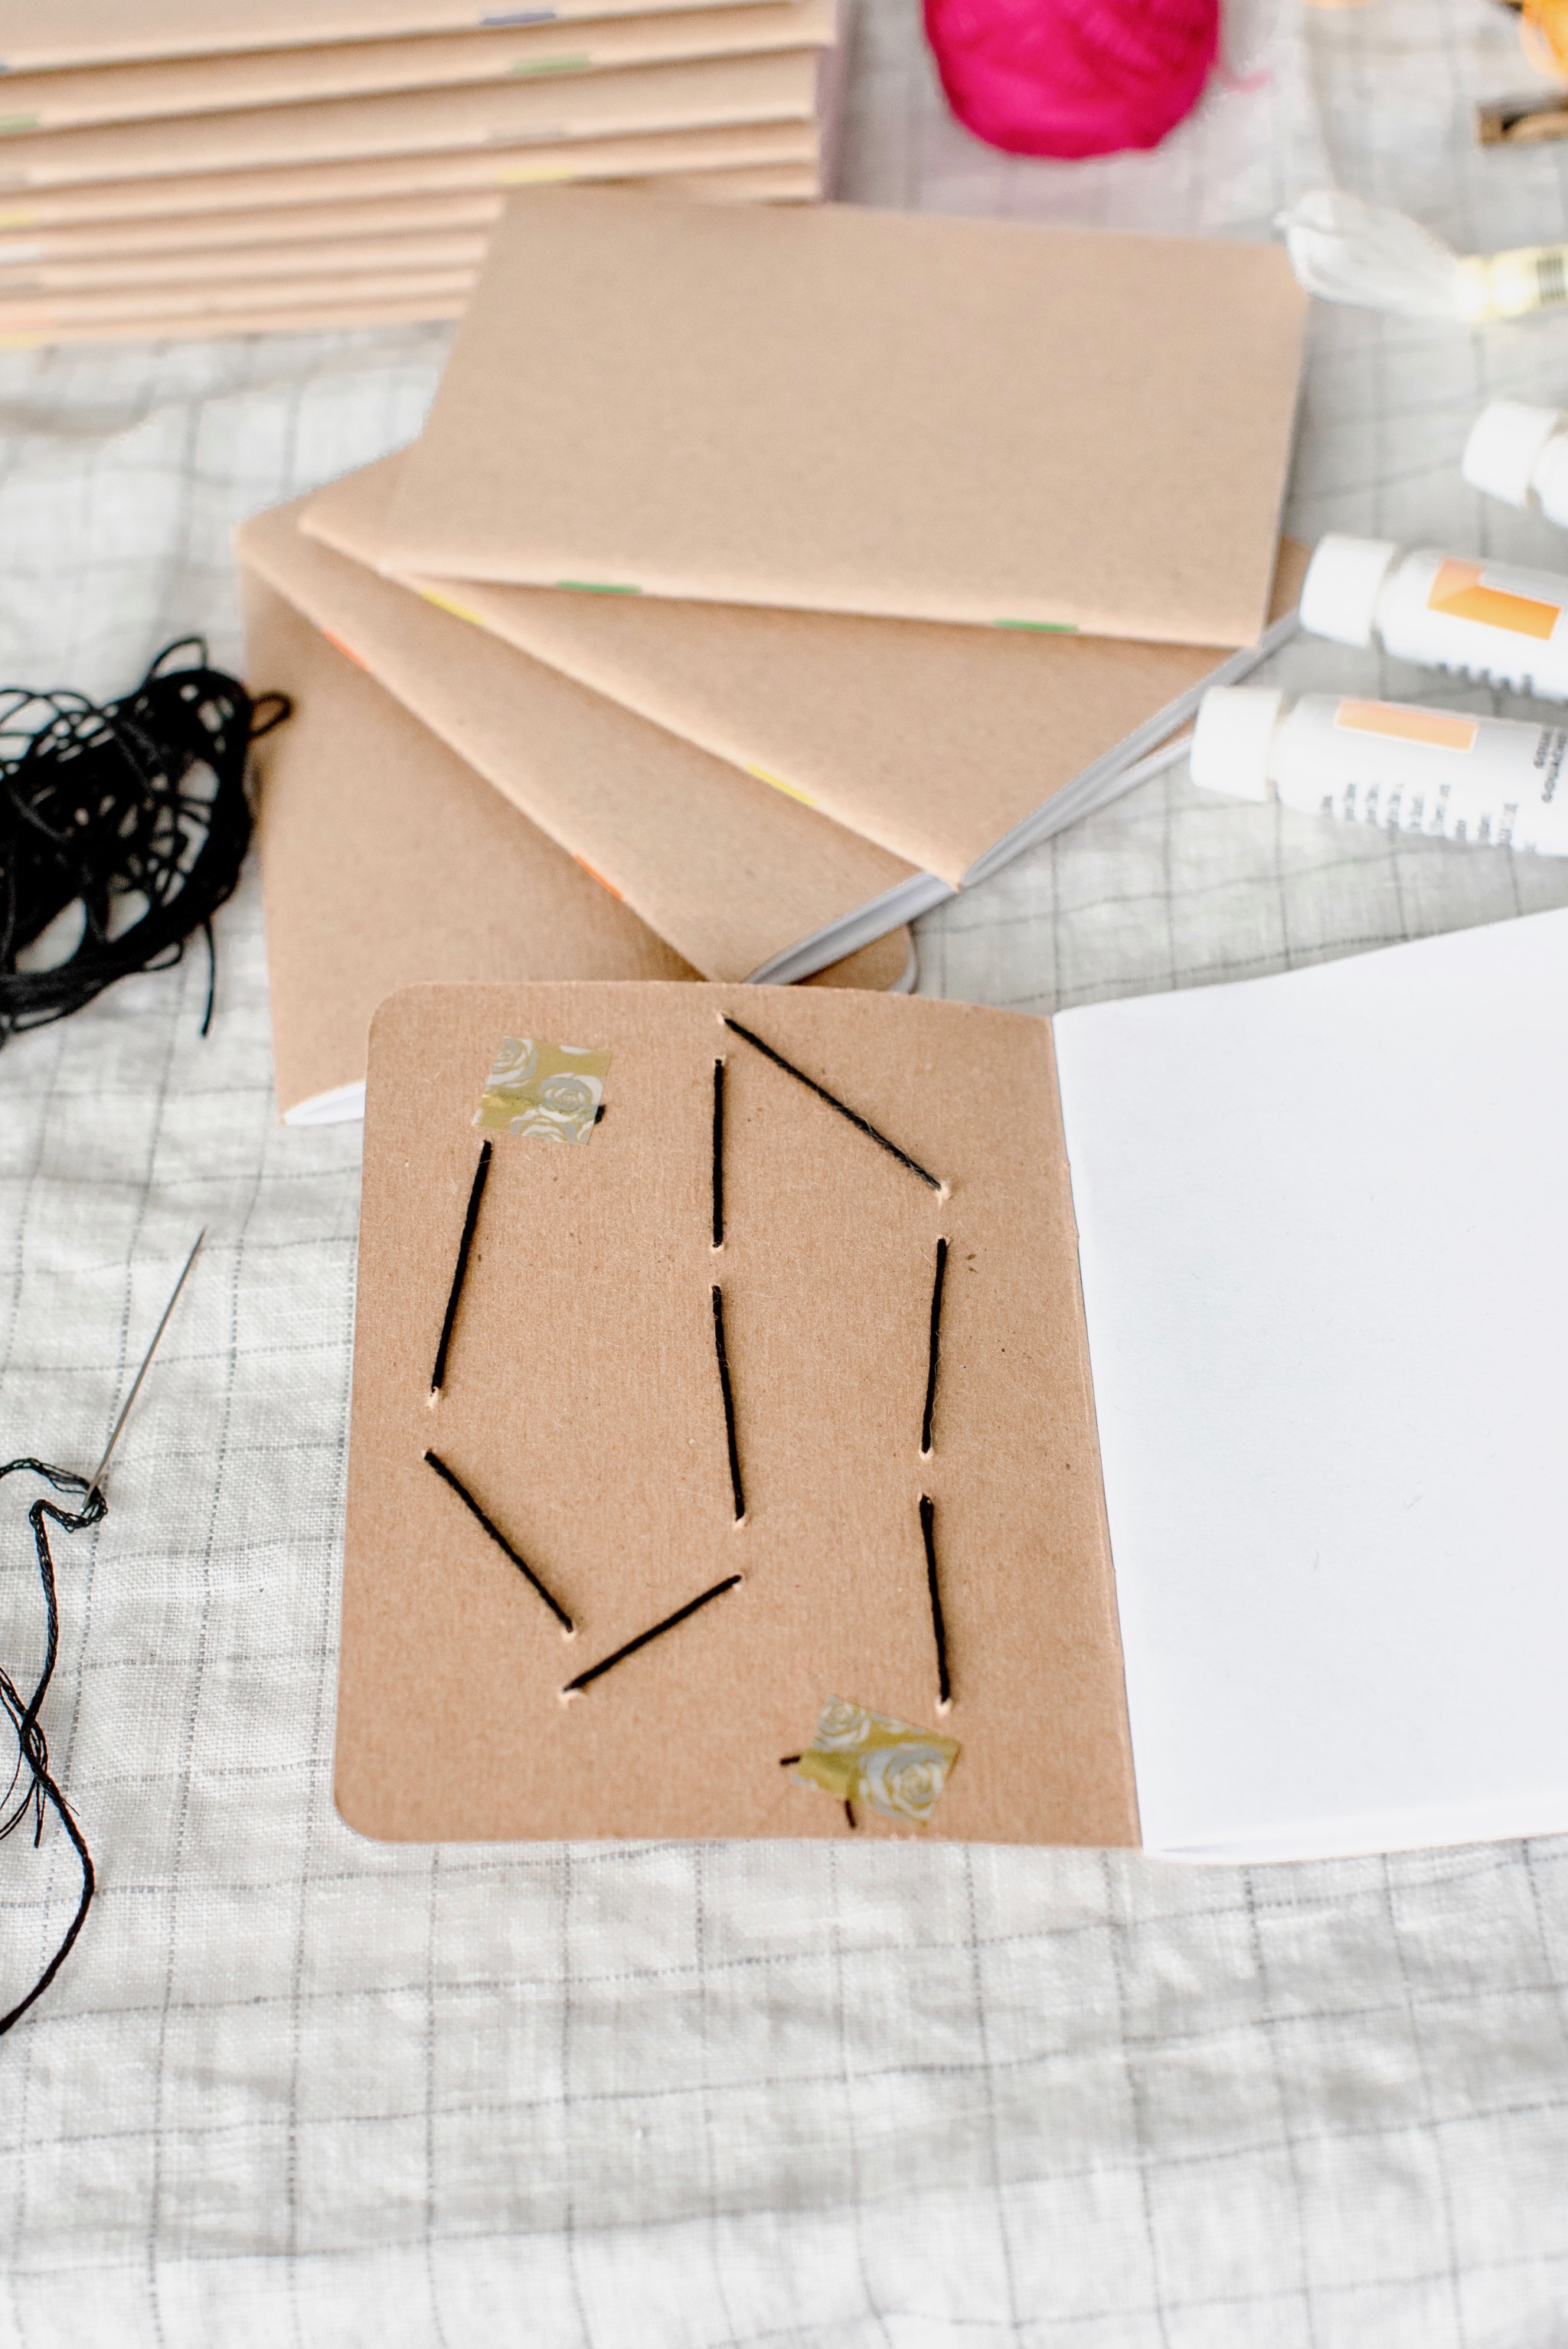
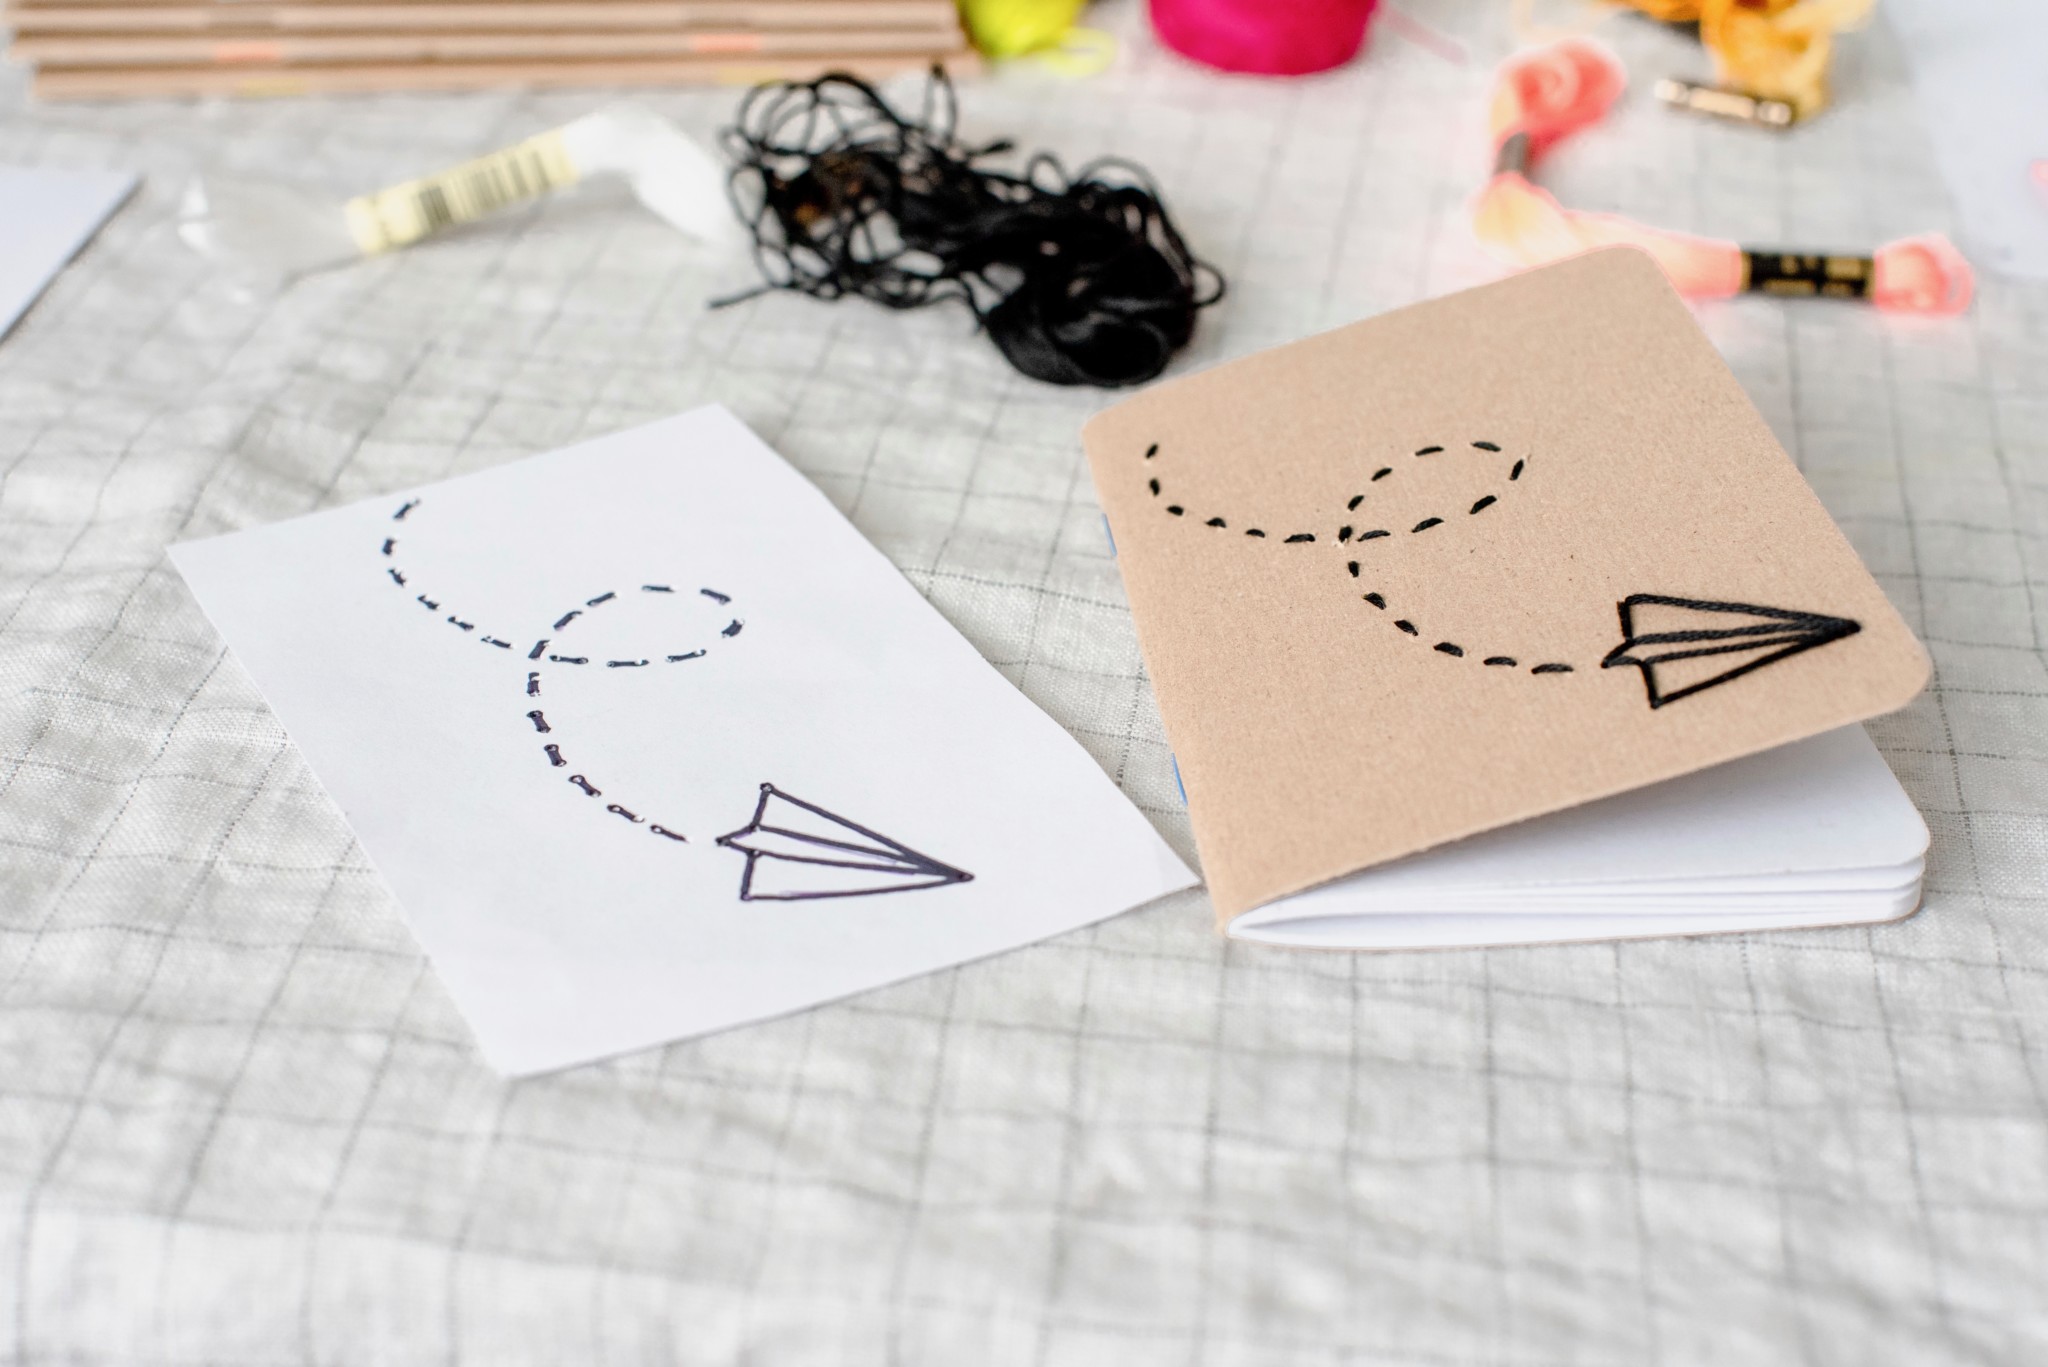
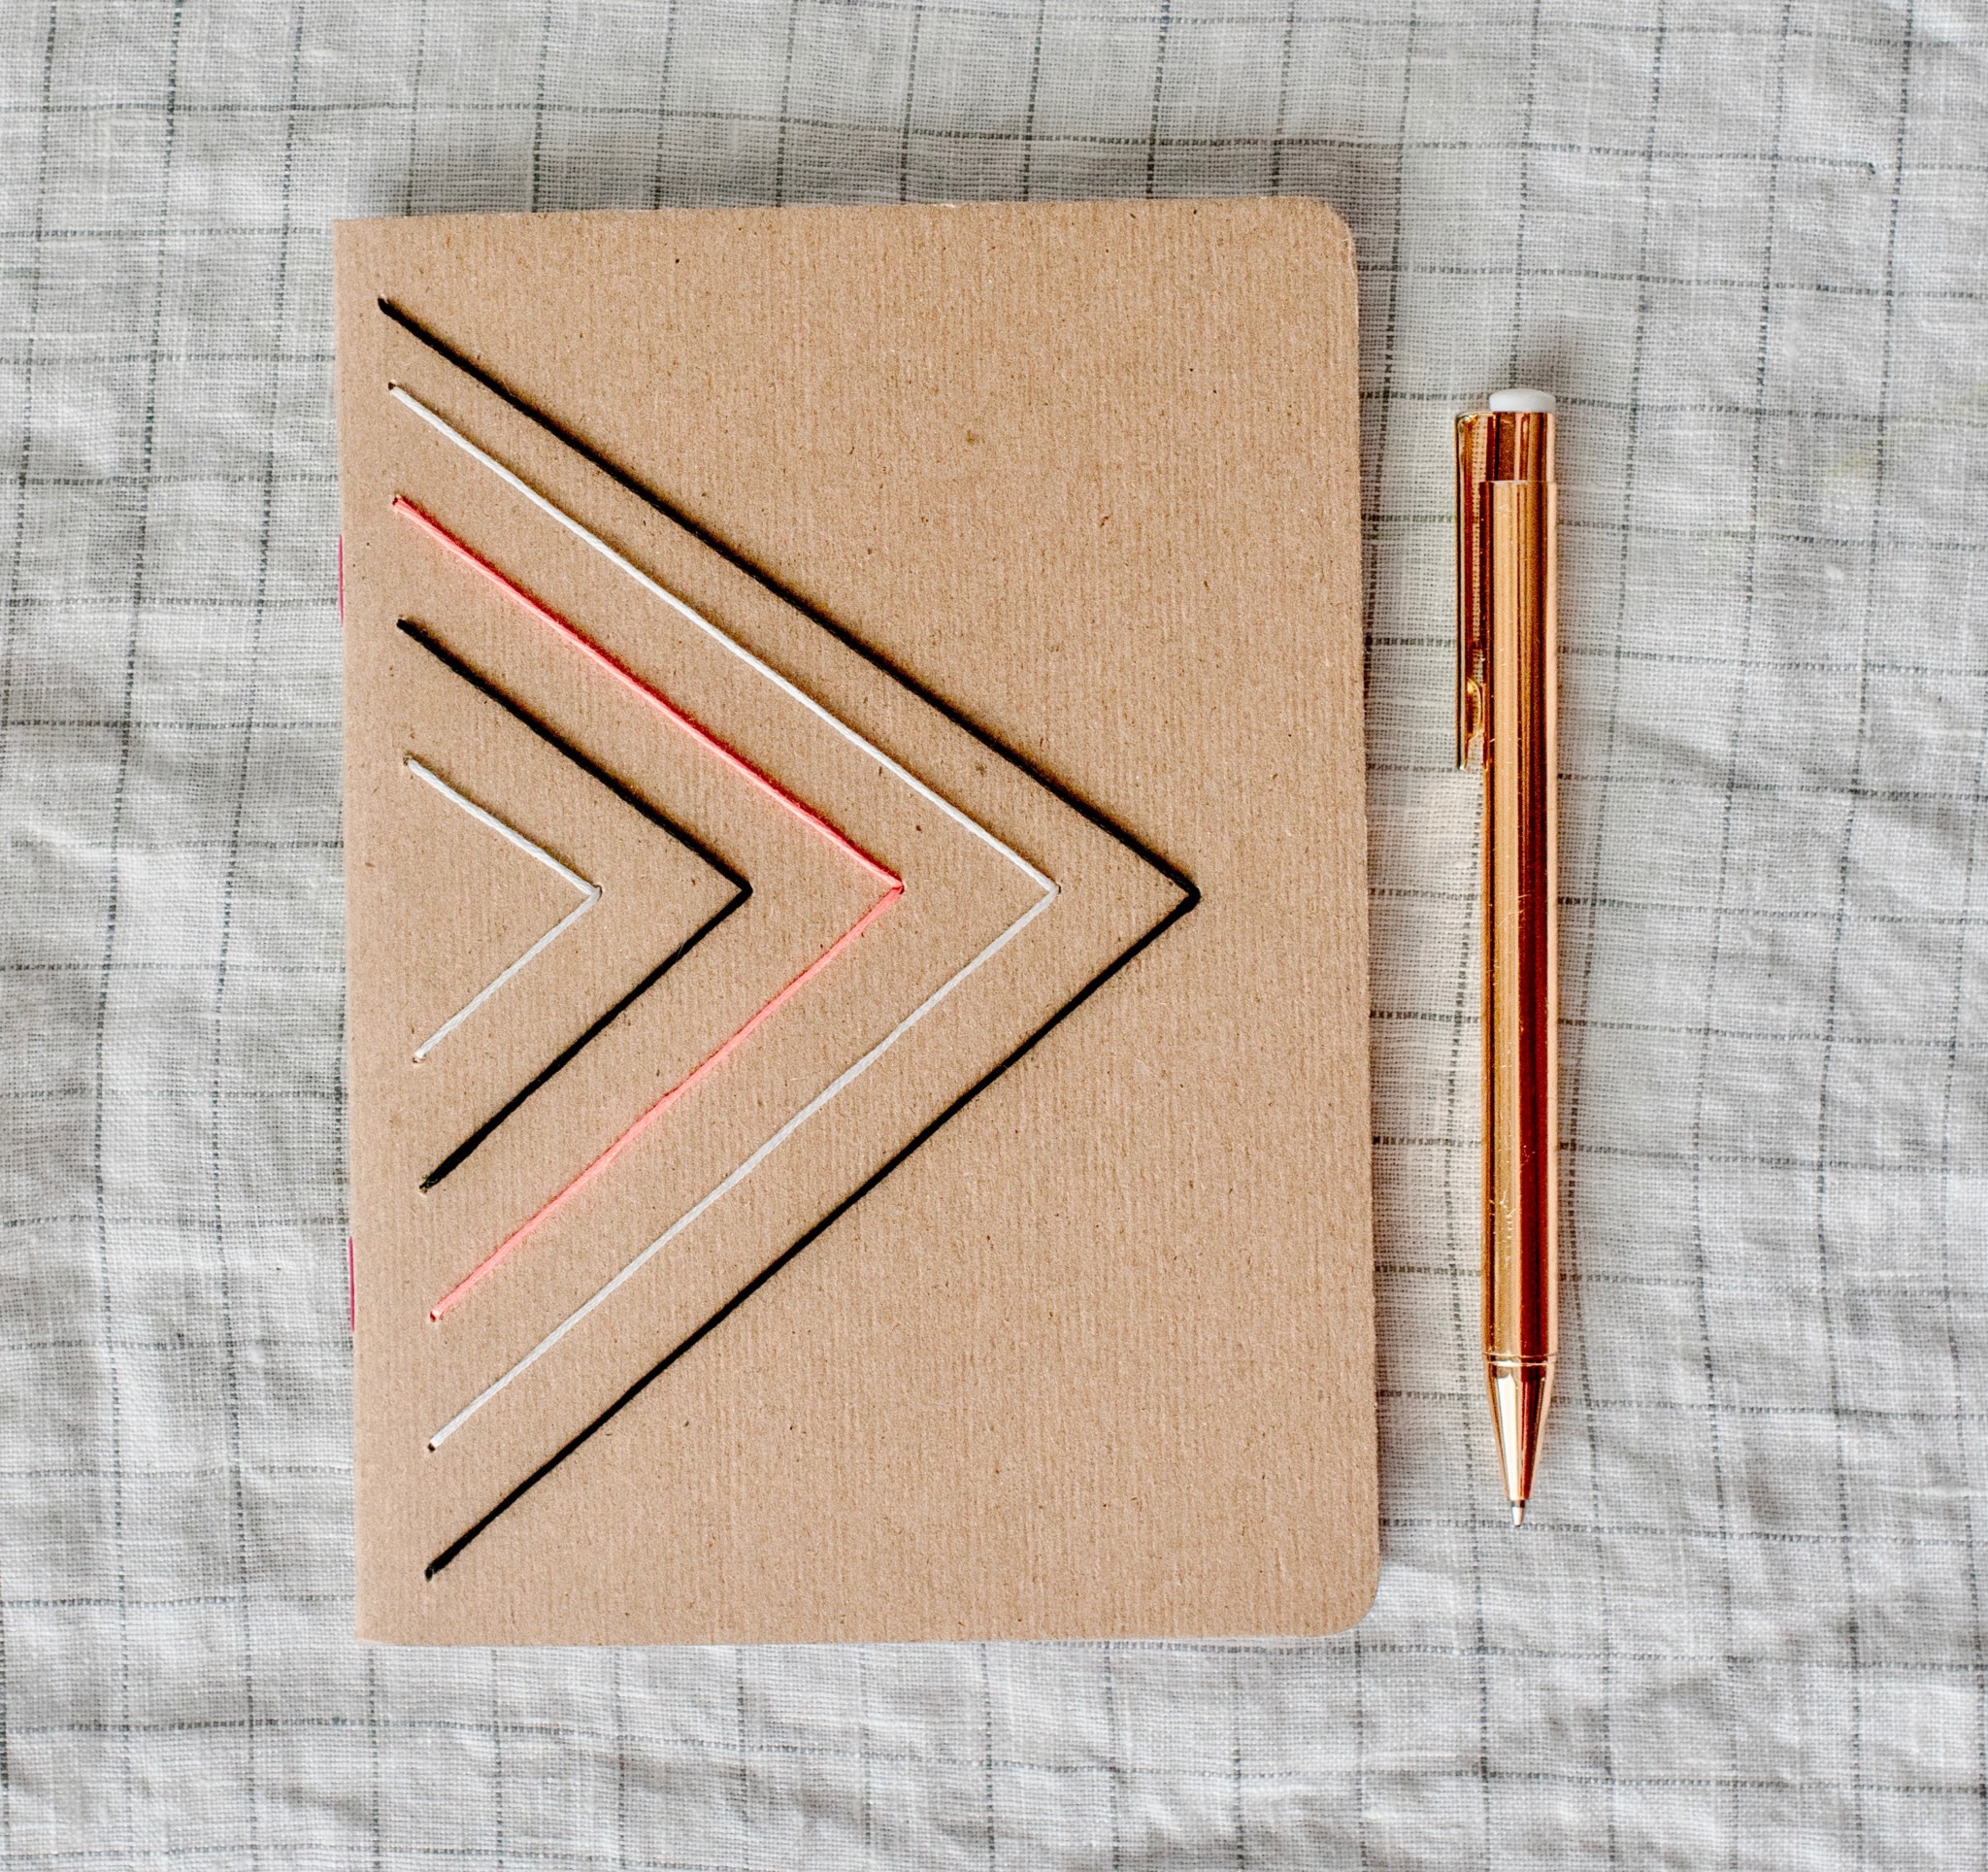
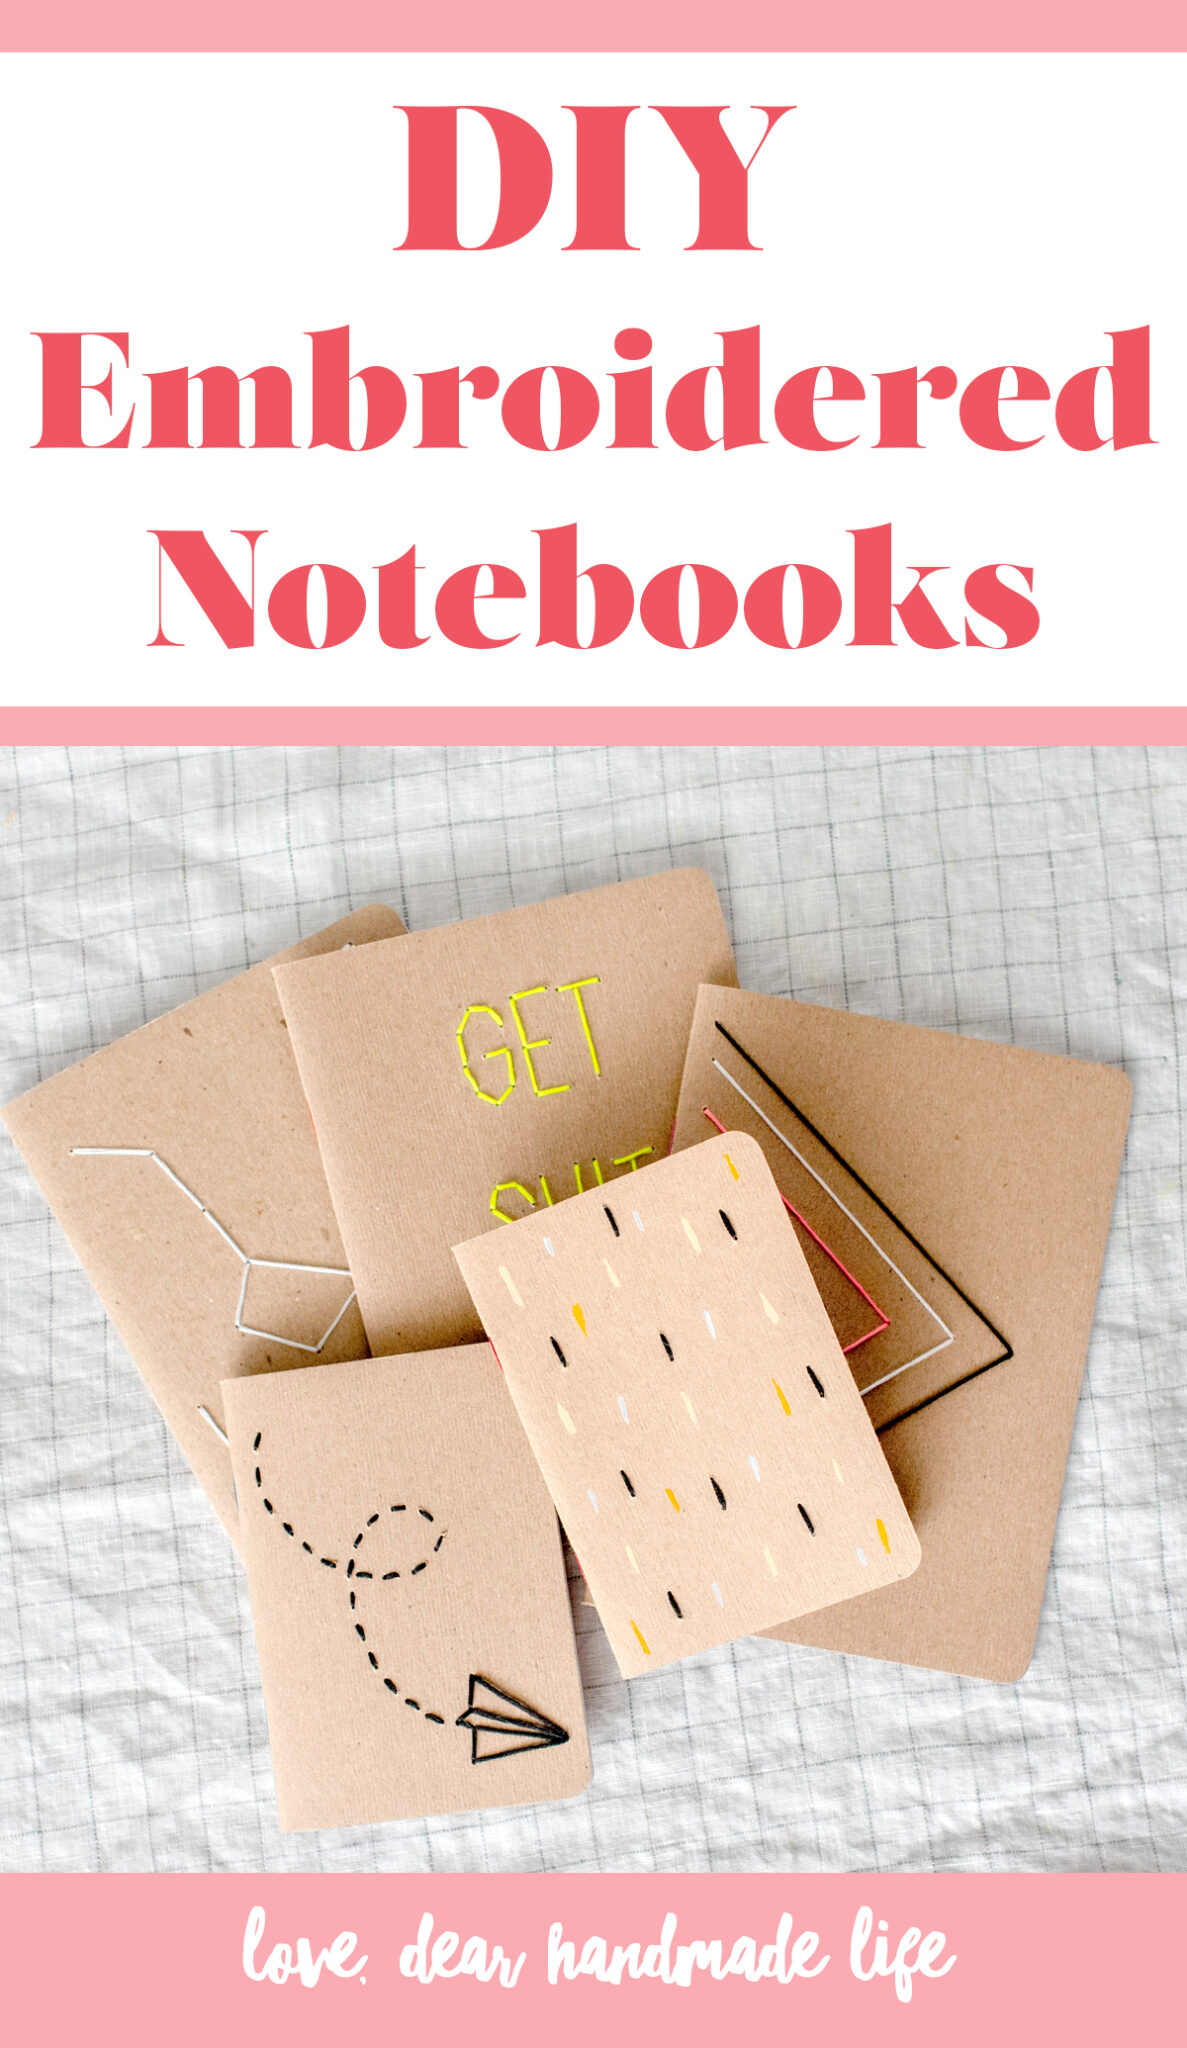
1. Cut the scratch paper to the size of your notebook and then decide on the design you’d like to go with and sketch it out on your scratch paper. I knew I wanted a simple triangle design so I just freehanded the dots where I knew I would end up punching through.
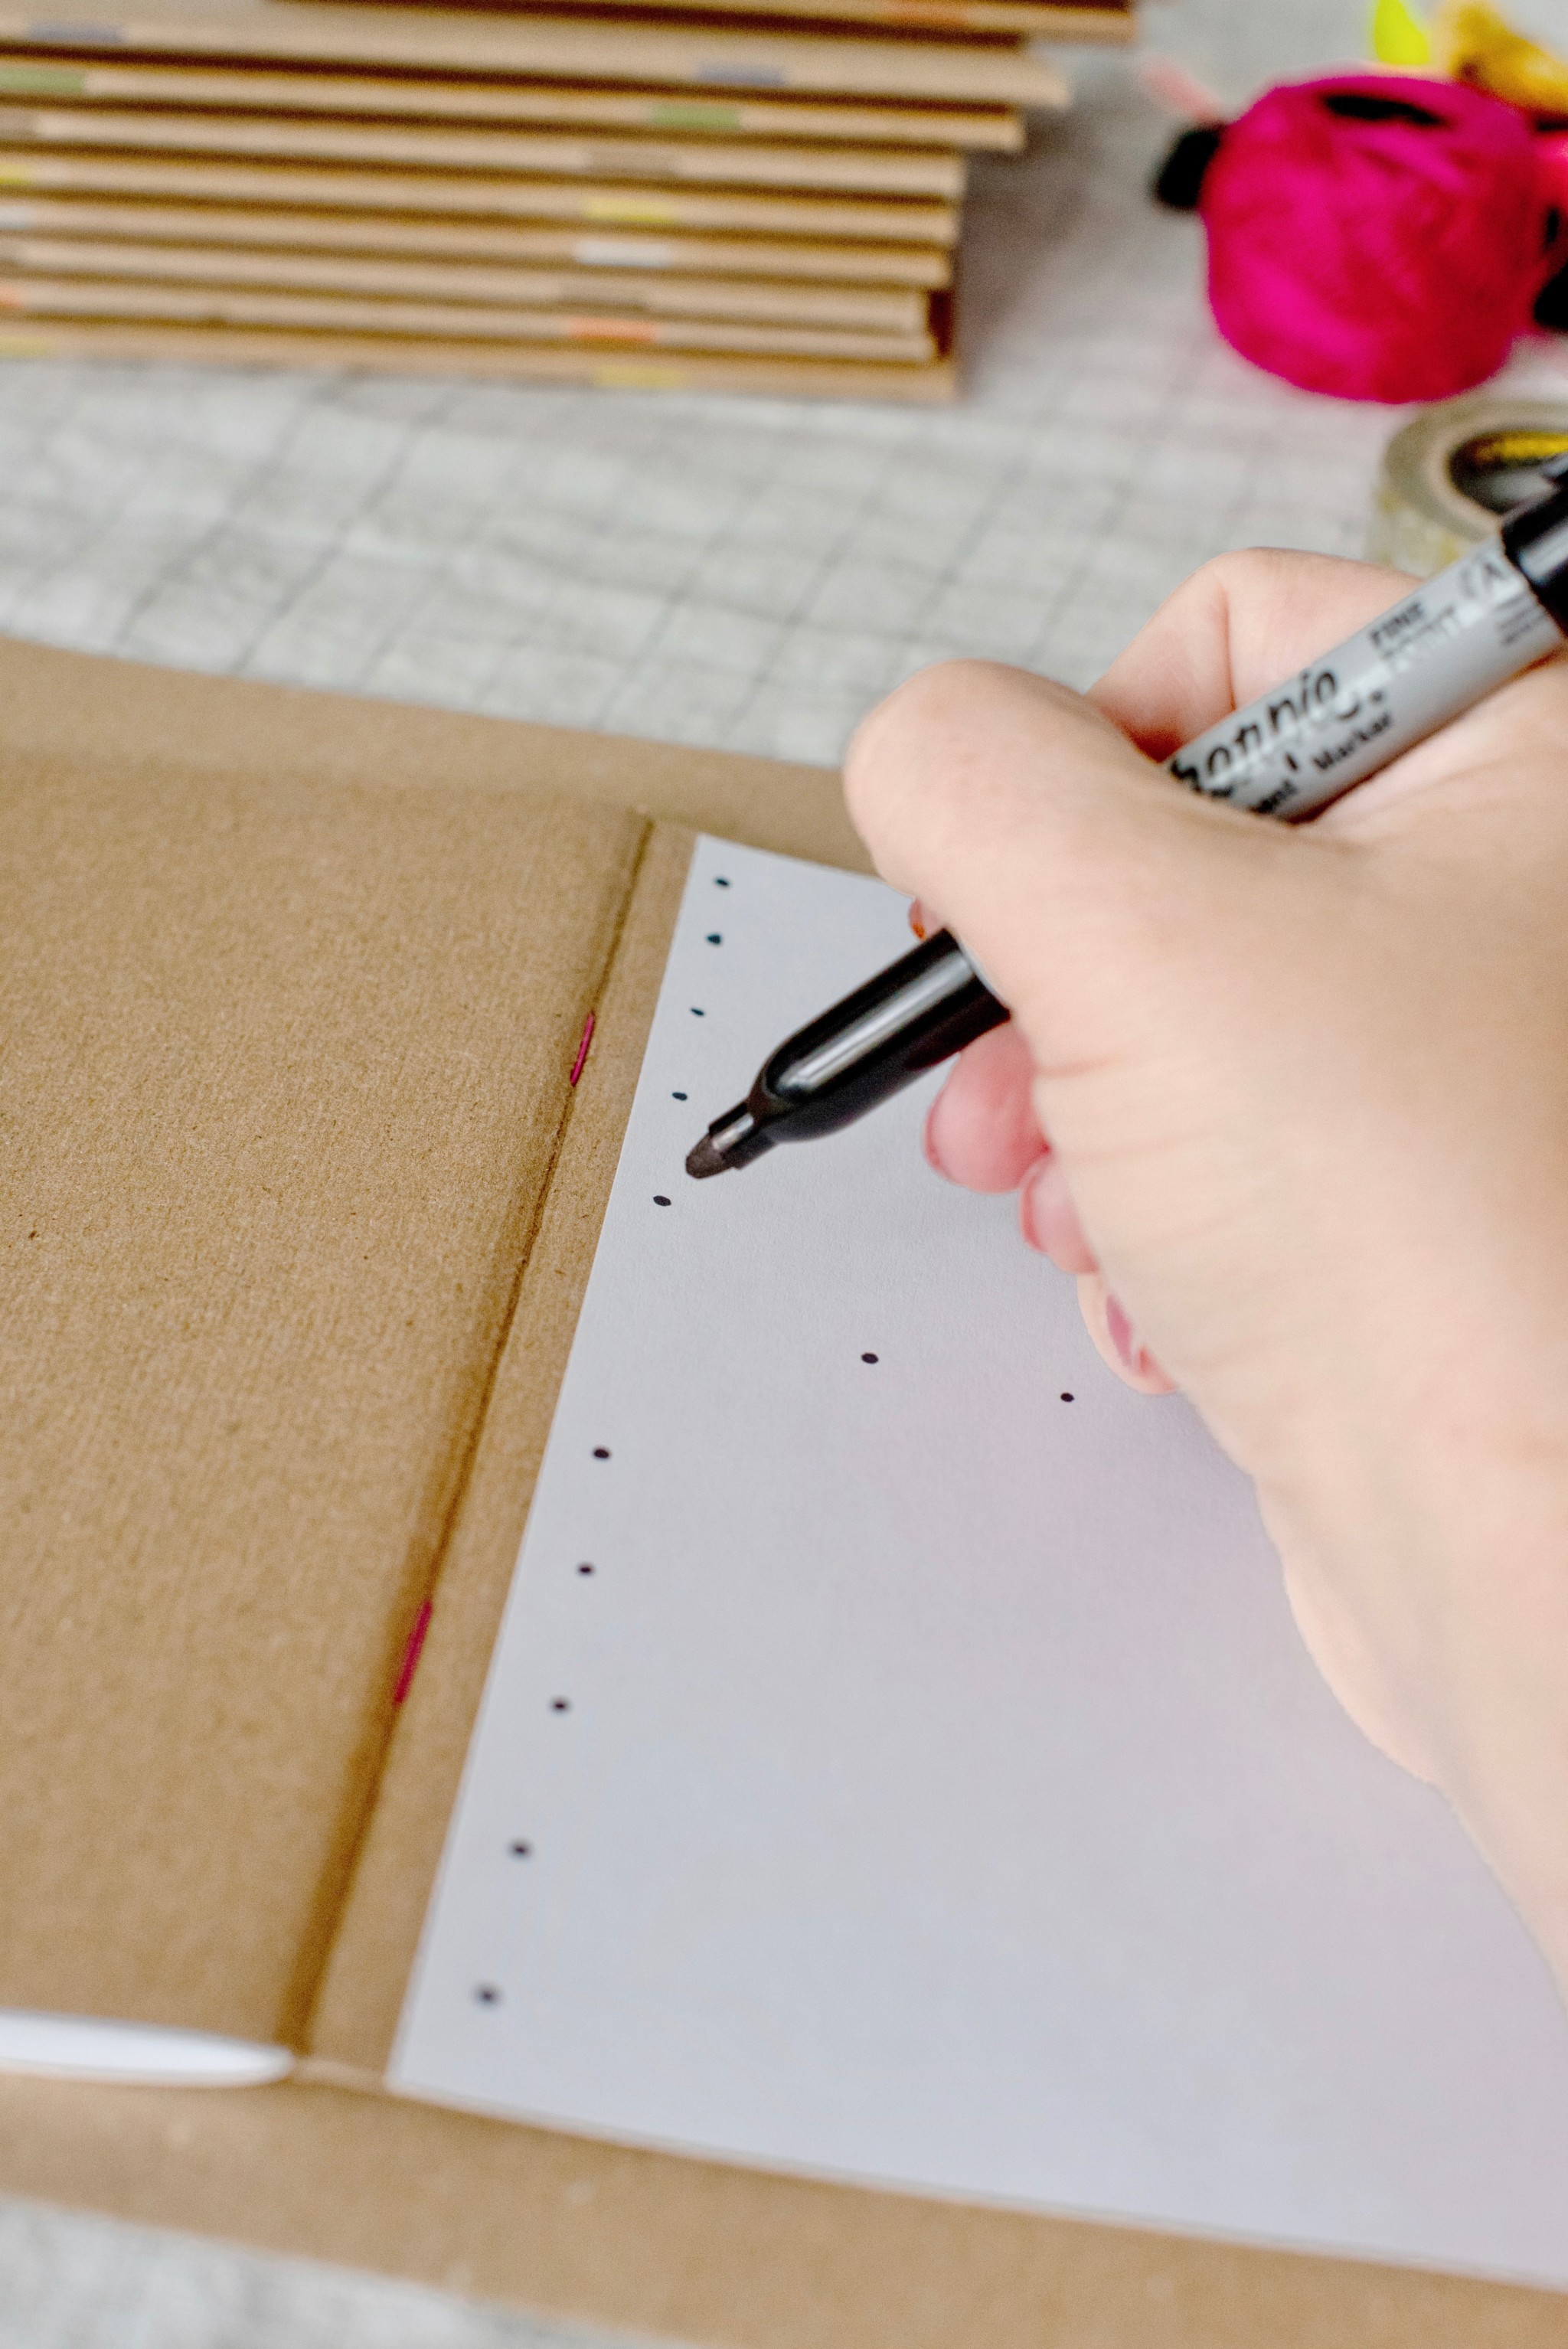

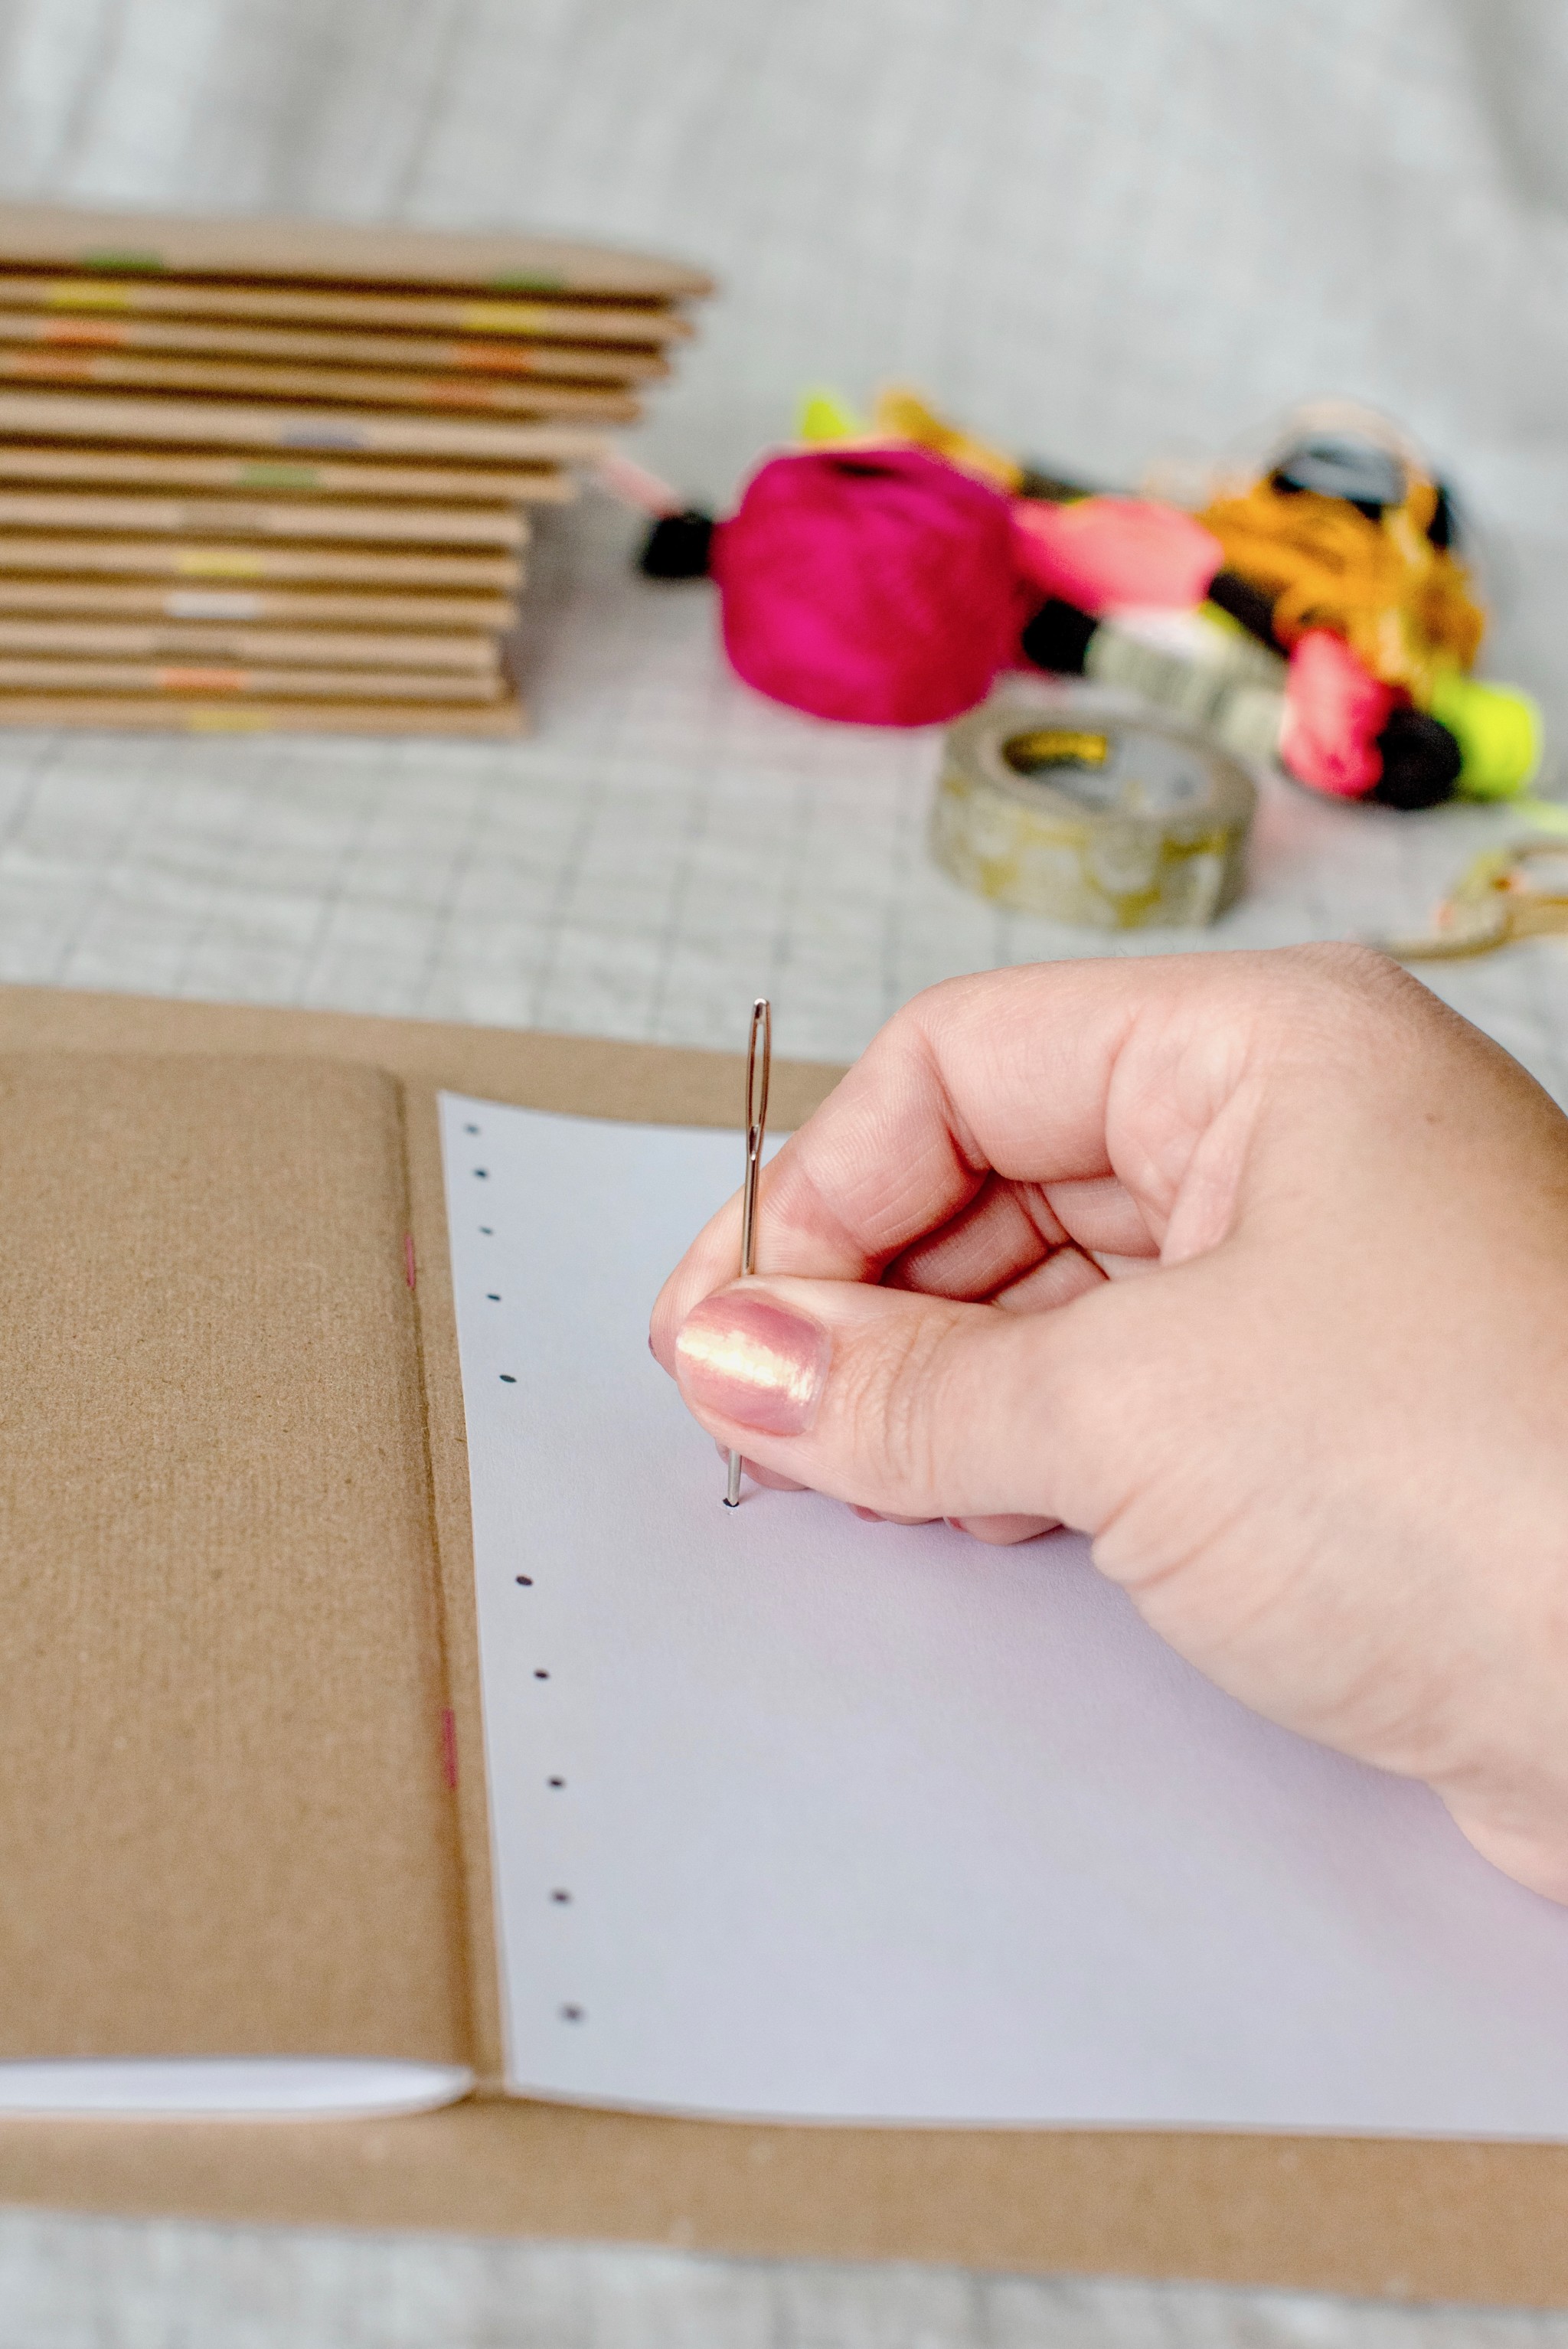
2. Open the notebook cover & lay it flat over your surface protector. Make sure your scratch paper (now your pattern) is lined up where you would like your design to be & carefully punch through the pattern and through the notebook cover.
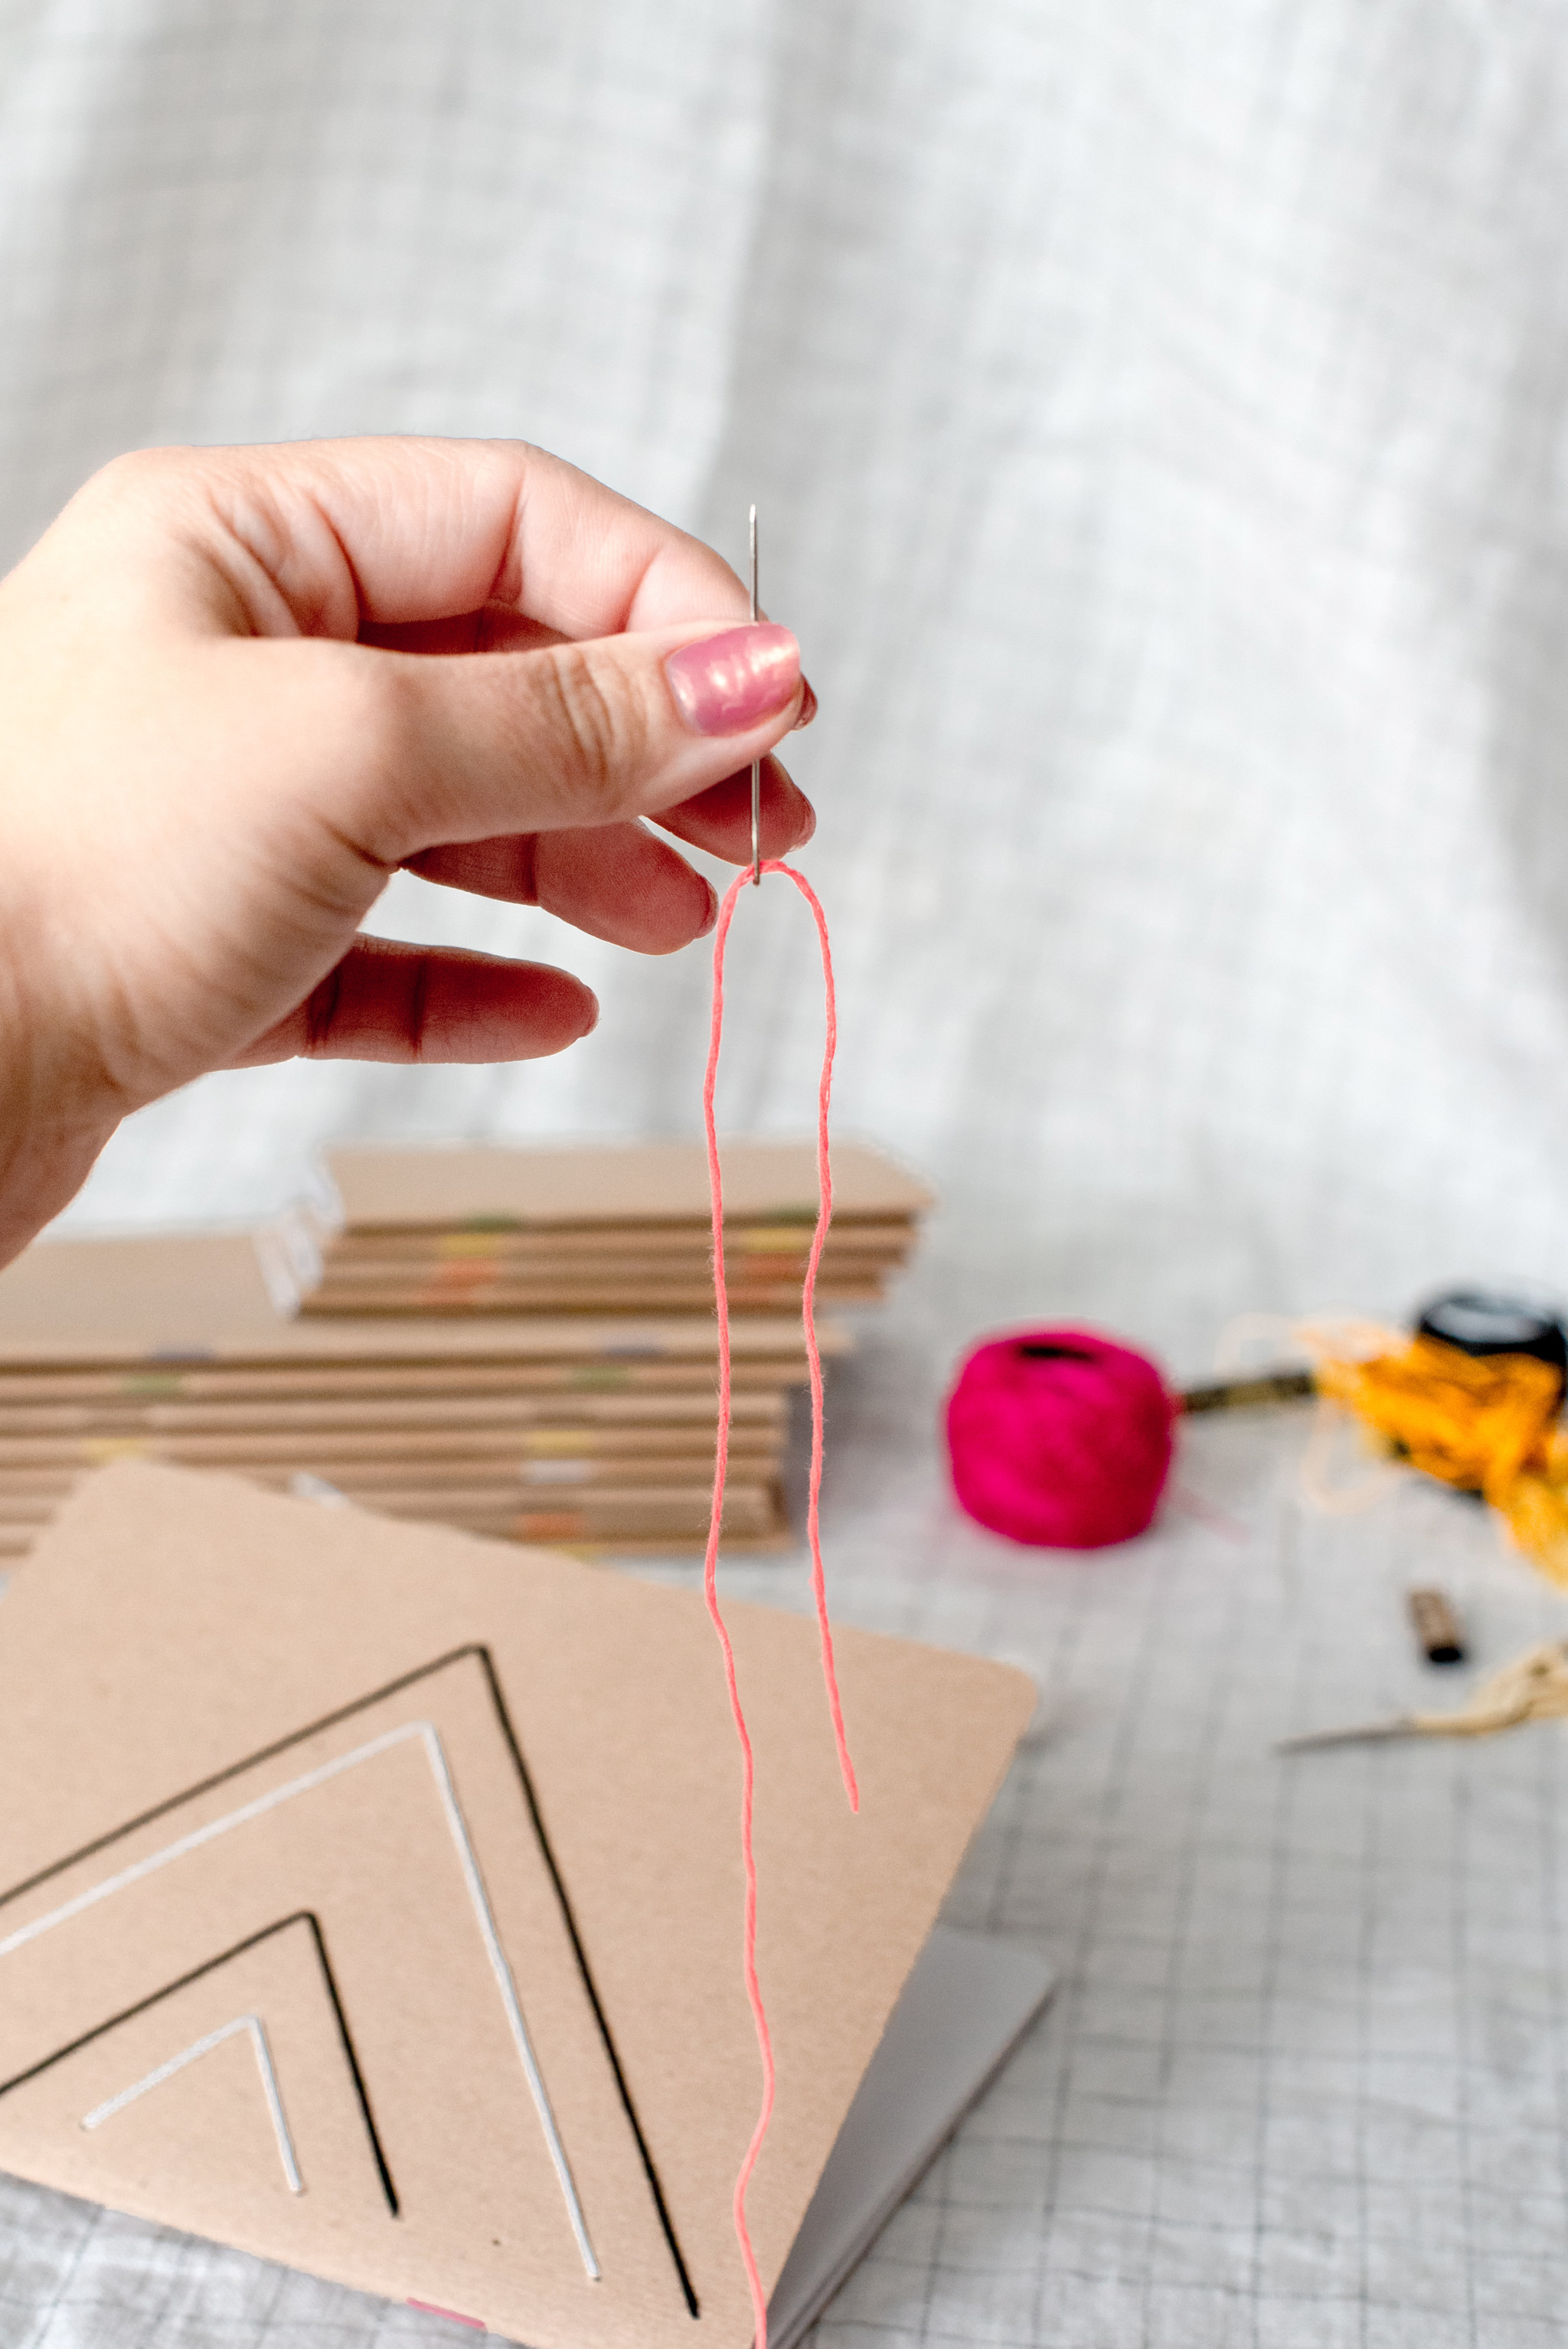
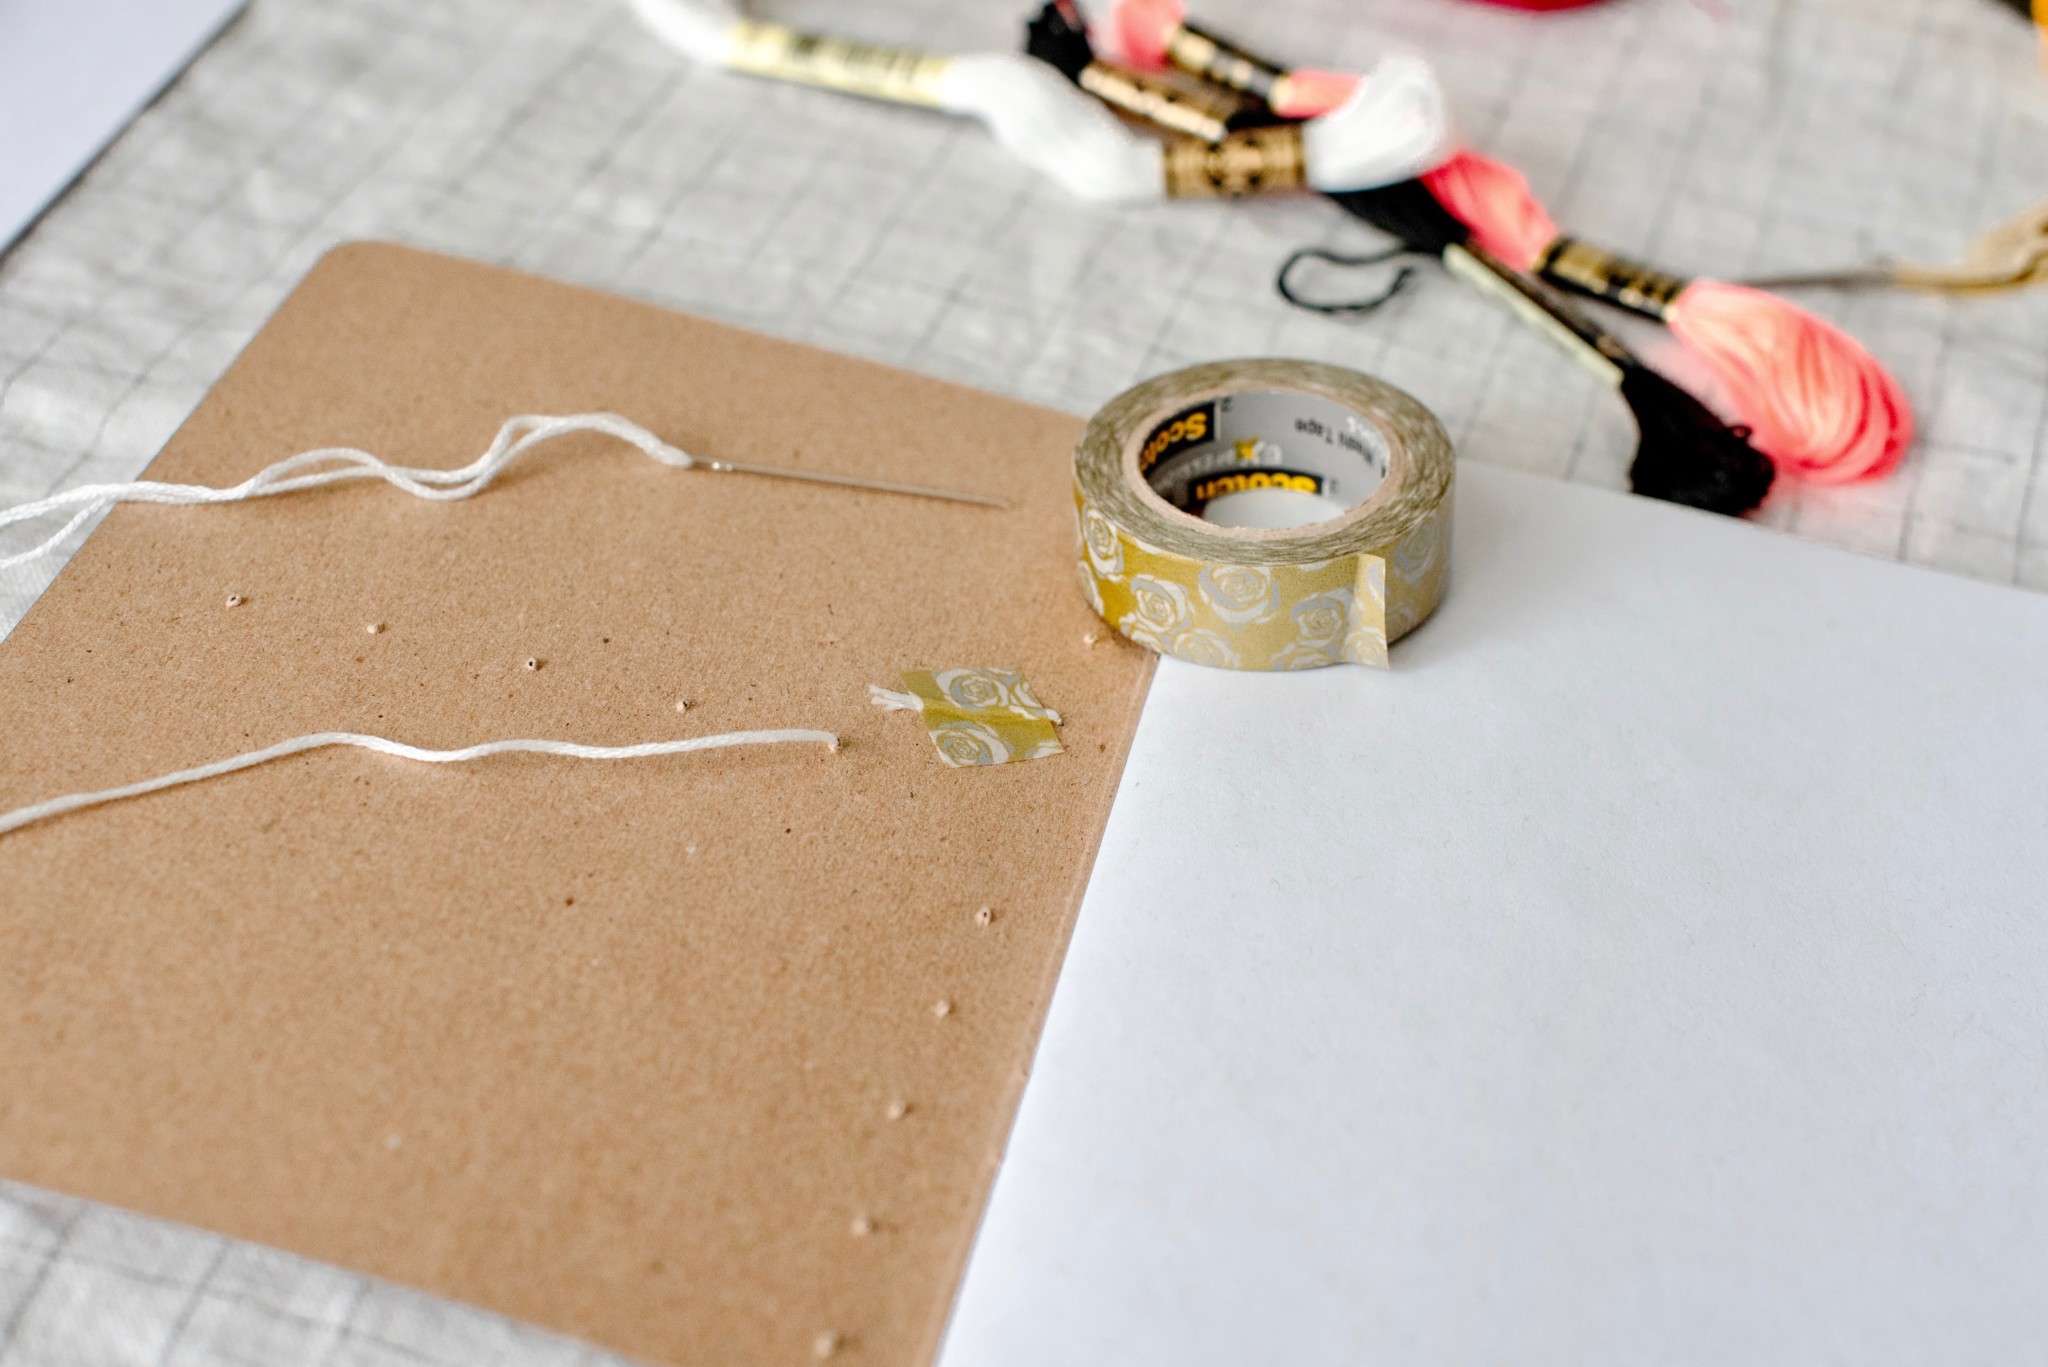
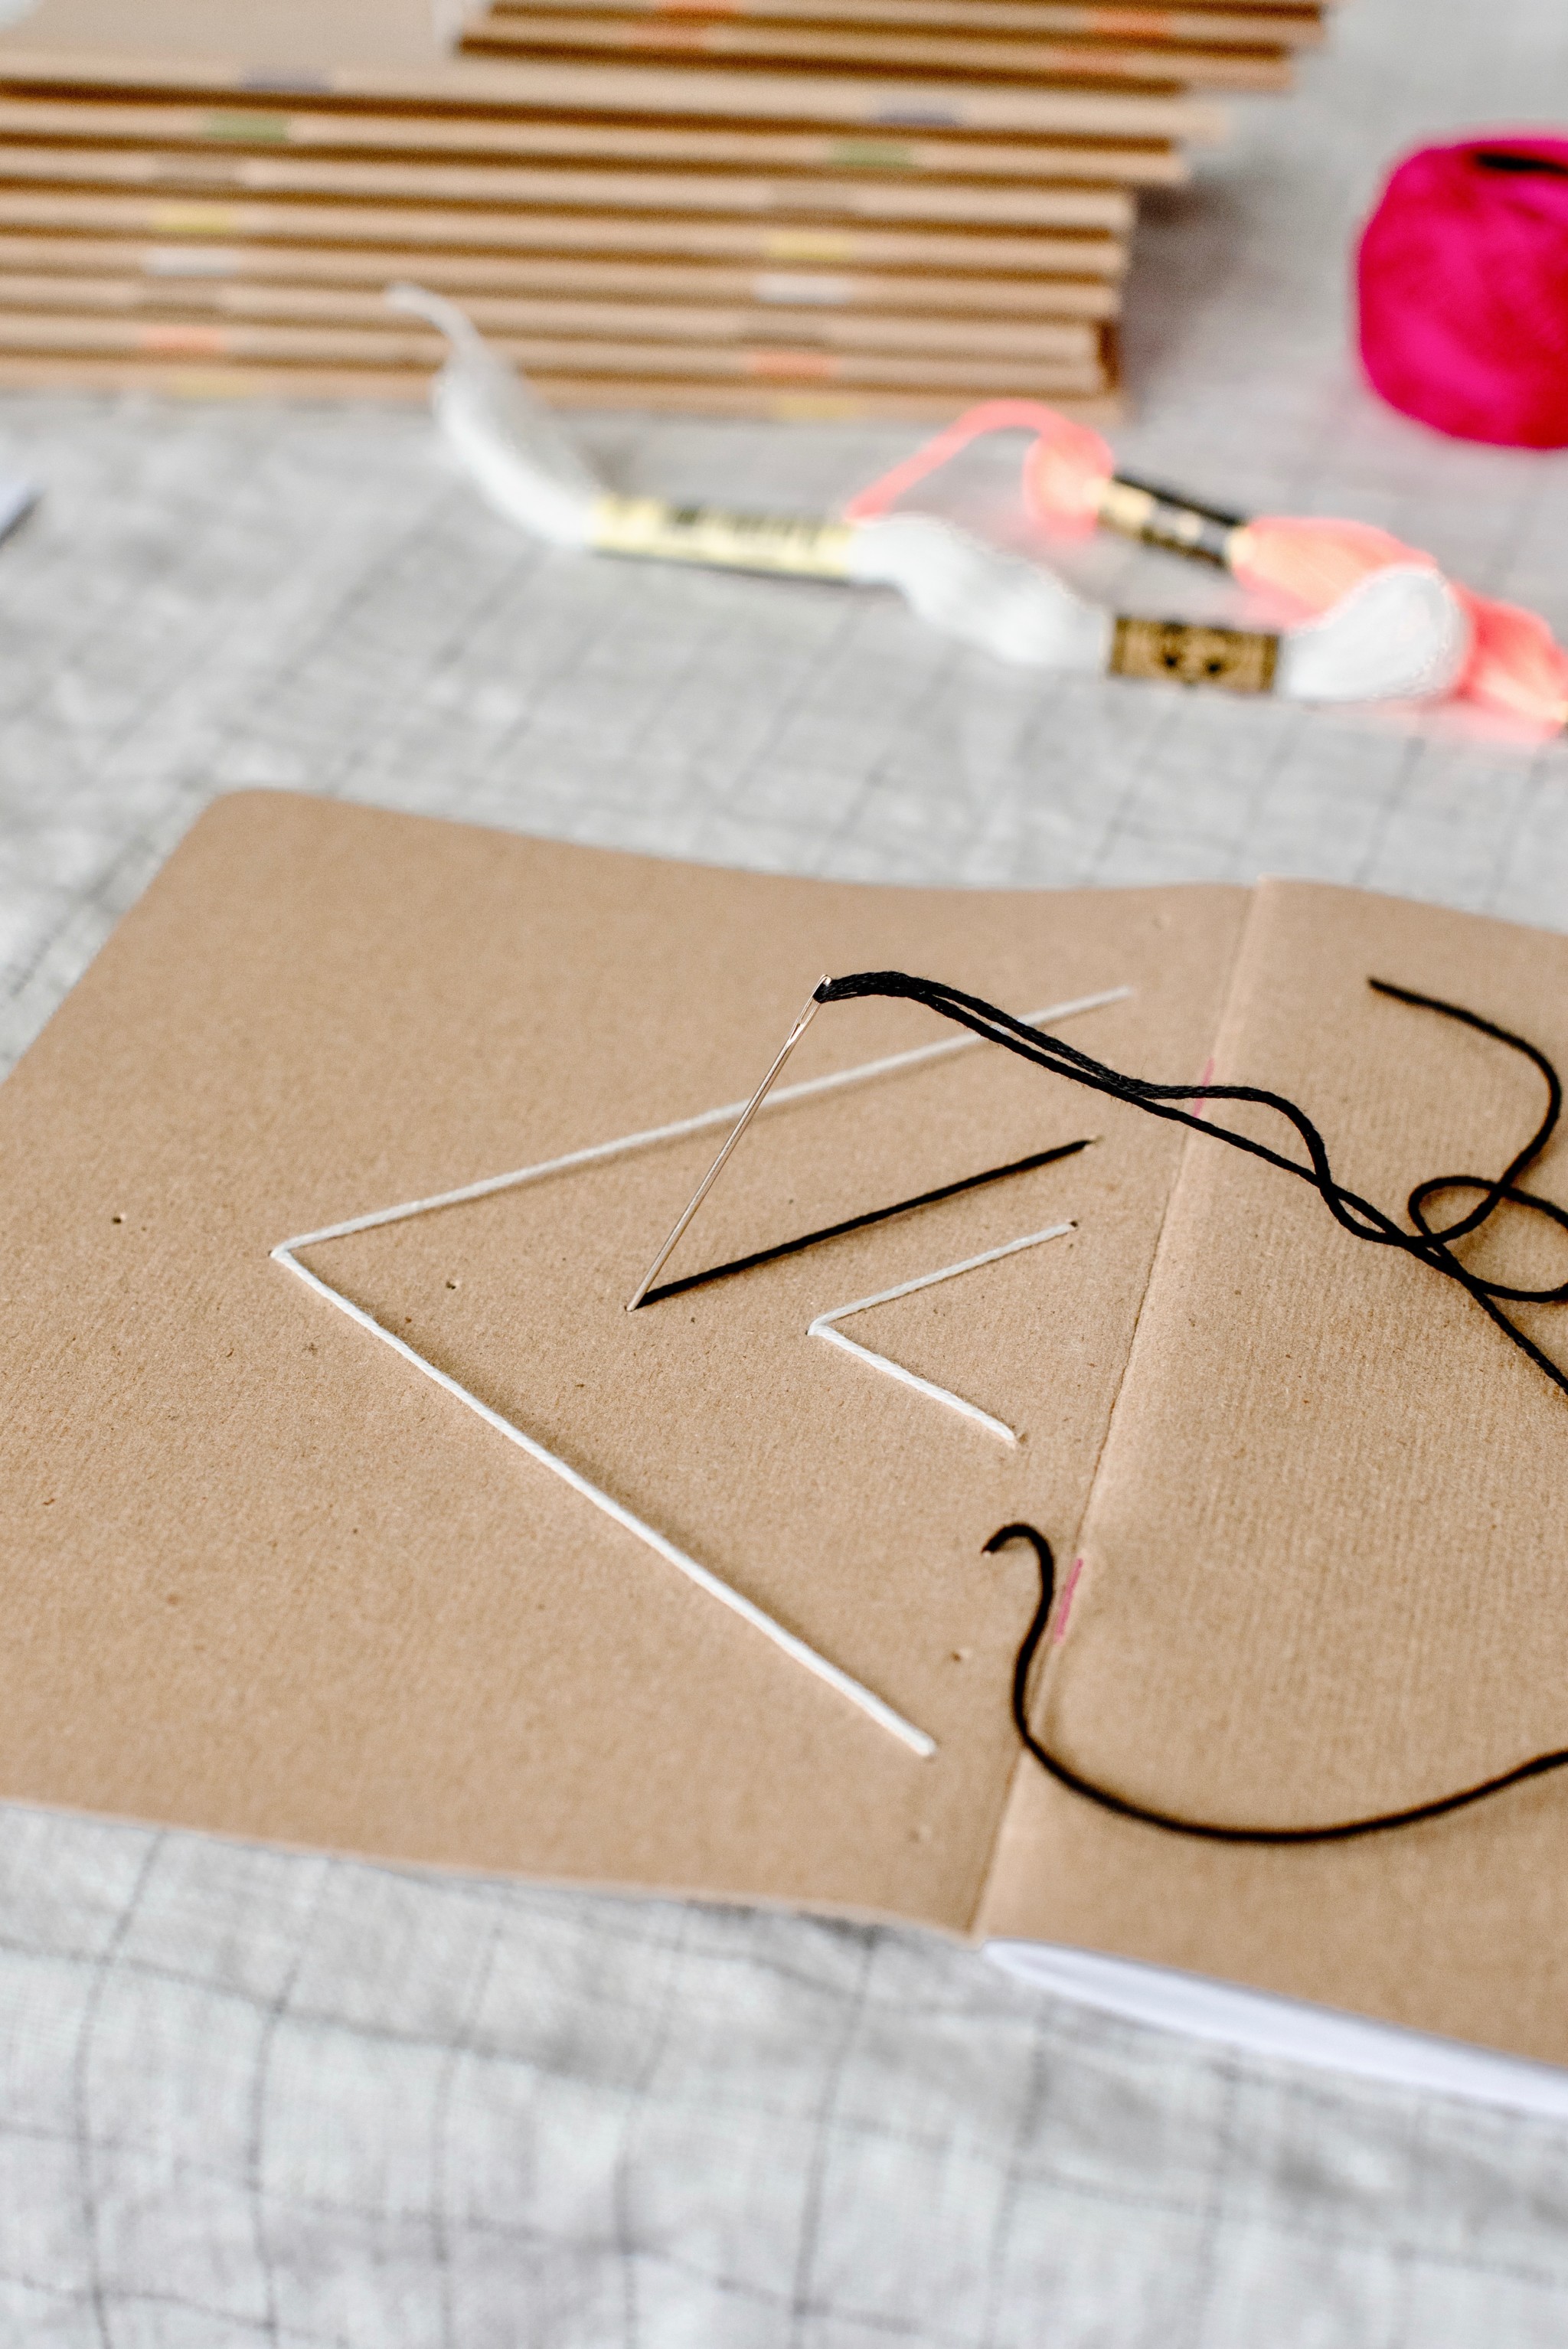
3. Thread your embroidery needle leaving a good size tail and don’t knot either end. Choose where you will start, for my design I started in the middle. Push the threaded needle through the inside of the notebook cover & pull until you have a small tail left, tape that down on the inside of the cover with your washi tape. For this design I used the back stitch, so I made my first single straight stitch, continued to my next hole in the pattern, but came up a hole ahead so I could bring the needle back down the same hole at the end of the last stitch I made. Continue until you’re finished and tape down the end of the thread once you’re done. And there you have it, designs are endless so just have fun with it!

Some tips & tricks :
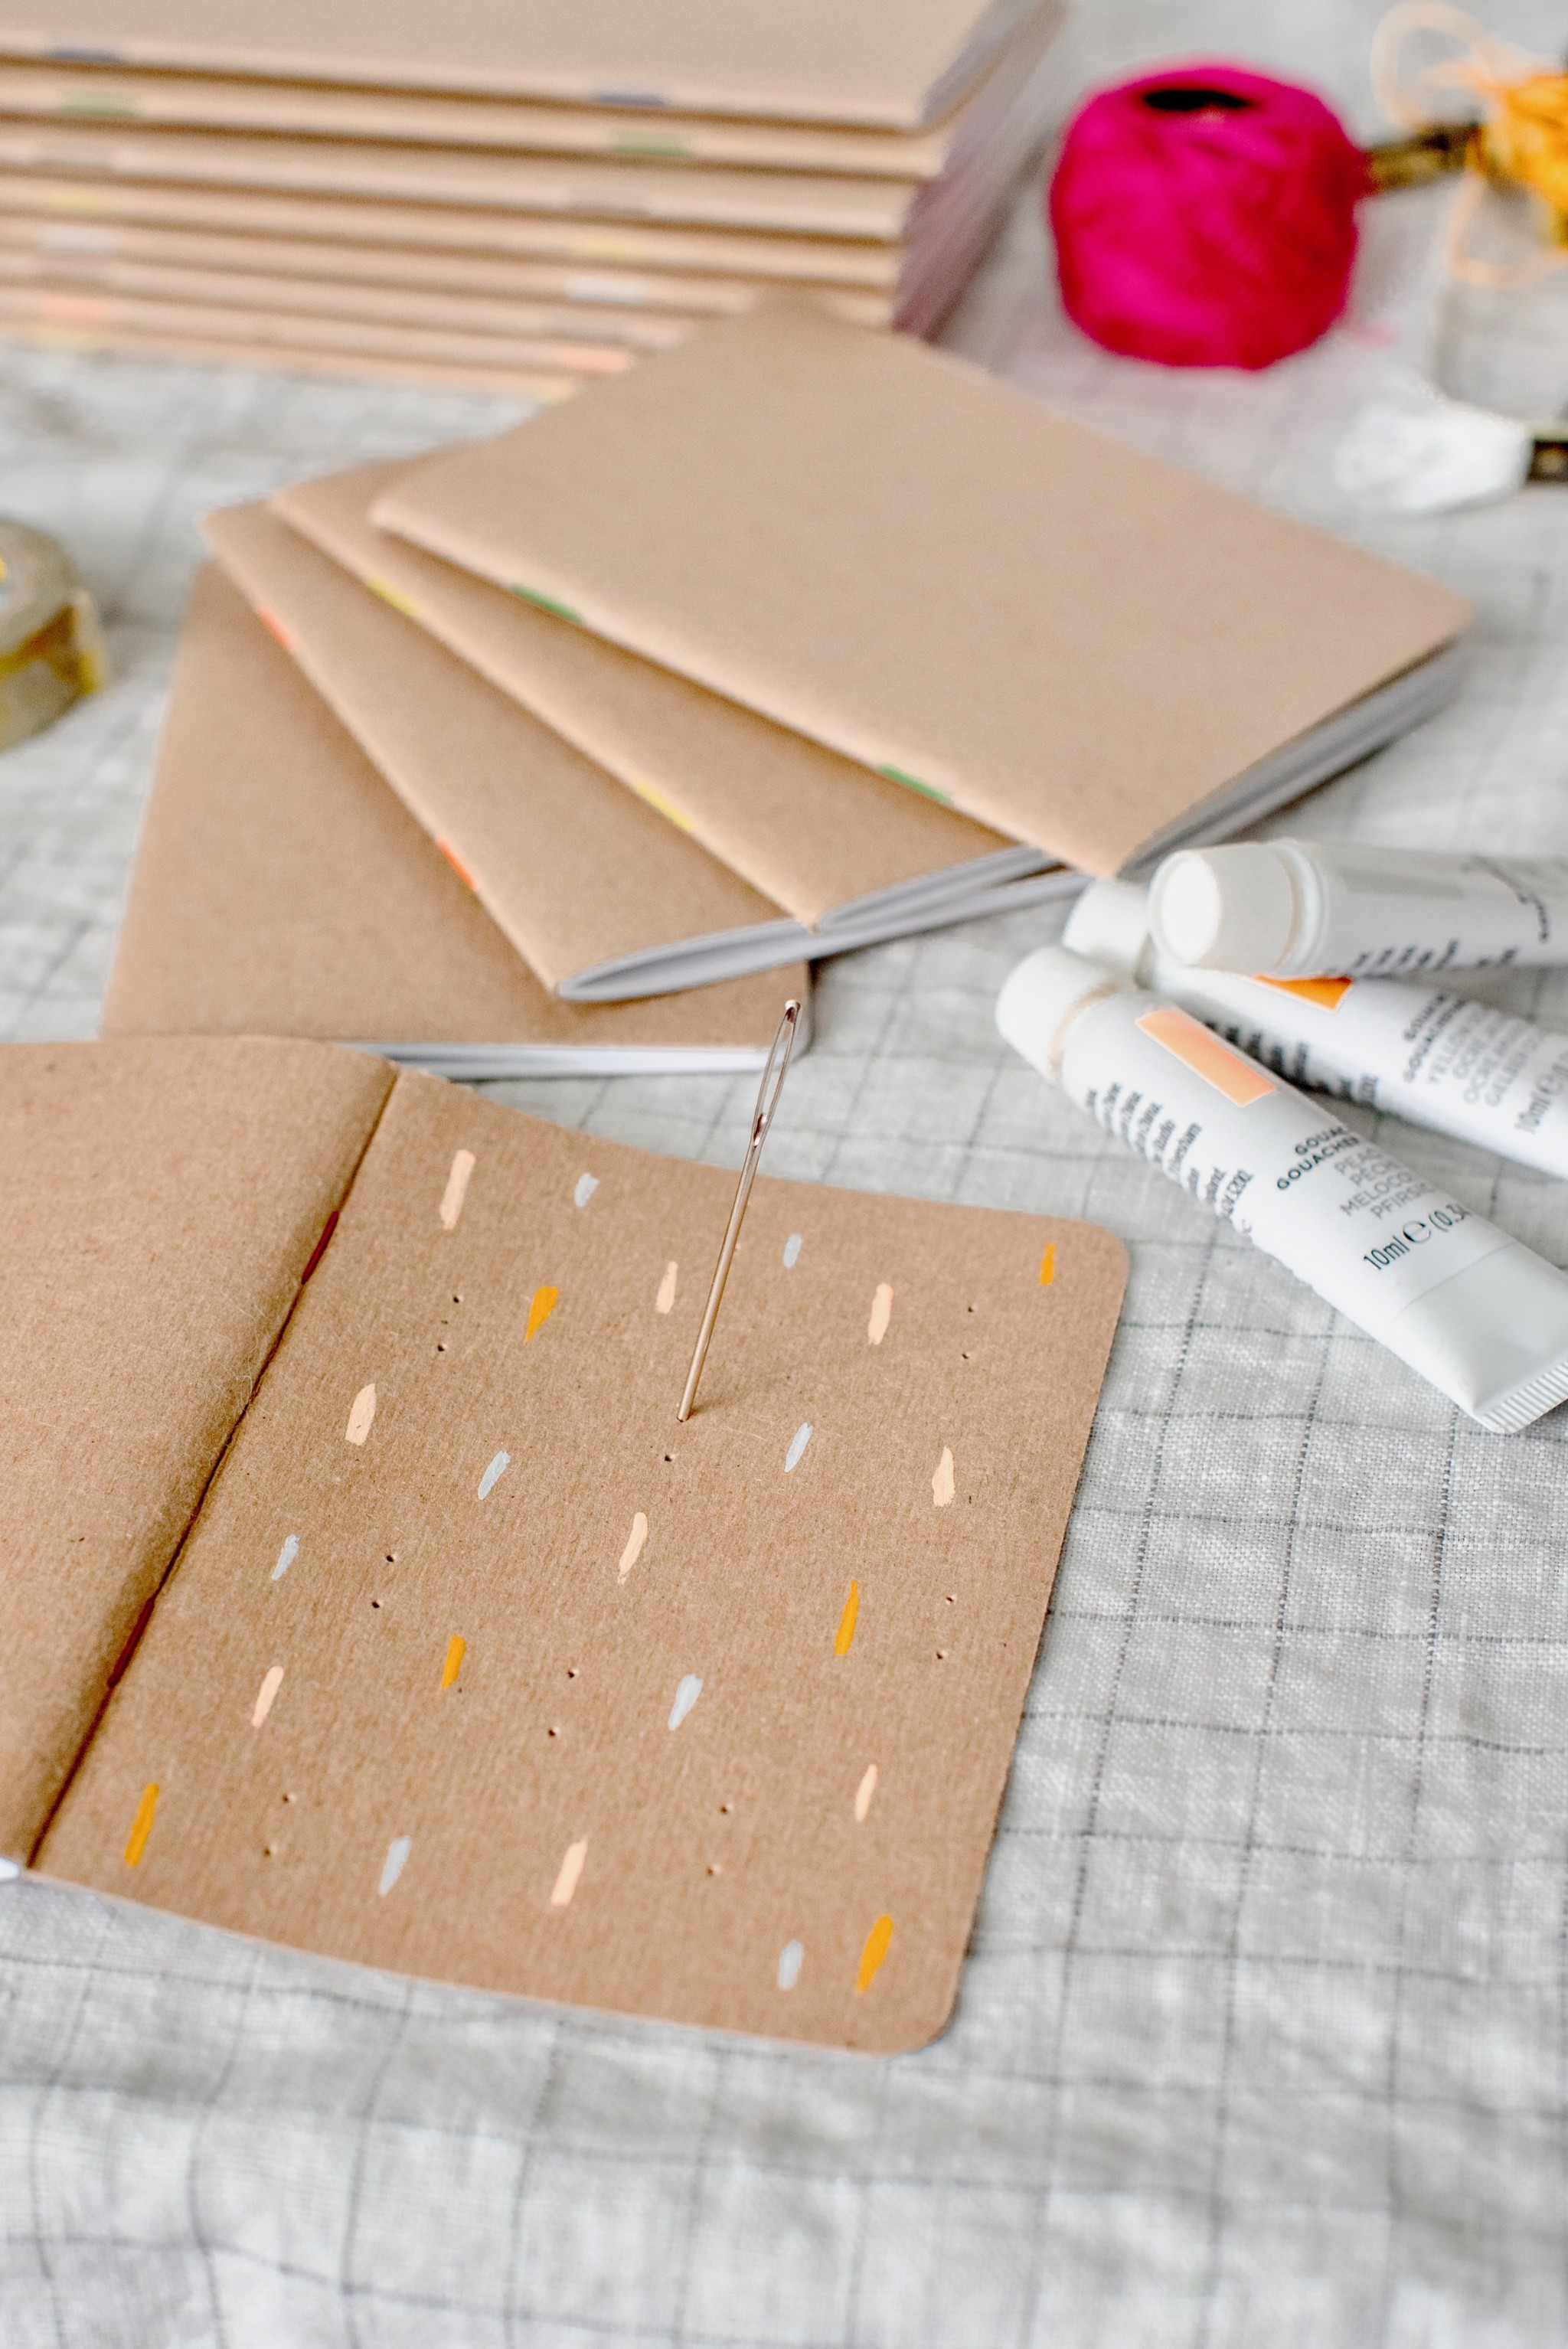
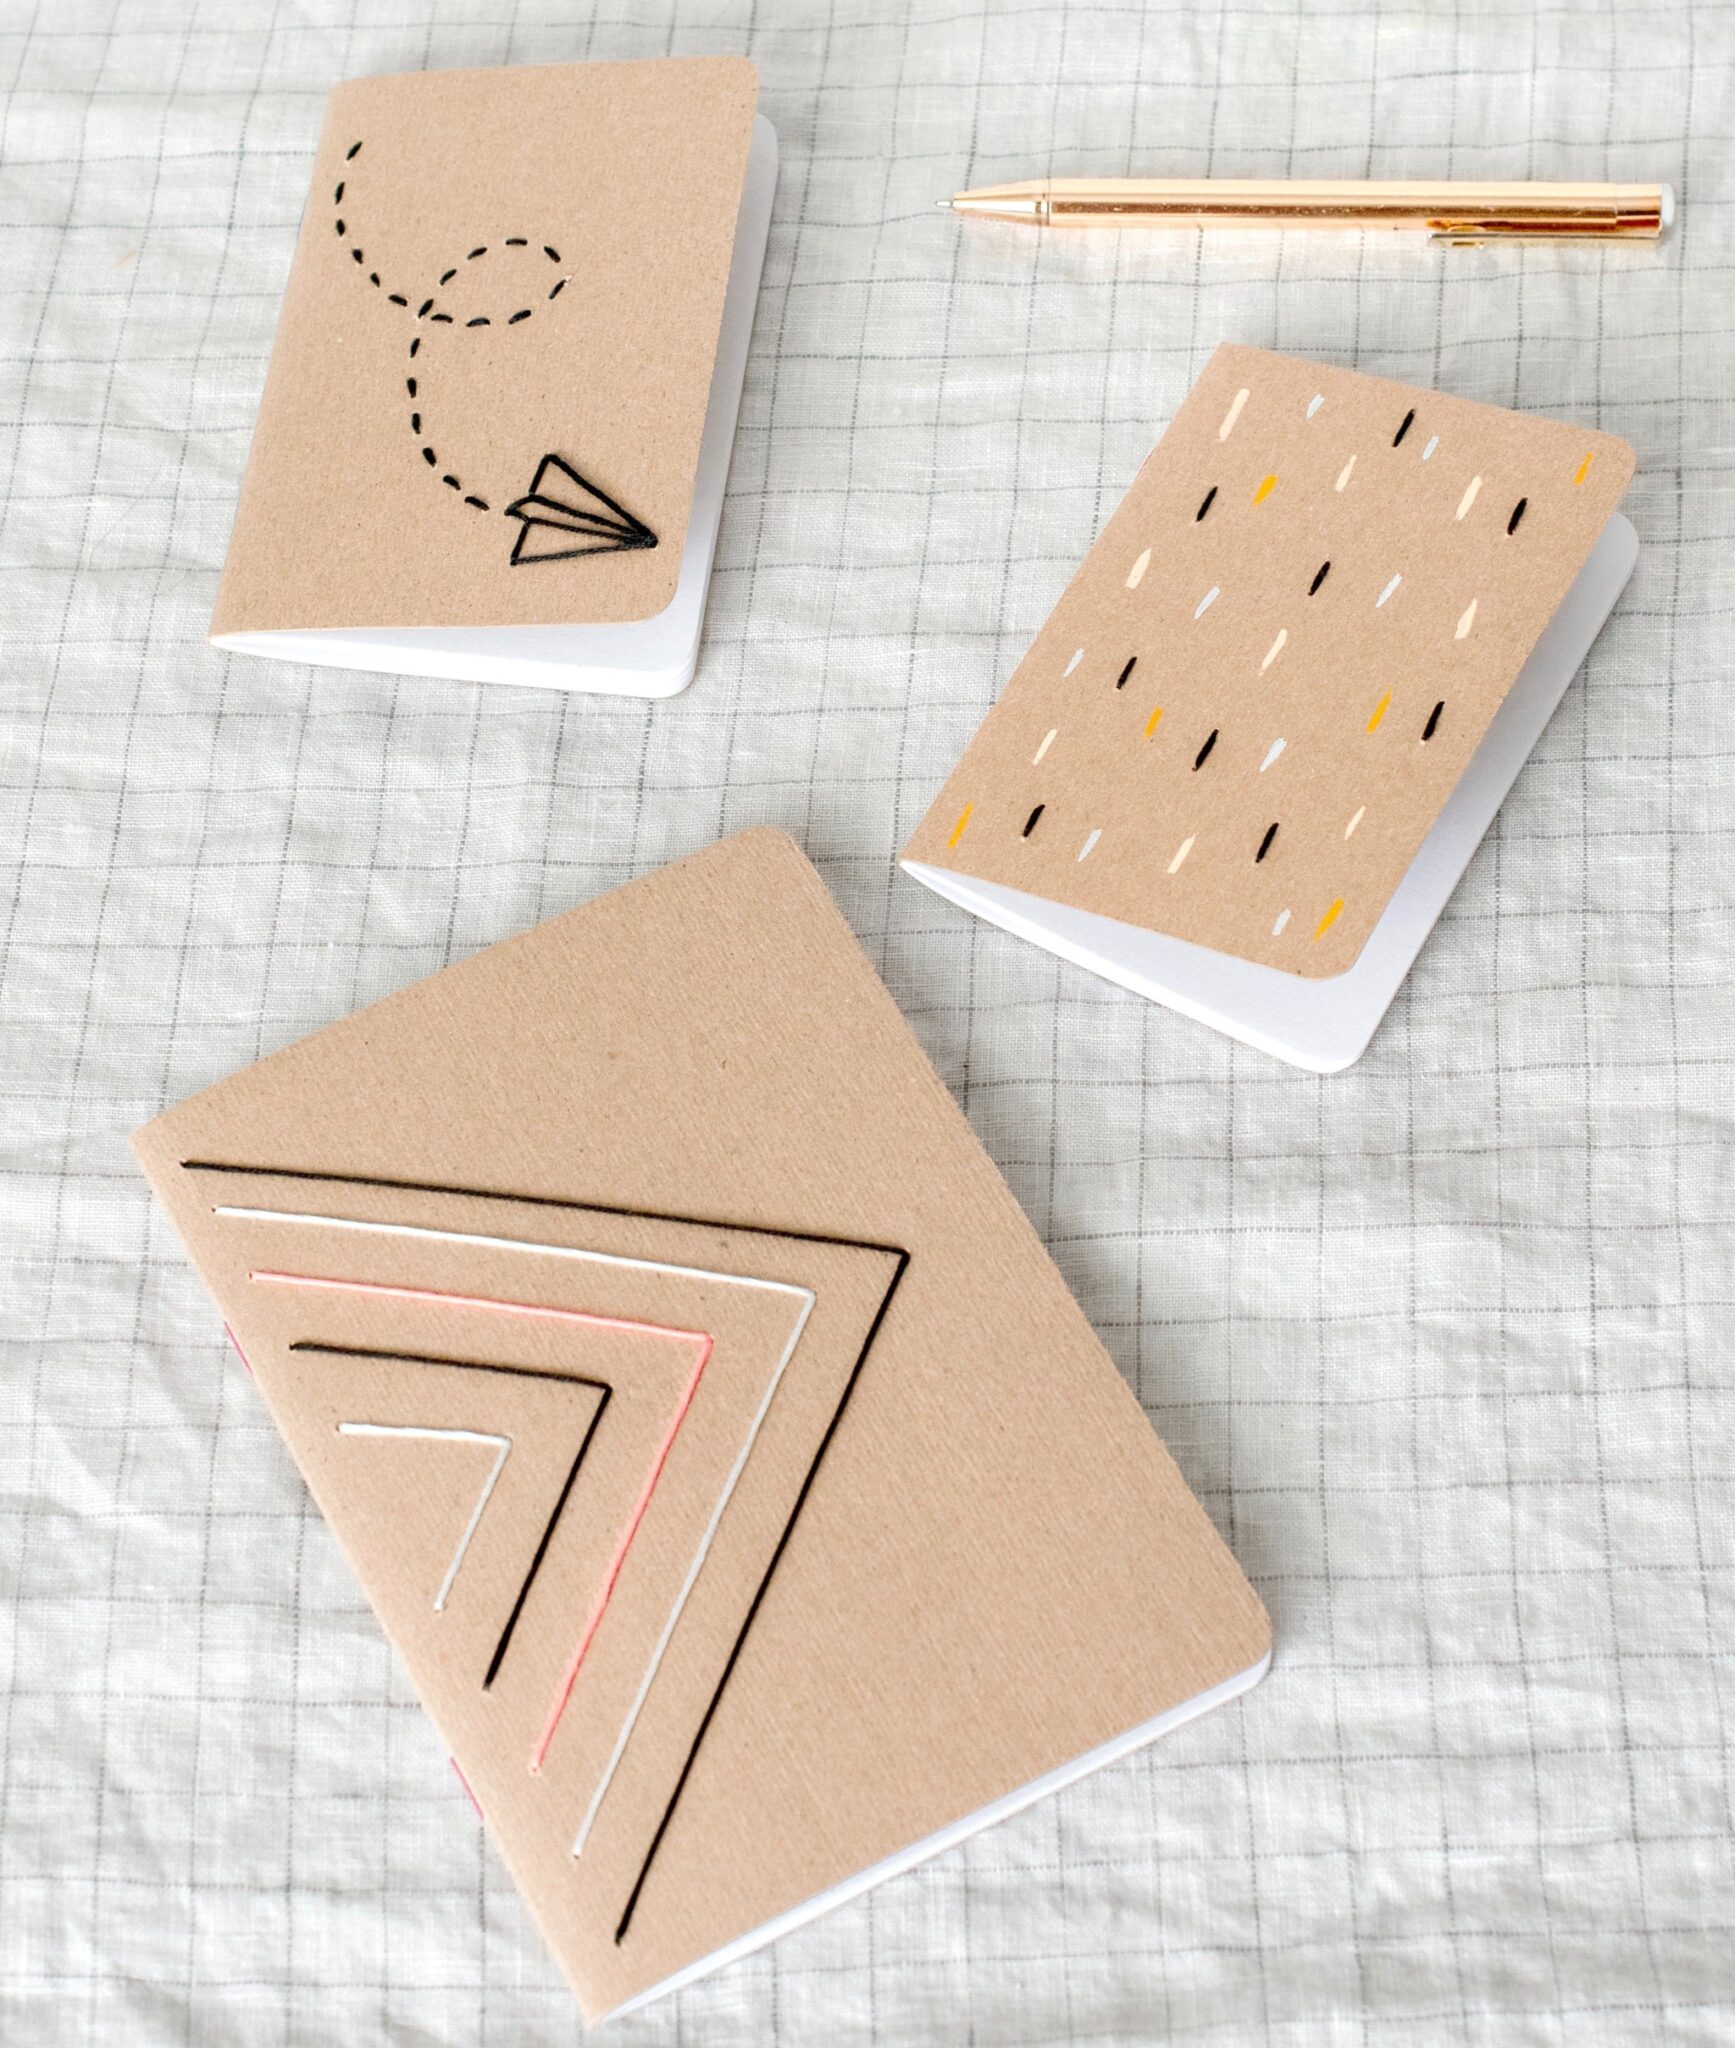
You can mix in paint & embroidery for a cool mixed media look. Here I just used some Reeves gouache and made simple little strokes and then freehanded my holes right onto the cover without a pattern. I then just used the straight stitch with my embroidery floss.
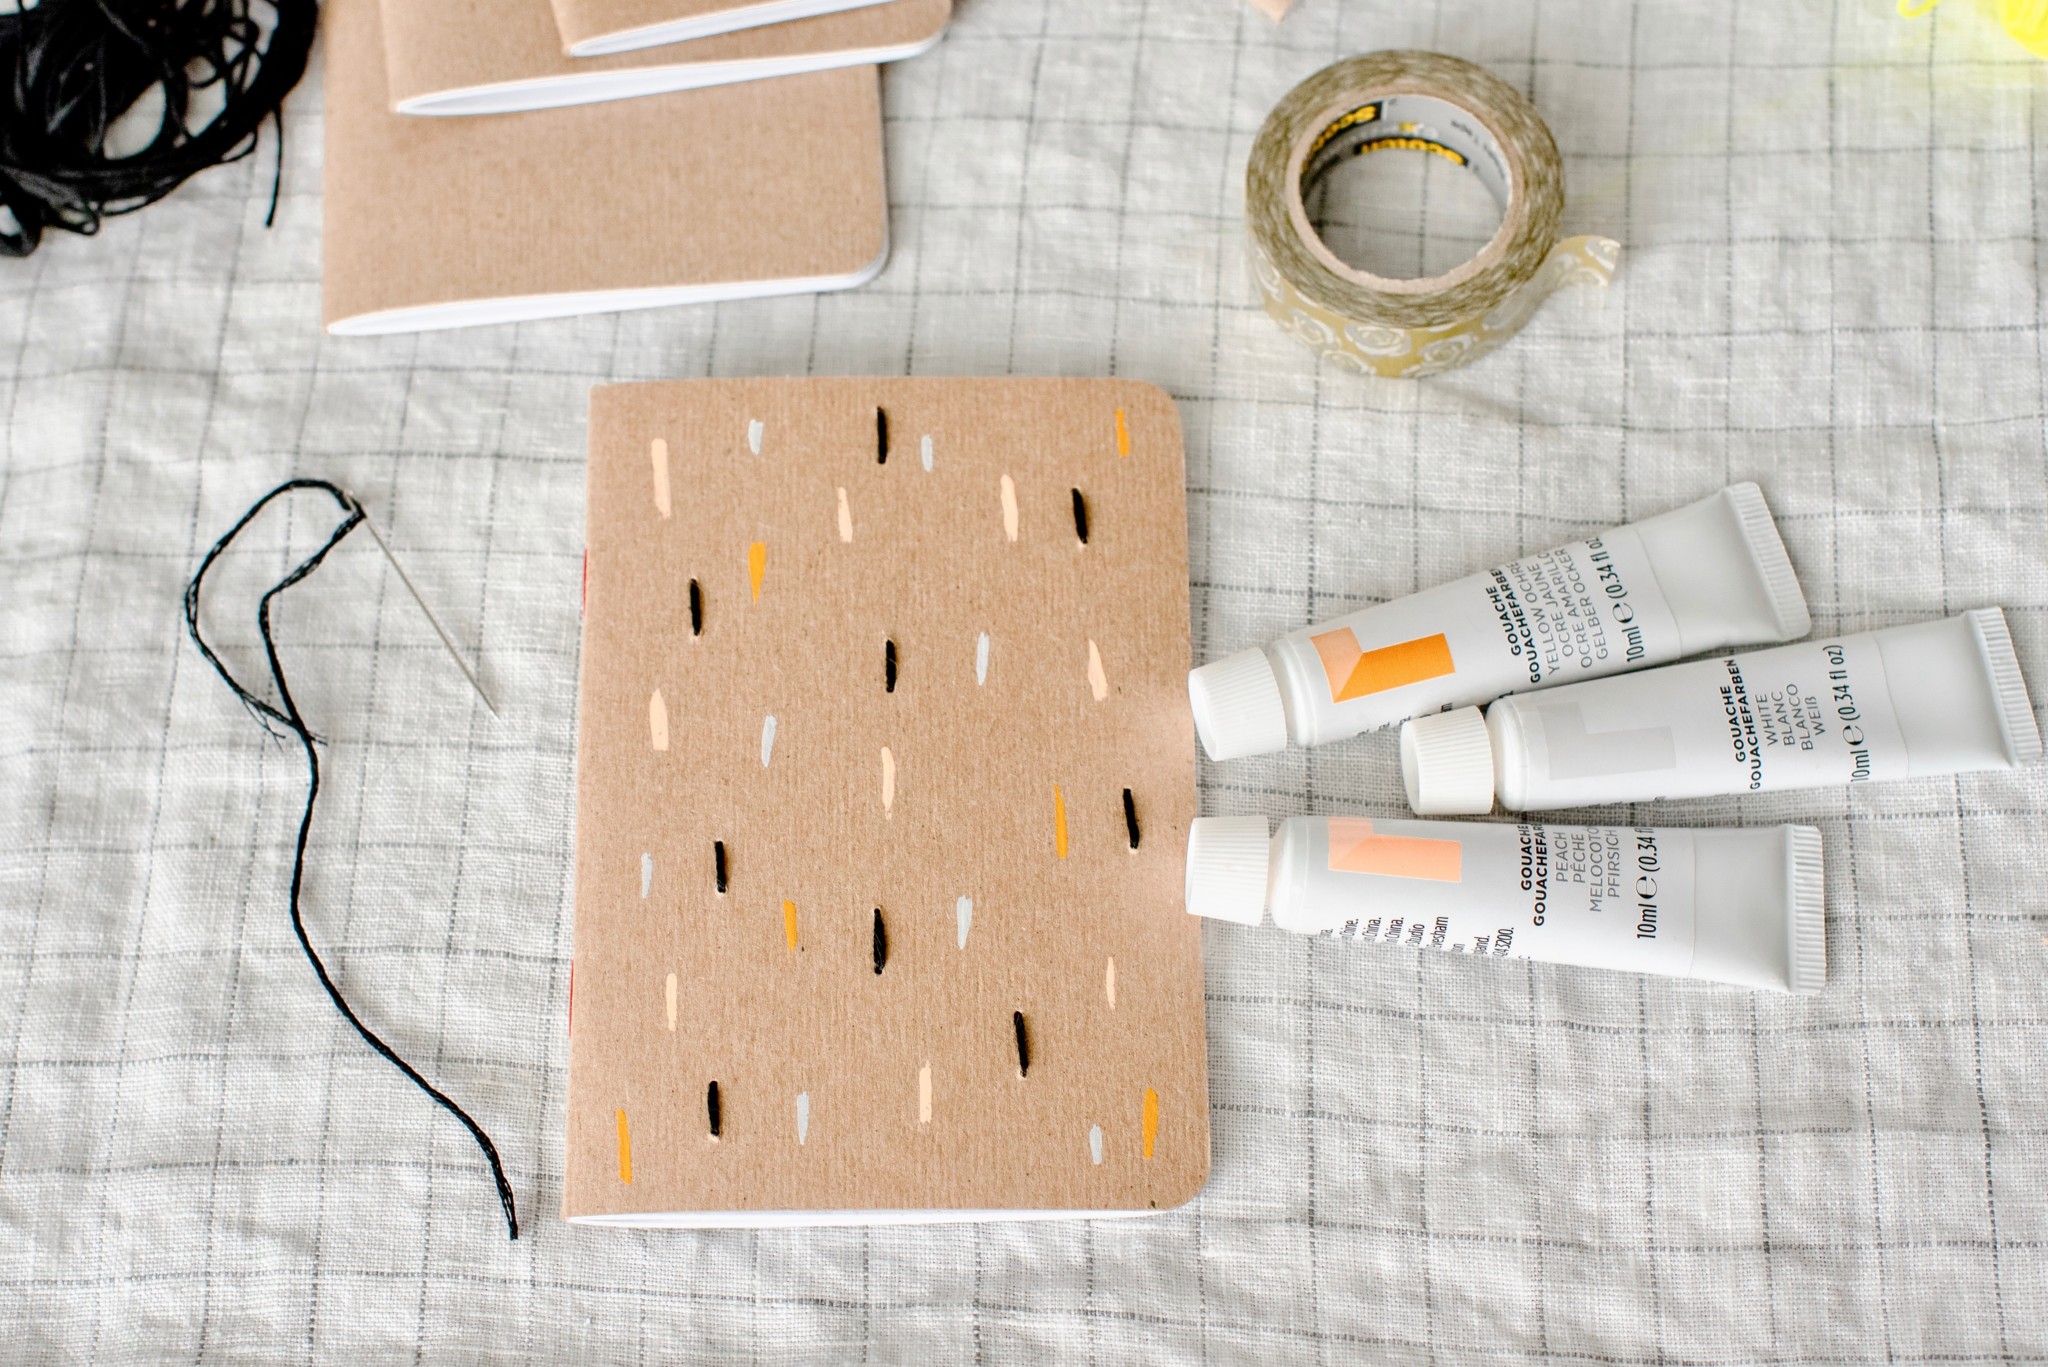
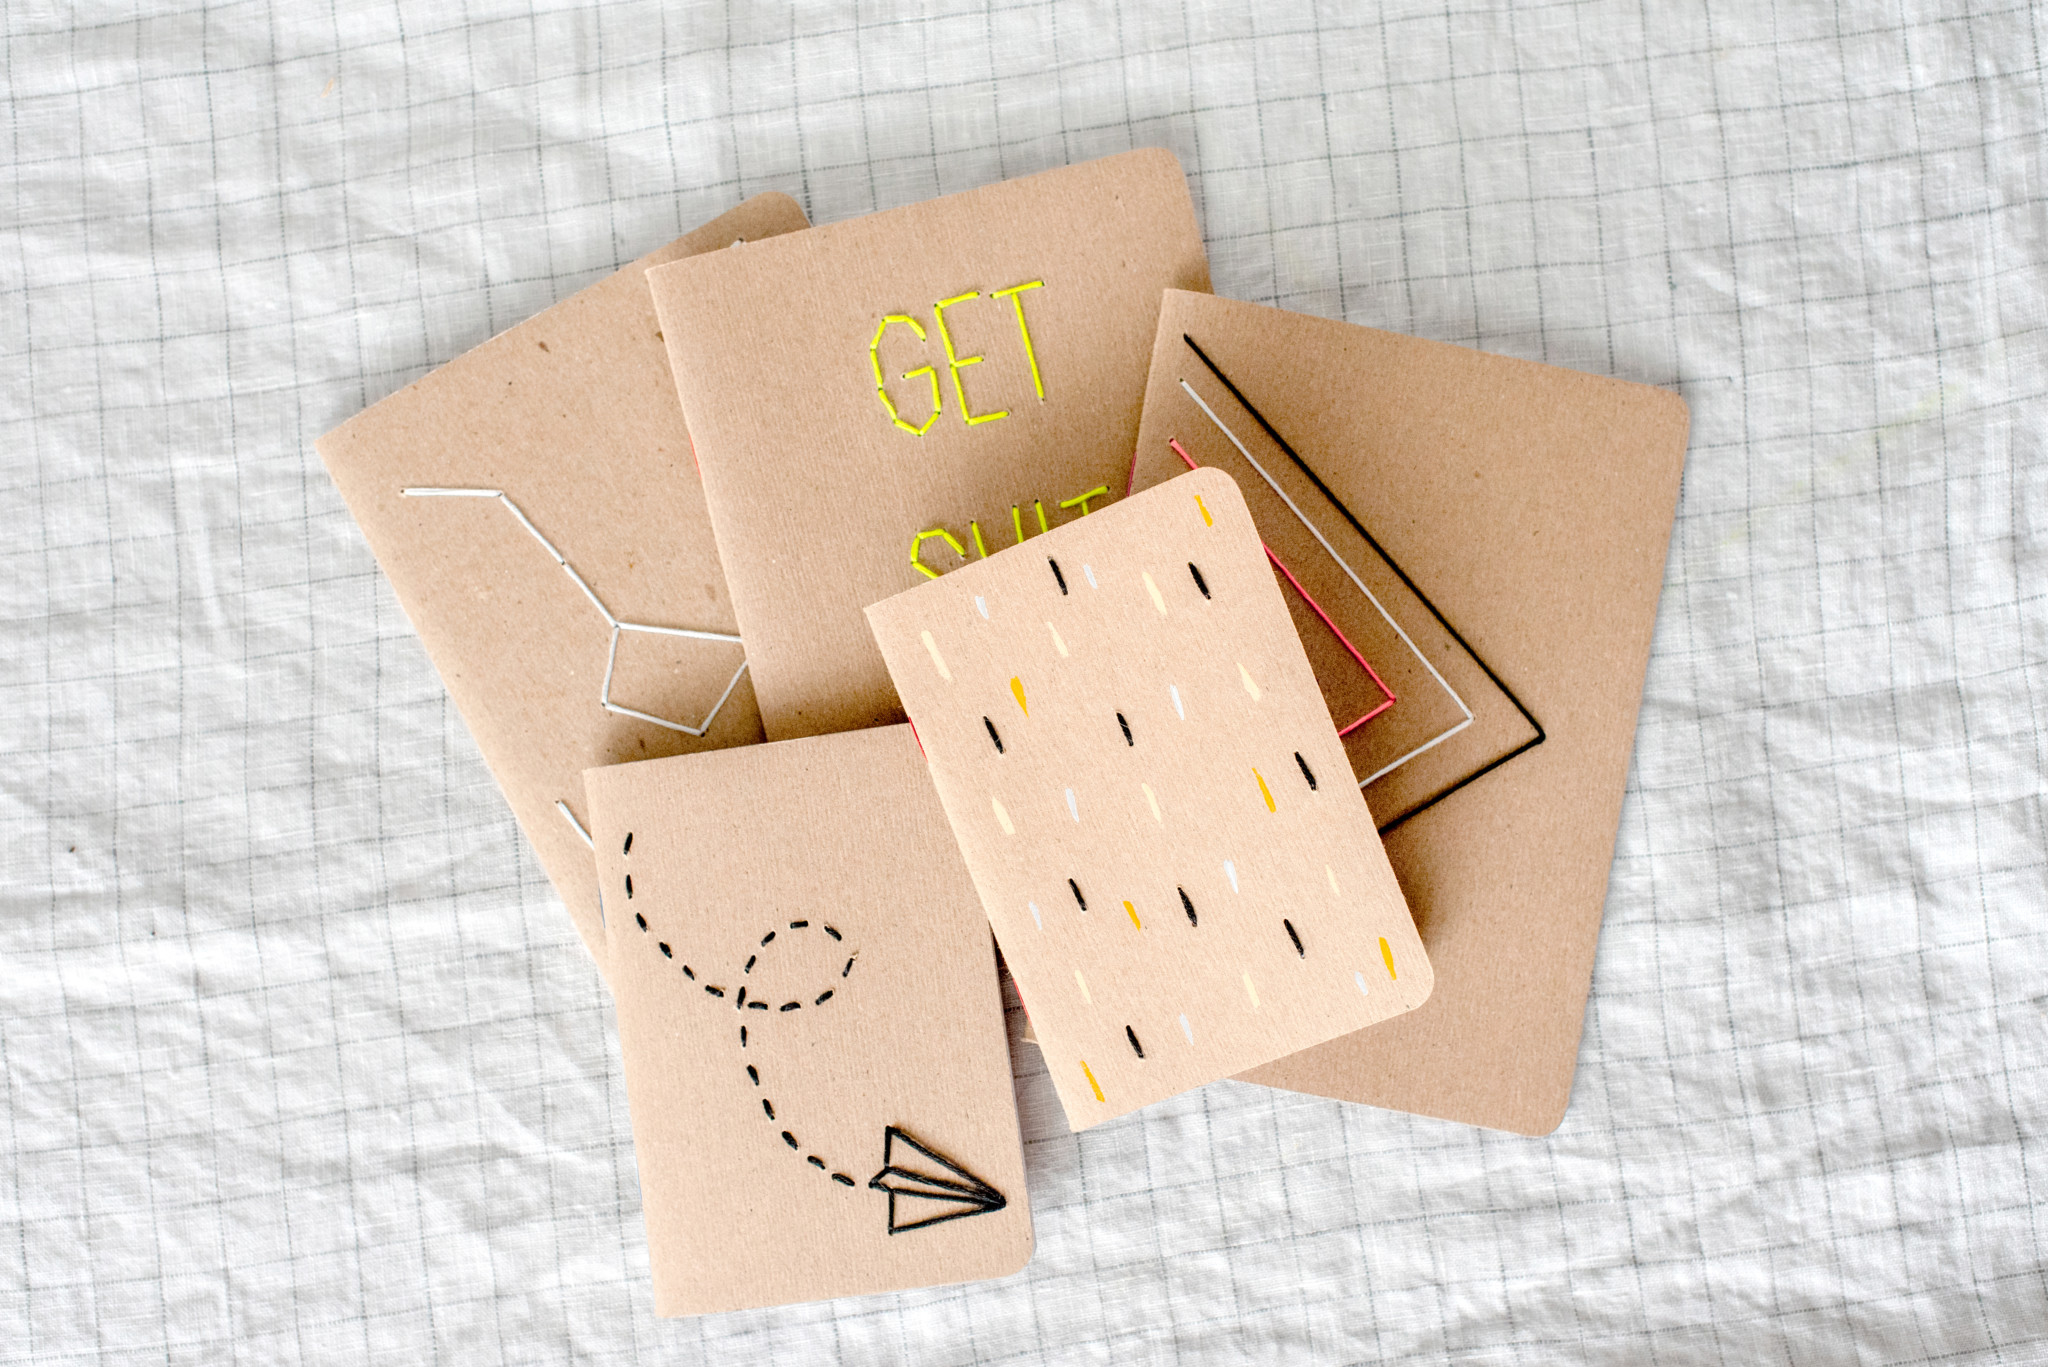
For words it’s easiest to use capital block letters. I wrote out the words first and then just punched holes in a way that I thought would look best once the were stitched. For instance, an S needs more holes around the curves but a T only needs 4 because it’s a more simple shape. Since paper is so much more rigid than fabric, it’s best to stick with more simple shapes, geometric patterns, block letters etc.
ABOUT NIK VANDEVENTER:
Nik is a maker, day dreamer & potty mouth who loves cats, coffee and craft beer. She is a self taught hand embroider and will DIY pretty much anything she can get her hands on. She is head Boss Bitch behind Wasting Thyme creating & selling naughty hand embroidery and sassy greeting cards. You can find her products at justwastingthyme.etsy.com. She lives in Long Beach with her husband and her three awesome cats (that she can’t shut up about).


One Comment
Comments are closed.