how to make soy candles

Remember the whole story about my heartbreak and how it led to me leaving my house in Los Angeles and moving in with Delilah in Orange County and how that led to us founding Patchwork Show? If not, check out my tale of how Patchwork started here. Patchwork Show wasn’t the only good thing that emerged when I moved in with Delilah. We also started another business together, The Family Van. We created soy candles in upcycled thrift store jars and containers.
I’d been making candles for years (see my post here about how I got started pouring soy candles) and Delilah and I are both avid thrift store shoppers, so it seemed like the perfect new side business for both of us. Every few weeks we’d spend the day jetting from thrift store to thrift store hunting down the perfect one-of-a-kind jars. At night we’d turn on the stereo, open a bottle of wine and hangout in the kitchen, melting wax on the stove in a double boiler while scenting and pouring soy candles until the wee hours of the evening.
The name, The Family Van, comes from one of our favorite childhood memories. Delilah’s dad (aka Papa)/my grandfather used to have an old VW bus without any seats in it. Papa would let us sit in the back on the floor while he drove up the hill to my house. The hill was long and there was a speed bump every 15 feet. Delilah and I were tossed around in the back of the van and Papa would say, “How are my Mexican jumping beans doing?” and we’d laugh until our sides ached. I love how the simplest things can be so entertaining and become so memorable to kids.
When Delilah and I were brainstorming a name for our candle business, we wanted something that represented our family connection. We started telling stories about our childhood together and when we landed on the story about Paps’s van, it seemed only natural to name the business after a thing from one of our favorite times in our shared childhood.
Although the candle business is behind us now, I still make candles for personal use and occasionally teach candle workshops in the bay area at Workshop SF (which is the place where I took all the photos below – note the awesome upcycled painted wine corks that the innovative Workshop sf co-founder Kelly Malone created in the photos above). I love making soy candles because soy wax burns slower and cooler than paraffin wax creating a longer burning candle. It also doesn’t release any petrol-carbon soot (you know that nasty black smoky stuff that other candles emit). To top if off, soybeans are a renewable resource! Plus if you’re not the tidiest of crafters (like me) soy wax is way easier to remove from surfaces when you accidentally spill it.
One of my favorite things about making soy candles is that it’s the perfect craft to do with a friends or even in a group. Also, it doesn’t require a ton of technical know-how, so it’s great for a Sunday afternoon brunch/crafting day with mimosas. Hope you enjoy yourself as much as Delilah and I did when we made soy candles. If you want to make your candles super fancy and awesome… check out the post I did on how to fancy up your jars with washi tape and image transfers!
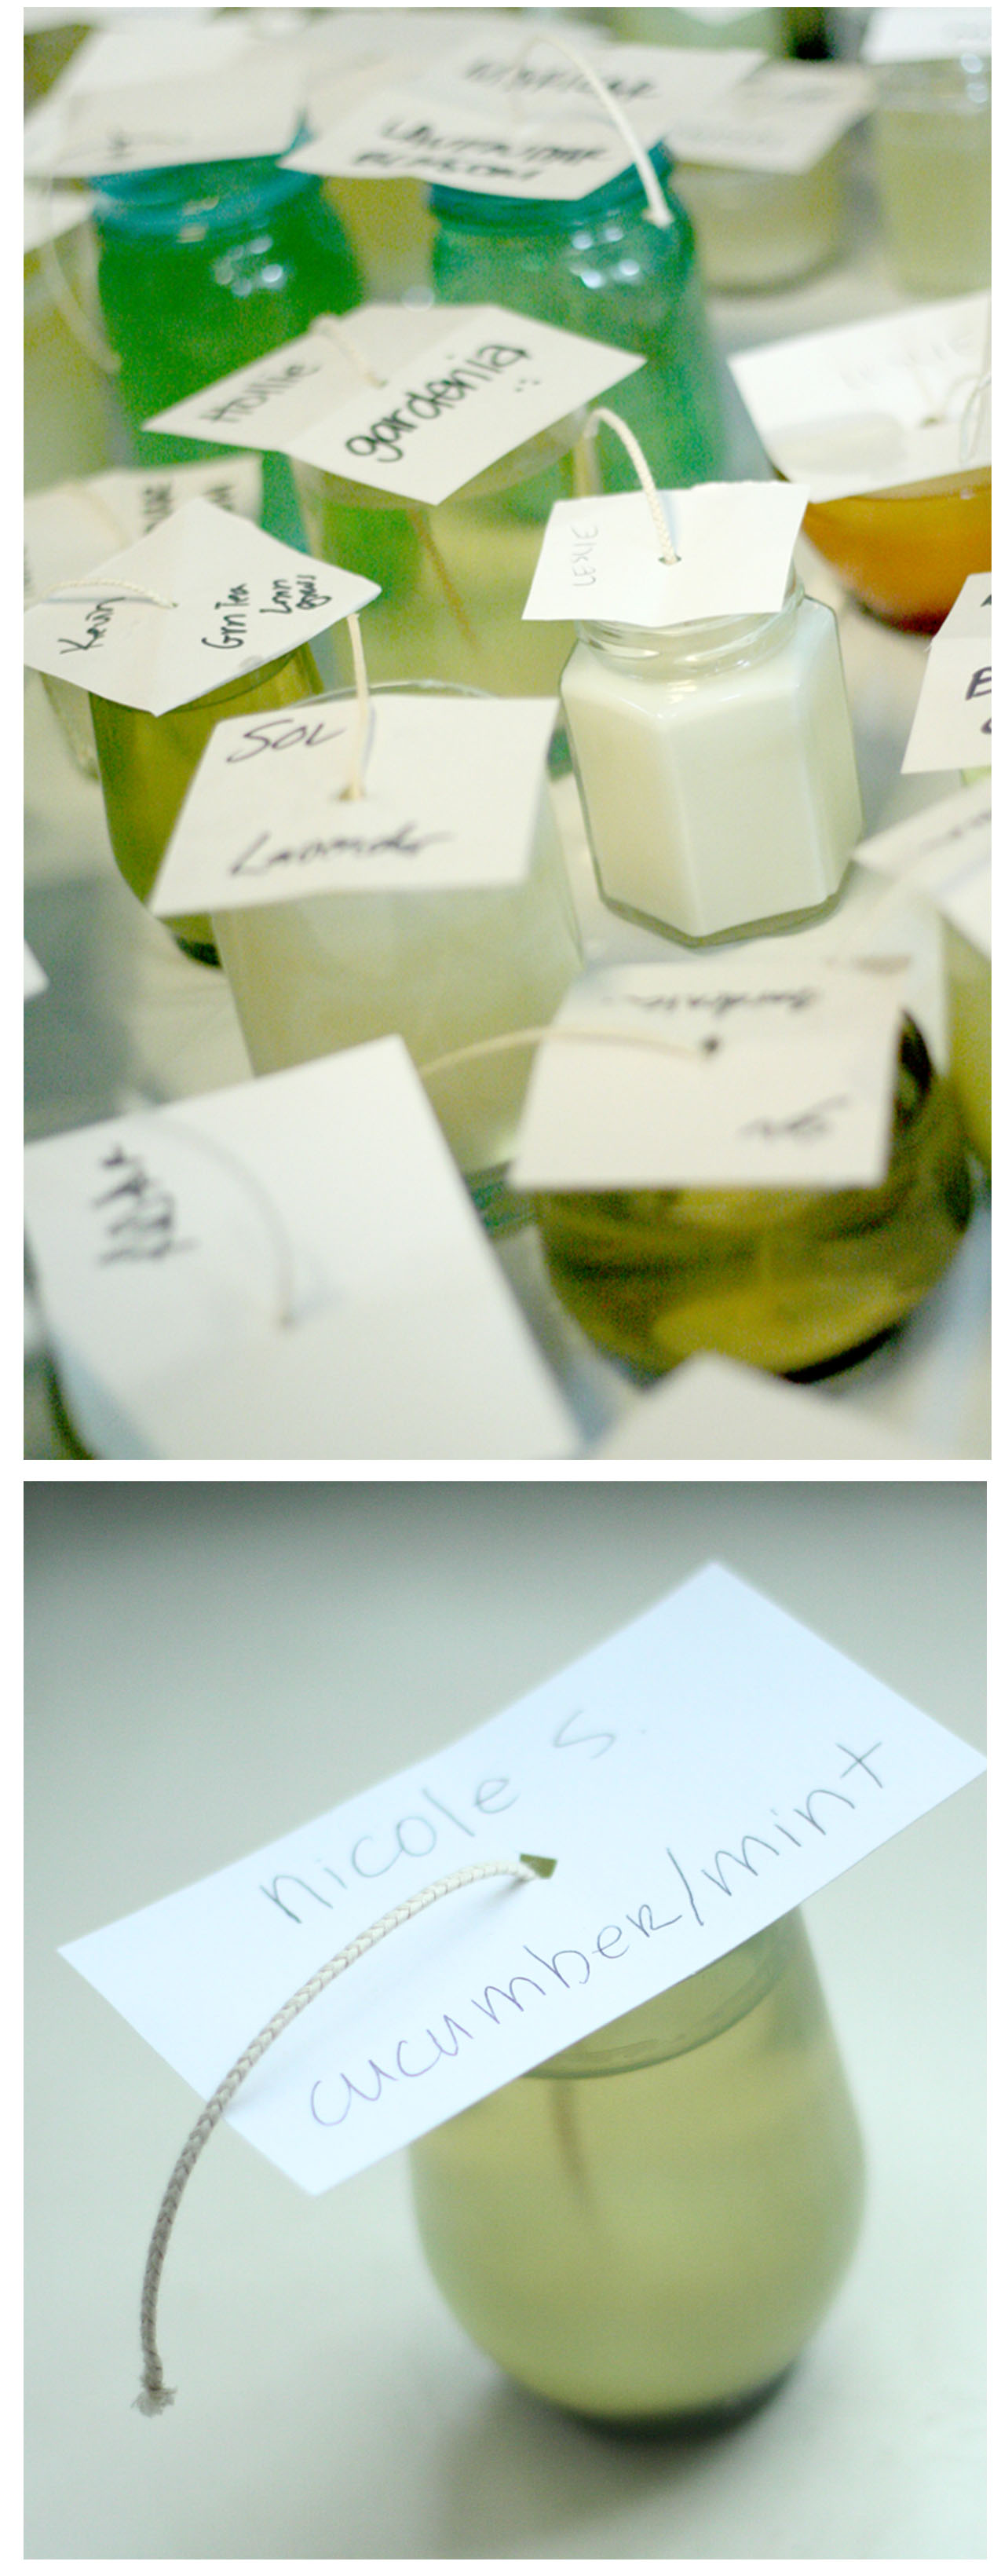
-nicole s.
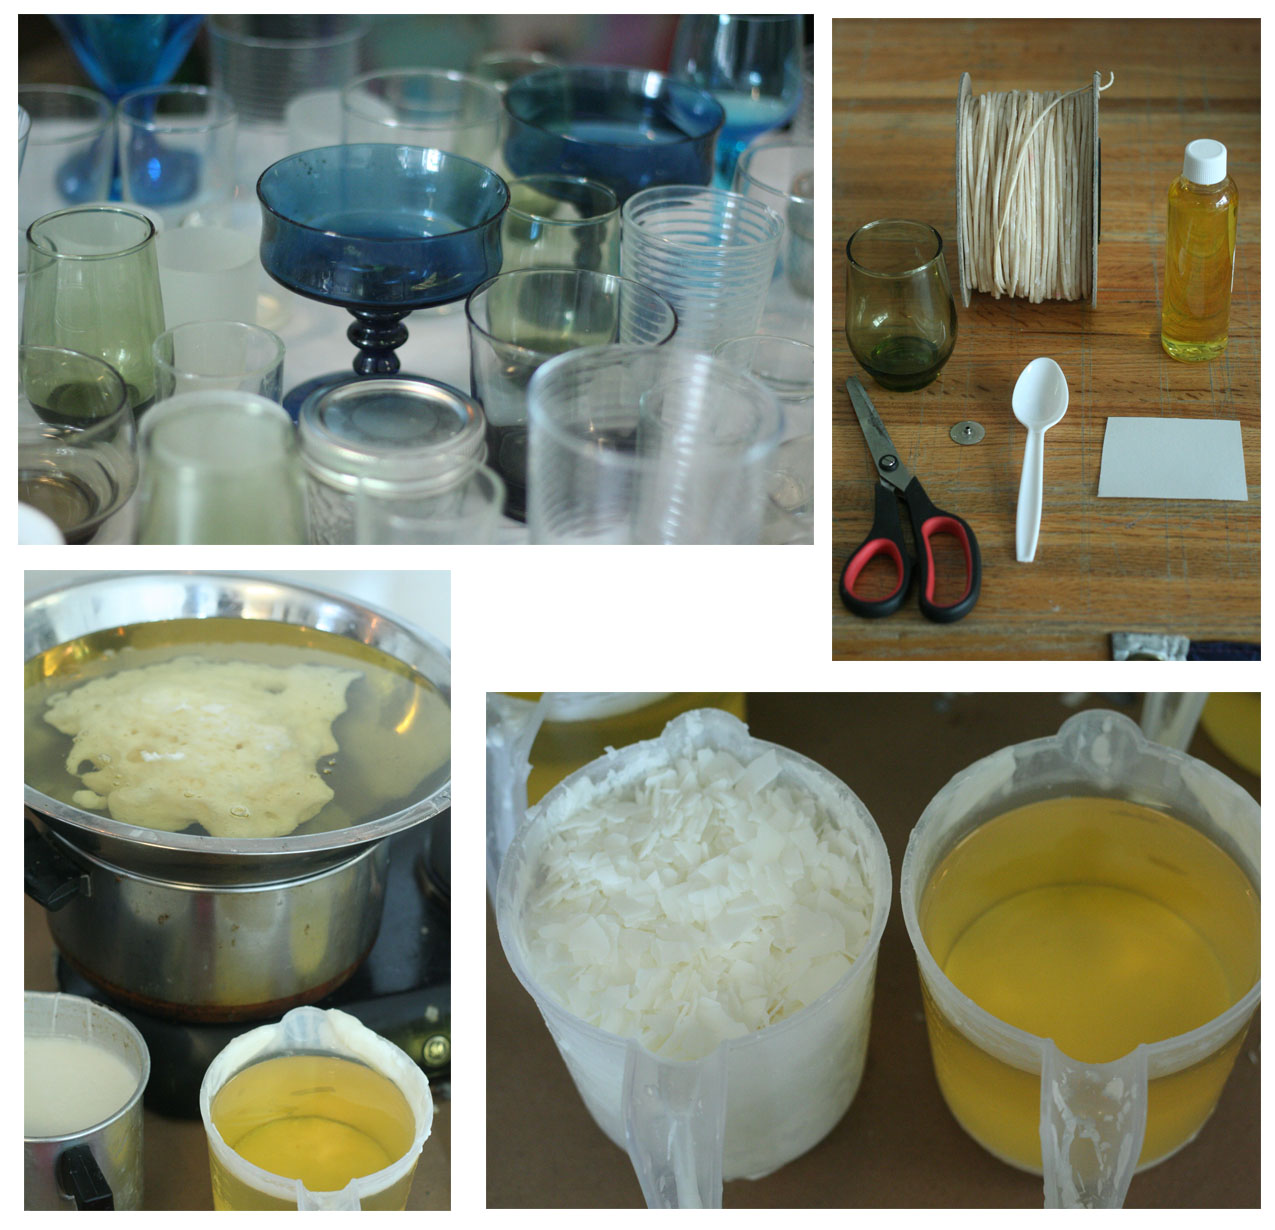
what to get:
-Double boiler (pot with a metal bowl on top)
-Candle wick
-Wick clips
-Measuring cup
-Wooden spoon
-Fragrance
-Soy wax
-Glass jars or other containers
-Glue gun with glue sticks or sticky blue goop
-Card stock
-Pen
-Hole punch
-Decorative papers
-Mod Podge or glue stick
what to do:
1. In a double boiler melt wax on stove until it’s totally liquid.
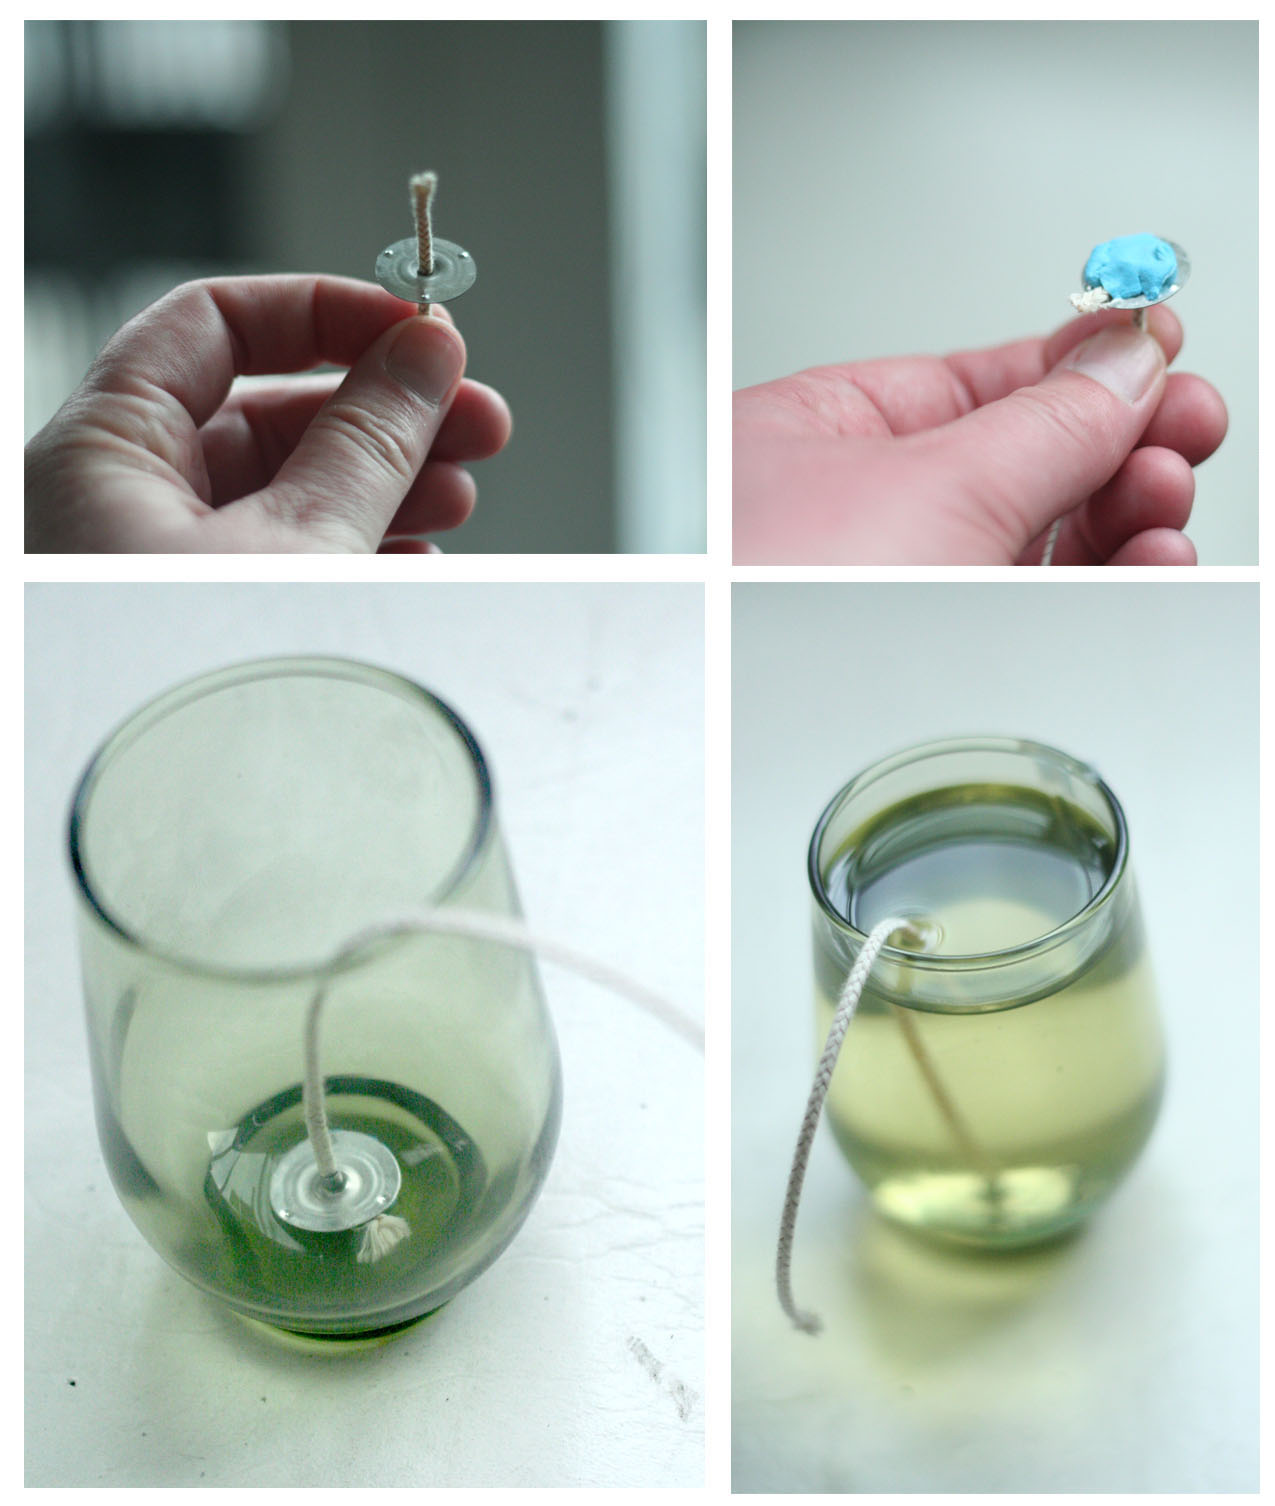
2. Prepare your container: measure out a length of wick that’s 3-4 inches longer than the height of the container.
3. Put the end of the wick through the wick clip and have 1/2 inch sticking out bottom of wick clip. Fold this 1/2 inch over and affix the wick clip to middle bottom of container with blue sticky goop or a hot glue gun.
4. Pour the melted wax into your container leaving 1/4 – 1/2 inch at top.
5. Add your scent. The amount of scent depends on type of scent ie: fragrance vs. essential oil and size of container. For a 16 ounce candle I use 1 tablespoon of fragrance or 10 drops of essential oil. Start small and add more scent as needed.
6. Stir well to completely mix the scent.
7. Make sure the wick is straight and centered and set a piece of card stock on top of the container with a little hole in the center to feed the wick through to keep it in place.
8. Let the wax cool and the candle set and then decorate.
*Don’t trim the wick or burn the candle for 24 hours.
 Resources:
–General Wax & Supply Co.
-Local craft store

Thanks for sharing.
Can I know where do you get the fragrance for the candles?
I just have experience import finished soy candles…
Very nice write up. This is perfect for those looking to get into the industry of hand making soy candles.
These are good. I prefer using clothline clips instead of the card stock to centre the wicks. and for the wick holder and wick thread – i usually order a set of 500 – this will help you get rid of the blue goop step.
Also, you can try out organic colours and fragrances (Alibaba / Amazon) – For indians try IndiaMart.